
Aconcagua route descriptions
Aconcagua Horcones Valley
Much of the hiking is on scree and rock. Although there are no permanent snowfields, crampons and ice axe are still required for the higher sections. Sometimes the final few hundred metres is covered with ice and snow which is much easier to crampon up, than having to walk up on loose scree after a dry winter.
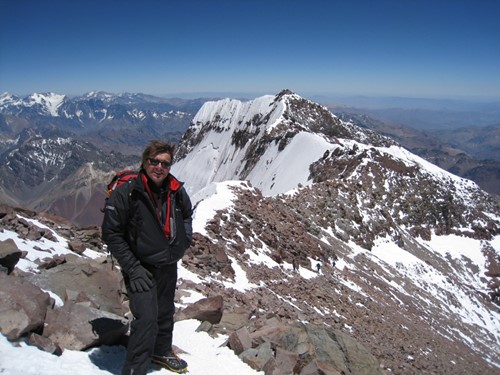
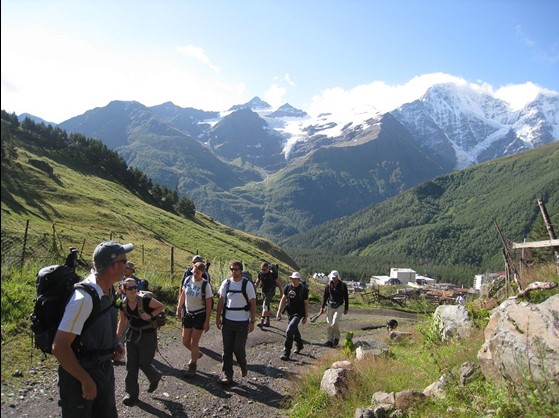
The route for the Horcones Valley on Aconcagua starts from the road at Puente Del Inca with a two day walk up the Horcones Valley (stopping at Confluencia along the way to acclimatise), a long and dry valley all the way to Plaza del Mulas. The weather can be very extreme, either very hot and dusty or with the potential for snow, wind, hail and storms. The route has stunning views of surrounding peaks and cliffs.
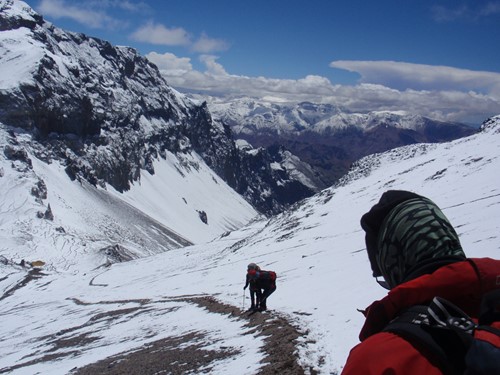
From dusty, rocky terrain to long paths laden with snow, there are a lot of extremes on Aconcagua.
We use mules to take all the gear to this point and stay overnight at Confluencia Camp for two nights. The third day’s walk to base camp takes a whole day and it is tough. It is not uncommon to feel dehydrated, tired and slightly altitude sick on reaching Plaza del Mulas (4200m).
At base camp, there is little or no vegetation, and it is dry and cold with temperatures ranging from -15 to +15 degrees Centigrade. Here we put up our tents and use local base camp services for meals, toilets and showers. There are charging facilities and a free medical service. Base Camp to Camp Canada is about four hours to 5000 metres on a long easy scree slope with a zigzag path. We have to manage some carries of food, gas and equipment.
Camp Canada to Nido de Condores is about four hours to 5400 metres on scree and snow with a path. We will have to stock this camp with food, gas and tents. Nido can be very windy with deep snow. Decisions on summiting are made here since above this camp our supplies will be limited.
Nido de Condores to Berlin Camp is about four-hour hike to 5940 metres, on rock and snow. Everything required for summit day will be carried up in one load normally, so heavy rucksacks are normal. Another option is to hike a little further to Camp Colera (5980m) which is a little more exposed but has more space. This is a dramatic place to camp with exceptional views over the Andes. We try hard to get some rest, liquids and food into us before attempting to reach the summit.
Normally summit morning begins at about 3 am. Berlin Camp or Camp Colera to the summit is about 8 - 10 hours to 6962 metres on rock, snow and ice, and then about 3 - 4 hours descent back to camp. Summit day is long and hard, very taxing on energy and a considerable achievement. It is always cold and windy and great effort must be put into looking after yourself. This is not a place for cheap equipment.
Aconcagua demands respect, determination and discipline. But there is plenty of opportunity for fun.
There are several sections to the summit route, starting with an initial ascent on the mixed ground up to White Rocks at 6100 metres. From here there are fine views over the Polish Glacier and a long set of zigzags on the exposed ground leading up to the Independencia Hut. By now the sun will be up, and the wind and cold can be savage.
There is then a long, low rising traverse to the base of the Canaleta, a 400m steep ascent on a mixture of scree and snow, and then a traverse to the Cresta del Guanaco just below the summit. From here it is another 30 minutes to the summit itself which is quite large; normally spend about 20 minutes on the top taking photos.
The descent back to base camp at Plaza del Mulas is over two days. Either sleep again at the top camp after the summit attempt and the next morning return to Nido de Condores to pick up the remaining gear and brave a very heavy rucksack back down to base camp. Or pack up the tent and get down to Nido straight away, and descend to base the next morning.
GPS Co-ordinates
The 1:40,000 map ‘Cerro Aconcagua’ (ISBN 978-3-9523294-0-5) is compatible with GPS and uses the WGS84 co-ordinating system. You can buy it online from Climbing Map for about €17.50. Below are the GPS coordinates for the main places visited on the Horcones Route and summit day.
|
Site |
Altitude |
Latitude |
Longitude |
|
Puente del Inca |
9,020 - 2.750 |
32º 49.47' |
69º 54.69' |
|
Confluencia |
10,990 - 3.350 |
32º 45.56' |
69º 58.29' |
|
Plaza de Mulas, lower |
13,450 - 4.100 |
32º 39.65' |
70º 03.52' |
|
Plaza Mulas camp |
14,440 - 4.400 |
32º 38.92' |
70º 03.45' |
|
Plaza Canada |
16,670 - 5.080 |
32º 38.71' |
70º 02.62' |
|
Nido de Condores |
18,330 - 5.590 |
32º 38.24' |
70º 01.81' |
|
Berlin Refuge |
19,600 - 5.970 |
32º 38.32' |
70º 01.30' |
|
Camp Colera |
19,680 - 6.000 |
32° 38.25' |
70° 01.11' |
|
White Rocks – summit day |
20,010 - 6.100 |
32º 38.42' |
70º 01.12' |
|
Black Rocks – summit day |
20,360 - 6.210 |
32º 38.49' |
70º 00.96' |
|
Refuge Independencia |
21,000 - 6.400 |
32º 38.77' |
70º 00.93' |
|
The Finger - traverse |
21,290 - 6.490 |
32º 38.92' |
70º 00.95' |
|
The Cave – base of Canaleta |
21,940 - 6.690 |
32º 39.24' |
70º 00.95' |
|
Cresta del Guanaco |
22,400 - 6.830 |
32º 39.27' |
70º 00.86' |
|
Summit |
22,841 - 6.962 |
32º 39.19' |
70º 00.72' |
Vacas Valley (Polish) route on Aconcagua
This route ascends the mountain by the second most popular way, called the Vacas Valley Route (also called the Polish Glacier Route, although it does not go on the glacier but skirts around the base of it). This route is quieter. Only 35% of all climbers on the mountain take this route, and it has superior countryside, vistas, greenery, flora and fauna. It also has a longer walk-in which is good for acclimatisation, although the base camp is the same altitude as Plaza del Mulas on the other side.
The downside of this side is that the summit day can begin from Camp 2, which is at 5600 metres, slightly lower than the Berlin Hut on the other side, which means a longer round trip to the trip (around 12 hours is normal). It's possible to put in a further camp at Colera which is 6000 metres but this is a significantly difficult day to get the gear this high from Camp 2. Some people do a traverse - carry gear all the way to Camp Colera at 5980m for the final push to the top, and then descend all the way to Plaza del Mulas. This is a great journey but physically demanding. We generally go up and down the same way, unless there is a specific desire in the team to do the traverse.
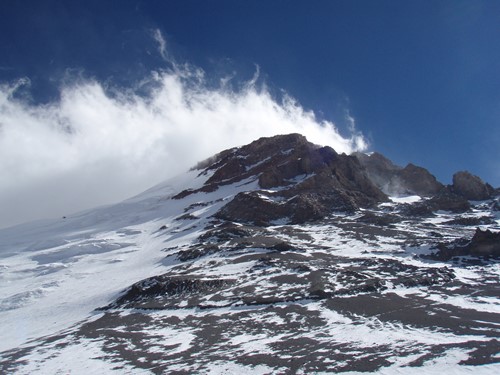
The windblown summit of Aconcagua.
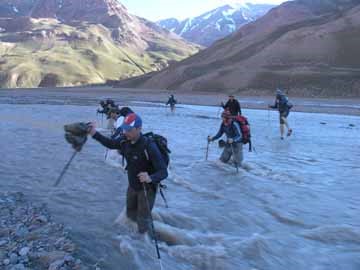
The route is camping all the way and gear is carried on mules for the walk in, which accompany you on the approach to the base camp of Plaza Argentina from the main road at Punta de Vacas (2600m). Note that this walk in requires crossing several rivers and therefore appropriate shoes are required for this (sandals or old trainers). The walk-in is 60 kilometres and 2190 metres of ascent to the Plaza Argentina at 4100m.
From Plaza Argentina, the route follows quite a rocky path to Camp 1 which is at 4650m and a huge area spread over much of the hillside. There are many rock platforms to choose from for your tent. We will make several forays to this point, depositing gear and acclimatising by climbing high and sleeping low.
Camp 1 to Camp 2 at 5600m is a straight walk uphill carrying the gear again and making camp right below the famous Polish Glacier. It can get very windy and cold here with potentially lots of snow drifting around the tents. The route is easy to follow but at this altitude, it is definitely more than just a hike, especially with full packs.

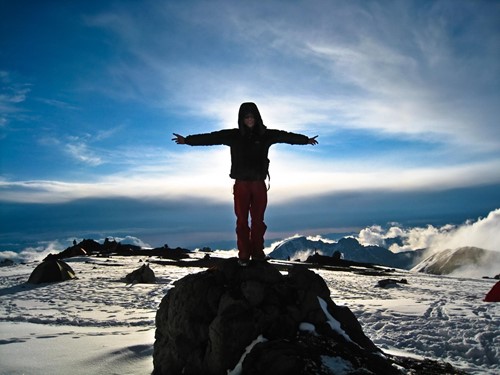
The summit shadow of the tallest mountain in the Americas, Aconcagua.
The summit route from this point crosses beneath the huge Polish Glacier and joins the normal route which is used by climbers coming from the other side near to White Rocks and then continues to the summit via the Independencia Hut and the Canaleta. The descent back to Camp 2 is the same way and generally, people spend one night before going all the way back down to base camp in one day.
Elevations
Place Altitude No of nights High point reached
Mendoza 760m 2
Puente del Inca 2740m 1
Pampa de Lenas 2700m 1
Casa Piedra 3200m 1
Plaza Argentina 4200m 4 4850m
Camp 1 4850m 3 5600m
Camp 2 5600m 2 6962m
Aconcagua Rescues
Rescues on Aconcagua
There are excellent free medical facilities at the base camps with English-speaking doctors experienced in high altitude conditions and wilderness medicine. They have the authority to prevent people from climbing if they feel it is wise not to continue. If they deem it necessary a helicopter can be called to take a patient as far as the road ahead, and the cost of this is covered in the cost of the permit.
The National Park now requires every climber to receive at least two medicals before being allowed to go on the summit cycle. The first medical is on arrival at base camp, the second will be after a few days of acclimatisation and the third will be the day before you plan to head up for the summit cycle. They are very strict on this, and it is strongly advised to have a medical with your GP prior to this expedition, especially for high blood pressure which is a common reason for being prevented from climbing high.
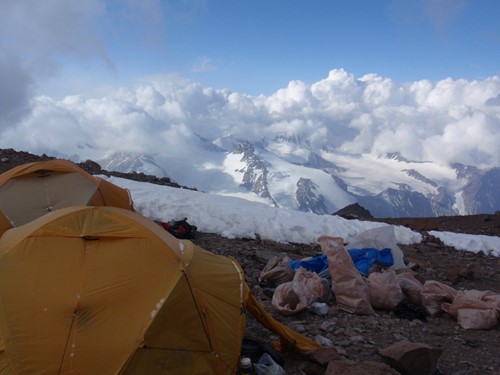
Camp 3 offers spectacular views, but the altitude is a beast to tend to.
High on the mountain, any medical emergency must be handled by the group. Although there are Rangers at Nido de Condores, and generally other climbers around, the team has to be in a position to conduct its own rescue and evacuation, which means helping people down and carrying their kit. As obvious as it sounds, any medical emergency will take immediate precedence over any summit attempts.
The leader will carry a mountain first aid kit with us, but you will all be expected to carry a small personal kit.
There are now emergency facilities stationed at all the major points on the summit route which have been put in by the Campanini Foundation, in memory of an Argentinian guide known as El Fede who died in 2009 while attending to a rescue. This means that now you will see large barrels at Nido de Condores (also a Ranger Hut here, a rescue hut and a helipad, Independencia Hut and the base of the Canaleta which contain highly important and useful rescue and survival equipment.
Clearly this equipment has changed the face of climbing on Aconcagua, but the best cure is prevention so please make sure you are well equipped by following the equipment list carefully and that you carry a personal first aid kit of your own and that on the summit day you are fully aware of your situation, your group and the weather patterns.
Emergency Procedures on Aconcagua
In the event of a rescue or an emergency, the guides will manage the situation on the ground along with any required external rescue teams, in this case, the Aconcagua National Park Rangers. All parties will then coordinate a rescue involving an assisted descent down the mountain. Serious accidents may involve the use of a stretcher but descents are generally quickly organised. The Rangers work alongside the medical staff which have well-serviced facilities at both base camps.
There is a helicopter rescue service which can go as high as Nido de Condores, but normally picks up casualties at base camp and takes them to park gate. This service is included in the cost of the park permit, and therefore you will not need to cover this cost with your insurance policy. From the park gate, you can go to the hotel in Puente del Inca and rest, or go straight to the hospital in Mendoza. Transport can be arranged through our local provider.
The guide will call the UK office and together we will ensure that the next of kin is notified and ensure that the insurance company is contacted as soon as possible so that a case number can be applied and the situation monitored by their Emergency Assistance Team. However, you should carry your insurance policy with you and have a credit card handy to pay for upfront costs, which can be claimed later.
Life at high-altitude can be tedious at times, but our team is always prepared for emergencies on the mountain.
Knowing when to go down and relying on the guides
Some people may not acclimatise well to altitude and for them, it is simply not worth continuing if it is likely to be injurious to your health. “The mountain is always there” may be a cliché, but it is true. With that being said, our acclimatisation program has proved very successful over the years on the mountain and few people have had to abandon their summit plans purely due to altitude. If you did have to go down, our guides are prepared to assist you. They also recognize when you are unable to make decisions for yourself and you are in good hands.
Our guides are trained in mountain safety. They have been climbing mountains for many years and know when someone is not up to summit.
We always recommend listening to your body. If you are truly struggling, it is ok to abandon the climb. No summit is worth your safety or a sour memory.
If you are feeling fine, don't rush or go quicker than planned. Instead, enjoy a great day in the mountains.
Nearest Hospital to Aconcagua
There are a number of public and private hospitals in the vicinity of Mendoza. Follow the recommendations of the doctors on the mountain.
River crossing near base camp can be treacherous. Take care to wear proper footwear and be prepared for the challenge ahead.
Medical Support While Climbing Aconcagua
During your climb, you will have to undergo two medical checks at Base Camp. You must complete both successfully before you are allowed to proceed. Arterial oxygen saturation, heart rate and blood pressure measurements will be taken. In addition, you will also be asked questions about long-term medical problems, as well as any altitude related symptoms that you may be suffering from at that time.
For those with a history of high blood pressure, it is important to have a plan formulated in case your reading is high. This may involve increasing the dose of your current medication or adding an additional drug to your normal regime. Speak to your doctor about this before you leave home.
Beware! Several individuals have been prevented from climbing the mountain as a result of high blood pressure.
Bring a spare set of medication with you in case of loss or damage.
(courtesy UIAA guidelines)
Aconcagua weather
Weather on Aconcagua
Weather on Aconcagua is variable like any high mountain, but is often cyclical, with short periods of adverse weather often lasting three days followed by longer periods of stable weather. The forecast for Santiago is often more indicative of what is to come to the mountain than the forecast for Mendoza due to the weather patterns coming in from the Pacific. There are clear indicators that can be seen from base camp, and it is important not to get caught out on summit day during a storm. The winds are extremely strong and it is very cold, with whiteouts common.
January and February have the best weather. Rain is rare at the high camps but precipitation in the form of snow is very common, with blizzards and whiteouts to be expected. Conditions at the high camps even in good weather are normally very cold, with temperatures at 0 degrees F when starting out for the summit before sunrise. Typical wind chill makes it much colder and frostbite is a near constant danger. However a clear windless day on Aconcagua is an absolute pleasure, and sometimes you can sunbathe at base camp. Be prepared for a wide diurnal temperature range, which is tiring, and potential for windburn and sunburn. Covering your face and protecting your extremities is important with these weather conditions.
Typical storms and bad weather on Aconcagua are generated by low-pressure systems called "vaguadas" that move eastwards from the Pacific Ocean. These are predicted by a warm front that precedes a cold one (the actual storm occurrence). Also, the Andes mountain range divides a western marine and an eastern continental climate, generating a mountain weather feature known as a Fohn effect (known regionally as Zonda or the viente blanco).
Windblown snow on the summit of Aconcagua is a common occurrence.
It is fairly easy to forecast the three factors which bring bad weather:
- a low-pressure system moving east from the ocean
- rain in Santiago
- local alterations of barometric pressure and cloudiness on the mountain
Always keep an eye out for the following occurrences:
* If a warm front arrives, prepare for a later cold front
* If a cold front from the Pacific arrives, there is a high probability of a storm on Aconcagua
* Changes in cloudiness, barometric pressure, the intensity of wind and wind direction all indicate a regional change of weather so be careful if you are planning your summit cycle for 4 days
Remember that the mountain generates its own climatic conditions that cannot be forecast. Typical cloudy phenomena begin with small cumuli that grow in size every hour to the south (watching from Plaza de Mulas down the Horcones valley), or northwest.
These clouds begin to appear between 2 and 4 pm, becoming completely cloudy in the evening and sometimes clearing after sunset. These first clouds appear earlier each day, and bad weather is established when they appear between 10 am and 12 pm.
Lensed stratocumuli and hooked cirrus also foretell bad weather, generally indicating a Zonda phenomenon, which means very strong winds and snow at high altitude. This is known as the viente blanco or white wind and is particularly dangerous. Big lensed stratocumuli appear as a hat or “mushroom" on the summit and is a clear confirmation that bad weather has arrived.
Predicting and analysing weather patterns are an important part of high-altitude mountaineering. Before you go, understand weather trends and what it will mean for your time on the mountain.
Analysing Pressure:
For calibration of altimeters Plaza de Mulas uses a constant value of 4260 m (13,976 ft). Normally pressure increases slowly from sunrise to midnight and diminishes again during the night.
If pressure reduces...
Slowly (1 to 2 hPa/day): this means bad weather coming, confirmed if, in addition, the temperature rises Slowly (1 to 2ºC/day, 2 to 4ºF/day) and/or ‘sheep’ clouds (cirrocumulus) are observed.
Abruptly (3 to 4 hPa/day): immediate and intense bad weather, confirmed if, in addition, temperature descends abruptly (3 to 4ºC/day, 5 to 7ºF/day).
Oscillating: long bad weather.
If pressure increases...
Slowly: this means good weather, confirmed if in addition temperature descends slowly and sky is clear or with medium and isolated cumulus. If increase starts from a normal pressure (between 599 and 601 hPa for Plaza de Mulas), good weather will last a period of time equivalent to the time pressure took in reaching its maximum value.
Abruptly: temporary improvement, confirmed if in addition temperature descends abruptly; or unstable weather.
Oscillating: improvement in the weather will be delayed.
If pressure remains stable...
In a low value (below 599 hPa in Plaza de Mulas): this means unstable good weather.
In an average or high value (600 hPa or more in Plaza de Mulas): this means weather will remain unchanged, confirmed if temperature is also stable.
Latest snow forecasts on Aconcagua:
http://www.snow-forecast.com/resorts/Aconcagua/6day/top
http://www.meteoexploration.com/mountain/world.html
Nepal trek food & lodging
Lodge Accommodation on Trek in Nepal
The lodges are comfortable and warm and very well appointed, but they do become more basic as you go higher. Rooms are twin bed with two beds per room and do not have a bathroom attached unless you wish to purchase an upgrade during the trek and only in some lodges.
The beds have mattresses and pillows and some blankets to borrow. The ‘living room’ area used for eating and relaxing is heated in the evenings with a pot-bellied stove. Lodges are always sociable places where you can meet many other trekkers. Many will have books to read and some have phones. Almost all have hot showers available which are mostly gas heated.
Wifi is available everywhere in the Khumbu and a good speed but ensure all background updates and apps are turned off as it's sold by the MB and a background app can quickly use up the credit. Higher up there is also a Wifi network between villages so you can buy credit and use it over several villages / lodges. You can also charge your electronics by the hour in the lodges but it's expensive and popular so we recommend bringing a power pack along. If you're on a longer trek then a small solar panel would also be useful for charging up smaller devices.
There's no TV in the lodges but you could pre-load your tablet with movies, podcasts and so on to have something to watch and listen to while on trek.
Generally, breakfast will be at 8am and you will need to pack your bags ready for the porters to leave early. Lunch will be taken enroute in one of the many tea houses, and dinner is generally at 7pm.
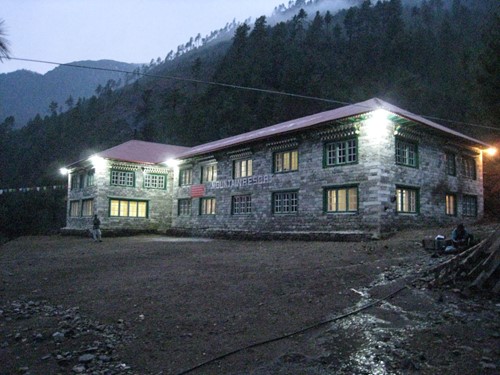
Typical lodge in Khumbu, many of which are still hand made with dressed stone.
Below is a list of the expected costs for facilities at various lodges on the trail. Snacks are an average figure, boiled water is for a litre and snacks is an average price for one bar (of Snickers for example).
| Location | Snacks | Wifi | Charging per hour | Hot shower | Soft drinks | Boiled water |
| Phakding | 200 | 500 | 350 | 400 | 250 | 150 |
| Namche Bazaar | 200 | 500 | 250 | 500 | 300 | 150 |
| Tengboche | 200 | Everest Link | 300 | 600 | 400 | 200 |
| Dingboche | 150 | Everest Link | 600 | 500 | 300 | 250 |
| Pheriche | 200 | Everest Link | 350 | 500 | 450 | 200 |
| Lobuche | 300 | Everest Link | 600 | 700 | 400 | 300 |
| Gorak Shep | 500 | Everest Link | 500 | 700 | 400 | 400 |
Payment is made in cash and in Nepali rupees although some places will take dollars and even euros. In Namche Bazaar and Lukla there are forex bureaux to change money.
Room upgrade or single room
If you wish to have either an upgrade to a room with an attached bathroom/shower or you would like to have your own room then arrange this with your guide first thing in the morning. He will send a porter ahead to change the booking. You can pay him the extra money directly in cash, but it does depend on availability. An average cost for a room upgrade in Namche Bazaar is around 750 rupees and to have a normal single room would cost an additional 1000 rupees.
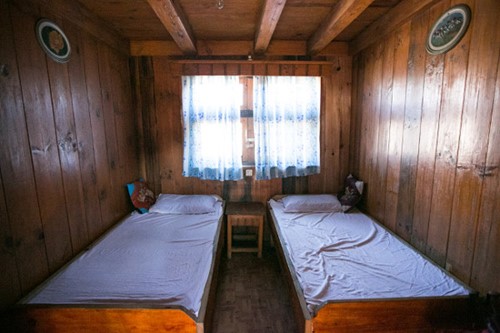
Typical room in a lodge in Nepal. Some of the lodges have ensuite rooms but normally there is a communal toilet place with a sink, and a hot gas shower which you have to pay separately for.
What are the toilets like on the trail?
In some of the lower lodges you will find clean western-style flush toilets but as you go higher you will find more commonly long drop toilets which are a hole in the ground. Some are better than others. You are advised to have some toilet paper on you at all times, although every lodge will sell it. On the trek, it is fine to use any of the other lodges or shops along the way if you need to use a toilet. Do not go behind bushes or drop used toilet paper outside. Most indoor toilets have a bucket for putting in used toilet paper and it's important to do this because all waste ends up in large pits underground and unfortunately many seep into the river system. Paper is usually burnt.
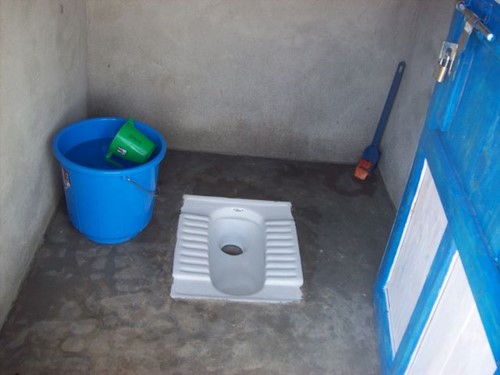
Typical long drop toilet in a lodge in Nepal
What about rubbish on the trek?
There is no recycling on the trails in Nepal as yet, although there is now a recycling unit in Namche Bazaar. Currently around 20,000 people per year go on the Everest Base Camp Trek so this obviously creates a huge amount of waste. Many people just drop it on the ground, some people use the bins in the lodges or they burn it in the stoves, but recycling is not yet a real option.
Obviously we do not want people to drop rubbish at all, but our preference is that all our clients keep their rubbish in a container or bag and pack it out back to Kathmandu. One person probably generates less than 1 kg of waste from sweet wrappers and so on during a trek so it would not be a burden. Please help us with our policy of packing out your own waste.
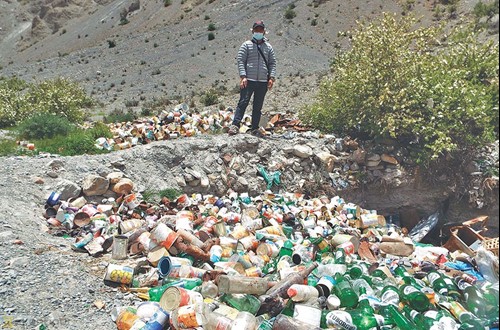
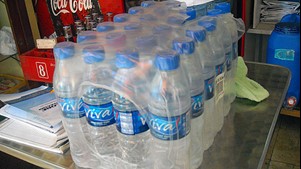
Litter on the Annapurna Trail mostly caused by tourists. Note the number of throwaway water bottles. This is what we want to avoid contributing to on our treks, so please take a Nalgene water bottle and treat your water, and pack out your waste!
Food on Trek in Nepal
Food is of a very good quality, and we recommend you try local foods such as dal bhat (lentil stew with rice and curried potatoes or meat), boiled potatoes with chilli sauce, Sherpa stew (meat, potatoes, vegetables in a rich sauce) or curry with rice. These are the staple foods for Sherpa people but every lodge will also offer a wide range of western meals:
Breakfast – Eggs (fried, boiled), omelettes, toast, pancakes, Tibetan bread, muesli, porridge, tea, coffee, chocolate.
Lunch/dinner – Soups (tomato, garlic, vegetable, mushrooms etc), veg fried rice, dal bhat, curry w/rice, noodles (mix fried, veg, egg, w/cheese), macaroni, spring rolls (veg, egg, cheese, mixed), momo (boiled or fried mini pasties with either veg or meat), pizza (all types), fried potatoes (w/veg or cheese), chips, buff steak (water buffalo, occasionally yak), lasagne.
Dessert – apple pie, fruit cocktail, chocolate cake, rice pudding, snickers pie!
We provide one hot drink for each meal but if you want to order more then the average price is 150 Rs per cup of tea, coffee or hot lemon etc, or 1500 Rs for a flask. A can of beer is between 600 - 800 Rs.
Meals In Kathmandu –
Breakfast at a hotel in Thamel ~ 600 Rs
Meal in town ~ 1200 Rs
1 litre of mineral water in hotel 150 Rs, in street Rs 25
Beer/soft drinks 350 Rs (more in the hotels ~ 500 Rs)
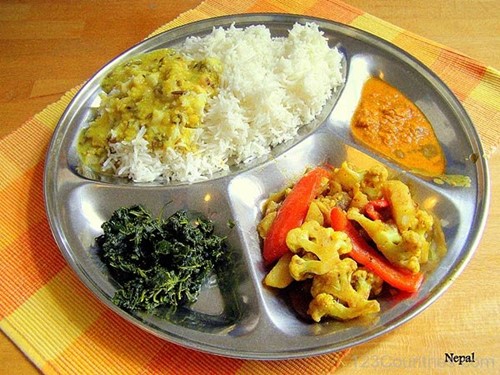
Dal bhat is the national dish of Nepal and very tasty, full of slow energy for a day or trekking.
What about drinking water on trek in Nepal?
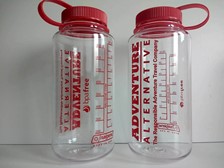
Bottled water is for sale but we do not recommend the purchase of the single use plastic bottles. We have Adventure Alternative Nalgene bottles which you can buy or bring your own on the trek. Please note that cheap Nalgene water bottles bought in Nepal are not real Nalgene and they easily split when filled with hot water!
You can order boiled water from the lodge kitchen or you can treat the tap water. River water is generally full of glacial silt and could possibly be contaminated with animal urine and the run-off from toilets, so do not drink this. The tap water in the lodges is piped from high up, off the rivers and clean glaciers so is better but still needs treated.
One option is to use iodine drops (3 per litre) which you can buy in Kathmandu (known locally as Lugols solution, available in the supermarkets in Thamel) and flavour it with Tang powder which can be bought locally.You can also try the chlorine based tablets but they do leave a taste in the water. Or you could buy a Steripen which uses UV to kill the bacteria, but it's a bit fragile to carry.
Our favourite is Aquaprove, which is a water purification tablet using the latest technology. It's light, easy to use and has to after taste and most importantly it works against all pathogens in impure water.
Bottled water in Nepal is a very lucrative business but takes no account of the environmental impact of all that plastic being left. We prefer using a proper Nalgene bottle and either paying for boiled water in the lodges or treating the water with products like Aquaprove.
Different trekking areas in Nepal
In Nepal some areas are more regularly walked than others. The Everest Base Camp trek in the Khumbu region, and the Annapurna Circuit are the most popular and there you will find lots of lodges with good facilities throughout. Waste management is not that advanced, most rubbish is put into large pits or burnt, so we really stress the importance of packing your rubbish out.
Other treks in the Khumbu region visit some of the same towns and villages as the Everest trek, for example the Gokyo Lakes Trek. Gokyo itself is a community high up in the mountains with amazing views and some turquoise lakes which are beautiful, and the lodges there are well appointed with everything you will find on the main trail.
The Annapurna Sanctuary Trek is a little more off the beaten track with a combination of lodges and campsites at the actual base camps of Annapurna, and then there are the much more remote treks like Manaslu Circuit and Kanchenjunga Base Camp Trek and the Upper Mustang Trek where you will see far fewer people and the facilities will be more basic. Toilets are more likely to be long drops in all the lodges, food will be more local and it is more important than ever to pack your own rubbish out. These are fragile mountain environments that need protecting from the effects of tourism.
If you are going on a climbing trip to the likes of Island Peak then the trek in is through the Khumbu region, while Mera Peak is in the Barun district which is a little more remote but you can cross the Zetra La and drop into the Khumbu valley, so once again this section is busy with tourism.
Nearest to Kathmandu is the Langtang Valley trek and the Yala Peak climb, a popular area which attracts a few thousand trekkers every year. The food and accommodation in this region will be more basic and local, and again no waste management to speak of.
How is gear carried on trek in Nepal?
Big expeditions use yaks to carry all the climbing equipment to the base camp of a mountain and that is a traditional image of how things are carried in the Himalayas. But for the shorter trekking peak trips and the treks, all the equipment and trekkers clothing is carried by people. In fact as you trek in Nepal you will see that pretty much everything is carried by people, from wood and stone to all the items for selling in shops, mattresses, beer, water, and even elderly people.
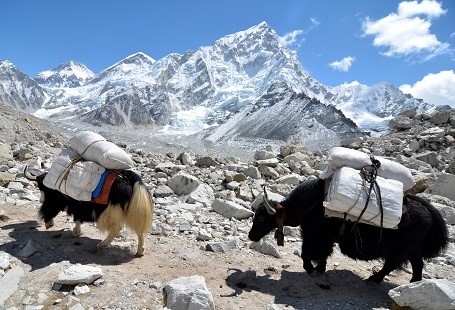
Yaks approaching Everest Base Camp for an expedition to climb Mount Everest. They can carry 60 - 80 kgs typically.
Nowadays you won't see so many Sherpas carrying loads on their backs, they will normally be guiding or running the teahouses and lodges. Other castes are used to carry bags, for example the Rai people who commonly live in harmony with the Sherpas. They carry the bags using a tumpline across their forehead and the accepted weight of a bag should be about 15kgs.
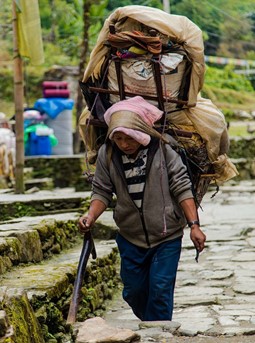
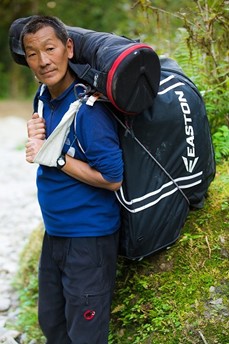
Local people still carry large loads for their own needs, using a tumpline across the top of the head and a wooden frame on which the items are strapped. The wooden stick is for leaning on when they take a rest. On the right is a trekking porter carrying a trekkers bags and still using a tumpline.
Nepal trekking seasons
Nepal trekking seasons
Nepal's peak climbing seasons are traditionally late March to May and September to November. These periods are either side of the main monsoon period in this area of Asia. The first of these periods is also the most popular period for climbs of the higher peaks.
The weather in the higher regions of Nepal sees a very large diurnal variation in temperature. On most days you will notice a daily cycle where it is usually clear and cold in the morning with the sun warming the air through the morning and white clouds rolling in soon after lunch. It is important to plan your clothing to account for the large variation in temperatures that you will see at different times of day and also at different stages of the trek.
Depending on when you are travelling depends on if you will encounter snow. However, you are in the mountains, so expect varied temperatures and the potential for moody weather.
On the lower stages of the trek it will be cool for your morning start but will very quickly be very warm and dry and will leave you sweating and seeking shade. In the early afternoon, you may see a shower of rain so waterproofs always need to be near the top of your bag for rapid deployment.
Further up on the trek you are likely to see the same daily pattern but the air temperature will generally be colder. Night-time temperatures on the upper half of the trek can drop well below freezing even inside the lodges so a good sleeping bag will be important to help get your rest.
One consistent fact will be the intensity of the UV sunlight. You will need to bring high factor sunblock, a lightweight long sleeved top and a hat that will cover or shade your neck and ears. The sunlight will be intense even when the air temperature is low and the wind is blowing so you may not think to cover up your face. The UV can also give you a headache especially when you spend all day gazing up at those beautiful white peaks all around you. You ought therefore to bring good quality polarizing sunglasses. Full details of kit to bring is on each trip page alongside information about safe acclimatisation for a trek to Everest and the ever popular question 'How hard is it to trek to Everest base camp'. Plus feel free to call or email the office with any concerns or questions!
Nepal Trek emergencies
Nepal trek emergencies
The great mountaineer Alex Lowe once said that the best mountaineer was the one having the most fun. This holiday to Nepal will provide a lot of that but it is still a trip a trip into the mountains and we take your security very seriously at Adventure Alternative.
Primarily it is important to remember that trekking in Nepal is not an experience in solitude, there are a lot of people around including your own team members, Sherpas, porters, villagers and medical clinics. There is a very good clinic run by the Himalayan Rescue Association in Pheriche which you are well advised to visit.
It is important to remember some rules for your safety while trekking in the Himalayas:
1) Go slowly and take a full day for the hike rather than get there as fast as possible.
2) Drink lots of liquid.
3) Always give way to yaks right of way and when you meet one on a path with a drop to one side, always stand on the uphill side.
4) Don’t get caught out with inadequate clothing to cope with a rapid change in weather. This is the high Himalaya and a clear bright morning does not mean the same in the afternoon.
5) Do not wander off by yourself and always make sure people know where you are. Anything can happen and a slip on scree or moraine can mean getting cold very quickly while waiting for someone to come and help.
6) Part of the trek is on lateral moraine and then on the Khumbu glacier itself and some places are slippery. There is no need for crampons but simple care where you are walking is important.
7) Remember that the best approach to safety is to prevent an accident happening in the first place.
One of the most important contributors to a medical provision in the Khumbu valley, in particular, is the Himalayan Rescue Association (HRA).The HRA is a voluntary non-profit organization formed in 1973 with an objective to reduce casualties in the Nepal Himalayas. The HRA has an aid post at the village of Pheriche (4250m) which is served by a helipad and has a permanent building as its clinic. During the main climbing season in April/May, there is also an HRA station run by volunteer doctors at Everest Base Camp. This is housed in tented accomodation and each year all the expeditions muck in to construct a helipad nearby.
The only two methods of travel mostly are on foot or by helicopter once in the mountains. Obviously certain medical conditions are either so debilitating or urgent that the first option is not practicable as an evacuation method. Helicopter evacuation is very expensive and is also dependent on favourable weather conditions. Many of the helicopters are working at the limit of their operating altitude in the higher parts of the valley. Adventure Alternative will be well placed to coordinate an efficient rescue but we must stress that there is no single definitive cost for a helicopter rescue, much depends on what else the pilot is doing in the area, how far the helicopter has to fly, where it started from and so on. The maximum is about $10,000 from Everest Base Camp itself, so your insurance should cover up to this figure specifically for rescue costs.
The helicopter company will require a payment guarantee before they fly, this will be done by your insurance provider, opening a case number and arranging the relevant exchanges of information and certification. For this purpose, it is essential that you have the right policy and provide us with all the policy details. Our staff have got mobile phones and generally, there is somewhere near with a phone signal, or else one of the staff will go to the nearest place. The safety and stability of the injured person is the job of the group and the staff and anyone nearby who can assist because sometimes it can take hours for a helicopter to arrive. Thankfully many of the trails have first aid posts along the way, but every group should be prepared to help deal with an injured person and in this case, it goes without saying that the needs of that person are more important than the trek itinerary.
It will be a matter of the helicopter company ascertaining that it is safe to fly to the relevant location and then flying the casualty to a nominated location, almost certainly a hospital in Kathmandu. The helicopter will then be met by Adventure Alternative staff who will help to coordinate any further stages in the process. The helicopter will also fly into Kathmandu airport and our staff will arrange for a car or ambulance to take the person to the hospital.
If for any reason the helicopter is unable to fly we will use our many local staff and contacts to coordinate an alternative rescue and treatment regime. Normally this means using horses or simply stretchering a person off the mountain to the nearest safe place or safe helicopter landing area. Again, this is something that will generally involve everyone.
Nepal trip preparation
Nepal preparation
Initial useful links:
Latest entry requirements from Gov.UK - Nepal Travel Advice
Latest Health Requirements and information for Nepal - Travel HealthPro or NHS website Fit for Travel.
Information on visa prices and application for an e-visa - Embassy of Nepal, London
Information on permits for trekking routes - Nepal Dept of Home Affairs
Information on peak permits fees - Nepal Mountaineering Association
List of healthcare facilities in Nepal
British Embassy in Kathmandu +977 (0)1 423 7100 - .gov website.
Vaccinations and Travel Health
Do visit your GP or a travel health clinic prior to your trip to discuss vaccinations and anti-malarial tablets if you are heading to the southern region and also to take advice on prescription drugs for high altitude sickness such as Diamox. The use of a prophylactic like this does have statistical benefits for going to altitude but taking an drug is a decision not to be taken lightly and Diamox does have side effects, plus there is a valid argument that going slowly and looking after your health and hydration is enough to allow the body to acclimatise to the hypoxia caused by having less oxygen in the air at altitude.
We have some useful articles on this site which will help prepare you for going to Nepal and trekking or climbing at altitude:
Health at Altitude
Acclimatising Safely
There are no vaccinations required for entry in Nepal except for covid-19, which may yet change. Please check on the travel health websites above for the latest information.
Trekking and Climbing Insurance for Nepal
You will need a policy that includes helicopter evacuation specifically in Nepal or from a semi-remote region and specifically covering the altitude reached during your trek or climb and the type of trip it is - trekking, guiding climb, technical climbing, trekking peaks or expeditions peaks.
There are plenty of companies to choose from, such as DogTag, Campbell Irvine, Snowcard, the British Mountaineering Council, Austrian Alpine Club, True Traveller and even some of the popular general ones such as the Post Office or some of the supermarkets.However they each have very different interpretations of trekking and climbing.
Check the policy carefully for cover to the altitude you are going to and also check the criteria and description of climbing peaks because they do change. Some specify with or without ropes, some specify with or without a guide, or using a rope only when necessary. Some companies understand that a trekking peak can be technical or non-technical and they provide specific quotes for individual peaks. It just depends what factor the insurer is prioritising. Here are some examples of our trips and their descriptions:
| Peak | Altitude | Guided | Description | Ropes | Terrain |
| Mera Peak | 6000m+ | Yes | Trekking peak | Man rope | Snow covered, non-technical, alpine PD. |
| Island Peak | 6000m+ | Yes | Trekking peak | Man rope and fixed lines | Snow covered, glaciated, semi-technical, alpine PD+. Includes abseil without top rope, crossing crevasses on ladders, exposed ridge. |
| Yala Peak | 5500m | Yes | Trekking peak | Man rope | Snow covered, non-technical, scrambling, alpine F. |
| Khumbu Peaks | 6000m+ | Yes | Trekking peaks | Man rope and fixed line | Snow covered, technical and non technical climbing up to alpine PD+. See Mera and Island Peak above. |
| Everest | 8000m+ | Yes | Expedition peak | Fixed lines | Snow covered, fixed lines and man ropes. Mixed grades - alpine PD+ on south col side with VS rock scramble on the Hillary Step (if bare) at extreme altitude. |
| 3 Peaks, 3 Passes | 5500m | Yes | n/a | none | Non-technical walking, snow covered. |
Buy your insurance as soon as you have booked your flight and trip, in case there is a need for cancellation. Take your papers with you and make sure your tent mate knows where it is, in case somebody else needs to make a phone call for you.
In the event of an incident requiring a helicopter evacuation up in the mountains, the insurance company prefer to get a call first from the policy holder in order to create a file and then let the insurers deal direct with the helicopter company. Normally there is a process of justification for an evacuation and the payment is arranged directly. Sometimes it may be necessary to pay the helicopter yourself and recoup the costs later with an insurance claim but this is potentially much harder and you would need to have medical proof of injury or emergency in writing. Be aware that there have been a lot of hoax calls for helicopter evacuations in Nepal and insurers can take their time to greenlight your claim, and also be aware that helicopters can only fly in good weather. The average cost of a helicopter evac from Everest Base Camp is $10,000.00.
For expedition peaks it is necessary to find a specialised insurance and there are specialist brokers such as Campbell Irvine who can advice.
Getting your Nepalese Visa
You will need a visa for travel to Nepal and currently for British, American and most European nationals you can buy this on arrival at the airport, or you can purchase one from your nearest Nepalese Consulate. On arrival at Kathmandu airport you first have to register at one of the machines which takes details of your passport and then takes your picture. You get a printout and go to the visa payment desk where you pay in cash (any major currency) and the amount depends on the length of your stay. You are given a receipt, take everything to the visa desk and get your passport stamped.
The process at the airport is very easy and quick, or you can apply for an e-visa.
Passport pages for peaks and restricted areas
If you are doing a trekking peak then it's best if you can send us a copy of your passport page in a pdf or jpeg format so that our staff can get the permits in advance of your arrival. The permit offices are not open on a weekend and can often be very busy so it's best if you can send us the paperwork well in advance.
If you are visiting an area of restricted access like Dolpo or Mustang then we need the original passport to get a Restricted Area Permit, so our staff will need to take this when you arrive and go to the office with it. Again, this cannot be done on a weekend.
Flights to Nepal
Kathmandu International airport (KTM) is the most convenient point of entry to Nepal, being the capital and main transport hub in the country, however there is also an international airport at Pokhara as of 2023 and also one in Lumbini. Most indirect flights are via one of the Middle Eastern hubs like Doha or Abu Dhabi, or via Delhi. It's worth shopping around for the best price and routing. Currently the quickest way to get to Nepal from the UK is with Qatar airways via Doha.
We will meet you at arrivals in the airport, but make sure we have the right flight number and arrival time well in advance so that we can plan this. Our staff will be holding either an Adventure Alternative sign or possibly one with your name written on it. The airport is about half an hour or so from Thamel which is the main area in town where the hotels are. Be aware of pickpockets and scam artists asking to carry your bag.
Money in Nepal
The local currency in Nepal is the Nepalese Rupee. You can check the current exchange rate on xe.com. There are ATMs in town which take Visa and Mastercard, and there are banks with forex facilities. In Kathmandu bigger shops and restaurants and hotels will take card payments and also major currencies but on trek you will need Nepali rupees preferably in small denomination notes.
It's difficult to buy Nepali rupees outside of Nepal so change locally and use a currency card to avoid credit card charges. If you are travelling from Northern Ireland or Scotland then remember to bring Bank of England sterling notes, you will find it difficult to change regional notes. Avoid old $100 notes.
What to pack everything in
You will need a duffle bag or rucksack for the porter to carry your main clothing and equipment, and also a day pack for you to carry what you need for the day. Make sure individual items inside the duffle are packed into dry bags and do carry a separate bag for dirty clothes to keep them separate. Porters will strap your main bag together and carry it on a tumpline which is a band of material going over the forehead.
You can leave bags or suitcases in the hotel or in our office while you are away climbing or trekking and it will be perfectly safe. This is useful for travel clothes. You can leave valuable items like laptops in our office.
Porters generally carry around 18 - 20kgs but this includes their own bags too, so we generally ask that your main bag weighs around 15 kgs. The day pack should not be too heavy or else it will become too difficult to carry at altitude, so we generally recommend 10 kgs maximum.
Cash you might need on a Nepal trek
The cost of items in the lodges increase the higher you go up into the mountains so it's hard to give one figure for every day. But here are some average prices. As a general rule of thumb, £100.00 is enough for a 2 week trip if you keep it reasonable! Not included here are the variety of sweets and chocolates available; imported brands are about the same price as in the UK or the US.
| Location | Charging phr | Hot shower | Mineral Water |
Boiled water (litre) |
Beer | Can of soft drink | Thermos of black tea / milk tea |
| Namche Bazaar, Kyangjin Gompa, Khote | £1.25 | £3.15 | £1.85 | £1.50 | £5.00 | £2.20 | £7.50/£11.25 |
| Tengboche. Dingboche, Chukkung | £2.75 | £3.15 | £2.00 | £1.50 | £5.00 | £2.50 | £8.75/£12.50 |
| Lobuche, Gorak Shep, Khare | £3.15 | £4.70 | £2.80 | £2.50 | £5.00 | £2.80 | £11.25/£15.00 |
Payment is in cash and in Nepali rupees although some of the bigger towns like Namche Bazaar will take dollars and euros. In Namche Bazaar and Lukla there are forex bureaux to change money. Whatever the case you will need to change money in Kathmandu before the trek to have enough cash for extras and to pay tips.
Cost of Meals in Kathmandu
You will also want some cash for meals and drinks in Kathmandu and visiting sites, souvenirs and so on. Many places will take card payment or payment from your smartphone but smaller establishments will be cash only. A standard meal with drinks in a mid range restaurant in Kathmandu or in a hotel will be around £25.00.
Tips in Nepal
There are different terms used in Nepal which can be confusing. For clarity, on treks the terms trek leader, trekking guide, tour guide, sirdar or Sherpa mean all the same person, the one in charge. For trekking or climbing peaks we say Climbing Guide or Sherpa. The word Sherpa is actually the ethnic caste, but western people have misused the term to mean anyone who works in the mountains. In reality the porters in Nepal nowadays are not Sherpas, they come from many different castes.
Often a trek leader will also be qualified as a climbing guide and therefore will also climb a peak. So if you are doing a trek and a climbing peak then it may well be the same person. Or sometimes we use local guides from the nearest village to lead the climb of a trekking peak.
Tip amounts vary of course but a rule of thumb per staff member is as follows:
| Trek or Climb | 2 week trips like Everest BC, Annapurna, Langtang, Mustang | Longer treks like Kanchenjunga, Upper Dolpo, 3 Passes, Manaslu Circuiit | Trekking peaks like Island Peak and Mera Peak | |
| Porter | USD$40 | USD$55 | USD$65 | |
| Asst trek leader | USD$65 | USD$75 | USD$100 | |
| Trek leader | USD$75 | USD$85 | USD$100 | |
| Climbing guide | USD$100 |
In order to work out the tip you should bring, it's necessary to know how many staff and how many clients are in the group. Then, calculate the total tips based on the figures above and divide by the number in the group.
Tips for porters must be paid in Nepali rupees because they cannot get to the city easily to exchange money, while the guides can be paid in dollars or other currencies because they are often in Kathmandu where they can change money.
Kit Rental in Nepal
You can either rent equipment from our store or you can rent locally in Kathmandu or in a nearby lodge if you are climbing Mera Peak or Island Peak. It will be cheaper to rent everything in the nearest village (Chukkung for Island Peak and Khare for Mera Peak) and there are plenty of rental shops there, but if you are planning to rent plastic or hybrid boots then it cannot be guaranteed that you'll find a boot your size, especially if you have particularly large or small feet.
Adventure Alternative has some equipment to rent including axes, poles, crampons, harnesses, jumars, slings, karabiners and descenders and you can add them to your order when you book. You'll receive these in Kathmandu when you arrive. The prices are all on the website under Extras.
You can also hire sleeping bags and down jackets and pretty much any outdoor clothing in Thamel before your trip begins, it's just a matter of shopping around! Everything is negotiable and there are hundreds of outdoor gear shops.
Trip pages this article refers to:
Everest Base Camp
Manaslu Circuit Trek
Annapurna Circuit
Annapurna Sanctuary
Gokyo Lakes Trek
Classic Everest Trek
Langtang Trek
3 Passes 3 Peaks Trek
Kanchenjunga Trek
Upper Mustang
Poon Hill
Mera Peak
Island Peak
Mera Peak and Island Peak combined climb
Yala Peak
Khumbu Peaks
Parchamo Peak
Mount Everest
Nepal Medical Electives
Nepal School Expedition
Tribhuvan Hospital
Nepal medical elective - Tribhuvan University Teaching Hospital
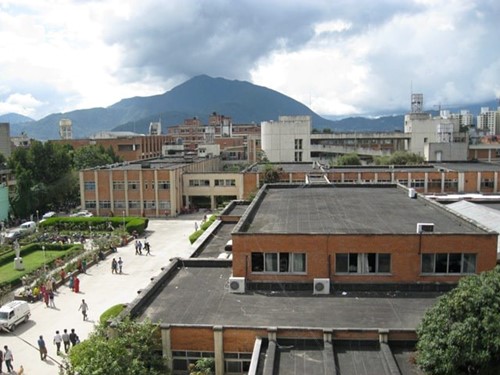
Tribhuvan University Institute of Medicine (IOM) was established in 1972 with the responsibility of training all categories of health workers in the country. It’s primary goal has been train primary health care workers as well as tertiary care workers including specialists. From the time of its establishment, there has been changes, both quantitatively and qualitatively, according the medical needs of the country.
Objectives:
Develop undergraduate and postgraduate level of human resources for health.
Undertake scientific research in the field of health sciences.
Provide curative, rehabilitative, promotional and preventive health care services.
Activate continuing medical education for health professionals.
Provide training for certificate-level health personnel (no longer present).
Number of Beds: 444
Where you are living
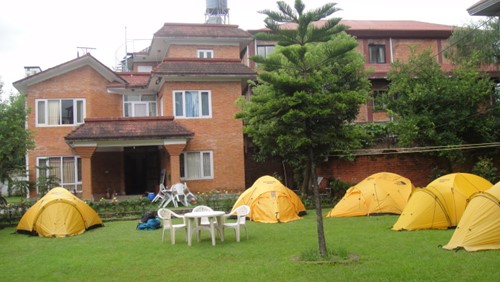
Your accommodation will be in a homestay in the area of Bansbari, near the Australian embassy. The house is slightly northeast of the city centre and is large and comfortable with four rooms (three double and one triple), two bathrooms, a large roof terrace and a large garden. The area is safe and quiet and about ten minutes drive from the Tribhuvan Hospital, and a little further to the city centre of Thamel. The large supermarket nearby sells literally everything you may need and there are ATM machines which take Visa and Mastercard. This area of the ring road is about 20 minutes drive from the airport.
It is a lovely quiet area and we offer a buffet breakfast service, lunch and dinner which you can pay for in local currency as and when you need it. Staying in the house is very comfortable, and in the evening you can enjoy time with a Nepalese family (Sarasoti and Pasang have a son called Jubilee, and a daughter called Ellie Dolma) or you can pop into town for dinner and a drink. The rooms are twin or single and there are hot showers, as well as television. It's the perfect place to live and experience a Sherpa homestay while you are working at the hospital.
Kenya volunteering activities
Kenya volunteering activities
The projects and programmes you will be involved in have been long term development aims of Moving Mountains for many years. Moving Mountains Trust is a group of registered charities in the UK, Ireland, Kenya and Nepal. It also funds a large tree-planting project in Borneo, which is our carbon-offset initiative.
Every trip we run has some sort of link with the development of the community or village through Moving Mountains, since this was the reason that Gavin Bate started the company and the charity in the first place. It is very much an example of social enterprise, using tourism to create development and wealth. It also fits in with the criteria of Fair Trade Volunteering.
Embu - You will be working with Gilbert Njeru in eastern Kenya at our Rescue Centre for street children, and also with local Primary Schools, including Embu County Primary School, Urban Primary School and the rural Gatwe Primary School on the lower slopes of Mount Kenya. Gilbert has been with us for over a decade and has studied development at college, and he will arrange for you to spend time at these places plus also coaching the local Black Cats team and working with the street kids who visit the rescue centre. Accommodation can be provided in our Embu Guest House, or for larger groups at the Embu Scout Centre or in large safari tents on the site of one of the projects.
Siaya - You will be working at our Ulamba Children's Home with local staff and helping with the 20+ children at this community project in western Kenya, living in guest rooms or camping on the grounds attached to the Home. You could be spending your days in either the Early Child Development Unit (96 children), or one of the ten Primary / Secondary Schools which Moving Mountains has developed or is in the process of developing. Our presence here is very strong and we work alongside all the local authorities, so you will be welcome everywhere. If you're with a group the work may involve the refurbishment or development of one of the schools, and sometimes you will be helping in the classes, or helping at the deaf child unit, or running a camp for children who benefit from the work of Moving Mountains, or something as simple as peeling potatoes for the kids coming back to the orphanage from school. Each group will work in small units, going out each day to experience an aspect of the projects. Ulamba began over a decade ago and is still developing, thanks to Gap trips and our school trips.
Solio - in central Kenya, this is a vast area of land which was set aside for internally displaced people who had to rebuild their lives with nothing. MM works with the Kenyan Govt on a very long programme which essentially means building 7 villages for around 10,000 families, including water wells, schools, clinics, hostels for children and teachers, kitchens at the schools and housing. This is such a huge project that there is work here for decades and the Kenya trip will allow you to completely involve yourself in working with our own MM Community Action Team who are all employed to manage the contracts to give them.
Tigithi - Any visit to Solio will be combined with visits to Tigithi Primary, where we have now completed the renovation of this rural Primary School on the lower slopes of Mt Kenya. As a result the school has now gone from one of the worst performing schools in the area to being the top Government Primary School in the area, and further to this Moving Mountains Kenya has started to build the ‘Chris Morrone Kaimathaga Secondary School’ on the grounds of Tigithi to provide affordable and high quality secondary education to all the kids in the area.
Nairobi - Nairobi is the location of our central office and the heart of Moving Mountains Kenya. It is also home of the original Black Cats team, where there are now Junior and Senior teams as well as girls and boys teams all competing regularly and reaching out to all children in the slum areas of Nairobi. There will be plenty of opportunities to work with the Black Cats as well as our Community Health Workers in Kibera and the staff from Mama Fatuma Orphanage in Eastleigh. You’ll also be able to explore these slum areas and our supported Ushirika Clinic and Muthurwa Primary School along with our staff as they visit the families who are supported and benefit from Moving Mountains work.
Office and admin - All volunteers also help out with collecting data for the charity and helping with general administrative tasks like accounts, correspondence, filing and helping to manage the paperwork. This involves teaching the local people how to manage their committees and offices and also teaching IT skills on laptops. As a charity Moving Mountains needs to justify its expenditure to donors and to the Trustees, and part of your role will be to learn about managing a charity and learning about development skills.
Promotion and online - We also ask volunteers to help keep us online by writing blogs and helping the local NGO with social media posts, online campaigns and planning events like community health fairs.
Events - A lot of volunteers have many different interests which are incredibly useful in the areas where we work, and we try to ensure that people get to share and utilise those skills for the benefit of the community. This may be running an orchestra, a school play, a community healthcare event, a sports event, a local business doing carwashes, or a specific sport like basketball or judo. The children love it of course, but we very much want you to interact with the adults, so you could also run free IT training sessions for people who need to learn basic computer skills, English role playing events like job interviews and also helping with our social welfare staff who visit families and schools to help children perform better at school or college.
Mentoring - a lot of the people we support are in college or university and would greatly value time spent with you thinking and planning their next stages in life, which might include searching online for job opportunities or applying for courses or jobs, and thinking about the future. This is all very useful stuff that we take for granted but in many cases your assistance here could make the difference between success or failure, confidence or despair.
Siaya District Hospital
Kenya Medical Elective - Siaya District Hospital
Location: Siaya, Western Kenya
Outpatient Clinics: Casualty Dept, Voluntary Counselling and Testing Centre for HIV/AIDS, Anti Retroviral Therapy Clinics, Chest Clinics (TB, COAD, Asthma), Mother and Child Health Clinics, Antenatal Clinics, Diabetes Clinic, Eye Unit, Dental Clinic, Ear, Nose and Throat, Immunizations, Psychiatric consultations
Inpatient Wards: Medical, Surgical, Orthopaedics, Paediatrics, Obstetrics and Gynaecology, Maternity
Medical Facilities: X-ray, Physiotherapy, Occupational Therapy, Laboratory, Theatre, Pharmacy
Number of Doctors: 25
Number of Beds: 240
Siaya District Hospital - Summary
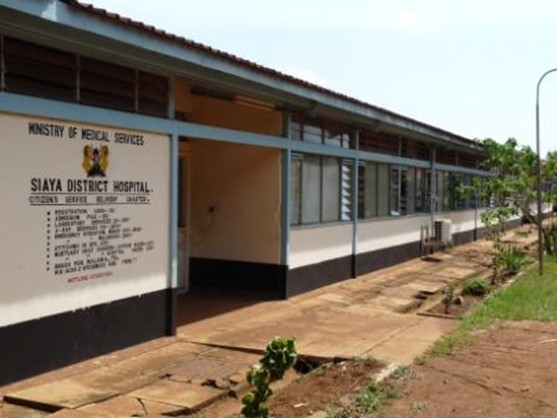
Siaya District Hospital is a large teaching hospital situated in Siaya Town serving an extremely large population of rural living people. The hospital itself is quite run down and is lacking in government funding, but they have recently opened a medical and nursing school in the area so there are now a lot of Kenyan student doctors and nurses completing their training at the hospital so government funding is on the increase.
Siaya district is a rural area in the Nyanza Province of Kenya, close to Lake Victoria and the Ugandan border. It is one of the poorest regions of Kenya which continually faces a number of economic problems, including high unemployment rates (particularly in the youth), limited farm productivity (regular droughts have occurred in Nyanza Province over the last decade and beyond), poor infrastructure and government services and a lack of affordable, quality healthcare.
Unfortunately, Siaya district also has the highest rates of morbidity and mortality in the country due to infectious diseases and the infant mortality rates in Siaya are very high. The most common diseases in Siaya district are malaria, HIV/AIDS, respiratory infections, and skin diseases. Severe malnutrition is another major problem, with rates estimated at 2.5 to 5% in children less than 36 months of age.
Recent statistics at Siaya District Hospital show that there are approximately 3 births per day and further statistics show that over 10% of babies were born with low birth weight, and nearly 5% were born prematurely. Nearly 20% of women visiting the Siaya District Hospital Antenatal Clinic had a positive blood smear for malaria, these high rates of low birth weight and premature deliveries are likely to be related to malaria infection during pregnancy.
Adventure Alternative has been sending Medical Students to Siaya District Hospital since 2003 and we have a strong working relationship based on mutual respect and support from both Adventure Alternative and our charity, Moving Mountains Trust. Over the years we have provided a variety of equipment and medical supplies for Siaya District Hospital, most of which have been donated by Medical Students who have spent time at the hospital and have raised funds for our charity.
Elective Video from Western Kenya - Excellent compilation video of Phil Huang's experiences throughout his Medical Elective at Siaya District Hospital and Dophil Community Clinic (December 2005) in Western Kenya.
Siaya District Hospital Elective Guide - Maddie Trott's elective guide to her experience at Siaya District Hospital (December 2009).
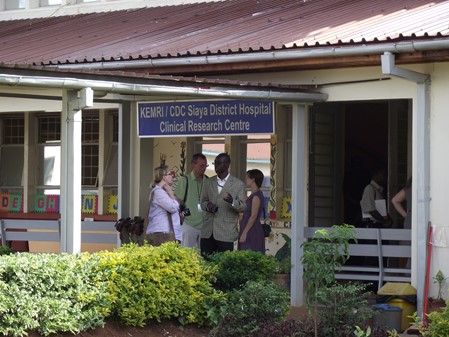
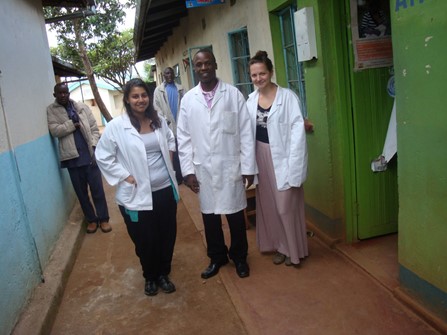
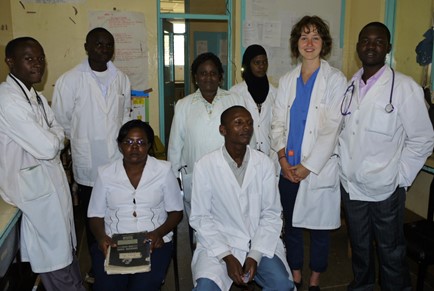
Elective students talking with their supervising Doctor

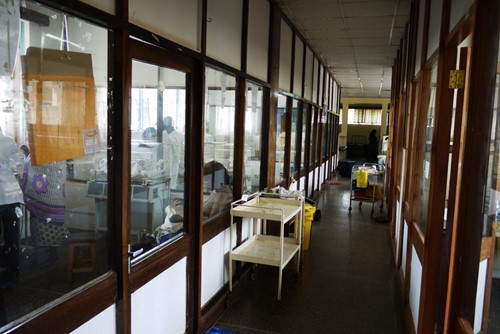
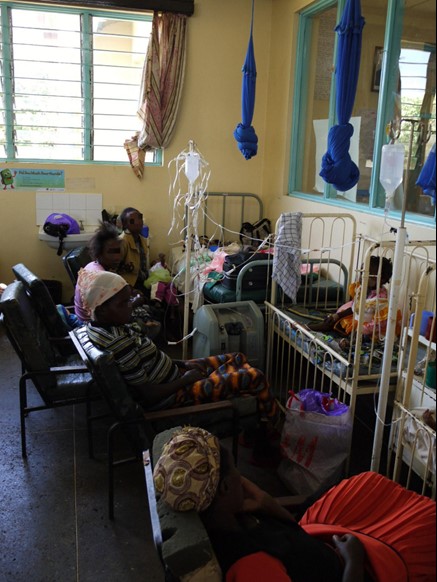
Critical care at Baby Unit in Siaya District Hospital
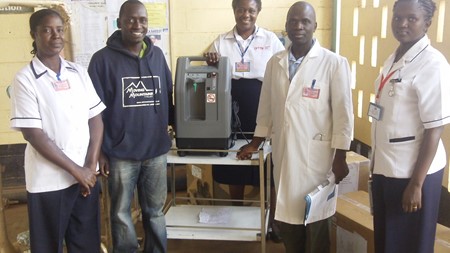
Donating equipment funded by Medical Students to Siaya District Hospital
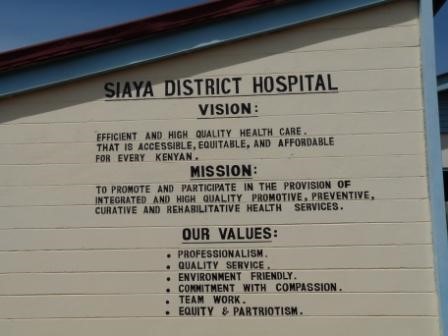
Siaya District Hospital's Vision, Mission and Values.
Kenya medical elective - Dophil clinic and maternity home
Location: Siaya, Western Kenya
Dophil clinic is approx 20 minutes drive on the road from Ulamba Children's Home towards a town called Luanda. It is a private clinic that receives financial assistance from a local church, although it is now essentially self-reliant except for large expenditures such as new equipment. It has recently added a Voluntary Counselling and Testing Centre for HIV/AIDS, and many of the staff at the clinic have received the relevant training in counselling to run this new service.
They also offer free Anti-Retroviral Drug Therapy as they receive the drugs free from their sponsors. The clinic is operated by three Doctors, one of whom is on site 24 hours a day. There is also a team of Nurses and Laboratory Technicians who work in shifts.
Moving Mountains built the operating theatre on the grounds of Dophil so minor surgery is carried out at the clinic and this helps to take some of the burdens off Siaya District Hospital. The clinic also has a male and female ward, a paediatric ward and a maternity ward with a delivery suite. There is also a laboratory and a mortuary and the clinic provides outpatient chest clinics, mother and child health and family planning clinics, antenatal clinics, diabetes clinics, dental and ear, nose and throat clinics and immunizations.
The clinic offers a wide variety of services to a large surrounding population and is run by an Administration Board Committee consisting of Doctors, Church Officials and members of the local community.
Siaya district is a rural area in the Nyanza Province of Kenya, close to Lake Victoria and the Ugandan border. It is one of the poorest regions of Kenya which continually faces a number of economic problems, including high unemployment rates (particularly in the youth), limited farm productivity (regular droughts have occurred in Nyanza Province over the last decade and beyond), poor infrastructure and government services and a lack of affordable, quality healthcare.
Unfortunately, Siaya district also has the highest rates of morbidity and mortality in the country due to infectious diseases and the infant mortality rates in Siaya are very high. The most common diseases in Siaya district are malaria, HIV/AIDS, respiratory infections, and skin diseases. Severe malnutrition is another major problem, with rates estimated at 2.5 to 5% in children less than 36 months of age.
Dophil Clinic is a great introduction to medicine in Western Kenya, though we wouldn't recommend spending your entire Elective at Dophil, possibly one or two weeks before starting a 3 to 4-week Elective at Siaya District Hospital. It is a great place for aspiring or first/ second-year students not on their Electives but looking for medical experience in a less overwhelming environment.
Irish Times article about health and family planning in Kenya... Featuring our very own Dophil Community Clinic!
Volunteer medical students at Dophil Community Clinic
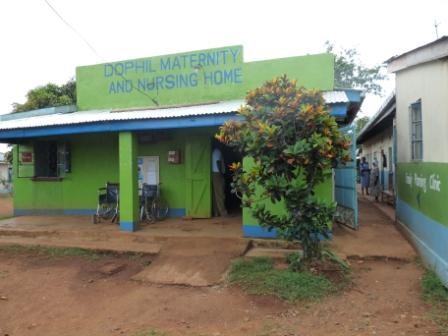
Reception at Dophil
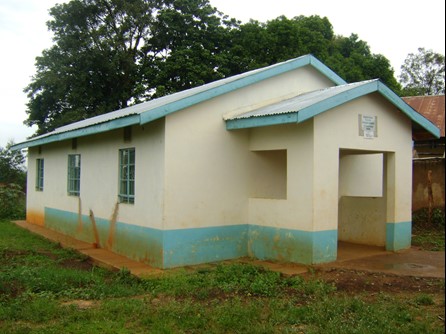
Operating theatre was funded, equipped and built by Moving Mountains
Kenya Medical Elective - Embu Provincial Hospital
Location: Embu, Eastern Province
Outpatient Services: Casualty Dept, Voluntary Counselling and Testing Centre for HIV/AIDS, Anti Retroviral Therapy Clinics, Chest Clinics (TB, COAD, Asthma), Mother and Child Health Clinics, Antenatal Clinics, Diabetes Clinic, Eye Unit, Dental Clinic, Ear, Nose and Throat, Immunizations & Psychiatric consultations
Inpatient Services: Medical, Surgical, Orthopaedics, Paediatrics, Obstetrics and Gynaecology & Maternity
Medical Facilities: X-ray, Physiotherapy, Occupational Therapy, Laboratory, Theatre for minor surgery & Pharmacy
No. of Doctors: There are approximately 30 qualified doctors working at the hospital ranging from interns to specialist consultants and the hospital provides education facilities and clinical placements for nursing students and also trains laboratory technicians within the hospital. Newly qualified doctors are also supervised through their internships at this hospital.
Number of Beds: 468
Embu Provincial Hospital - Summary
Embu Provincial Hospital is a relatively large teaching hospital on the outskirts of Embu town. It is the main hospital for Eastern Province, providing both inpatient and outpatient services for a large population. The hospital has good x-ray facilities and laboratory testing facilities, and referrals are taken from all the surrounding rural clinics and dispensaries.
The hospital is very clean and tidy, and well organised and efficiently run, though it does get overcrowded. At present there are no Intensive Care Facilities, although construction is underway for a new six bedded unit and other additions, all of which will make Embu Provincial the 3rd largest referral hospital in Kenya.
Embu itself is situated on the southern slopes of Mount Kenya and is about 2 hours from Nairobi depending on traffic. Outside of the town it is very green and you'll find a huge variety different fruit, vegetables, coffee, etc being grown in the foothills of Mt Kenya. There are also some stunning waterfalls, good day hikes and access to Mt Kenya via the Chogoria route. The town itself has a safe feel about it, there are a number of outdoor swimming pools, bars and restaurants and hotels and a young population, due to a number of different colleges and university campus in the area.
Your accommodation in Embu is at the Adventure Alternative Guest House, which is a 5 minute walk from the hospital. The guest house has a large living area, kitchen, hot shower and western toilets, two dorm rooms and a veranda that overlooks the hills which surround Embu.
Moving Mountains has a number of projects in Embu including the renowned ‘Black Cats’ Street Children Football Club and the Rescue Centre for street children. We also support a couple of schools in the area and have successfully set up some of the local street children in businesses or helped them back in to a school/college environment.
Elective Video from Embu - Part 1 of Claire McClintock's time with Adventure Alternative in Embu where she spent 4 weeks in the physiotherapy department of Embu Provincial Hospital
Elective Video from Kenya - Part 2 of Claire McClintock's time in Kenya with Moving Mountains and Adventure Alternative where she travelled to Western Kenya to join the one of our school 'Africamp' expeditions on the grounds of the Moving Mountains Ulamba Orphanage and Community Village.
Elective Blog from Embu - Joanna Byers Elective blog from Embu Provincial Hospital (April 2012) including her experience on an Adventure Alternative Mt Kenya climb and overland safari.
Moving Mountains Blog from Embu - Update from our staff in Kenya that shares some of the experiences of Antonia Hoyle (Medical Elective - January 2011) who had been working at Embu Provincial and St Mary's Hospital in Nairobi
UK Medical Student with Junior Doctors at Embu Provincial
Baby Care Unit at Embu Provincial Hospital
Embu Provincial Hospital
Embu Provincial Hospital - Medical electives abroad, Kenya
Location: Embu, Eastern Province
Outpatient Services: Casualty Dept, Voluntary Counselling and Testing Centre for HIV/AIDS, Anti Retroviral Therapy Clinics, Chest Clinics (TB, COAD, Asthma), Mother and Child Health Clinics, Antenatal Clinics, Diabetes Clinic, Eye Unit, Dental Clinic, Ear, Nose and Throat, Immunizations & Psychiatric consultations
Inpatient Services: Medical, Surgical, Orthopaedics, Paediatrics, Obstetrics and Gynaecology & Maternity
Medical Facilities: X-ray, Physiotherapy, Occupational Therapy, Laboratory, Theatre for minor surgery & Pharmacy
No. of Doctors: There are approximately 30 qualified doctors working at the hospital ranging from interns to specialist consultants and the hospital provides education facilities and clinical placements for nursing students and also trains laboratory technicians within the hospital. Newly qualified doctors are also supervised through their internships at this hospital.
Number of Beds: 468
Embu Provincial Hospital - Summary
Embu Provincial Hospital is a relatively large teaching hospital on the outskirts of Embu town. It is the main hospital for Eastern Province, providing both inpatient and outpatient services for a large population. The hospital has good x-ray facilities and laboratory testing facilities, and referrals are taken from all the surrounding rural clinics and dispensaries.
The hospital is very clean and tidy, and well organised and efficiently run, though it does get overcrowded. At present there are no Intensive Care Facilities, although construction is underway for a new six bedded unit and other additions, all of which will make Embu Provincial the 3rd largest referral hospital in Kenya.
Embu itself is situated on the southern slopes of Mount Kenya and is about 2 hours from Nairobi depending on traffic. Outside of the town it is very green and you'll find a huge variety different fruit, vegetables, coffee, etc being grown in the foothills of Mt Kenya. There are also some stunning waterfalls, good day hikes and access to Mt Kenya via the Chogoria route. The town itself has a safe feel about it, there are a number of outdoor swimming pools, bars and restaurants and hotels and a young population, due to a number of different colleges and university campus in the area.
Your accommodation in Embu is at the Adventure Alternative Guest House, which is a 5 minute walk from the hospital. The guest house has a large living area, kitchen, hot shower and western toilets, two dorm rooms and a veranda that overlooks the hills which surround Embu.
Moving Mountains has a number of projects in Embu including the renowned ‘Black Cats’ Street Children Football Club and the Rescue Centre for street children. We also support a couple of schools in the area and have successfully set up some of the local street children in businesses or helped them back in to a school/college environment.
Elective Video from Embu - Part 1 of Claire McClintock's time with Adventure Alternative in Embu where she spent 4 weeks in the physiotherapy department of Embu Provincial Hospital
Elective Video from Kenya - Part 2 of Claire McClintock's time in Kenya with Moving Mountains and Adventure Alternative where she travelled to Western Kenya to join the one of our school 'Africamp' expeditions on the grounds of the Moving Mountains Ulamba Orphanage and Community Village.
Elective Blog from Embu - Joanna Byers Elective blog from Embu Provincial Hospital (April 2012) including her experience on an Adventure Alternative Mt Kenya climb and overland safari.
Moving Mountains Blog from Embu - Update from our staff in Kenya that shares some of the experiences of Antonia Hoyle (Medical Elective - January 2011) who had been working at Embu Provincial and St Mary's Hospital in Nairobi
UK Medical Student with Junior Doctors at Embu Provincial
Baby Care Unit at Embu Provincial Hospital
Preparing for Elbrus
| Location | Travel | Insurance | Visas | Moscow | Weather | Clothing and kit |
Accommodation | Food |
Summit day |
Hygiene |
Where is Mount Elbrus?
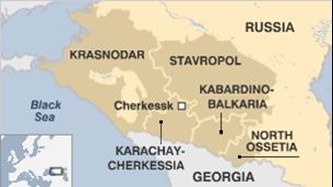
Mount Elbrus is situated in the Western Caucasus Mountain Range near the border of Georgia with the south side in the Russian republic of Kabardino-Balkyrie and the north side in the republic of Karachay-Cherkessia.

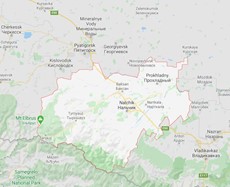
The small republic of Kabardino Balkaria is just 12,500 sq kms in the north Caucasus with a population of just under one million, made up of Kabardanians in the lowlands and Balkarians in the mountainous area. Karachay -Cherkessia has an area of 14,100 sq kms and a population of just around half a million. The Karachay and Cherkess are two separate Muslim peoples.
Prielbrusie is the national park around Mt. Elbrus and is the most frequented area in the Central Caucasus and Elbrus itself is a popular ski resort for Russians.
How do I get to Elbrus?
Whether you want to climb Elbrus by the south or north routes, the first step is to get to Mineralnye Vody airport and in almost every case this means flying initially to Moscow and then taking the four hour flight directly south on either Aeroflot or S7 airlines.
From the UK or Ireland or indeed most places in Europe the best timing is to take an overnight flight to Moscow and then a morning flight to Mineralynye Vody, aiming to arriving late morning.
For people on the Elbrus South trip, you then take road transport to the Baksan Valley and the village of Terskol where there are plenty of hotels and restaurants. The journey takes about four hours and arriving early evening leaves plenty of time for settling in, having a meal and an early night.
For people on the Elbrus North or Traverse trips, the minibus takes you to the nearby town of Pyatigorsk about an hour from the airport. We overnight in a hotel and the next morning a more robust minibus will drive the four or five hours to the mountain, half of which is off road.
On the return, it's a good idea to take an early afternoon flight out of Mineralnye Vody. and then the evening flight out of Moscow. This means departing Terskol village or the north side base camp after breakfast at around 8.00am. For the North siders we often leave the campsite the day before, depending on the height of the river which needs to be crossed in the vehicles.
Travel insurance for Mount Elbrus
It's important that everyone gets travel insurance as soon after booking the trip as possible, but many UK insurance companies don't offer policies to this mountain because of the UK Government FCO advisories against travel for all but essential travel. However some specialist companies do offer policies and we recommend Campbell Irvine who we have used for many years.
Getting the Visa for Elbrus
The process is not difficult but it is a bit time consuming, and it begins about six weeks prior to the trip when we ask for your passport information so that we can process an invitation letter for you. The visa is quite specific with dates and places to be visited so if you plan to stay in Moscow or travel longer in Russia then we need to know the dates.
There is more information on our Practical Information page regarding the process itself. Be aware though that some nationalities require original visa invitations to be posted to them rather than soft copies which adds to the cost, and some nationalities require a more stringent process. In the UK now for example, every applicant must go in person to the nearest Russian visa office to submit their biometrics, and the three offices are in London, Edinburgh and Manchester. This means an additional cost to factor this visit in.
Moscow visit
A lot of people choose to visit Moscow and we can assist with your travel and accommodation needs. Please contact us for more information about airport transfers, recommended hotels and hiring our city guide. We can also pre-book tickets to events and to visit the Kremlin.
What is the weather like on Elbrus?
Elbrus is at a latitude of 42 degrees North, similar to that of Rome. However, due to its altitude and its surrounding mountain range, it can produce some extreme weather conditions and very low temperatures. You can see 6-day weather forecasts and temperatures for the mountain at different altitudes on Mountain Forecast.
During the climbing season from June to August expect warm sunny days with little precipitation in the valleys and progressively colder days and nights as you go higher on the mountain, with lows of minus 20 Celsius on the summit with windchill. Prepare for a wide diurnal temperature range which is tiring, and rapid change in weather conditions and especially visibility on the mountain.
Read more about the climate in this part of Russia on our General Information section.
What kit do I need for Elbrus?
Treat the Elbrus expedition as a winter climb, even if you are going in the stable months of July and August. The variation in weather is one of the main objective dangers on this mountain and it's important to be prepared for a wide range of weather and extreme windchill on the summit.
You can buy or rent the cold weather gear and the climbing equipment, but what you buy depends a lot on what other climbing you intend to do in the future. You can discuss with us any time about specific brands or models but the general requirements are below.
Boots - this climb requires plastic mountaineering boots but a high quality hybrid boot will be adequate. Take normal hiking boots for the acclimatisation treks but once on snow you will need to have good quality warm 'double' mountain boots. Also take hut shoes or sandals. Heavy wool socks for the days on snow and trekking socks for lower sections.
Hands - a good pair of waterproof, lined mountain mitts, fleece gloves and liner gloves.
Head and face - warm hat with ear covers if possible, and a sunhat. A buff or balaclava, high quality mountain sunglasses or glacier glasses, and goggles.
Body - You need good quality waterproofs, and a good quality down jacket with a hood and preferably long enough to cover the backside. Layering with several fleece layers and normally a single thermal layer is enough for summit day. Please note that the lightweight down jackets are not enough for the cold on Elbrus, they have to mountain quality down jackets which you can rent in the village if needs be.
Legs - trekking trousers and shorts and leggings for the valley walks, lined trousers or soft shell for up high with shell or over trousers against the wind and snow. Take a pair of thermal bottoms for summit day.
Rucksack - on the north route and traverse you will be doing carries of kit from base camp to high camp so a 75 litre sack is necessary plus you will need to use the larger rucksack to carry gear up like tents, food and stoves. On the south route a 40 litre day pack for the summit day is all you need, since your main kit will go up to the hut in the cable car. You also need a good duffle bag, especially the north siders, and a travel bag for leaving in the hotel.
Sleeping bag - on the north route it's best to opt for a four season bag since there is much more camping, whereas the warmer huts on the south side mean a 3 season bag will probably be enough.
Climbing equipment - for both routes on Elbrus you will need a pair of crampons, a walking axe, harness, slings and karabiners, trekking poles and a climbing helmet. All these can be rented from us.
Miscellaneous - water bottle, thermos flask, wash kit, personal first aid kit, trekking poles, plenty of sun cream and lip salve and moisturising cream, travel clothes and bag for leaving in the hotel, power bank and charging items for phone, tablet etc.
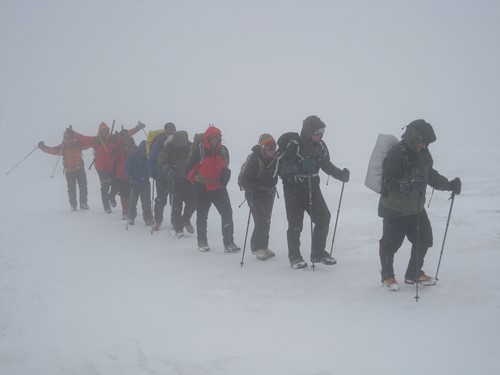
Low visibility on the lower slopes of the mountain. This photo is in the height of summer in July, but it could winter in Scotland.
Accommodation on Elbrus
For a full description of all the huts and accommodation on this trip, covering both north and south sides of the mountain, please have a look at the blog piece Huts on Elbrus.
The new National Park huts on the south side are heated and comfortable with bunks and mattresses in small dormitories. There is wi-fi and phone signal. A communal area for eating and relaxing is next to the kitchen. We would recommend a 3 season sleeping bag. We have an expedition cook who will prepare all the food for everyone throughout the trip but do bring some snacks and sweets from home.
On the north side the accommodation is in tents at base camp and in a fairly rudimentary hut at the snowline. Sometimes the team camp at the high Lenz Rocks before summit day, but only if the weather allows it. We would recommend 4 season sleeping bags and you will need a good quality sleeping mat.
Food preferences on Elbrus
The food in the restaurants in the Baksan valley restaurants is lovely and there's quite a range, but there's no doubt that they do not cater very well for vegetarian or vegan diets. There are plenty of soups and salads and breads though, but not many vegetarian recipes. Russians are meat lovers and the local dish of shashlyk - a lamb kebab roasted over an apple wood barbecue - is the national dish.
On the mountain we have a cook who prepares all the meals which again are quite limited in the range of ingredients, because the shops in the valley don't have a great stock. Plenty of soups and stews, potatoes and vegetables with some meat (tinned mostly, but sometimes chicken), sweets and snacks. Breakfast is mostly porridge, eggs and bread with cheese and sometimes muesli.
We won't be able to cater very well for some specific dietary requirements, for example celiacs. Gluten free food is not possible to buy. We would also advise you bring your own summit day snacks and foods, the shops locally don't sell any specialty energy bars or drinks. We will provide things like glucose biscuits and orange juice.
What to expect on an Elbrus summit day
Leaving the hut in the dark on summit morning you are likely to be in mountain boots and crampons, soft-shell or mountain trousers with base-layer tights, probably over-trousers, a base-layer and fleece mid-layers plus a down jacket. You'll also have a balaclava or buff, warm hat, liner gloves and thick windproof insulated gloves.You'll be carrying a pole and a walking axe and most likely have headtorch on.
In your day pack bag carry goggles, sunglasses, flask of hot drink, water bottle, snacks and harness/sling/karabiners/helmet which you will use for tying into the fixed line or into a man rope. For groups on the traverse you will have a bigger pack and include a sleeping bag and travel clothes for going over to the south side.
Leaving the hut at around 4am, most climbers on the south side opt for taking a ratrack to Pastukhov Rocks to start the day, while on the north side the hike begins from the tent at Lenz Rocks. Depending on weather the route could be icy and hard or soft with deep snow.
The day will be long on either route, estimate a twelve hour day and plan in terms of snacks and drinks. It's almost impossible to avoid getting dehydrated on a day like this and inevitably with such a big height gain you will feel the effects of altitude. Try to leave the hut as hydrated and well rested as possible and take plenty of snacks for the day.

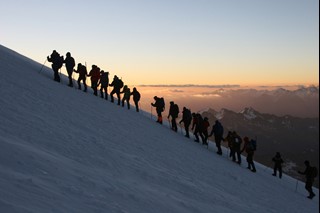
Left: Icy ground on the open slopes up to the Saddle require sharp points on your crampons and a walking axe.
Right: A clear beautiful morning on Elbrus, every person has the right kit and clothing and enough to cope with significant changes throughout the day.
Hygiene on Mount Elbrus
Toilets
All the huts and the campsite on the north side have outside latrines which are wooden huts with a floor and a long drop. Some latrines are worse than others, and it is not the job of the Rangers to clean them. Company staff can do this job, but under duress, since many of the problems are caused by people who miss the hole and don’t clean up afterwards.
Sometimes a visit to a latrine can be a dispiriting experience. It is important to take a torch with you at night and take a responsibility to keep the huts clean. Going to the toilet behind a rock is strictly forbidden and the authorities have the power to send people off the mountain if they are caught, and fine the company. We will provide toilet paper but by all means bring your own.
Rubbish Disposal
All rubbish is collected by the staff and carried down the mountain. Do not throw rubbish down the long drop (toilet paper is fine) and make a habit of picking up litter that you see on the trail. The responsibility for keeping the mountain clean is on the shoulders of every visitor.
Water
We do not bring bottled water on the mountain; we boil all water which comes from the rivers and glacial streams. The staff will fill your water bottles every evening. Do bring some water purification tablets for yourself if you would like the extra reassurance or something like a steripen.
Elbrus safety
This page describes the dangers of Mount Elbrus, rescue procedures and also some thoughts on managing summit day scenarios.
What is the route like on Elbrus?
The south face route is the most popular with huts above the snowline extending from 3800m to 4100m. Most people make use of a 'ratrack' or piste groomer to transfer up to Pastukhov Rocks at 4650m which still leaves a long summit day ascent of 1000m which takes around 7 - 10 hours.
The north side is not as facilitated, it's a wilder more remote experience. It's not technically difficult, about a PD alpine grade, but it's a 1900m ascent on summit day which is commonly between 12-16 hours. There are a few huts on the moraine at 3750m, and a small higher campsite at Lenz Rocks which is 400m higher.
To get to the higher west peak, climbers have to traverse through the long col between the two peaks and join the south route, or potentially ascend directly to the summit plateau.
Make sure you read our page on preparing for Elbrus so you are well informed before going on this trip
How dangerous is Mount Elbrus?
There are no major crevasses or objective dangers on the main routes on either the north or south sides, but the weather is very temperamental and visibility can drop rapidly. Sudden storms and extremely cold weather are common, even in the height of the summer season during July and August. It is easy to become disorientated when the cloud comes in and wander off route, and there are many stories of frostbite and cold weather injuries on the mountain every year.
Altitude is high enough to need proper acclimatisation and increased liquid intake during the climbing period. Summit day is a long day on the hill with a significant gain in elevation so it is vital to take plenty of liquid and lots of snacks and energy gels. Even on a day of fine weather, the ascent is exhausting and very challenging. Success will depend a lot on hydration, plenty of good food and rest, good acclimatisation and a lot of willpower.
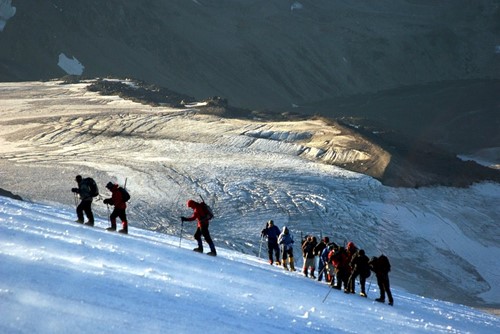
South side of Elbrus on summit morning. The gradient is not steep but the wind and cold and 1000 metre ascent to the top makes it a long day, and in winter conditions. Think a cold Scottish winter day at altitude.
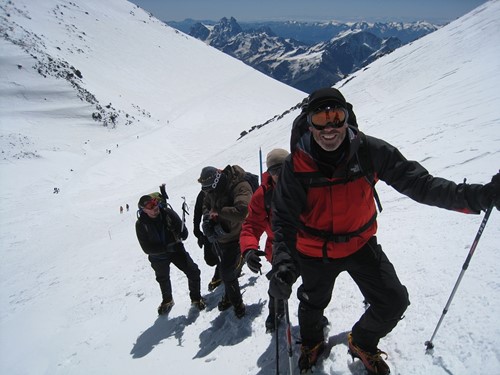
Climbing on the rising traverse above the Saddle and up to the summit plateau. Objectively this is probably the most dangerous section on the south side because of the distance you might fall in a slip without a successful self arrest. A confident team with training and good equipment, well hydrated and rested and acclimatised, should not find this too difficult.
What equipment do I need for climbing Elbrus?
Consider Mount Elbrus to be a winter climb needing basic alpine skills on a non-technical but snow-covered slope at altitude. You will need crampons, a walking axe, a helmet, mountaineering boots, a harness with slings and karabiners to clip into a rope, a proper mountain down jacket and down mitts as well as your layers of fleece and shell. See the Preparing for Elbrus page for the full kit list and more information on preparing for a mountain expedition.
Crampons are needed once you go above the snowline and a walking axe is necessary for self arrest and walking poles with snow baskets are also a must. A climbing helmet is recommended; the danger is not from falling rock, but a head injury occurring during a slip or fall. A harness with locking carabiners and a sling is necessary so you can clip into the fixed-line above the Saddle, and we would recommend an alpine harness because it is easier and safer to put on with boots and crampons.
The guides will carry ropes in case of an emergency or if they feel that someone would benefit from being roped up, particularly on the descent.
For north route expeditions, you will additionally need a four-season sleeping bag (a three-season bag would suffice on the south side because the huts can be quite warm) and a sleeping mat but the equipment otherwise is much the same.
Treat summit day on Elbrus with respect and as a winter climb. Visibility can drop very fast, as can temperatures. Be prepared for different snow conditions too, the route can be be hardpack and ice at 4am on the way up, but soft snow on the descent.
Is there a Fixed Line on Elbrus?
On the South face route above the Sedlowina Saddle - the huge snow basin between the east and west peak - there is a fixed line in place for added safety on the rising traverse up to the summit plateau. This means that you can clip in and be held in the event of a slip on that section which is the steepest on the mountain. It's also potentially icy.
To clip in you will need your harness and a sling and two screw gate karabiners. Use one karabiner to attach the sling to your harness, and use the other karabiner to attach the sling to the fixed line. When you come to an anchor point on the fixed line make sure you are safe and stable, and then move the karabiner across the anchor to the line and screw it shut again. It’s a simple safety system but you will also need your walking axe and pole for support.
On the North route there are no fixed lines, but the guide might lead the group through the Saddle to ascend by this way. Or the guide may make a direct ascent from the other side of the saddle up to the plateau and would likely rope everyone together on a man rope.
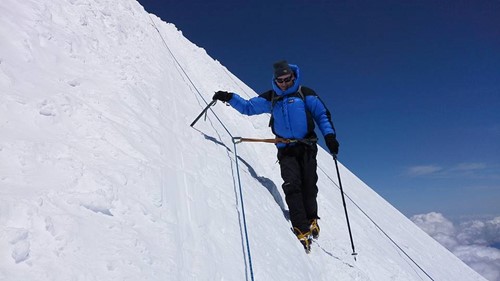
A climber attached to a fixed line on Mount Elbrus. Note the walking axe in the uphill hand and the pole in downhill hand (extended to its full length so you don't have to bend over). The slope angle is just under 45 degrees at it's steepest point.
What happens in an emergency on Mount Elbrus?
In the event of a rescue or an emergency, the guides will manage the situation along with the mountain rescue team (on the south side only) using mobile phones, as there is some signal on the mountain. However above the Saddle there is no signal so any situation above that point has to be self-managed.
A rescue will involves an assisted descent down the mountain using primarily the tracked vehicles and manpower on the south side, and only manpower on the north side.Snowmobiles and ratracks can get up to 5000m in the right conditions and take casualties to the chair lift. Theoretically someone could be down in the valley in a matter of a few hours.
If climbers on the north side have travelled through the col then it would be sensible to descend the south side to the village. Otherwise, an injured person would need to be assisted all the way back to the snowline at the top hut which would be very difficult.
Casualties are generally taken to the nearest hut and kept warm and safe until a decision is made to move further down the mountain. On the south side, this can be done with the ratrack vehicles and then transferred to the cable cars to get to the village in less than an hour. On the north side, an injured person would need carried or assisted with manpower to the base camp and then taken by car to the nearest town and hospital which adds further hours to the evacuation.
For all of these evacuation scenarios there is no external assistance, and a helicopter is not a possibility because of the difficulty of landing on the mountain at high altitude. Every rescue becomes a group responsibility and other mountain guides will help. On Elbrus the mountain rescue team is made up from all the local mountain guides and during the season there will always be other people to help and rely on. Inevitably the snow cats play a big part in rescues.
Common reasons for rescue are exposure due to the cold, exhaustion and collapse due to a combination of the cold, tiredness and altitude.
Is there an emergency shelter on Elbrus?
If an accident occurs in the saddle, or people become benighted for some reason, between the two peaks there is an emergency shelter with room for two or three people to sleep if necessary and a group to rest if the weather is bad. This hut is painted a bright orange. There are no supplies inside but it offers shelter and is a useful place to gather resources before descending.
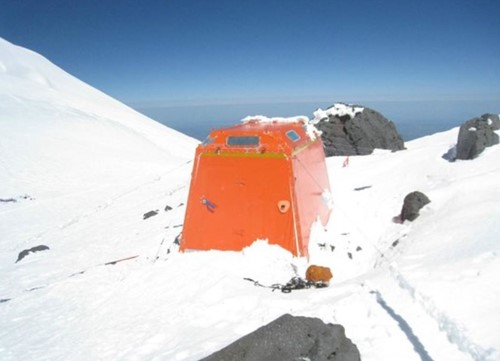
The emergency shelter has enough room for about four or five people.
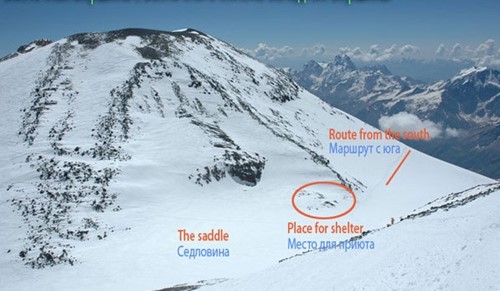
Location of the emergency shelter, which is quite easily reached for climbers on the south side. Note the length of the saddle coming from the north side, which is often full of deep snow.
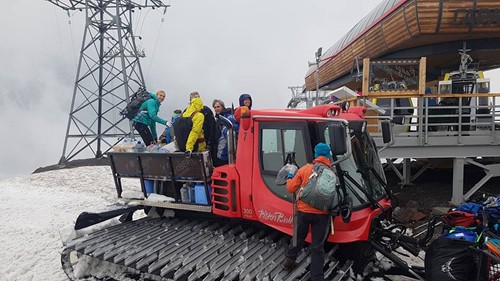
The snow machines or 'ratracks' on the south side of Elbrus are often used to help casualties off the mountain but they charge for the service. The amount depends how high they have to try and reach, which can be 5000m in the right conditions. Otherwise it is possible to get this high with a snowmobile.
What is summit day like on Elbrus?
On both sides of the mountain the summit day is long and arduous, cold and demanding, but not technically difficult. Mount Elbrus is quite a symmetrical volcano so the gradients on each side are similar, but the north side has none of the facilities of the south side so it's more committing. The pictures below show each route and the altitudes.
Summit day on the south side is usually made shorter because a snow machine drops people off at Pastukhov Rocks (4700m), while on the north side there's no choice but to walk all the way. There is more on this subject on the Preparing for Elbrus page.
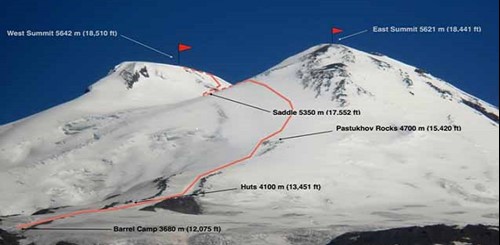
Weather should always be considered as cold and windy and changeable on Elbrus. You may be lucky and have a sunny windless day, but always prepare for worse and hopefully be happily surprised.
What happens if the group splits up on summit day?
Where is the nearest hospital to Mount Elbrus?
On the south side, the nearest hospital is in Nalchik, about an hour and a half by car from Terskol, although there is a small clinic in the village of Azau at the base of the mountain. There are several local Doctors in the villages but they are limited in what they can do to assist. A casualty would have to be taken by vehicle to Nalchik.
On the north side, the nearest hospital is in Pyatigorsk which is close to Mineralnye Vody. To get there would mean driving a 4x4 from base camp back across the river and along the off-road tracks to the road and then to the city, a total journey time of about 5 hours.
In all situations, any payments for use of the snow machines would need to be made in cash and recovered later from insurance. The insurance company can help with the repatriation of somebody from the airport to get home but they would be unlikely to make direct payments to a Russian hospital, so therefore you should expect to pay with cash or perhaps a credit card.
Is there mobile phone signal on Elbrus?
On the south side there is mobile phone signal from the high huts down to the phone towers in the valley but only generally in clear weather and with good line of sight. Above the Saddle there is no signal at all. However in the huts at about 3800m now there is wifi.
There is some mobile signal on the north side from the top hut but none at all at base camp and nothing from the higher points on the mountain.
Decisions making on Elbrus
Be patient with the language barrier even though most guides do speak good English. Russian guides are not known for their loquaciousness!Culturally they are unlikely to provide lengthy briefings and justifications for decisions. They take the view that clients should accept a guides decision as correct, and not require explanations. This is a cultural interpretation of the relationship between a guide and a foreign client. They may feel that they cannot properly explain the nuances of a decision. While the decision is based on safety and care for the client, some people may feel frustrated by the reticence. The best way to handle this is to ask questions without being confrontational.
If you would like to climb Elbrus and choose a route then please refer to the main Climbing Elbrus page and choose your preference.
Borneo Preparation
Preparing for your trip to Borneo
There are a number of pages on this website which provide quick answers and some information on visiting Borneo.
For country information, visit our Borneo Country Information page which covers general questions, culture, laws and some practical answers to common questions.
Booking on the Adventure Alternative site
When you book your trip with us you will create an account with a username and password. Please use these to log in to your account from our website (on the main menu options) and you will be able to see all your personal information and your trip information, and you can add information and make interim payments.
Generally people will first email us and check availability, and our staff will either confirm everything in which case you can go to the website page and book your place.
If you would like to organise the trip according to your preferred dates then contact us first and our office in Borneo will help creat the trip with you. This process can take a few days or weeks as we build the trip with you and finalise the price and the details. Once that is agreed then we put your trip up on the website on our Bespoke Borneo page and you can book on.
After that there is a process of us internally creating the trip and putting all the information on our shared spreadsheet. We then need your passport data and any personal preferences plus your flight details for arriving and departing.
A few weeks before the trip we then get in touch and give you a pdf of your finalised itinerary showing any telephone numbers and specifics. On your account with us you can also download information sheets about any of the places you will be visiting, and there is also a wealth of information on our website, for example this page.
Over time you can go into your account and make interim payments or make a bank transfer, and full payment is due four weeks prior to the start of your holiday.
Flying to Borneo
Please check first with us that there is availability for your trip and consider if you would like to arrive a little earlier to acclimatise to the heat and humidity. Visitors from Australia can fly direct into either Kota Kinabalu or Sandakan, if you are coming from Europe or the United States then most likely you will fly through the major hubs of Kuala Lumpur or Singapore. From there you can book a connecting flight to either KK or Sandakan for Sabah, or Kuching or Miri for Sarawak.
For our wildlife trips in Sabah like the Borneo Wildlife Tour, the most convenient point of entry is Sandakan and for Sarawak we would recommend Kuching. If you starting your trip going to Mulu Caves then it will be easier to fly into Miri and similarly for trips into the interior to visit the Penan tribe.
For Mt Kinabalu it will be easiest to fly into Kota Kinabalu. For the islands on the west coast like Sipadan, Libaran and Lankayan then you can still use Sandakan airport.
Flying out of Sabah you can consider going from Lahad Datu if your trip ends up in Danum Valley or Tabin. From Lahad Datu you can fly into KK or Sandakan. Another option a bit further away is Tawau airport.
When booking your flights it's possible to fly into Sandakan and out of Kota Kinabalu for example and add those connecting flights to the main return journey to KL.
Passports
We will need to have your passport information, dates of birth and any information you feel we need to know well before the trip starts. You can put all this information on your account profile with Adventure Alternative or you can send it to us as an email. There's no need to send a picture of the passport, just the data.
Heat and humidity and physical fitness
It is not possible to prepare for the heat and humidity if you are in Europe, but it's easier coming from Australia. For safari holidays like the Borneo Wildlife Tour it might be a good idea to arrive one day earlier than the programme begins to overcome any jetlag and give your body a chance to acclimatise to the change in environment. This holiday and others like Wild Borneo do involve jungle walks which are not a great distances but the humidity is sapping.
if you are planning to climb Mt Kinabalu it's a good idea to train on a step machine! Mt Kinabalu has a large number of steps which put a lot of strain on the thigh and calf muscles.For descending it's a great idea to bring poles especially if you have had problems with your knees.
None of our trips to Borneo requires any specific training programmes, but clearly those ones with more walking will be more enjoyable with a bit of training. Whilst out trekking it is generally very hot and sweaty and most hills are steep and muddy. Do take good walking boots, and consider something like gardening gloves for sharp plants and also the sharp rock on the pinnacles in Mulu. There will always be places to wash and cool down in waterfalls and in the rivers so take a costume and a lightweight towel.
For the biking holiday the land is hilly and there are plenty of long days cycling on rural roads surrounded by jungle; the main problem is heat exhaustion so make sure to keep hydrated and bring salts to prevent muscles seizing up during the day. A good option would be Nuum tablets which are great for replenishing electrolytes.
Travel Insurance
Please buy your travel insurance after booking your holiday. For most of our Borneo trips a standard holiday cover will be fine but do check the policy if you are climbing Mount Kinabalu. More information is on our Insurance page.
Vaccinations and anti malarials
There are no specific requirements for entry to Malaysia and you only need yellow fever if you are coming from a country where yellow fever is prevalent. We recommend visiting your GP or travel clinic to discuss anti-malarials because although the prevalence of malaria is low in Borneo there is a higher prevalence of dengue fever which is also spread by the mosquito. The NHS publish guidance on their Fit For Travel website. There is also further information on Vaccinations and Malaria medications on our relevant web pages.
Visas
For most European and British passport holders and citizens from Australia and the USA a visa is not necessary. You can check requirements with the Malaysian Ministry of Foreign Affairs. You need to make sure that your passport will not run out sooner than 6 months after your trip date, Do check this early as it can take a long time to process a new one.
Money
The local currency in Borneo is the Malaysian Ringgit and there are about 5 Ringgit to the GB Pound. Ringgits can be written locally as either MYR or RM. You can obtain ringgit in the UK before you travel but there are forexes and ATMs in the airports and towns to withdraw cash from major cards. It's a good idea to get a foreign currency card to avoid excessive charges. You can use your cards to pay for things in the towns but to avoid charges we generally recommend using cash.
The wildlife lodges and places out of signal range will only take cash and you should bring ringgit for things like drinks, souvenirs and also paying for tips. Drinks are western prices for wine, beer, soft drinks. See below for tips. Other cash costs would be paying for an additional wildlife drive. The amount you bring does depend obviously on what you need but in general an equivalent of USD$150.00 or GBP£120.00 each will be enough.
Paying for your holiday
When you book your holiday the website will offer you a choice of the following:
Credit or debit card payment - deposit of £100.00 or full payment. If you pay money now then you will get your invoice and receipt by email.
Bank transfer - you will get an emailed confirmation of your booking and the details of our bank account in the UK to make a transfer. Please let us know when you have done this so we can manually update your account.
Wise for international transfers or other currencies including sterling if paying from abroad - you will get an emailed confirmation with the Wise bank account details. Please let us know when you have made a payment.
For interim payments or instalments you can go into your account on our website and go to the trip details and scroll down to see the payment option. This will let you choose how much money you wish to pay.
Food in Borneo
Borneo street food compares favourably with the likes of Vietnam and Thailand. However, anyone who has tasted a longhouse or village feast cooked with jungle vegetables and washed down with some Tuak (rice wine) will rank it as some of the most memorable of the region.
You can buy Asian food, Chinese food and western food in the cities, and the seafood is of course very good. Vegetarians have no problem but vegans will need to check menus carefully. Most lodges can cope with dietary needs such as celiac and gluten free. Please let us know in advance so we can advise the lodges.
Compared to other areas in the region, standards of cleanliness are high. Minor upsets can be expected due to a change of diet. Bottled water is always safe as is boiled or filtered water provided in hotel rooms and lodges villages. Ice cubes are generally ok as they are factory made but it's good to check in public restaurants, but avoid 'shaved' street ice.
Meals on the itinerary
Generally speaking if it's a whole day in the itinerary then we will include breakfast, lunch and dinner, unless it's a travelling day when the driver will stop at a local restaurant and you can choose from a menu and self-pay for lunches. In the lodges there are menus prepared for each day, and most meals are served from a buffet.
For arrival and departure days it depends on the time of your flight and the time of transfers. A late arrival at Sandakan will mean we include dinner on the itinerary for example. An early departure from Danum Valley to get to Lahad Datu airport will mean a breakfast is included.
A meal at places like Sepilok, Telupid or Lahad Datu is around RM30.00. This is around GBP5.00 or USD$7.00.
In Kota Kinabalu, Miri and Kuching the hotels will have a buffet breakfast but we let people buy their own meals in town if it's a sightseeing day. Once you leave for a tour to Bako or wherever then we include the meals again. Similarly at Mulu the meals are all provided once you arrive.
You can buy snacks around the towns and enroute to the reserves and in some of the lodges. It depends how remote the accommodation is. But generally you could say there is plenty of chance to buy snacks, drinks and fruit. If you have your own favourite sweets or snacks from home then you can bring them but don't forget the heat and humidity will melt almost everything. Driving to Deramakot for example your driver can stop in small places to buy snacks and drinks but once the road turns onto the logging tracks and roads then there won't be any more of those shops.
In Sarawak when you are visiting the villages and centres you can buy some snacks and cold drinks and souvenirs but generally the rule would be the further away you go from the city the less opportunity there is.
Costs at Sepilok
We don't include a guide on the day of arrival at Sandakan because most people coming from Europe arrive mid to late afternoon and generally want to relax in the lodge.Most people do the centre visit on the next day when you have the whole day to enjoy the orangutan centre, the sunbear centre and also the rainforest discovery centre.
If you are visiting the centre yourself then you can take a taxi or use the online app Grab which is ubiquitous in Malaysia for everything from rides to meals. Sepilok is 30 minutes from Sandakan town. The costs in cash are as follows:
Rainforest Discovery Centre (RDC) visit - RM30.00
RDC night walk - RM150.00
Sepilok orangutan centre - RM30.00 (valid all day so you can use the same ticket to come back in the afternoon)
Camera lens bigger than 600mm - 1000 RM.
Sunbear Centre - RM50.00
There are two feeding times at Sepilok, morning around 10am and afternoon around 3pm. Morning time is busiest. Volunteers will be laying out the fruit for the orangutans but the apes will only come if people are quiet. It's very well worth visiting the outdoor nursery a few minutes further on from the feeding platform because you can watch the juvenile orangutans learning through play and social interaction.
Ticket counter openings times are 09:00 – 11:00 and 14:00 – 15:30
The feeding platform and Outdoor Nursery opening hours are: 09:00 – 12:00 (On Fridays they close at 11:00) and 14:00 – 16:00.
Tipping
No need to tip staff at restaurants or lodges, but it's customary to tip your guides and sometimes your drivers. Someone doing a two hour transfer do no expect anything but if you did want to give something then 50 MYR would be sufficient. River lodge guides if on a private basis could get 100 ringgit per day per group, but the Deramakot guides who are working at night generally get more, around 150 ringgit per night per group.
Local taxes
There are three taxes to consider on a trip to Borneo, two are included in your invoice and one is paid in cash by yourself.
- 6% service tax for hotel rooms on accommodation cost - included in your invoice
- 6% government sales tax on total cost of your holiday - included in your invoice
- Hotel tax of 10RM per night which most hotels ask for but not all - this is paid by the client in cash.
Wildlife Guides and vehicles
We have our own full time wildlife guides at Adventure Alternative Borneo and they are very experienced and knowledgeable. Mike Gordon has his own wildlife channel on youtube an you can follow him on instagram. The vehicles at Deramakot are pooled and operated by one agency nowadays; to some extent you can go and choose your vehicle on the day but generally the drivers will be allocated their car. The cars are not all the same so some have better vision to the front than others but you can easily stand up in them. We would recommend monopods rather than tripods because of space.
We always ask clients whether they prefer private guides or shared guides at some of the locations and on the itinerary it will show which ones you are having. Obviously a private guide is more expensive and at the moment people are booking up to a year in advance for private photography groups, so a lot depends on availability. The guides will work on two to three week shifts and then take a break.
At Deramakot, Danum and Tabin we can provide private guiding or shared guiding. The vehicles can take up to seven people and in our itineraries at Deramakot we provide 7 hours of vehicle use in every 24 hours. Extra hours are 250RM per hour, paid in cash on the spot. Wildlife drives are normally at dawn and dusk but with seven hours you can go through the night, it's a flexible system agreed between the group and the guide.
On the Kinabatangan river the lodges have their in-house guides so the boats are shared and they go out at dawn and dusk. We don't generally provide our own guide for these locations because the river guides know their area very well. Our drivers will provide the transfer to the jetty for the particular lodge and you will join other clients and off you go.
At Tabin we bring our own guide and add an extra private safari to the standard itinerary which we think adds a lot to the experience. The local in-house guides are good but we feel we can add more by adding our guide. At the field centre in Danum Valley we provide our own guides too, but we do also use a lodge just outside the main entrance gate.
In Sarawak we provide our own guides too for visits to the cultural centres and parks like Bako. The guides will come to your hotel and meet you for the day and arrange any overnights. At Mulu we have our own guide who meets you off the plane and looks after all your visits to the caves. If you are going to Camp 5 and the Pinnacles then we hire in a specialist guide.
On Mount Kinabalu we arrange the logistics and the accommodation, but the mountain guide is allocated by the Park. You meet your guide at the gate when you enter and sign in.
We have two offices in Borneo, one in Kuching and one in Kota Kinabalu and a team of full time staff who prepare all the trips and keep in touch with all the drivers and guides all the time. In Kota Kinabalu the main member of staff to keep in touch with is Leny Subimo and her number for contacting on whatsapp is +60 10-959 7647. in Kuching the main person is Angela Pengiran and her number is +60 19-892 9627. When you are in country these are the two people to keep in touch about the details.
What to Take
This depends a lot on what type of trip you are doing, from wildlife watching to mountain climbing or biking or hiking. We have a page entitled Borneo Clothing Advice which hopefully will answer all the questions.
From an environmental perspective please do bring biodegradable products, especially soaps and shampoos. We would also like to ask people to take out their own rubbish which is recyclable; sometimes this means putting it in a bag and taking it all the way back home where we have better recycling facilities.
For Mount Kinabalu there is a more specific kit list which includes all you need for that particular trek. There is also a page entitled Health and Comfort which mentions first aid, climate, leeches and malaria.
Safety in Borneo
Borneo is a safe place to travel, locals are trustworthy and welcoming. It is unlikely anyone will give you the hard sell nor rip you off, though of bargaining is part of the experience. Most locals have a basic level of spoken English but in the lodges everyone will speak very good English and a smattering of other languages too.
Street crime and begging is practically non-existent but be wary when leaving cash machines and normal levels of awareness should be upheld. Be mindful of any shows of wealth.
For emergency situations in Borneo where evacuation is necessary then generally we can use vehicles and boats and planes, and the staff manage the optimal solution to the particular situation and the location. The Health and Comfort page includes some information on helicopter rescue from remote areas.
Laundry
At Deramakot you can get laundry done for 30 ringgit per bag but Tabin does not offer the service. River lodges will charge as follows: T-shirt rm5, underwear rm3, socks Rm2, long trousers rm10, long sleeved tops rm6.
Mobile Signal and wifi
At the lodges and hotels in the towns you will have wifi and be able to use whatsapp and so on, in the reserve lodges you can get mobile signal in most places except Deramakot. If you would like to buy a local sim card then Celcom is probably the best for signal to these places.
Water
All locations provide filtered or boiled water. At Deramakot guests can fill their water bottles in the dining room and we do strongly recommend bringing your own water bottle and not buying single use plastic bottles. By all means do bring your own purification methods such as tablets or a steripen, but these would be more useful on the more remote trekking trips.
Rooms in the lodges
The rooms will have beds with mattresses, pillows, sheets, blankets and nets, and most of them will have ensuite bathrooms with a flush toilet and a shower. There will be electricity, and at night generators are used but these are turned off at a certain time. The rooms will have lights and sockets (UK three pin style) for charging and there will be storage space to hang your clothes. Everywhere will have nets over the beds.
The lodges we use are generally all of a similar standard but obviously there are different grades of room. The biggest difference would be whether they have air conditioning or a fan. The chalets at Deramakot have air conditioning for example. At Bako Park they offer both. Danum Valley Field Centre has both. At Mulu there's a wide range of rooms, from the 4 star Marriott rooms to the Park HQ rooms with fans and then dormitories. When you come to discuss your holiday with us make sure to give your preference.
If you are going to more remote areas like Camp 5 at Mulu or on the mountain, or sleeping out at the jungle survival camp or overnighting in villages then it's a good idea to bring your own sleep sheet. You can buy these made out of cotton or make your own out of a bed sheet.
Mount Kinabalu Prices
There is a cash price to pay for climbing the mountain and you can see the exact breakdown on the Mt Kinabalu page. Our trip price includes the transfers and accommodation but not the mountain guide, entry fee, peak permit, local insurance and park transport. All of these prices are required to be paid by the individual as a policy of the National Park. As a guide, this works out at about £126.00 per person for a couple.
Fig Planting programme
As a matter of policy Adventure Alternative Borneo makes a donation of 100RM for each client towards a fig planting programme in east Sabah. This video will help in explaining the importance of figs to the biodiversity of the region, especially in degraded forest areas caused by logging. If you would like to donate separately to this project and perhaps consider using it to offset your flight emissions then please get in touch.
Borneo Health and Comfort
Borneo health and comfort
It is important to consider health on a trip into the jungle, in particular, the effects of heat and humidity on the body. Remember to bring supplies of rehydration electrolytes. Altitude is not a big problem for this expedition since the elevation is not so high and there is plenty of time in the programme to acclimatise.
Before You Go
Make sure you have visited your GP to discuss any innoculations you may need; although there are no medical requirements to enter Malaysia, such as yellow fever, it is important to be well protected against the usual conditions such as tetanus. You will also need to bring a supply of malaria tablets, and your GP can recommend which brand is the most suitable for this area. If in doubt contact a specialised travel clinic. Further information is also available via our account with Interhealth and from the NHS.
First Aid Kit for Borneo Travel
Your trip leader will carry a first aid kit, but it is also important to have your own supplies of basics such as bandages, plasters and headache tablets. Also recommended are medications for heat rash, which is a common affliction during a trip into the jungle. It is important to wash regularly and keep clean, but inevitably much of the time is spent sweating and coping with continual dampness on the body. Keeping your feet in good condition is absolutely vital, especially if you get a blister. There are plenty of opportunities to swim in rivers and cool off, and in the evenings on the mountains, it will be cool enough to warrant a fleece, but a small towel or headband is a good idea to wipe yourself when walking.
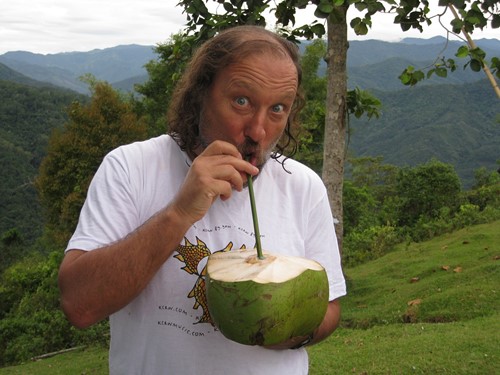
The jungle is an unforgiving landscape, so it's important to take care of your health and well-being while travelling.
Jungle Climate and It's Affect on Your Well-Being
Feeling rundown because of the heat and humidity is by far the most common condition faced by people trekking into the jungle, and it is best tackled by drinking lots of water and taking it easy. It is very much a case of working with the environment, rather than against it. Of more serious concern is dehydration. The humidity can at times be unbearable especially in the lowlands, and a strict policy of rehydration should be implemented from the moment of arrival. On trek there will be plenty of rest stops along the way and you should always make sure you have potable water on you at all times – there are no excuses for running out. Your leader or local guide will inform if it is necessary to fill up at any given point. Be mindful that if using sterilisation tablets or iodine this takes approximately 20 minutes to be ready. Make sure you start each day with at least half a litre of water upon waking up – this really does make a difference especially if the first trek of the day is uphill. Make the most of re-hydration salts and use them generously.
Food and Drink Safety
In terms of food, there is little to worry about in Borneo. Standards of food hygiene are high compared to other parts of the developing world. Of course, the usual protocol of washing hands should be adhered to and when in camp a well-tested regime of personal food handling and hygiene will be implemented. Any small discomfort is usually the result of a change of diet and nothing more - there is no need to rush to the Imodium unless the symptoms persist, at which point you should tell our leaders as you may need the cause to be treated.

Enjoying a day fishing with the Penan tribe.
Malaria and Other Disease in Borneo
Malaria is now rare in Malaysian Borneo thanks to a successful policy of eradication but some of the trips do visit the remote interior where some strange fevers do still exist. You should consult your doctor before departure and obtain the recommended prophylaxis and other suggested vaccinations. Of more common concern is Dengue Fever, to which presently there is no known cure. Dengue is a town or city based illness spread by a daytime female mosquito. As always the best treatment is prevention so whenever possible wear long sleeves and trousers especially around dawn and dusk. If you are feeling unwell at any time on your trip please inform your leader and upon returning home do not ignore flu-like symptoms if you should get them for up to a year – consult your doctor immediately.
The forests of Borneo are of considered the most bio-diverse in the world and as such are home to an astonishing collection of flora and fauna. Most of this is benign but of course, some are some nasties to watch out for. These include snakes, millipedes that sting, bees, fire ants, scorpions, itchy caterpillars and of course mosquitoes and leeches. In addition, there are a number of plants that will give you an incredibly painful rash should you brush against their leaves or bark – a good reason to always try and look before grabbing hold of a tree!
Leeches in the tropical rainforest
One of the issues of travelling in the rainforest is dealing with leeches. In Malaysia, generally there are three types; the dark brown ground based common leech, the green-reddish tiger leech which hangs under leaves, and the Kinabalu giant red leech.
Leeches in the rainforest are blood-thirsty. As you make your way in the wet rainforest trail, you will realise how they are just about everywhere, quivering in all directions. They have heat-seeking sensors that are very sensitive to human body heat. If you are standing still for a rest, you are likely to find them dropping from the overhanging leaves or attaching themselves to your body.
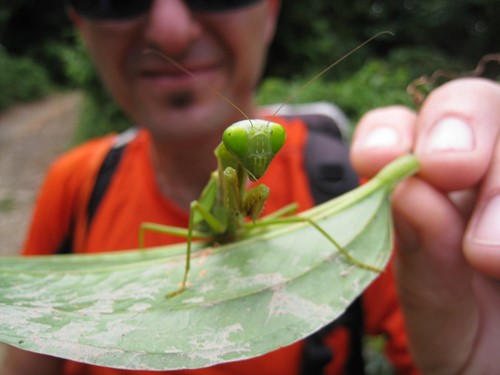
Not quite a leech, but the jungle is full of wildlife, especially insects and bugs.
Leeches will crawl into places of maximum warmth before biting. The ankles are the most common places for bites since the leeches generally are quite low when you pick them up, and they can also bite through the loose weave sock material. Leeches are inchworm-sized creatures that stay on low lying bushes and the forest floor waiting for unsuspecting warm-blooded creatures to pass by. They then latch on for a meal of blood, letting go when they are fully engorged.
What is a Leech?
There are two types of leeches - neither of which is poisonous or carry disease. You cannot feel when brown leeches bite as they inject a kind of anaesthetic when they attach. The tiger leech has a small bite that you can feel. Both inject an anti-coagulant, so the blood continues to flow for some time after the leech drops off. Unlike the old wives tale, you can pull leeches off in mid-feed in a panic, although it is easier to nonchalantly roll it around until it lets go and then flick it off.
Leeches are responsive to light and mechanical stimuli. First, they can detect movement. So if you brush against a tree and tread heavily they will feel, rather than hear, you coming. Secondly, they can detect you by your body temperature. They have heat receptors. Leeches easily dry out and go into a torpid state if they do. But add water and they will rapidly spring into action.
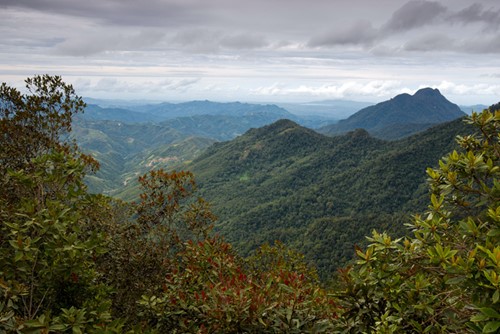
The jungle landscapes are well-worth the nuisance of leeches.
Leeches attach to their hosts and remain there until they become full, at which point they fall off to digest. Leeches' bodies are composed of 34 segments. They all have a ventral sucker formed from the last six segments of their body, which is used to connect to a host for feeding. They use a combination of mucus and suction (caused by concentric muscles in those six segments) to stay attached.
To counter the leech problem:
If you find a leech attached to your body the first thing to do is don't panic! The only thing a leech does is steal a tiny bit of your blood, look revolting and make a bit of a bloody mess. You can simply wait till it drops off, thereby avoiding touching the slimy thing. After all, once it is attached it makes no difference when you remove it. You can just physically pull it off but then it may leave its mouthparts embedded in the skin potentially leading to infection. (Although this can happen anyway.) Lastly, you can resort to chemical means - anything that the leech won't like such as vinegar, lemon juice, salt or tiger balm (a type of ointment).
Over the years and after many bites some people develop a bit of a reaction to leech bites and the itching can drive you crazy. Also, the potential for infection should not be underestimated; this can be a real problem in the tropics especially as most bites will occur around the ankle area where shoes and socks tend to rub. Leech proof socks are the best way of denying access to your bare skin. (Most leeches can easily tunnel through the weave of your socks.)

Sine the jungle is so dense, creatures have developed unique skills in order to survive. Leeches are among those that get by with help from others.
The best answer to landed leeches problem is to wear anti-leech-socks: A self-made sock of tightly woven and stitched cotton or other fabric would do if the sock is long enough to get to just under your knees and held by a strap. Leeches will almost always try to find the shortest way to a place that is body-warm and therefore get trapped between your leech sock and your boot. If they are really a pest you can improve this by a ring of insect repellent around your leech proof socks just above the place where they might enter your boot. Of course, the socks won't make you 100% immune to the problem as the leeches will also climb on to you from overhanging vegetation and can attack you around the waist or the neck as well, but this extra protection will get rid most of the leech from the ground.
For more information regarding kit lists for Borneo, check out our Borneo kit list guide.
Borneo Rescue
First aid and initial support can be provided immediately on the ground by staff. There are medical clinic facilities available at small settlements such as Long Banga, Long San and Long Akah, plus an excellent hospital in Miri for our trips which visit the Penan tribe. In Sabah, there are excellent facilities in Kota Kinabalu. All rescues and emergencies will be medi-vaced by helicopter or the most available form of transport to either hospital in Miri or Kota Kinabalu.
The only two methods of travel and transport in the jungle are on foot, by boat, by helicopter and by 4x4. Obviously certain medical conditions are either so debilitating or urgent that the first option is not practicable as an evacuation method. Helicopter evacuation is dependent on favourable weather conditions and a suitable landing site. We have contacts at the helicopter companies and in the case of a medical emergency, we will coordinate an efficient rescue. Communication is by telephone, there is some signal in the forest villages, but clearly, this area is not within immediate contact of a hospital and any emergency would take time-based on the helicopter timing and ability to land safely.
The helicopter company will require payment before they fly which is normally with a credit card. You should contact your insurance provider, open a case number and arrange the relevant exchanges of information and certification. For this purpose, it is essential that you have the right policy and provide us with all the policy details. You should also carry your policy with you and also have your credit card with you to use initially to pay for a service which can then be recovered through your insurance provider.
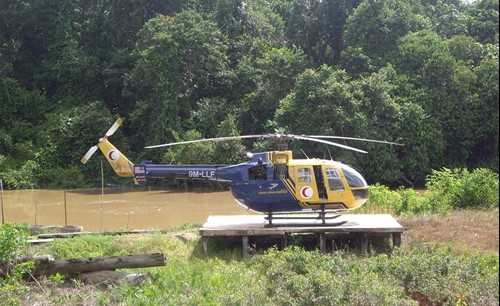
A helicopter waits on a jungle heli-pad.
The process for organising a helicopter evacuation is as follows:
- A booking will have to be made and is subjected to availability of the Helicopter. Minimum wait time is 1 hour for the Helicopter to depart Miri.(if available)
- Full Payment has to be made before the flight either by banked into our account or at our Miri office by cash or credit card.(Bank Charges will apply for credit cards.). You'll have to make the full payment and you can make your claim from your insurance later.
- Our flight hourly rate is RM8,000.00 per hour and RM11.00 for airport tax.
- A 6% GST is applicable to the above amounts.
It will be a matter of the helicopter company ascertaining that it is safe to fly to the relevant location and then flying the casualty to a nominated location, almost certainly a hospital in Miri, Kuching or Kota Kinabalu at least initially. Our staff who will help to coordinate any further stages in the process and ensure that family is informed, unless it is already done so by yourself.
If for any reason the helicopter is unable to fly we will use our many local staff and contacts to coordinate an alternative rescue and treatment regime. This in reality means being taken out of the area by boat and 4x4 to the nearest landing strip and calling in an aeroplane to fly out to Miri or Kuching.
Helicopter companies in Borneo
Layang Layang Services
Terminal 2, KKIA Tanjung Aru, 88100 Kota Kinabalu, Sabah, Malaysia.
Haji Kamalrudin Osman
Deputy Ops Manager, Kota Kinabalu Office
Tel: +6 019-8899412/8823636 or +6 088-484919
hageekamalosman@gmail.com
flightops@layangaero.com
Mr Joseph Ling
OPS, Miri office
Tel: +6 019-8493062, +6 085 414199
Mr Chan Chuan Lee, General Manager, Tel: +6 016-8791177
Capt Irwin, Ops Manager, Tel: +6 016-2198080
Approximate Costs:
BO 105 RM 8000.00 per hour flight + 6% tax
Twin Engine Helicopter 4 pax or 1 x stretcher + 2 pax
Bell 206
Single Engine Helicopter 4 pax or 1 x stretcher + 1 pax
Criteria
Evacuation will be carried out in VMC/day time only
Evacuation subject to helicopter availability
Allowable waiting time at any one station is 1 Hour. Thereafter a rate of RM500.00 per hour or part thereof will be charged.
Night stop charges are RM650.00 for Pilot & Heli per night
The charterer will pay in advance one hour flight time before the commencement of the charter flight.
The Final cost of charter will be calculated upon completion of such flight & the balance shall be payable on presentation of invoice by cash or cheque made payable to Layang Layang Aerospace
Sdn.Bhd.
Co-ordinates for villages visited on our Sarawak trips where landing facilities are available:
Ba Lai NO3 19.330 E115 20.123
1 hour walk at end of logging road and start of trail to village
Long Kerong NO3 17.068 E115 12.881
Has heli landing space next to small medical clinic in village
Long Speigen NO3 13.570 E115 11.884
Main logging road at Long Siut (approx 45 mins downriver) or at a number of sights upriver where there are large flat rice field clearings.
Health and altitude
Health and altitude
Trekking in the mountains is a great challenge but it is important to look after yourself and prepare for the effects of being on the mountain. Prior to your trip, it is important you visit your GP for a checkup and to arrange any vaccinations for visiting the destination country and region. Yellow fever is usually not a certificate required to enter most countries unless you are coming from an endemic area, but check a reputable resource for medical travel advice before you leave and with the UK FCO and NHS Fit For Travel websites.
Caution with Food
In towns and cities be very careful with water and food, because most tummy bugs start here and become full-blown conditions on the mountain. Drink bottled water; avoid ice and spicy food, street foods and fish. Don’t drink water from the taps in your hotel bedroom. Be careful of the sun and don’t let yourself get dehydrated on the rest day after the flight. The rest day is usually a chance to get some sleep, rehydrate, meet the Adventure Alternative staff, enjoy the hustle and bustle of the capital, do some sightseeing and allow some acclimatisation to the climate.
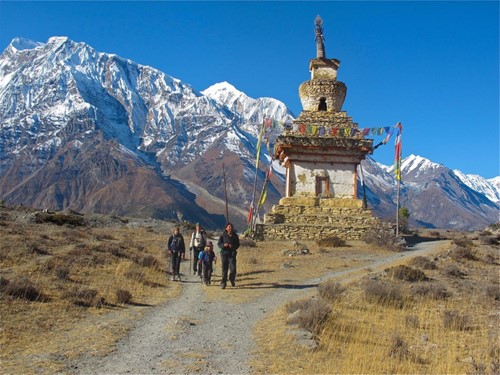
The trail along the Annapurna Circuit.
Common Complaints
Common health complaints in the mountains are headaches, dehydration, a stomach bug, diarrhoea, sunburn and altitude mountain sickness. Keep hydrated at all times, drink only boiled water or treat it yourself, cover up in the sun and use plenty of cream, and eat every meal for energy. If you do get diarrhoea then adjust your diet to plain rice with some vegetables, and don’t eat fruit or dairies or meat. Try hard to keep clean as much as possible by washing hands, and the top tip is to bring a nail brush!
People who expect to climb to what is officially termed high and extreme altitudes with absolutely no changes in the metabolism are being a bit optimistic. The body is coping with extraordinary pressures and change, and it is very likely that you may feel a bit off and get a headache as you approach the higher villages. All this is to be expected, but there is much you can do to mitigate the severity. Without a doubt, the best advice is to drink liquids, since your body is rehydrating much faster in the high, dry air and you are working hard to climb.
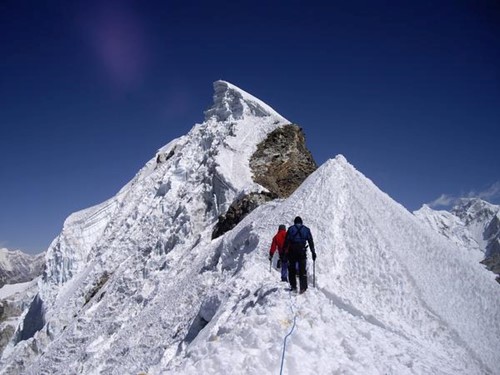
From trekking routes all the way to the Roof of the World, everyone will need time to acclimatize at higher altitudes.
How to Acclimatize
Acclimatisation is a perfectly understandable physiological process which everybody undergoes at varying speeds (which is why some people will suffer from Altitude Mountain Sickness before others) as the body adapts to existing in an atmosphere with less oxygen. Muscles feel tired more quickly, sleeping habits change, you gasp more easily, you lose your appetite and you generally find things hard. Characters can change and people can become moody or depressed. Meanwhile, your body is busy producing millions more red blood cells to carry more oxygen around. The reality is that our programme for trekking the Annapurna circuit is really optimum for the vast majority of people to acclimatise enough to successfully reach the elevation without hurting themselves.
When in the mountains Altitude Mountain Sickness (AMS) is a significant worry for the majority of climbers, and it warrants a whole advice booklet of its own. The fear is borne partly out of ignorance. Please read the free Medex booklet Travel at High Altitude before you go.
Mount Kenya food & lodging
Mount Kenya food and Accommodation
Huts and Camps on Mount Kenya
The camps on Mt Kenya are basic but clean. The camping grounds have running water and some have western toilets, the rest of the toilets will be of the long-drop type. There are also mountain huts which we may use for sleeping in and/or to prepare and serve our meals.
A group heads up a snowy rock field on the way to Point Lena.
Toilets on Mount Kenya
All the campsites have latrines which are wooden huts with a floor and usually a long drop. Some latrines are worse than others, and it is not the job of the rangers to clean them. Company staff can do this job, but under duress, since many of the problems are caused by people who miss the hole and don’t clean up afterwards. Sometimes a visit to a latrine can be a dispiriting experience. It is important to take a torch with you at night and take a responsibility to keep the huts clean. A small bottle of hand sanitiser is strongly recommended for use afterwards. Going to the toilet behind a bush is strictly forbidden and the Ranger has the authority to send people off the mountain if they are caught, and fine the company.
Rubbish Disposal on Mount Kenya, Being More Sustainable
All rubbish is collected by the staff and carried down the mountain. Do not throw rubbish down the long drop (toilet paper is fine) and make a habit of picking up litter that you see on the trail. The responsibility for keeping the mountain clean is on the shoulders of every visitor.
Food on Mount Kenya
All our food is fresh and the meals are tasty and well prepared and served by our staff. Three-course meals with vegetables, fruit, salads, desserts, soups, popcorn, biscuits and a complete range of beverages including herbal teas. We want you to enjoy your holiday on Kilimanjaro and that means good food! Our cooks are all well experienced in Western tastes so expect as an example a soup starter with bread, tomato and avocado side salad followed by chicken casserole with boiled potatoes and julienne carrots with a fresh fruit medley to finish with, and coffee and chocolate for supper.
If you have dietary preferences then do write this on your Booking Form, and also inform Adventure Alternative staff after your arrival/briefing. The cooks can easily cater for most preferences, although celiacs should bring their own supplies from home. We cannot buy gluten-free products in Kenya.
Sweets and chocolate are all available in the shops in Nairobi and in Naro Moru, as are things like batteries, but you may want to bring your own supply from home.
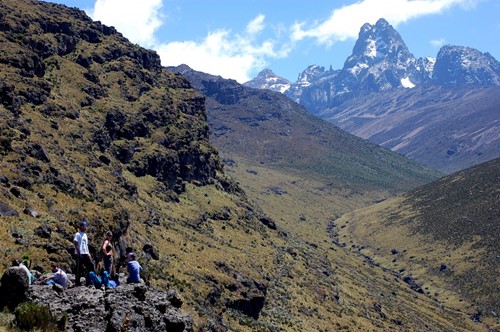
The surreal landscape of Mount Kenya makes less-than-ideal bathroom situations well worth it!
Water and Water Purification on Mount Kenya
We do not bring bottled water on the mountain; we boil all water which comes from the rivers and glacial streams. The staff will fill your water bottles every evening. Feel free to bring some water purification tablets for yourself if you would like the extra reassurance (iodine is fine). You could also bring a Steripen which will also kill all germs.
Mount Kenya advice
Mount Kenya advice
This page pertains to advise about the trekking peak up Mount Kenya, with some information about the climbing peaks. For specific inquiries please contact us.
How much will you carry?
We run trips of different types on Mount Kenya. The general format is to provide full porter support so you'll just be carrying a day pack with essentials that you'll need during the day (waterproofs, snacks, personal medication, sun cream, sunglasses, water, etc). Porters will carry your main pack, food, group equipment and tents (if required), if you're climbing on a traverse then any kit that you don't need on the mountain will be stored securely and returned to you again when you come off the mountain. We do not allow porters to carry more than 20kgs so please do not overfill your bags with unnecessary equipment (your main pack should weigh no more than 15kg).
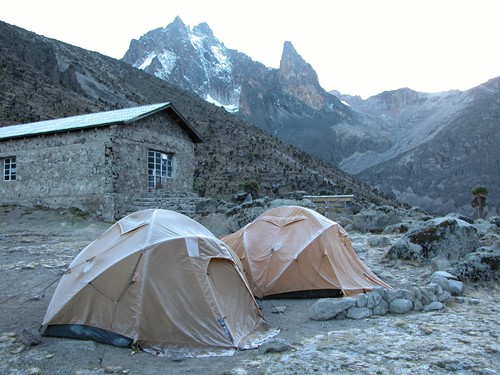
Looking towards the summits of Mt Kenya from Mackinders Camp on the Naro Moru route.
In an alternative format, you could carry all your own kit. This is normally about 15 kilogrammes for a 5 day / 4 night climb and although it will require more personal effort it can enhance the sense of achievement. This will reduce the per person cost of the climb, please contact us for the discounted price if you plan to climb Mt Kenya carrying all of your own kit.
Keeping in Touch with Home
Your mobile phone may work on parts of the mountain with a good line of sight to the towns below (slightly dependant on which network you are using) as long as you have roaming access. Please note you cannot charge batteries anywhere on the mountain. You may need to walk a little distance to find a spot with a signal. Also, do not expect to get 3G connection, mostly you will find it is text only.
Keeping Dry and Warm
There is little doubt that you will have some rain, and it is likely to be in the lower regions around the montane or forest level. Waterproofs are necessary; remember that on the equator the rainy season is traditionally April and September/October.
Expect short-term extreme conditions, i.e. sharp showers of rain, hot sun, gusts of wind, snow and low night temperatures. Clear nights will be colder but more beautiful, and generally, the cloud builds up mid-morning, only to dissipate again with the setting sun. Up higher it will be colder and windier so the shell jacket is really vital; temperatures can drop dramatically, and there may be snow. Summit morning can be icy underfoot, and very cold (minus 10°C) so good boots with hats and gloves are important.
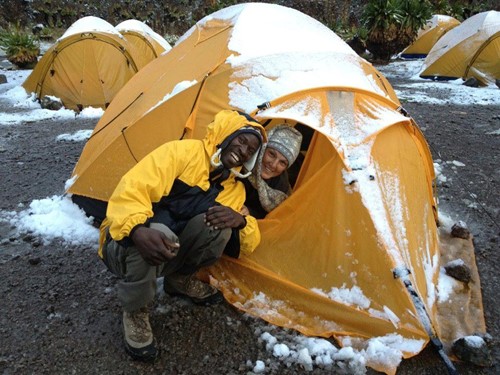
A snowy camp along the Mt Kenya Sirimon Route.
Work on a ‘wet and dry’ system so that if your T-shirt gets wet during the day, you always have a dry T-shirt and warm top to change into the moment you get to camp. This is really important for morale if nothing else. Don't let people keep wet clothes on. It's such an obvious point but commonly ignored.
Daily Routine
Generally, breakfast is between 7.30am and 8.00am, and departure from camp is at 9.00am. There is a lunch at midday, tea and biscuits around 4 pm and dinner at 7 pm. Summit morning is different; tea and biscuits at midnight to start hiking at 1am or 2am.
The pace is slow and not forced at all. There is a rest at least once every hour and plenty of time to take photos, enjoy the view and chat. When you arrive at the huts / camps you will find your bags ready to collect. In the morning please have your bags packed before breakfast.
Tips
Adventure Alternative is proud to pay excellent salaries. We are members of the Kilimanjaro Porters Assistance Project, the Ethical Tour Operators Group and the AITO Sustainable Tourism Committee. We also fulfil and exceed the International Porter Protection Group (IPPG) guidelines on porter safety. For more information about tipping see our tipping cheat sheet.
Mount Kenya - Terrain and Fitness
GENERAL FITNESS REQUIRED
To climb to Point Lenana on Mount Kenya you don't need to be a super-fit athlete or experienced mountaineer. The trek is accessible to anyone with good basic fitness and an enthusiasm for the outdoors. It will be an advantage to have good previous hill-walking experience and therefore be familiar with walking in the countryside for many hours at a time and there is no doubt that using Chogoria route on the ascent or descent is a more challenging option than the likes of Sirimon or Naro Moru.
You will enjoy the trip all the more if you do have good fitness and experience. Therefore we do advise that on the lead up to the trip you do spend time checking and working on the kind of fitness that you need for the trek. The ideal preparation is spending a good number of hours walking on rolling terrain with a small pack of about 5kg on your back. Other forms of cardio-vascular exercise such as running, cycling and swimming will also of course help with the right kinds of fitness, though especially if they focus mainly on the legs.
All of our staff have climbed Mt Kenya many times so if you have any doubts or questions, do give us a call or email to discuss.
TYPE OF TERRAIN
The first day tends to involve a drive up to the National Park Gate (this could be by 4x4 if you are using the Chogoria route) and then a trek, through the dense hardwood forest but this will be on a good vehicle track so the going is generally easy underfoot, unless there has been a lot of rain when it can be a bit muddy. Above the first camp, the forest opens out to the alpine heath. The path can at times be more indistinct, the terrain is open and tussocky and can be a bit harder than the path below, but still fairly straight forward on all of the routes.
Higher up, the heathland thins and the way is more bare, rocky tracks following ridges and rivers to reach the 2nd camp. From here you are up close and personal with the jagged rocky peaks and remaining glaciers which feed numerous small lakes and tarns dotted around the peaks. Summiting Mount Kenya will involve tackling a scree slope before the summit attempt.
Mount Kenya books & maps
Mount Kenya books and maps
Maps & Guides
Mount Kenya 1:50,000 Map & Guide. Wielochowski. EWP 2007
Kilimanjaro & East Africa, Climbing & Trekking Guide. Burns. ISBN 0-89886-604-9
Guide Book to Mt Kenya & Kilimanjaro. Mtn Club of Kenya, (4th Ed 1990) ISBN 9966-986-0-3
Trekking in East Africa, Lonely Planet, ISBN-10: 1864502894, ISBN-13: 978-1864502893
Factual Stories & Autobiographies
No Picnic On Mount Kenya. Felice Benuzzi. ISBN 978-1-59228-724-6
Upon That Mountain, Eric Shipton, Ashdown. ASIN:B000QREDLY Chapters 4 & 5
That Untraveled World, Eric Shipton, Hodder & Stoughton. ISBN 0-340-21609-3
Snow On The Equator, H.W.Tilman, The Travel Book Club. Chapter 4
Kenya Mountain, E A T Gregory, Jonathan Cape. 1929.
The First Ascent of Mount Kenya, H Mackinder, Hurst. ISBN 1-85065-102-7
Through Masai Land. J Thomson. Frank Cass & Co Ltd. ISBN 1-141-95717-5
Large Format Pictorial & Descriptive
Snowcaps On The Equator. Ward, Boy & Allan. ISBN 0-370-31126-4
On God’s Mountain. Amin, Willets, Tetley. ISBN 0-86190-393-5
Mount Kenya, John Reader, Elm Tree. ISBN 0-241-12486-7
Expedition Reports, Journal Articles & Scholarly Publications
A Journey to the Summit of Mount Kenya. H. Mackinder, The Geographical Journal, May 1900.
The Glacial Geology of Mount Kenya. J Gregory, Quarterly Journal of the Geological Society, 1894.
The Great Rift Valley. J W Gregory, Frank Cass & Co. ISBN 0-7146-1812-8
The Glaciers of Equatorial East Africa. S. Hastenrath. D. Reidel. ISBN 90-277-1572-6
Discovery of Lakes Rudolf and Stefanie. L. Höhnel, S. Teleki. Longmans
Geological Map of the Mount Kenya Area. Cartography by B. H. Baker
General Country Information & Relevant Books
Kenya, Lonely Planet Guide. ISBN 978-1-74104-773-8
The Rough Guide to Kenya, Rough Guides, ISBN-10: 1848361378, ISBN-13: 978-1848361379
Born Free, Adamson, Pan Books, ISBN-10: 0330391909, ISBN-13: 978-0330391900
Out of Africa, Blixen, Penguin Classics, ISBN-10: 0141183330, ISBN-13: 978-0141183336
Mountain Travel & Altitude
Altitude Illness: Prevention & Treatment. Bezruchka. ISBN 0-89886-985-5
Travel At High Altitude. Medex. ISBN 0-901100-76-5 http://medex.org.uk/v26%20booklet.pdf
British Mountaineering Council website : http://www.thebmc.co.uk/Feature.aspx?id=3158
International Mountaineering and Climbing Federation website : http://www.theuiaa.org/medical_advice.html
UNESCO listing info http://whc.unesco.org/en/list/800
Videos
Summary & Aerial Shots of Mt Kenya. https://vimeo.com/80359250
Aerial shots and Time lapse of Mt Kenya. https://vimeo.com/80375283
Volcanic Origin, Retreating Glaciers, Watersource. https://vimeo.com/80362793
Volcanic Mechanism of Rift Valley & Mountains. https://vimeo.com/80375280
Flora & Fauna on Mt Kenya. https://vimeo.com/80364403
Flora & Fauna on Mt Kenya. https://vimeo.com/80377285
Kikuyu Beliefs & Ngai. https://vimeo.com/80365566
Kikuyu Beliefs & Drought. https://vimeo.com/80365567
Weather & Climate on Mt Kenya. https://vimeo.com/80375277
Forest Zone- Colobus Monkeys. https://vimeo.com/80368535
Aberdares- As an ancient version of Mt Kenya. https://vimeo.com/80367751
Mount Kinabalu Kit List
Mount Kinabalu Packing list
This packing list covers Mount Kinabalu, for a look at what to pack for other Borneo tours, see our Borneo kit list page. Please note that the huts on Mount Kinabalu provide bedding so there is no need to bring a sleeping bag. You can bring your own sleep sheet or liner if you want but they do also have them in the huts.
The huts provide buffet style meals and there are some snacks to pick up for summit morning and an early breakfast before setting off, but we do recommend you bring your preferred energy snacks too.

Views along the Mount Kinabalu summit trail.
Bags
Back pack with rain cover & waterproof liner, around 50 litres maximum should be enough (this can be carried by a porter if required)
Dry bags for smaller items inside, especially any electronics
Bag to leave travel clothes at the hotel before the trek
Outer
Waterproof jacket and trousers for summit morning
Poncho for lower down on the mountain
Gaiters are optional
Warm insulated or fleece jacket for summit morning
Mid and base layers
Trekking shirt or top - synthetic quick dry material
Trekking trousers and shorts - similarly quick dry
Change of clothes
Lightweight base layer is optional (it can be very cold early in the morning on the summit plateau)
Underwear is best quick drying synthetic
Extremities
Cap / beanie / headscarf
Insulated windproof gloves
Thin liner gloves
Trekking socks
Lightweight but sturdy trekking boots or hiking shoes, preferably with ankle support
Crocs/sandals for indoors at the hut
Electrical
Head torch & spare batteries
Camera, memory card & batteries - in a dry bag
Power pack
Miscellaneous
Trekking poles
Earplugs (optional)
2 x refillable water bottles
Energy snacks eg chocolate, energy drink powder, energy gels, jelly cubes etc
Wash kit and lightweight towel
Sun protection - sunglasses, sunscreen lotion, SPF lip balm
Personal Medical Kit - for example plasters, blister pads, paracetamol, ibuprofen, rehydration sachets, tubigrip for knee support if needed, personal medication if required (inhaler)
Passport - you will need this to register at the park and also with Mountain Torq if you plan to do the via ferrata
Cash in Malaysian Ringgit to pay for the sabah park fees which are currently about £120.00 per person. This fee has to be paid by the individual and covers the permit, insurance, park guide and internal transfers. A colour summit certificate at the end of the trip is about £2.50.
Mountain Via Ferrata Equipment
The via ferrata is run by Mountain Torq who provide safety helmets, harnesses, dynamic ropes and energy absorber lanyards (also known as via ferrata kits), all of which are certified by the International Climbing and Mountaineering Federation (UIAA) and meet the EN958 standard. A continuous belay system is employed throughout the Via Ferrata route wherein climbers are always hooked up to a guideline, making any deviation from the route virtually impossible.
Note that there is a compulsory safety briefing near the Laban Rata hut at 3.30pm on the first day, so it's vital that you leave the park gate with enough time to reach this place in time otherwise Mountain Torq will not allow you to partake in the activity.
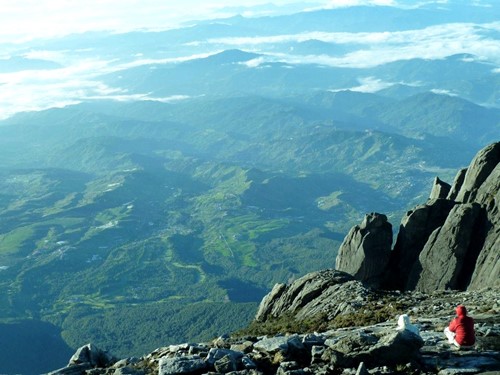
Looking at the lowlands while perched high in the clouds on Mt Kinabalu.
.
Borneo Volunteering Projects
Borneo Volunteer Projects
In Borneo, we are working alongside the indigenous Penan people to protect and preserve the Sarawak rainforest. We're planting around 10,000 trees a year, reforesting areas which have been damaged by illegal logging and extreme weather phenomena. You'll have the chance to explore the rainforest, learn from the deep knowledge and traditions of the Penan people, assist with the collection of saplings and seeds from the forest, help with the planting of saplings in the tree nurseries we are supporting and be fully immersed in the fascinating culture of this amazing place.
A successful morning of tree planting with volunteers and the local Penan people.
The Adventure Alternative Impact
Adventure Alternative contributes to the local economy and spreads that income throughout the community by choosing carefully the people we work with and making agreements beforehand about how many clients we will bring and how much money the community will get from the visit. Our leader makes regular visits to the villages in order to ensure that we are not making unfair demands on the community and that our presence is both wanted and enjoyed.
Our Work in the Penan Villages
In the Penan villages, we spent two years preparing the ground and building trust with the villagers before discussing the concept of bringing tourism to the area in order to help fund the projects they most wanted, those being education and forest enrichment to tackle the effects of logging. Tourism is a completely new concept to them. The local benefits are to some extent unknown, we simply have to treat everything with great care and respect. We don’t condone exploitative tourism at all, we fundamentally believe that the community needs to extract more out of the tourism ‘contract’ than the visitor.
A look at the traditional housing of the Penan tribe.
Therefore, on one level the financial benefit is easy to quantify, but on another level, we are exposing these people to a new way of life which we want to promote as a way in which to protect their heritage and culture. We have been successful with this in remote areas of the Himalaya and even Africa, but clearly, this is a long-term commitment and one that must combine all the theory surrounding community tourism and the practicality of bringing visitors to such a special area. If their habitat had never been endangered by the logging companies cutting down all the trees, then you could say that there would never be a need for tourism, but in this case tourism could, in fact, offer them a source of cash income as an alternative to being forced into the need to cut down trees for money.
Borneo clothing advice
There are many different locations and modes of travel on a holiday to Borneo, from remote trekking in the jungle to high end beach resorts and wildlife lodges. This page aims to cover some tips and advice for as many of those options as possible.
General advice for the heat and humidity of Borneo:
- Avoid cotton for any jungle trekking since it is very difficult to dry in the high humidity
- Pack a swimsuit for the beach but also snorkelling shoes made of lightweight neoprene to protect your feet
- Wear lightweight, waterproof hiking shoes that are breathable and with good traction, the jungle is muddy and slippery
- Take clothing that is synthetic, quick-drying, lightweight and light coloured.
- Take lots of dry bags for electronics and keeping clean clothes dry
- Look after your feet, keep them dry, change socks regularly, use foot powder
- Expect rain - even out of season from Dec to Feb - so take a lightweight poncho or umbrella or good quality raincoat for the mountain
- Protect yourself from the sun really carefully, but remember that suncream will come off when you sweat.
- Rehydrate a lot, and avoid heat exhaustion by replacing salts and minerals with something like Nuum
- Prevent getting bitten by insects in the evening by changing into long light clothing, socks and sandals/shoes
- Hotel rooms and many lodges will have an option for air conditioning or fans - make sure to ask. AC rooms get cold.
- Lodges and campsites and homestays in the remote areas will provide a mattress and a mosquito net to sleep on, which are generally in a communal area, normally a room in a longhouse or equivalent. Take a sleep sheet and night clothes and a headtorch.
- Island resorts and beach chalets will also have beds with mosquito nets, and fans.
- Take fragrance free deoderants and creams because insects are drawn to the strong smells, plus the animals will smell you and be gone quickly.
The Borneo Wildlife Tour, Borneo Mammal Tour and the Borneo Nocturnal Mammal Tour are all trips using lodges or jungle chalets and vehicles for transport and are more comfortable experiences where beds will be provided. There are lots of facilities so pack appropriately, it will still be hot and humid but in many places there will be air conditioning and fans. Mulu and Bako Park is also well facilitated, unless you plan to do the Mulu Pinnacles walk which is remote and basic (there is a section below about it).
Wild Borneo, Bike and Hike Borneo, Sabah's Lost World and the Mount Kinabalu climb are all more remote and include jungle trekking as described below. Most of our trips fall into the Bespoke Borneo category, as people mix and match and create personal itineraries which often means that the clothing you pack falls into a number of categories.
What sort of luggage can I bring to Borneo?
- We recommend using soft trekking bags, rucksacks or duffle bags instead of hard suitcases. For holidays where you are on the move a soft duffle and a day pack will be your best combination. If you are only travelling to a hotel, then a suitcase will be fine but do also take a lightweight soft bag or rucksack for day visits.
- Any trips onto Mount Kinabalu will require a rucksack for yourself or a porter and you should aim for a maximum 50 litre bag to carry everything. If a porter is carrying your rucksack then you can carry a smaller day pack for essentials like water bottles and a camera and snacks, waterproof and so on.
- For jungle trips using multiple modes of transport like boats and 4x4s, a waterproof duffle bag will be best and a day pack for walks or overnights.
- A number of dry bags are essential for jungle trekking trips as it will rain. Put individual items into dry bags, like clothing, electronics, papers/books, and so on. Everything can get damp. You can also use a rain cover for your backpack or a waterproof bag for your duffle bag if it's not waterproof.
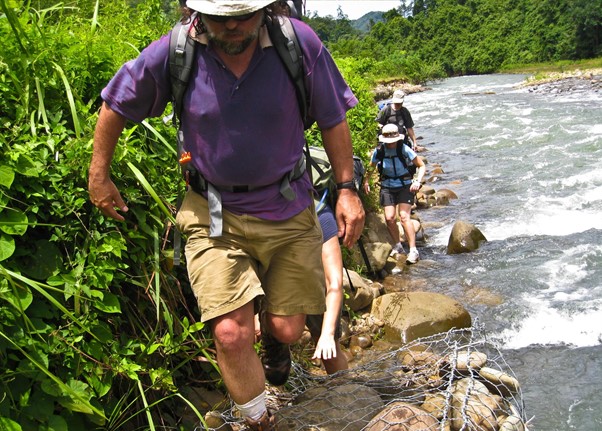 What activity you partake in will drive what type of luggage you should bring. A day pack is always necessary for excursions.
Hotel/lodge based wildlife holidays
If you are on a holiday which involves mainly river cruises or 4x4 safaris in the reserves, and staying in lodges and hotels, then lightweight, long-sleeved clothing with good sun protection will be necessary, along with light jumpers or jackets for the evenings and night safaris, plus light waterproofs for rain showers. Good walking shoes or lightweight trekking shoes are fine, also sandals. Take a wide brimmed hat and sunglasses, binoculars and a small dry towel for keeping equipment dry. Cotton gets damp quickly and is slower to dry, so quick-drying synthetic material is best for T-shirts and shirts. Trousers should also be lightweight and the zip-off ones double as shorts.
Swimming costumes and a sarong or light towel are also perfect to take if there's a beach visit or the hotel has a pool, but the sun is extremely strong so sun hats and sun protection is vital. Most of the beach places and islands offer snorkelling and kayaking and diving so do bring a pair of neoprene shoes to protect your feet underwater. All snorkelling and diving kit is available for hire.
Charging electronics is not always possible in the wildlife lodges so we would advise bringing a power pack. Plugs on Borneo are G type, same as in Britain. Do put everything into dry bags.
Water in lodges and hotels will be treated but you may still want to bring some water purification tablets or a filter, or buy bottled water. Be careful of water in local restaurants, especially in the form of ice. Check the seal.
Similarly with photography equipment, keep it all in dry bags. The boats and vehicles can get a bit tight so a monopod is often better than a tripod, and large hard shell lens cases will not be very popular unless you have paid for private vehicle use. Take a head torch with a red lens for using at night, and obviously binoculars or monocular and it would be a good idea to have a book of Borneo wildlife. Some of the lodges like the Borneo Rainforest lodge (below) are high end luxury but visitors aren't expected to wear smart clothing. Do however take long clothing to cover up your skin especially in the evening to avoid insects.
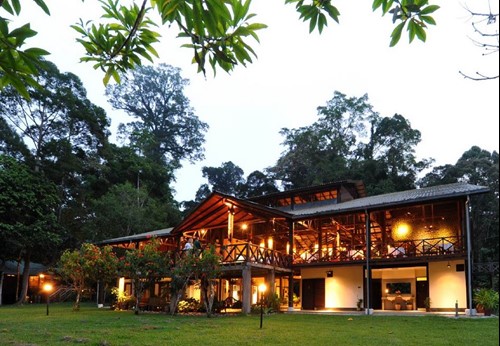
Borneo Rainforest lodge in Danum Valley is outrageously expensive but offers high end luxury for the wildlife enthusiast.
Jungle Trekking Tips
Try to avoid cotton clothing and opt for synthetic lightweight clothing that will dry quickly. Take plenty of underwear and light socks for walking (seamless is best), and a pair of trekking shoes with good grip since rocks and mud will be slippery. Expect your clothes to be continually damp and wet on any hiking trip; after an hour or so of walking it's nice to dunk in a waterfall to cool off, so take some shoes to change into that are waterproof, like crocs or sandals. You can buy hard shoes locally called adidas kampongs in the towns which are great with bare feet. Take a sarong or equivalent for drying off after a swim in the local river once you arrive.
You will want to have plenty of dry bags and a wet/dry system for clothes. The object is to always keep a set of dry clothing in a dry bag to change into at the end of the day when you have finished hiking, and wash your damp day clothes in the river for use again the next morning. During the day you can hike in a T-shirt or shirt, shorts or trekking trousers and trekking shoes or sandals (for example Tevas) or lightweight hiking shoes with a pair of lightweight socks. Cycling shorts can be a good option too for longer treks, since chafing can also be a problem in the humidity. Tank tops, sports bras, hair ties are useful for women, a small chill towel (dunked in cold water and wrapped round the neck), and a headband.
Leeches live in the jungle and will cling onto your as you walk past; they don't carry any viruses but when they come off the wound keeps on bleeding which is a pain. If you're going on a long remote hike then Purple Turtle sell leech socks that are like a big calico oversock that the leech can't cling to, but if you're going on short hikes then football socks should be okay.
You will not want to carry much in the jungle on a trek, it's too hot and humid. A days trek will be about ten kilometres as it's hard to maintain a pace in that environment. Take water bottles or camelbaks but also take water purification tablets or drops. The Aquapure filter water bottles are very good, especially for longer treks and even on Mount Kinabalu for the water stops.
A wide brimmed hat is essential and also a microfibre towel which will dry quickly. A small one also to wipe your face and neck on the move is quite a good idea.
For the evenings keep a set of dry long sleeved clothes to change into once you've washed and put your hiking clothes out to dry. It's important to cover up. A light jersey or fleece will be useful if you're up in the hills, it can get a bit chilly in the late evening.
For overnights in homestays or campsites or some remote lodges there will be a sleeping area, generally a raised platform which is often communal, and a number of mattresses with mosquito nets. For sleeping in the jungle bring a sleep sheet which is basically a sleeping bag liner. Silk is lighter than cotton or you can make one out of an old bed sheet. It's not necessary to bring a sleeping bag unless you are going high up. Most premises should have some light blankets to put over you if necessary, but do also wear night clothes like a loose T-shirt and shorts in case of toilet visits. Keep your sandals and head torch nearby.
Mosquito nets are always kept in good condition, but you may want to bring your own if you are visiting one of the jungle survival camps or going deep into the jungle to visit one of the tribes. They can be bought impregnated with chemical DEET. In some places it's quite an experience to sleep in a hammock in the jungle. Hennessy makes a very good range but talk to us first to see how necessary they are. At the jungle survival camp we often use, there are tents provided for sleeping in the jungle.
Rubbish is best carried out if you are in the jungle so take a plastic bag for small items, and ask about where to put rubbish in the villages.
Sanitary products - do bring your own supply of sanitary products and toilet paper, wipes and bags. Toilets will be flush in the expensive establishments but otherwise long drops. A menstrual cup is easiest to use in the jungle, applicator free tampons cut waste by 50%. The Scrubba is a bag that works as a portable washing machine and very useful for washing small items of clothing.
How much to pack for a day or so in the jungle - try to avoid overpacking, but be efficient. A few days hike only needs a set of dry clothes, a sleep sheet, two sets of hiking clothes, trekking shoes and sandals, a towel, head torch, and several sets of underwear and socks, hat and personal first aid kit, toiletries and water bottles. Ten kilos should be ample, any more and the hike will become uncomfortable.
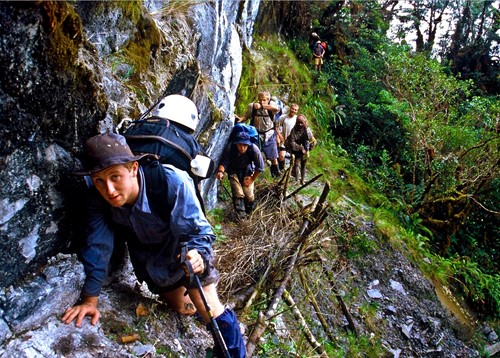
Jungle trekking is hot and humid and the ground will often be slippery, but you shouldn't need to take a lot on your back.
Mulu Pinnacles
You will need to carry your belongings in a rucksack for the trek to Camp 5 which is a basic jungle shelter next to a river; there are sleeping mats on a raised wooden platform to use. You can bring your own mosquito nets, towel, blanket and sheet or you can rent them from the HQ before you go to Camp 5. It costs just 15 ringgit for the net, you pay at HQ and pick it up at Camp 5 and get your money back on the bedding when you return it. There are cold showers, toilets, cooking facilities, free filtered water and some basic snacks to buy.
You need to be fully prepared for this visit, so take the clothing mentioned above - shorts, T-shirts, underwear, socks, hat and so on - with your sleep sheet and long sleeved clothing for the evening.Headtorch, waterproof top, insect repellant, sandals, towel, toiletries, personal first aid and cash for the small tuck shop.
The actual trek to the Pinnacles is hot and difficult and steep and the rock is very sharp so it would be a good idea to take gloves, for example the leather type gardening gloves which will protect your hands from cuts. Do take plenty of liquids on this trek, it gets extremely hot and tiring, three litres is best as a minimum. The distance is only 2.4kms but it is a 1200m ascent and the final section is climbing on vertical ladders bolted to the rock. There are ropes also to hold onto.
Take good boots with good grip on the soles as the trail through the gorge is steep and you will want to be very secure on the steep sections. Take a head torch with you in case you are forced to come down in the dark, energy snacks and some lunch, and first aid kit with plasters especially for cuts. Stay well hydrated with salts like Nuum tablets.
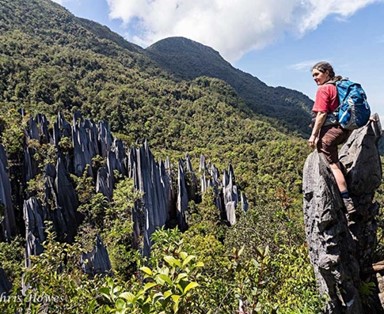
The Mulu Pinnacles trek is very challenging, but worth the views when you get to the top.
Personal First Aid Kit in the jungle
Insect repellant - various options include sprays and wipes for your skin, and sprays for your clothing. It's up to you whether to choose a chemical based DEET product or something natural, but mosquitoes and insects will be attracted to you and it will be good to repel them. Malaria is not carried much by the mosquitoes in Borneo but dengue fever is, so it's important to cover up.
- Antiseptic wipes and antibac wipes for grazes, cuts.
- Plasters - the long finger ones are best
- A few dressings and some zinc oxide tape for bigger cuts to cover up
- Nitrile gloves
- Tweezers and scissors
- Vaseline for chafing and sores
- Hydration salts like Nuum tablets or Dioralyte
- Painkillers for headaches
- Foot powder
- Medicine for diarrhoea
- Blister pads
- Sun protection - high UV protection, P20 does not wash off as easily
- Anti itch cream for bites, like hydrocortisone
On the beaches you will often see bottles of vinegar which is the best thing for jellyfish stings.
Toiletries in the jungle
You will sweat a lot so make-up is probably not worthwhile as it will run off. Take shampoo and soap but please make sure it is biodegradable, and the same with face wipes. Do try and pack out any waste since recycling is not available. Deodorant should be fragrance free otherwise the wildlife will smell you and disappear, and insects are attracted to fragrances. Toothbrush and toothpaste is best kept in it's own bag.
Staying healthy while you are in Borneo
Keep your hands clean. Toilets are often communal long drops without running water so bring a small bottle of hand sanitiser gel, and bring a pack of recycled biodegradable toilet paper.
Protect yourself from the sun. Take a high factor sunscreen with you and lightweight long sleeved and legged clothing and a hat that will shade your face, neck and ears.
Heat exhaustion - aside from the effects of the sun on your skin there is also the danger of heat exhaustion and its more serious development, heat stroke. These are both caused by the body's internal temperature being raised beyond its functional level and can lead to potentially serious complications. The ambient conditions in Borneo are hot and very humid. The way to minimise the risk is to stay out of the worst of the sun, particularly in the middle of the day, to keep cool and not to over-exert yourself.
You will also need to stay hydrated to help your body to cool its self through sweating. You will get used to the heat and humidity but it will take a week or more for the adjustment to be made by your body. Take a rehydration mix for replenishing salts, Nuum is a good option.
Watch what you eat and drink - street food is all part of the experience of being on holiday, but be careful of badly cooked food or anything that looks or smells wrong. Try to order dishes that will have been cooked to a high temperature and avoid cold dishes and ones that might have been cooked in untreated water, for example, salads. If you eat fruit, choose ones that have a skin or peel that you will not eat, such as bananas. Order bottled or boiled drinks like sodas or tea, always check bottles to see that the caps are still sealed.
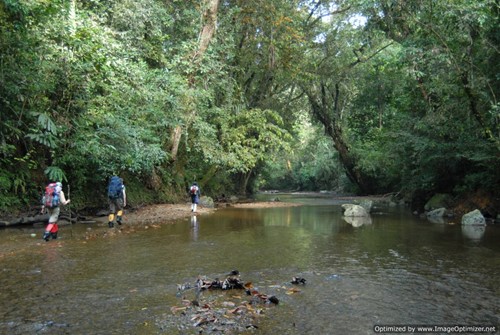
Trekking and walking in the oppressive jungle heat can quickly wear on you. Take time to acclimatize.
Links to Trips
Hotel and lodge based wildlife trips:
Borneo Wildlife Tour - Sabah
Borneo Mammal Tour - Sabah
Borneo Nocturnal Mammal Tour - Sabah
Remote trips into the jungle:
Wild Borneo - Sarawak
Sabah's Lost World - Sabah
Activity Trips:
Borneo Culture Tips
Borneo Culture Tips
Below is some information about how to behave while staying in a Borneo Homestay, be it with the Murut Tribe, Abai village or the Penan communities.
Gifts
- If you would like to take a gift for the families you stay with this will always be appreciated. Souvenirs from your home country/town are always popular! Some ideas are photos and postcards of where you live, something which has a personal link rather than something generic.
Tipping
- A tip would be welcome. The exact amount will depend on whether you have the same guide all the time or not, if you have porters and how long you are there for. You will need to take advice from our main office staff about this.
Etiquette
- Please don’t smoke in the houses, please go a distance away
- Take off your shoes and socks before entering someone’s house.
- Bathing: women should cover up. All the Penan women wear a sarong when bathing so this would be ideal, but a t-shirt and shorts would be fine too.
- Clothing: the Penan people are fairly relaxed regarding this; but be considerate that you are staying in other people’s houses and villages, however, as an example women are fine to wear a strap top and shorts.
- Some houses don’t have tables so you may be eating in a circle on the floor; if eating on the floor then don’t walk over any plates or any food.
- The majority of the Penan are Christian and pray before meals – so please wait to pray with the family before starting to eat.
Money & Souvenirs
You cannot buy things such as soft drinks and snacks, however, you may want to take money for souvenirs. For example, you can buy a beautiful basket woven out of rattan for about 50MYR (about £10), bracelets woven from rattan for about 5MYR (about £1), a Penan Machete for about 75MYR (about £15).
The Penan were once solely nomadic people, carrying little in the way of possessions. They did carry these beautiful rattan backpacks/baskets called keva. These are the pride of the Penan women, and represent the Penan’s bond with the forest. Although many of the Penan are now settled in villages, including the Penan people Adventure Alternative work with, these traditional weaving techniques are still practised by Penan women and passed down from mother to daughter. The men still use keva when they go hunting or fishing and the women when they collect the vegetable and fruit. Rattan mats are used on the floor of the Penan houses. The baskets and bracelets are made from wild jungle rattan. This is stripped, smoothed and treated with the sap of a plant, then certain strips are coloured. The rattan is then carefully woven into intricate designs.
Lupa Masa Jungle Camp
Lupa Masa is a unique jungle camp hidden on the lower slopes of World Heritage Mount Kinabalu National Park. Lupa Masa literally translates as ‘forget time’ and many travellers do just that. Set amongst primary rainforest, it is the perfect place for an introduction to the diversity of Borneo’s famous flora and fauna, as well as a retreat for those who simply want to relax in a beautiful environment surrounded by nature. Only a thirty-minute walk from the village of Poring, guests get their first taste of the rainforest on the guided walk into camp.
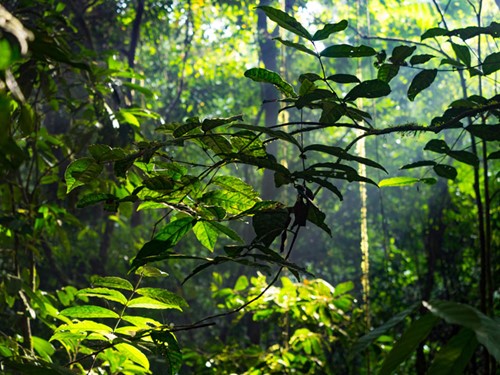
Links about Lupa Masa
- Trip Advisor - " Lupa Masa rainforest camp is a natural hideaway set amongst some of the oldest rainforest on Earth."
- Lupa Masa Borneo site
- Facebook page for up to date information
- Lonely Planet summary
- MySabah.com
- Adventure Alternative Borneo
Built entirely from local bamboo and reclaimed wood, accommodation at Lupa Masa jungle camp is rustic but comfortable. Sleeping open-air with mosquito nets, guests have the chance to immerse themselves in the surrounding sights and sounds of the rainforest. There is also the option to sleep within tents on the open-air bamboo structures for those wanting more privacy. It is recommended to pack light for your stay at Lupa Masa.
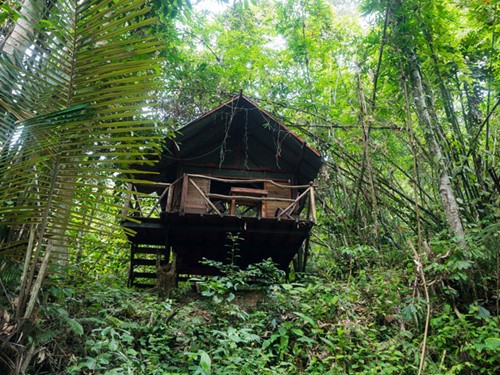
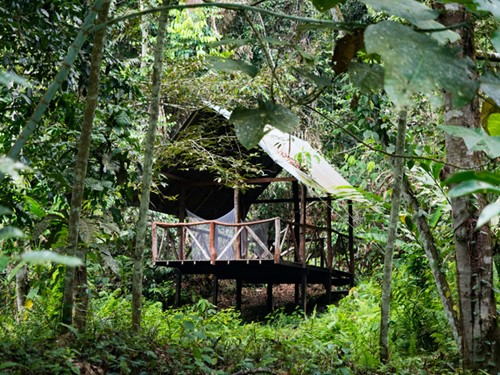
Activities at Lupa Masa
There are many activities for guests at Lupa Masa jungle camp. It is highly recommended to join the guided night trek that visits the surrounding trails; lastling 45mins, this simple trek gives guests a chance to see some spectacular nocturnal wildlife. Long and short day treks can be arranged to various locations near camp, as well as the fascinating jungle survival course lead by our local leaders.
The surrounding forests are rich in mammal, bird and plant life and treks have included sightings of the Slow Loris, the Western Tarsier, the Long-tailed Porcupine, the Yellow-throated Marten, the Rajah Brook Birdwing Butterfly and Wallace’s Flying Frog, a vast array of butterflies, dragonflies and fireflies, cicadas, frogs or even hooting gibbons. When in season, the Giant Rafflesia and many wild orchids can be found flowering nearby. As a sign of any healthy rainforest, there are leeches in the surrounding jungle, but there really is no need to worry about these harmless (if ugly looking) critters!
Guests can also enjoy their days spent on the sun deck by the river, relaxing in a hammock or swimming in the nearby river and waterfall.
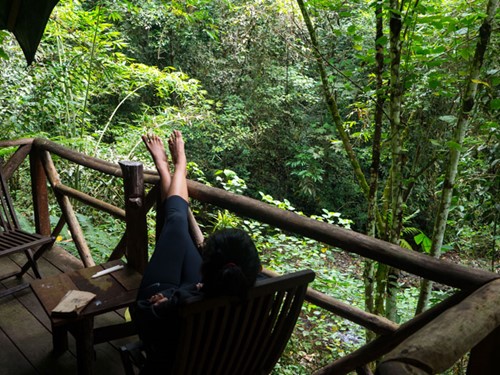
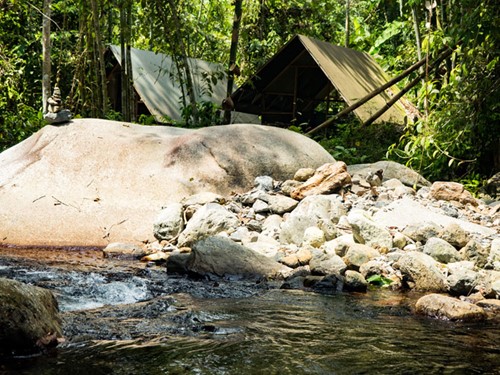
Facilities at Lupa Masa
The facilities at Lupa Masa jungle camp are simple and all ecologically sound. The hydroelectric power supply is the primary source of electric at camp, supplemented by a fuel generator when the river in low.
Simple private showers and taps are supplied from the surrounding rivers and water use is kept to a minimum. There are western toilets that require a ‘bucket flush’.
Meals are vegetarian and include rice with numerous jungle vegetables that are grown in the surrounding area and supplied by the local village markets. All food is organic where possible, food waste is composted and plastic and other materials are limited in their use. Food is served in a communal eating area so you can get to know other campers and talk with guides about the incredible things you’ve seen throughout the day.
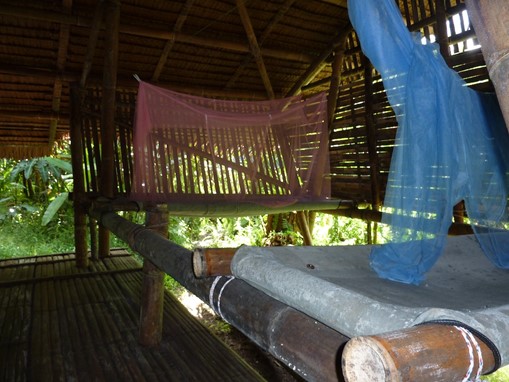
What to Bring to Lupa Masa
Lightweight breathable clothes, long sleeved and lightweight for the evenings and to cover up from the insects, a sarong or light towel, sandals and light socks for the evenings. The camp provides mattresses and mosquito nets but do bring a sleeping sheet or very lightweight sleeping bag.
Most people wear shorts and T-shirts or a light shirt with a sunhat during the day and some sandals which can be worn in the river for swimming. In the evenings and mornings change into long sleeved clothing and sandals with socks. At night people sleep in loose fitting trousers and a long sleeved Tshirt in a sleeping sheet or light sleeping bag. A torch is very useful, and any soaps or shampoos should be bio-degradeable.
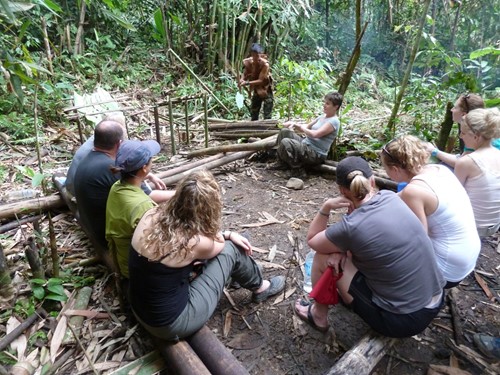
Learning jungle skills during the day
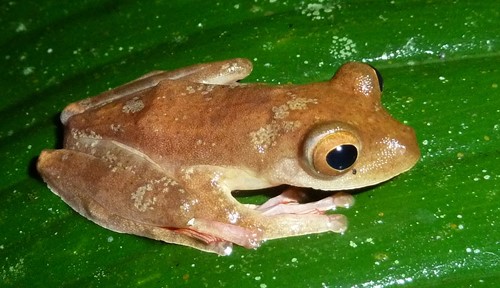
The jungle at night is very noisy, partly because of these frogs!
Borneo Community Benefits
Borneo Community Benefits
Adventure Alternative contributes to the local economy and spreads that income throughout the community by choosing carefully the people we work with and making agreements beforehand about how many clients we will bring and how much money the community will get from the visit. Our leader makes regular visits to the villages in order to ensure that we are not making unfair demands on the community and that our presence is both wanted and enjoyed.
In the Penan villages, we spent years preparing the ground and building trust with the villagers before discussing the concept of bringing tourism to the area in order to help fund the projects they most wanted, those being education and forest enrichment to tackle the effects of logging. With Adventure Alternative our charity is supporting the Penan people with these projects. Tourism is a relatively new concept to them. The local benefits are to some extent unknown, we simply have to treat everything with great care and respect.
We don’t condone exploitative tourism at all, we fundamentally believe that the community needs to extract more out of the tourism ‘contract’ than the visitor. Therefore, on one level the financial benefit is easy to quantify, but on another level, we are exposing these people to a new way of life which we want to promote as a way in which to protect their heritage and culture. Clearly, this is a long-term commitment and one that must combine all the theory surrounding community tourism and the practicality of bringing visitors to such a special area. If their habitat had never been endangered by the logging companies cutting down all the trees, then you could say that there would never be a need for tourism, but in this case tourism could, in fact, offer them a source of cash income as an alternative to being forced into the need to cut down trees for money.

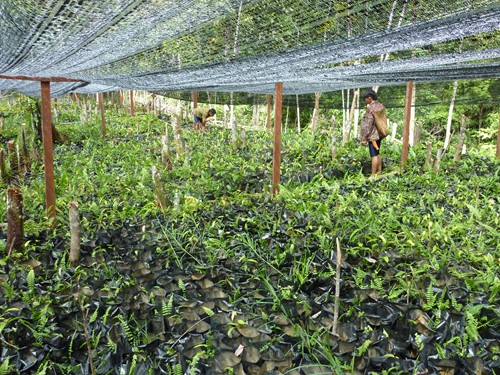
Our Kerong Tree Nursery in Borneo. We work with the locals to evoke a sense of ownership and stewardship for our projects.
This trip has been entirely thought out in terms of the local people and the impact upon them, and the benefit they can gain from having visitors. It’s not just a tourist trail, it really is an unusual adventure and one that we hope will help to transform the lives of these remarkable people. In that respect the trip falls within all the categories of the FairTrade Volunteering trademark, even if you are not actually volunteering to do some work in the jungle; the visit is still about making a positive impact on the people who live there.
Borneo Volunteer Projects
In Borneo, we are working alongside the indigenous Penan people to protect and preserve the Sarawak rainforest. We're planting around 10,000 trees a year, reforesting areas which have been damaged by illegal logging and extreme weather phenomena. You'll have the chance to explore the rainforest, learn from the deep knowledge and traditions of the Penan people, assist with the collection of saplings and seeds from the forest, help with the planting of saplings in the tree nurseries we are supporting and be fully immersed in the fascinating culture of this amazing place.
A successful morning of tree planting with volunteers and the local Penan people.
The Adventure Alternative Impact
Adventure Alternative contributes to the local economy and spreads that income throughout the community by choosing carefully the people we work with and making agreements beforehand about how many clients we will bring and how much money the community will get from the visit. Our leader makes regular visits to the villages in order to ensure that we are not making unfair demands on the community and that our presence is both wanted and enjoyed.
Our Work in the Penan Villages
In the Penan villages, we spent two years preparing the ground and building trust with the villagers before discussing the concept of bringing tourism to the area in order to help fund the projects they most wanted, those being education and forest enrichment to tackle the effects of logging. Tourism is a completely new concept to them. The local benefits are to some extent unknown, we simply have to treat everything with great care and respect. We don’t condone exploitative tourism at all, we fundamentally believe that the community needs to extract more out of the tourism ‘contract’ than the visitor.
A look at the traditional housing of the Penan tribe.
Therefore, on one level the financial benefit is easy to quantify, but on another level, we are exposing these people to a new way of life which we want to promote as a way in which to protect their heritage and culture. We have been successful with this in remote areas of the Himalaya and even Africa, but clearly, this is a long-term commitment and one that must combine all the theory surrounding community tourism and the practicality of bringing visitors to such a special area. If their habitat had never been endangered by the logging companies cutting down all the trees, then you could say that there would never be a need for tourism, but in this case tourism could, in fact, offer them a source of cash income as an alternative to being forced into the need to cut down trees for money.
Maliau Basin
What is the Maliau Basin?
The Maliau Basin is a Protected Forest Reserve in the heart of Sabah, Borneo. Surrounded by towering cliffs, the area has seen little human exploration and has evolved into its own distinctive ecosystem, with rare flora and fauna, towering waterfalls and untouched ancient rainforest. This is an area we visit on our Lost World holiday specifically but it can also feature on a tailormade Borneo adventure holiday.
You can read more about how challenging a hike is in the Maliau Basin on our blog, but for most people this region is a special journey to a lost world of ancient forests, a giant amphitheatre which has been completely overgrown by jungle and is home to more than 2000 species of animals and plants, of which many are only found in Borneo. Sumatran rhino, orangutan, pygmy elephant, banteng and sambar deer can be found here, but it is really the trees that steal the show. Plus the feeling of really entering a lost world when you hike here, the top of the basin itself acts as a natural barrier and the interior is so dense that even the Murut warriors would only venture in occasionally. As a trekking experience, Maliau Basin is unique and quite spectacular.
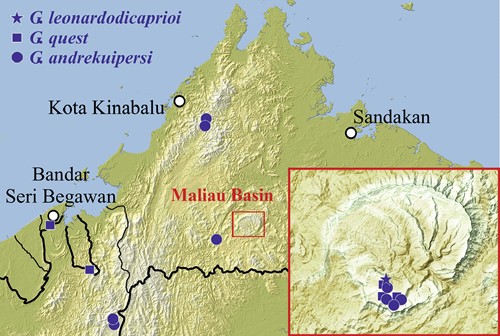
Maliau Basin is remote, almost a full day travel from Kota Kinabalu or Tuwau.
The basin has about 70 kilometres of trails and expect all day strenuous hikes in hot and humid conditions. The best time to travel is between January and July during the 'dry' season, with April and May being the driest. Accommodation is fairly basic with squat toilets and most treks are circular for three to five days around the basin. Trails visit the famous waterfalls, the Linumunusat Lake and of course the Maliau river itself. There is also an option to trek to the top of Mount Lotung which is a demanding challenge on muddy paths and in the heat.

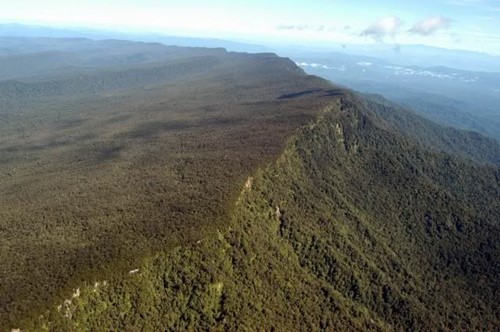
Seen from the air, you can clearly the rim of the basin which acts as a natural barrier to the lost world within.
History of the Maliau Basin
While local tribes will have likely known of the area, there is no archaeological evidence of any permanent human settlements within the Maliau Basin. The first encounter by a westerner was in 1949 when a pilot spotted the expansive crater carved into the forested landscape, but it was not until 1988 when a scientific expedition delved into the hollow that any in-depth exploration occurred.
Ecology of the Maliau Basin
Unlike many other areas of rainforest in Borneo, the Maliau Basin remains entirely primary rainforest, meaning no part of it has ever been logged and regrown. With over 2,000 different species of plants and animals, this wonderland of wildlife is every nature lovers dream. Comprising four different forest types, the plant diversity excels most other jungles around the globe.
The impenetrable jungle means that while the Maliau Basin is home to large numbers of wildlife, chances of seeing the better-known animals are slim. Accompanied by an expert nature guide for the entire trek, you will focus on spotting weird and wonderful fungi, flowers, insects, snakes and lizards.
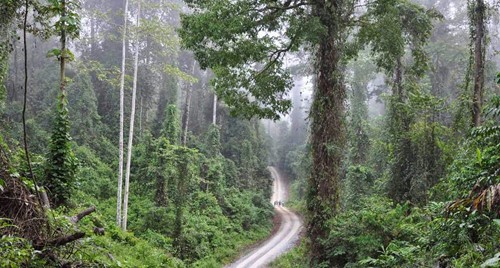
Trail through the forest in the Maliau Basin
Why Visit the Maliau Basin?
A trek to the Maliau Basin is suited to intrepid travellers looking for an authentic jungle experience with a keen interest in nature, wildlife and forests. The trip can be challenging at times due to the muddy and uneven terrain of the forest, but more than fitness, an enthusiasm for real adventure is what will ensure any trekker gets the most from this rare experience.
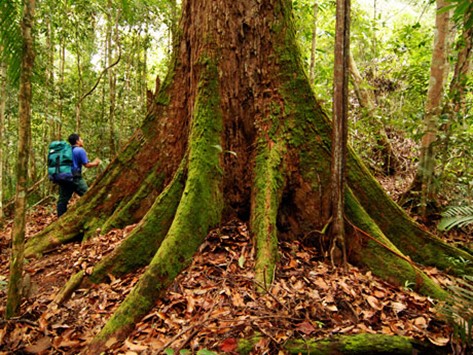
Gargantuan trees greet you in the depths of the jungle and in many ways they steal the show.
Maliau Basin packing list
It will be hot and humid so bring plenty of bags to protect electrical equipment. Quick dry clothing and leech socks are important, and a sleep sheet for the night. Good walking boots are essential for the paths, and don't forget insect repellant, toilet paper and a hand sanitiser, rehydration tablets and some antiseptic. If you can put everything in a waterproof backpack that would be best.
Personal health in Kenya
In order to help you to be as prepared as possible for your trip, we offer the following advice and tips on staying healthy and comfortable and some ideas for an advanced personal medical kit for medical students at the bottom of this page.
Before you leave you need to make sure that you that you complete our online medical form, it is always better for us to be informed in advance of anything that we may need to account for.
Please do look at these other websites for up to date information on health in Kenya:
Fit for Travel
National Travel Health Network and Centre
Immunisations and Antimalarials
You need to make sure that you receive all the relevant immunisations. You can get free information on which ones you need from your GP and from the NHS. The process of getting the immunisations will usually need a period of time for booking in the first appointment and then also a couple of visits over a period of a month or more for all the jabs to be actually done. Therefore you need to contact your GP or travel clinic as early as possible to allow time for this process.
When visiting your GP or travel clinic you will also need to seek advice on anti-malarial drugs. There are a number of different medications available and each has different properties in terms of how often you take it, how long after return you have to take it, how much it costs and potential side effects.

En route to the summit of Mount Kenya.
Health tips
Keep your hands clean
This is something that you will, of course, do to some degree at home anyway. However, when you are away there will be bugs to which your body may have no built up immunity to and general cleanliness in some places is not the same as at home. Toilets are often communal long-drops without running water. Bring hand sanitiser gel.
If you go to shake hands with someone they may offer their forearm and closed fist instead, this will indicate that have dirty hands and you should grasp and shake their wrist instead.
Protect yourself from the sun
The sunlight near the equator can be much more intense than that which you are used to and you can get burned very quickly. It is important that you have a broad spectrum, high factor sunscreen with you and also that you have options in terms of lightweight long sleeved and legged clothing and a hat that will shade your face, neck and ears.
Note that it is theoretically possible to get sunburned through some clothing materials, some trekking and outdoor clothing now comes certified with a UPF rating giving the proportion of UV radiation that is blocked by the material. It is also worth having a reasonable pair of sunglasses.
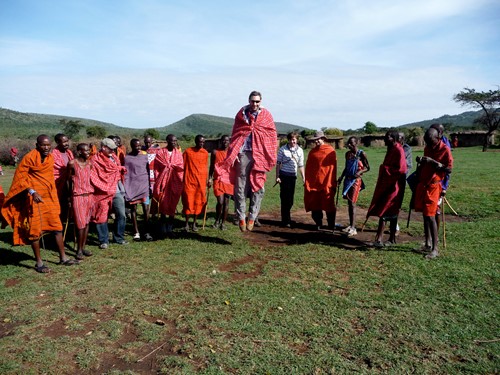
Exploring and learning about the cultures of Kenya.
Watch What You Eat and Drink
All the food prepared by our own staff will be properly cooked. However, you will also at some point be eating food from local restaurants and eateries. A few bits or advice can help to avoid nasty stomach bugs;
Check meat has been properly cooked and not served raw, and with street food try to check the oil that has been used is fresh. Some bacteria will not be killed by cooking so be careful of undercooked meals. Avoid dishes that might have been cooked in untreated water, for example, salads. If you eat fruit, chooses ones that have a skin or peel that you will not eat, such as bananas. Order bottled or boiled drinks like sodas or tea, and always check bottles to see that the caps are still sealed.
Look After Yourself and Your Friends
It is important to take responsibility for yourself and to take an active role in looking out for you and the others. Make sure that over time you are not getting progressively more tired and/or dirty. The way in which you will be living may be a distinct change from how you live at home and it is easy to fall ill and feel fatigued.
If you have a cut or graze for example you will need to keep it clean and change the dressing regularly. Even a simple splinter or thorn can develop into bigger problems if you don't look after it.
For people on longer trips, you may feel some degree of homesickness. This can come in waves and can be made worse if you are tired or not feeling one hundred percent. One of the best remedies is simply to talk about it. Our staff will always talk to you in confidence and will deal with any issues subtly and sensitively. Be careful of using social media or talking to people at home, who are likely to feel a bit helpless.
Advice for a Personal Medical Kit
General Items:
- Sunscreen
- Water purification tablets/iodine drops
- Scissors ± tweezers
- Antiseptic cream/Fucidin ointment
- Bandages and plasters
- Dioralyte: Or other rehydrating mixture, especially if diarrhoea is severe. Oral rehydration therapy (ORT): Put one 5ml teaspoon of salt with eight teaspoons of sugar in one litre of CLEAN drinking water and take 1–2 cups with each loose motion.
- Loperamide (trade name Imodium): Useful for diarrhoea, although the most important thing to do is keep yourself hydrated. It is useful to relieve symptoms if nothing else. Take two tablets with the first loose stool and then one for every subsequent one.
- Insect repellent and a net is essential. See malaria. If you’re really prone to be bitten, ‘after-bite’ type remedies are available.
- For allergies/insects: Chlorpheniramine: (for example, Piriton) or promethazine is handy for most allergies, including those to insect bites. It also helps in motion sickness. It can make you drowsy.
- For trauma/pain: Analgesics (aspirin or paracetamol or codeine/paracetamol combination). Note the latter can make you drowsy and give you constipation.
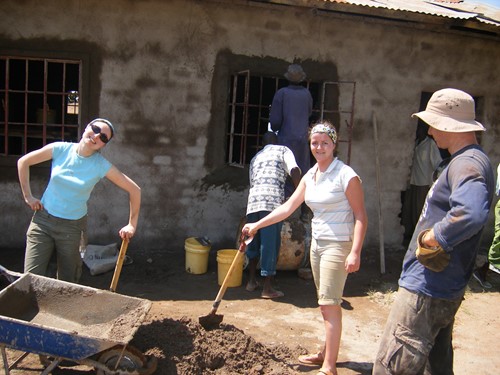
Working with locals on a voluteer project.
The items below are prescriptive medicines for students going on a medical elective or medical camp, or for team leaders of school trips to consider or for people going on trips in remote areas where access to a hospital may not be quick.
Antibiotics for gastrointestinal problems: If you note blood in the stool or develop a temperature, a short course of ciprofloxacin should help. If diarrhoea continues (especially if it may be amoebic or giardiasis infection) with nausea, frothy stools and lots of wind metronidazole would be a wise choice.
Cyclizine or prochlorperazine: May help if nausea and sickness is a major problem.
For throat/skin infections: Augmentin (Or doxycycline) is handy for a bad sore throat, most chest infections and skin that has become infected secondary to bites or sores. Combinations of amoxicillin with flucloxacillin can also be used.
Syringes and cannulae: Although taking your own cannulae may protect you from contaminated needles, it won’t help you much if it is being used to give you infected blood. If you really are going to take such risks, a bag of gelofusin or similar may be a good idea.
Safari Photography
Safari photography
Any holiday to the national parks of East Africa is a great opportunity to practise photography and hopefully get some stunning shots. The reality is that it is very difficult; many animals have adapted to blend in with the environment, during the day they are resting and often hiding, and practically it is hard to get close up to a wild animal, which means lots of shots with a vast panorama of dun-coloured savannah with some tiny non-descript animals somewhere in the distance. It would be extremely lucky to get a shot of a chase or a kill, all of which tend to happen extremely quickly and more often than not in low light conditions of dusk and dawn (hence the reason for game drives happening at these times when the animals are most active). Therefore, some preparation is essential.
Security of Your Camera Equipment
Ensure your cameras and your equipment are protected against loss, damage and theft. Keep them on you at all times and in your carry-on luggage for the journey. Most thefts of high value items like cameras are opportunistic, so don’t make it easy for a thief to quickly lift something that has been put down. The vehicles we have are safe, and there will always be a driver and guide to look after the belongings, but don’t take risks by leaving cameras lying on the seats while you are popping into a shop to buy a drink for example. On safari, open windows are an opportunity for monkeys to reach in, it does happen, so common sense and a vigilant attitude will be your biggest protection.
Protect Equipment from the Elements
Safaris are hot, dusty and camera equipment needs to be well protected from the elements. A camera bag or case is a good idea. Fine dust can easily get into the working parts. The vehicles are driving offroad (albeit slowly), and the roads themselves are full of potholes, so make sure the cameras don’t get knocked about.
Visibility on Safari
During a game drive, the vehicles will drive to areas where animals are in sight, and the drivers are mostly in touch by radio or phone. You will be sitting in seats with sliding windows through which you can use the camera, but the driver may well ask that windows are shut if the dust is too heavy or if the animals are too close (especially near baboons). However, the safari minivan has a pop-up roof allowing you to stand up and take shots without any impedance. If you are using one of our overland trucks then the windows roll up and you will have a high vantage point from which to shoot photos. In the safari vans, there is not enough room for every person to stand up and use the pop-up roof, so everyone will have to take turns.
Charging Equpiment
The lodges have power points for charging and Kenya uses the same three-point plug as used in the UK and they have the same 240V supply. If there is a generator then they will also supply 240V, but be careful of power surges. In the campsites, there are occasionally power points, but not many, so your options are to either bring a small solar charging unit with you or a charging cable that can be plugged into the cigarette lighter in the vehicle, of lots of spare batteries. The overland trucks have power points in the main seating area which provide a 24V supply and are fine for small devices like camera batteries. A lot of shops in Nairobi and the main cities like Arusha, Embu, Naivasha and Naro Moru will sell a limited selection of supplies like camera batteries and memory cards, but this not to be relied on.
Lenses and filters
To appreciate the vast panorama of the savannah a wide angle lens is obviously a good idea, but a standard 52mm lens will also be sufficient. To get the classic shot of a wild animal it is necessary to use a long lens up to 270mm. Also recommended would be a UV or skylight filter, and a polarising filter to make the best of a burnished blue sky that tends to overexpose a shot.
Tripods
These are probably very important to take, at least the small gorilla pods or clasps that will grip to something and hold the camera steady. Your best shots may well be in low light and using a zoom, so it will be important to hold the camera steady and for a long exposure. People using iPhones can also buy grips that will hold it steady. Clearly, there won’t be a lot of space to set up a large tripod in the vehicle so enthusiasts would be encouraged to take both, a larger one for panoramic evening shots from camp for example, and a small one to stand or grip onto the vehicle in some way while you are on the move.
The KWS Wildlife Code
- Respect the privacy of the wildlife, this is their habitat.
- Beware of the animals, they are wild and can be unpredictable.
- Don't crowd the animals or make sudden noises or movements.
- Don't feed the animals, it upsets their diet and leads to human dependence.
- Keep quiet, noise disturbs the wildlife and may antagonize your fellow visitors.
- Stay in your vehicle at all times, except at designated picnic or walking areas.
- Keep below the maximum speed limit (40 kph/25 mph).
- Never drive off-road, this severely damages the habitat.
- When viewing wildlife keeps to a minimum distance of 20 meters and pull to the side of the road so as to allow others to pass.
- Leave no litter and never leave fires unattended or discard burning objects.
- Respect the cultural heritage of Kenya, never take pictures of the local people or their habitat without asking their permission, respect the cultural traditions of the area and always dress with decorum.
- Stay over or leave before dusk, visitors must vacate the Park between 6.00 p.m. - 6.00 a.m. unless they are camping overnight. Night game driving is not allowed.
Family Safaris
Family Safaris in Kenya
The Safari is renowned for its adventurous appeal, its call of the wild, the lure of stunning scenery and its fascinating culture. Adventure Alternative will give you an experience that you will not forget easily and provide the service you expect on a high-quality holiday.
We cater to children and families. We have experienced staff and itineraries that we have thought about to give you the best of all options.
Our Family Safaris are designed to allow you as a family to explore whilst learning and experiencing this beautiful country and her people from a safe and secure base. Our staff will be with you all the time and we have qualified staff to look after your children should you wish to dine out for an evening or spend some time alone. We can arrange iPod connections on board the vehicles for long journeys and a supply of board games to play around the campfire.
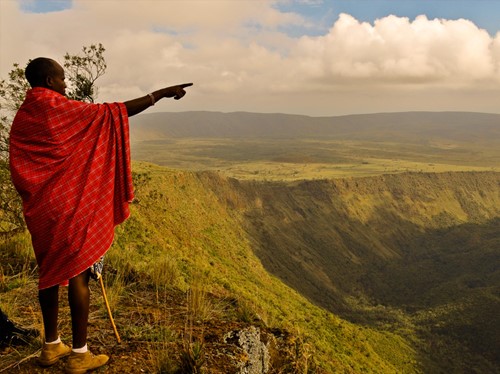
Exploring the great rift valley with the Masai Mara.
Activities for Children in Kenya
You can also take your children to a Kenyan school with our connection to the charity Moving Mountains which looks after Kenyan children who are from poor backgrounds. Your children can have a really unique experience of life for young people in Kenya, plus you can see the work of our charity and see classrooms, speak to teachers and even take part in a lesson. The itinerary would determine exactly where, but we would recommend that some time is spent on safari watching wildlife and some time spent in villages and areas where the charity works. It will not be seen as voyeuristic or inappropriate.
Health and Safety for Your Family in Kenya
When it comes to health then you and your children will need to get vaccinations and take anti-malarial tablets. You should seek the advice of your doctor or travel clinic who will ensure that you are adequately covered. If you had an illness or mishap whilst on holiday then there are excellent clinics and hospitals in Kenya and Tanzania. We are also members of KATO and have flying doctor cover with AMREF. All of our staff are first aid trained and we carry first aid kits in all our vehicles.
When it comes to safety in Kenya or Tanzania then you can be assured that you and your children will be very well looked after. We have a wonderful team working for us on the ground, who are all qualified and experienced. They will ensure that you are safe, well fed and have an amazing time. All of our staff are parents themselves and will work really well with your family. The Kenyan nature is very soft and fun and the interaction with your children will be wonderful. We can easily prepare your favourite dishes and we can cater for all diets. You will find the staff engaging, informative and very interactive.
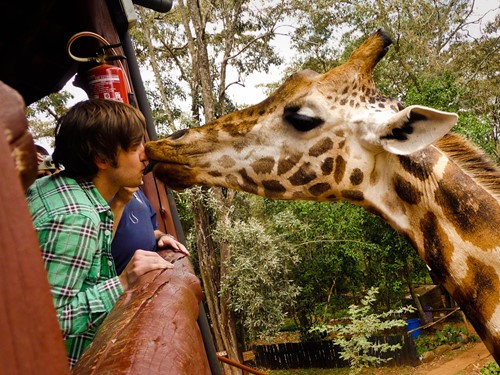
Enjoying a wildlife encounter while.
Long Trips on the Road
The views out the window are very different to home and your children will find it fascinating! Saying that young minds do wander and you are welcome to bring personal DVD players. We also have modems for laptop internet connectivity, however, this does depend on your location.
Since a family holiday is all about the family fun we would work with you to create a specific itinerary that suits you and your children’s needs. Commonly with a family safari, we would try to limit the amount of time spent driving. It really depends on the age of your children and the experience which you are after. Usually, the highlights for children are visiting places like the Elephant Orphanage or the Giraffe sanctuary in Nairobi, visiting Schools and interacting with Kenyan children of the same age through projects which we run through our charity Moving Mountains.
Having a private/bespoke itinerary does not mean that family safaris are premium priced. The cost of a safari varies greatly and the biggest expense is the Park entry fees and accommodation. We can mix the accommodation to suit. Many families prefer a camping experience, others Lodges, some a mix of both - again it comes down to what is best for you family.
Spotting wildlife means spending a lot of time in a vehicle.
The KWS Wildlife Code
- Respect the privacy of the wildlife, this is their habitat.
- Beware of the animals, they are wild and can be unpredictable.
- Don't crowd the animals or make sudden noises or movements.
- Don't feed the animals, it upsets their diet and leads to human dependence.
- Keep quiet, noise disturbs the wildlife and may antagonize your fellow visitors.
- Stay in your vehicle at all times, except at designated picnic or walking areas.
- Keep below the maximum speed limit (40 kph/25 mph).
- Never drive off-road, this severely damages the habitat.
- When viewing wildlife keeps to a minimum distance of 20 meters and pull to the side of the road so as to allow others to pass.
- Leave no litter and never leave fires unattended or discard burning objects.
- Respect the cultural heritage of Kenya, never take pictures of the local people or their habitat without asking their permission, respect the cultural traditions of the area and always dress with decorum.
- Stay over or leave before dusk, visitors must vacate the Park between 6.00 p.m. - 6.00 a.m. unless they are camping overnight. Night game driving is not allowed.
Volunteer Ethics
Volunteer ethics
Additional reading about the Moving Mountains charity you will be working with include this page on Development Education and Volunteer Placements.
Gap Years and overseas volunteering have suffered discreditation over the past number of years, frequently becoming the target of many jokes like the Gap Yah video. It’s worth mentioning that the actor in that video, Matt Lacey, made this comment about his sketch: "It's a satire on the great number of people who seem to be leaving these shores to vomit all over the developing world."
The problems with short-term ‘volunteering’ holidays for the market are many, but it’s not a case that every organisation should be tarred with the same brush. The issues that inflame the public perception of volunteering trips are quite easy to identify, and not too difficult to solve; at one level, it’s all about ethics and at another level, it's a lot about money.
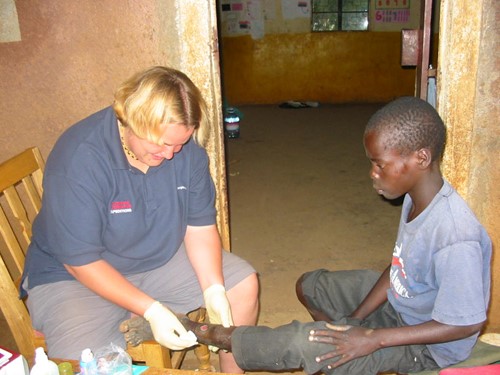
Sustainable volunteer work is the key to providing growth opportunities for local communities.
For example, the volunteer programmes are frequently too short term and not part of a long-term developmental aim; there is a need for continuity and for volunteers to contribute later on down the line to the programmes they have been involved with, rather than the find ‘em and forget ‘em culture that often pertains.
Volunteers are often under-prepared, untrained or unsuited to the volunteer programmes that they sign up to, and the company often has no selection or training process in place.
Insufficient investment and resources actually reach the target destination (that is, too high a proportion of let’s say, the signing on fee, is kept in the hands of the intermediary agents). In the worst cases, there is simply no interest in using these trips as a way of creating wealth and development in a community. The whole trip is commercially one-sided.
There is an image that some programmes have more cosmetic glamour than genuine and lasting value, and it’s all about a commercial ‘product’ when actually what we are dealing with here are real people and real communities who deserve a say in this type of tourism.

We strive to give local communities the tools they need to be self-sufficient.
There is an uncomfortable feeling that this is a one-way kind of trade, whereby the aid programme is established to improve the life skills and CVs of the volunteers involved, as opposed to best serving the needs of the target groups whose interests the programmes are ostensibly designed to help.
There remains the lingering suspicion that the balance between outright philanthropy and vested commercial interest is creeping relentlessly in favour of the latter.
How Adventure Alternative Breaks the Mold
Adventure Alternative is one of the companies that believe in commerce supporting development, and that a school trip, a gap trip or a sabbatical is essentially a form of international development and that it should promote the Millennium Development Goals and the more recent UN Resolution for Business and Human Rights. It should have clearly defined development aims, and those aims should be overseen and implemented by experienced, professional people.
There should also be a joint responsibility with the communities and the clients and the company. In essence, we can use tourism to provide a structured benefit to a village where there might not have been a route to market. A Gap trip is simply another type of tourism which can do that.
But if we are going to sell a product which purports to provide genuine benefit in terms of education, health, social welfare and emotional well-being then we need to have a long-term, professional, progressive and learned approach to it! This is why we started Moving Mountains at the same time as AA, and it is the charity determines the projects and programmes which we send people on. It is not a commercial decision, it is a developmental decision.
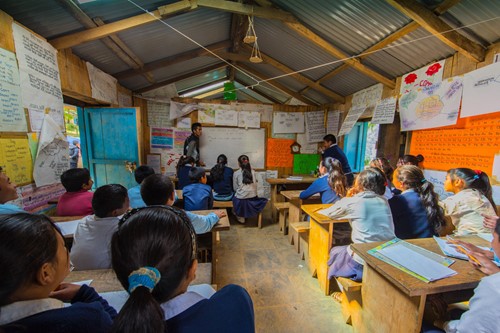
Community involvement starts with buy-in from locals. Our work in Nepal is proof that together we can all make an impact in the wellbeing of a small community.
If it is done right then a short-term holiday or school trip or 3-month gap trip spent interacting with local people, helping to build a classroom, learning building techniques and making friends can be a good thing. As long as that one trip is part of a structured mission spread over many years, providing capital investment and resources, and as long as the community have an equal role in deciding that development, and as long as it’s not a case of a colonial-style invasion of wealthy visitors dispensing their largesse to ‘poor’ people with no voice (and perpetuating a desperately old-fashioned and condescending form of ‘aid’) then it can do good.
Kenya and Moving Mountains
For example, renovating a school in western Kenya is actually part of a ten year programme which Moving Mountains has with the Kenyan Dept of Education to improve academic facilities in an entire district, providing facilities for 20 schools and achieving the official goal of putting all children through free primary education and a 100% take-up on secondary education, with a long-term view to a 40% take-up on tertiary level education. So MM is renovating 20 schools, building early child development centres, providing libraries and laboratories, promoting a sports programme, training teachers in child protection and care, and supporting a holistic welfare support service for hundreds of children without a team of counsellors. The programme allows both the company and the charity to be a part of that huge vision, and at the same time offer the scheme to Kenyan youth as well.

Connecting with locals in rural villages of Nepal.
Ethics and Volunteering
Fundamentally it is all about ethics, the underlying reason that the company began in the first place. Was it genuinely to offer a product to a client in order to use money cleverly and wisely in order to make a difference, or was it all about making a profit?
Adventure Alternative puts considerable resources and investment into the companies it starts around the world, and it provides full-time careers for people in all those companies. The financial risk, therefore, is on the company, not the employees. We treat the staff the same, whether they are working in the UK office or the Kathmandu or Nairobi office. Each company becomes self-sufficient because our aim is to create sustainability. But our development trips, gap trips and school trips all contribute to the long-term aims of the charity Moving Mountains, and that was the fundamental vision that Gavin Bate had when he started both organisations in the early nineties.
Our ethic is contained in the criteria of Fair Trade Volunteering, and we believe it is the onus of every Gap Year and volunteering company to go beyond the usual description of providing personal development and accept that these trips are about sharing the money with people who are equally deserving of the spoils of tourism.
Volunteer Providers
The volunteering and school expedition programme is run by three organisations and it is important to explain what each of them does and how they will all help you to have a safe and productive time abroad. All of them are interlinked in a model that was put together by Gavin Bate and it has created a supportive and complementary network and staff structure which enables us to run these trips and be confident that they represent ‘clever’ aid and relevant sustainable developmental.
Your involvement is part of something long-lasting, and you will start to see that as you go on the trip.
Adventure Alternative's Role
Adventure Alternative is the company that provides the trip and all the logistics and support and staffing. There is an Adventure Alternative UK and there is also an Adventure Alternative Kenya (and Nepal, Tanzania, Russia, Borneo). Each regional company is standalone but receives investment and resources from the UK to provide a high level of salary and training for the employees. Any volunteering trip is regarded as a holiday and 'AA' is the registered tour operator which can legally advertise and sell such trips. It provides financial bonding and insurance plus the staffing to manage all the logistics of your trip.
Moving Mountains Role
Moving Mountains is the charity that provides the projects and the programmes. It is financially supported by the company in terms of nearly all the administration and overheads. There is a Moving Mountains UK and there is also a Moving Mountains Kenya (and Ireland, Nepal and Borneo). Each regional NGO is standalone but receives the funding for all the projects and programmes it implements. Some of that money comes from donations, some from fundraising events, and some of it comes from clients such as volunteers and school trips or fundraising trips. Every project and programme you visit is benefiting by the money you are raising, and you will see it every step of the way.
AA UK provides
- all the pre-trip training and post-trip support
- all the administration for the group going on your trip
- financial protection for your money
- expert advice and monitoring of your trip throughout
- investment in the equipment you will use, eg trucks, tents
- organisation membership eg Association of Independent Tour Operators, Fair Trade Volunteering
- the promotion, advertising and marketing of the trips
AA Kenya provides
- the staffing in-country, eg drivers, cooks and guides
- the local tour license to run the trip
- the office back-up and implementation of your trip in Nairobi
- all the transport and facilitation of the activities you will do
- all the logistics of being sheltered, fed and safe during your stay
Moving Mountains provides
- arrangement and running of all the projects and programmes
- a professional underpinning of all the developmental aid
- team leaders and all our field workers working with you
- the allocation of your fundraising to all the aspects of our work
- training and development for your time in-country including the peer programme, the school help programme, Black Cats and learning Swahili.

Having a laugh and getting involved with the local community on the ground in Kenya.
The money you pay to Adventure Alternative covers all of the logistical elements of your trip, the training before you go, and a proportion of all the overheads required to staff and manage the main office, plus the equipment and vehicles we keep in-country for your use. This is normally not something that can fundraise for.
The money you fundraise for Moving Mountains covers all of the projects and programmes we run, that you will be taking part in, plus the costs of the peer you will be spending time with if that is the case.
Volunteer preparation
Volunteer Preparation to Kenya
We will make sure that any volunteers or school groups or university groups are properly prepared before they go abroad, by experienced people who represent the charity and who have spent many years in-country working with the local NGOs. These people are friendly, communicative and helpful, and they will ensure that every visitor gets the required amount of support prior to going and when they come back. We do have criteria for volunteers, including a DBS security check, and we require all volunteers to be vetted and trained before having any contact with children.
Further training is done on arrival by the local staff who will ensure that you are ready to move into the guesthouses and start on the programme or project that has been chosen. This may take some days, and some training will have to be signed off by you. For example, we are particular about personal health and ensuring that you take the anti-malarial tablets since we have experience of people in the past forgetting to take their tablets or not wanting to. Therefore all our staff are asked to follow up on this, and there is a chart on the wall in the guesthouse which you can fill in to make sure that this regime is followed.
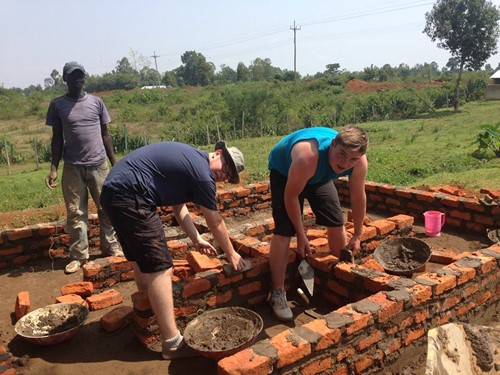
Working together to connect communities and people on a global level.
You may also be asked to get in touch with the in-country staff online through facebook and skype in the months before going. They will want to get to know you in advance and ask you questions about your life, as much as you will want to chat with them.
During the pre-trip training we look at the following issues and we have to 'sign you off' as having taken part. Some of this can be done online and in your own time, while some of it really has to be taught and experienced to make it worthwhile.
Project Descriptions
We will go through all the background of the projects and discuss your involvement. We can also Skype the programme managers so you can chat to them yourselves about what you will be doing.
First Aid
This is not a certified course but we will expect you to know how to handle minor injuries, personal hygiene and health issues specific to travelling such as managing antimalarials in east Africa. You also have access to a dedicated team of travel health experts at Interhealth, who can also carry out psychological counselling.
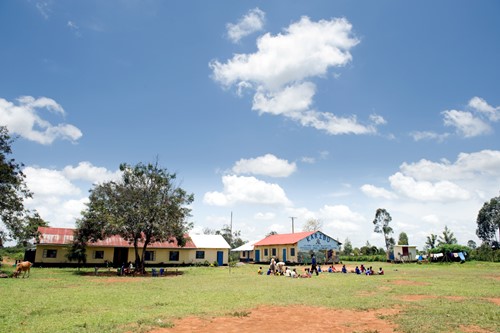
Hanging out at our Ulamba Guest House, playing some games with local children and enjoying some cultural exchange.
Culture and Language
This will be dealt with more thoroughly on the ground with the local staff, but we will discuss some issues of etiquette and especially your approach to material poverty and how you will deal with it. We would also expect you to start learning some Swahili and continue while in Kenya. For more information, see our Kenya Cultural Page.
Personnel Management
A good team member is someone who can work to a routine, have some discipline and look after him or herself in the outdoors or on the move. This is an important part of the training to make sure you can concentrate on the projects rather than worrying about yourself. We don't want people who stay in bed all morning or cannot turn up to meetings on time.
Teamwork and Leadership
This is developing the last aspect of personnel management, and we will discuss the characteristics needed for being a good team player. This is the sort of education you can't get in school but will prove invaluable in preparing for everything from job interviews to public speaking.
Blogging and Videos
We will be asking that every person keeps a blog throughout their trip. Part of your job will be to teach the local youngsters about social media and helping them understand that global reach. Looking for some inspiration? Check out our YouTube Channel.
Development Ideas
This is a really important aspect of your training and involves understanding what international development is all about. We will get some experts along to talk to you about what a gap year can achieve in the world of development and how our approach to aid has changed over the years. You will also be expected to do some homework on this and we'd also like you to try and get a Development Mentor in the industry to work with you personally on your own journey into this very complex and topical subject.
Personal interest
While you are working as a team, we will also expect every one of you to have one (or more) personal interests which you can work on during the run-up of the trip, the trip itself and hopefully afterwards. For example, you might want to study the environmental impact of tourism, or photography, or wildlife, or any of a long list of possibilities. It's an open field but we would like you to use this trip as a way of achieving something personal to you. If you want, we can help you publish it online.
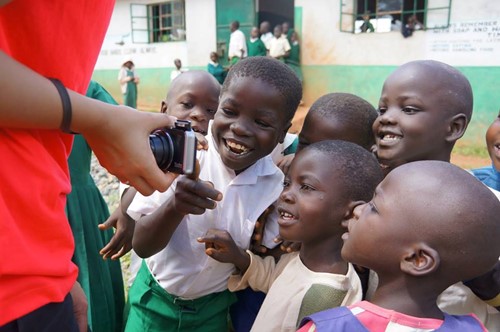
Work on your skills and engage with locals to create a lasting connection to the spaces you work in.
Fundraising for Volunteering in Kenya
This is probably going to be the biggest worry for you since the trip does cost money, but in itself, it is a huge subject and there are lots of opportunities out there which you may not know about. We will show you how to search for it, and also help you with answering some of the questions if you are applying for a grant. We will also talk about what you can reasonably fundraise for, and what you should find yourself from working or from family support.
Millennium Development Goals & Human Rights
Nowadays most developed countries have signed up to the 'MDG' aim, and you need to be aware of what they are and how this gap trip fits into the worldwide aim of bringing them to fruition. Adventure Alternative also signs up to all the major declarations concerning human rights, rights of indigenous peoples and responsible tourism; we would like you to understand what they all are, what they mean and your role in upholding them.
Social Impact Questionnaire
We will be asking that during your trip abroad you help carry out a continued social impact questionnaire in every area of the trip that you think relevant. This includes land issues, employment, environment and much more.
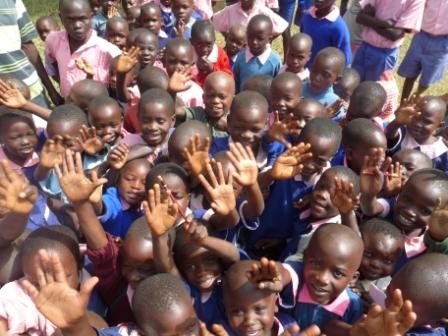
Together we can all make a difference and create a happier world.
Building Techniques
During your trip, you will be doing some construction or refurbishment work and we will provide training for you in how to use the tools and equipment. Some of it is quite unusual since in Moving Mountains we specifically promote techniques for unskilled labour. During your trip, you will get first-hand training, but beforehand we will help you understand what it all means.
Camping in Kenya
Some of the trips will be in tents so we will also look at principles of camping and make things safe. This will also be supplemented by training on the ground with the indigenous tribes who have lived in the rainforests for generations and provide a wealth of knowledge.
Homesickness and Home
You may not think it will happen but you would be very unusual if you never got homesick at least once during your trip. We'll talk about this a lot and discuss ways of dealing with it, and also make sure you don't worry your family too much! Being homesick, having bad days, feeling a bit sick, having arguments, getting emotional and getting annoyed with other people on the trip - these are all to be expected, but the better we discuss it first, the better you'll be ready for it.
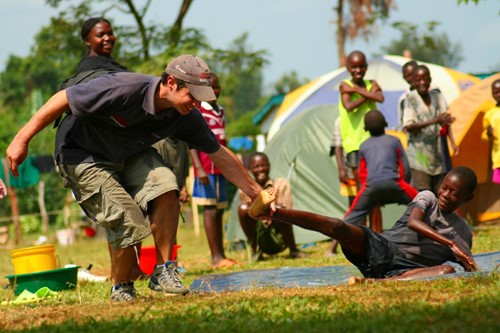
Playing games with the kids of the community. All smiles here.
Volunteer Support
Through our experience of providing development trips over the years, we have come to identify the benefits of providing a degree of support and follow-up to our volunteer clients when they return home. Aside from the social side of the home-coming experience, there is also the personal development aspect of the trip. It is important that you recognise the huge gains that can be made from your experiences and how they may help guide the next stages of your life. We believe that one of the strongest ways to get the most from your experience is to record them, actively reflect on them and then build directly upon them. We will provide a framework of support to help you to achieve this.
Activities and initiatives include:-
- We encourage all members to keep a journal of their trip, however brief or in-depth. We then ask that they produce a short report on the trip or specific aspect of it, to be shared with their fellow travellers.
- We organise a de-briefing stage for the trip on return to the UK.
- We provide a forum which group members can stay in touch with the rest of the group and with the communities that they visited abroad.
- We provide a workshop on careers, interview techniques, employability and International Citizenship.
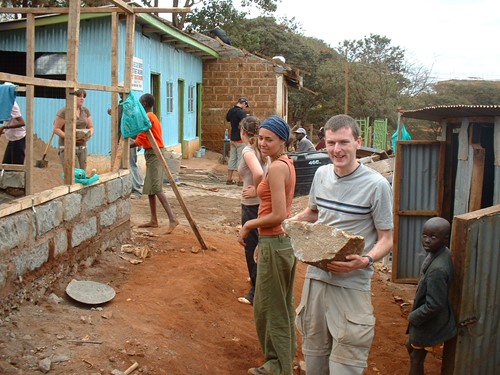
Build something physical and tangible, build community and make a change in the world.
We also provide continual support on the ground during the trip, from both the local staff and also the UK staff and Trustees. Generally, this follows a process of keeping in touch by phone, text or WhatsApp, email and Skype. Volunteers have contact with us all the time and there is plenty of opportunities for us to be flexible. We have a very large network of people on the ground so volunteers find they have plenty of people to socialise and discuss issues with. Each area has a high level of staff input and there are always activities going on.
Volunteers generally become immersed in a way of life and make lots of new friends, as well as contributing meaningfully to the work of the charity. If there are any problems, we can quickly respond to emergencies and information is very easily conveyed to the office in the UK and also to friends and family back home. Most Kenyans use wifi now to communicate with WhatsApp or VoIP technology, and most people use smartphones to get online. We provide logistical and practical support, as well as emotional back up when it is needed.
Tipping advice
Tipping Advice
Tipping in many parts of the world is a normal part of life, almost like a service charge, but unfortunately many people working in the travel industry are paid low wages and rely heavily on tips. Many of them do not receive regular employment either, especially in places where tourism is seasonal, so tips have become a supplement to an irregular income.
Adventure Alternative staff are paid 'industry rates' but more importantly we use the same staff for all our trips so they are guaranteed a regular flow of work.They also get clothing and equipment supplied by us, first aid training and guide training where necessary, plus perks like money for getting home. We also do not deduct any salary for food or accommodation, another common tactic by unscrupulous operators.
Tips are often difficult to split into a 'per person' figure because there is a hierarchy amongst porters especially; for example on Kilimanjaro there are grades of porter according to what job they do, and each one will have a slightly different rate of salary and corresponding tip. Hence we advice one figure per client which is then shared out.
Trek leaders in Nepal are often also climbing guides so they perform two roles on a trip and therefore get two tips, one for running the trek and all the logistics and another as the climbing guide.
in Kenya the staff are commonly split into porters, cooks and guides, which is much the same in Morocco.
How Much is Appropriate?
The following is a rough guide to the amount of money that you may consider giving as a tip to staff in different countries on different trips. Please note that some figures are calculated on the basis of an amount per client (Tanzania, Kenya) and some are based on a figure per staff member so it depends how many people are on the trip (Nepal, Morocco)
Mount Kilimanjaro - this figure is per client for all the staff and given to Castro in Tanzanian shillings to hand out at the end of the trip:
USD$150.00 - 7 day climb
USD$180.00 - 8 day climb
USD$200.00 - 9 day climb
Mount Meru - this figure is per client for all the staff, as above
USD$85.00
Mount Kenya - this figure is per client for all the staff and given to the guide at the end in Kenyan shillings
USD$85.00 - 5 day climb
Safaris - this figure is per client and given to the safari guide/driver at the end and depends on the number of days
USD$20.00 - per day
Morocco Trek/Climb - this figure is per client and given to the trekking guide at the end in any currency
USD$15.00 - per day
Nepal Treks and Climbs - this figure is per staff member and given to the trekking guide at the end (see notes below)
For treks like Everest base camp, Annapurna, Langtang and Mustang:
Porter - USD$40
Asst trek leader - USD$65
Trek Leader - USD$75
For longer treks like Kanchenjunga, Upper Dolpo, 3 Passes, Manaslu Circuiit:
Porter - USD$55
Asst trek leader - USD$75
Trek Leader - USD$85
For trekking peak trips like Island Peak and Mera Peak:
Porter - USD$65
Trek leader - USD$100
Climbing guide - USD$100
In order to work out the tip you should bring for Nepal, it's necessary to know how many staff and how many clients are in the group. Then, calculate the total tips based on the figures above and divide by the number in the group.
Tips for porters must be paid in Nepali rupees because they cannot get to the city easily to exchange money, while the guides can be paid in dollars or other currencies because they are often in Kathmandu where they can change money.
There are different terms used in Nepal which can be confusing. For clarity, on treks we say Trek Leader which can also be trekking guide, tour guide, sirdar or Sherpa. For climbing peaks we say Climbing Guide which is also often Sherpa (confusingly).
Often a trek leader will also be qualified as a climbing guide and therefore will also climb a peak. Often if the numbers require an extra climbing guide, then one from the nearest village to Island Peak or Mera Peak is hired just for a few days to help with the summit cycle.
Tips in hotels and lodges
Tips are expected at high-end luxury hotels and lodges and moderately priced safari lodges but they are not expected at restaurants and hotels frequented by locals. Most tourist lodges and hotels will have tip boxes at the reception desk and you can tip hotel staff individually, place a tip for all hotel staff in the tip box, or do both. The amount you give, and if you give, is very much dependant on you and there is much less guidance on an exact figure but generally USD$20.00 would be ample.
Walking Safari Tips
If you are on a walking safari in one of the Parks or Reserves with a Park Ranger then you must give this person a tip, recommended tips vary from Park to Park so check with your driver/guide; they will know what an acceptable amount to give is. An average would be USD$30.00.
Individual Tipping Advice
Please do not indulge in individual tip giving to specific members of staff, even if that person has gone beyond the ‘call of duty’ for you. It does cause problems after you have left, with arguments and jealousy. A far better alternative is that you tell our staff about it, and recommend that person to receive a company bonus (which we will pay) or a gift, which could be a new jacket or pair of boots. Don’t forget that we are trying to promote a career path for our staff, giving them training and development and incentives just like we get at work ourselves. So please help us do our job well, and provide feedback on our staff which will help everyone to improve and keep a sense of enthusiasm for the job.
With all of this, we would encourage you to talk about this openly with your trip leader so that it doesn't become a confused or taboo subject.
Nepal Seasons
Nepal Tourist Seasons
Peak seasons for tourism in Nepal are traditionally late March to May and September to November. These periods are either side of the main monsoon period in this area of Asia. The first of these periods is also the most popular period for climbs of Mount Everest.
The weather in the Khumbu valley sees a very large diurnal variation in temperature. On most days you will notice a daily cycle where it is usually clear and cold in the morning with the sun warming the air through the morning and white clouds rolling in soon after lunch. It is important to plan your clothing to account for the large variation in temperatures that you will see at different times of day and also at different stages of the trip.
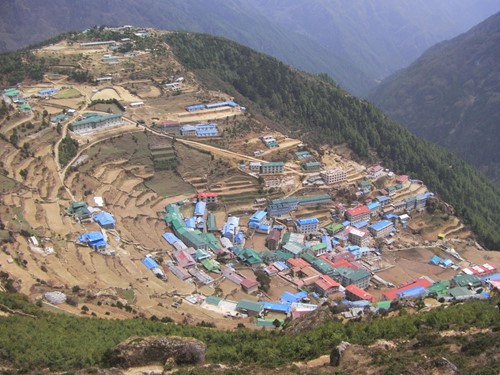
A look at Namche Bazar, a hub in the Khumbu region.
Lower in the hills it may be cool for your morning start but will very quickly be very warm and dry and will leave you sweating and seeking shade. In the early afternoon, you may see a shower of rain so waterproofs always need to be near the top of your bag for rapid deployment. An umbrella may not sound much like Himalayan equipment but it can be extremely useful and is used widely by the locals. There is something nice about intercepting the rain before it lands on you and not being crammed inside a damp hood.
One consistent fact will be the intensity of the UV sunlight. You will need to bring high factor sunblock, a lightweight long sleeved top and a hat that will cover or shade your neck and ears. The sunlight will be intense even when the air temperature is low and the wind is blowing so you may not think to cover up your face. The UV can also give you a headache so you ought therefore to bring good quality polarising sunglasses. For more information regarding kit items, look at our kit advice page.
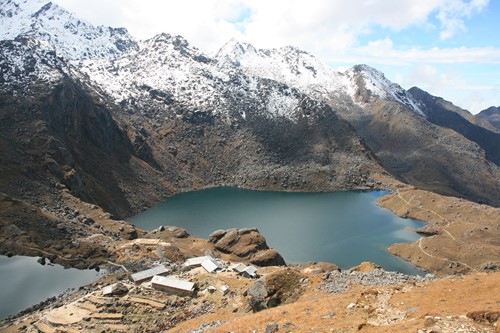
Afternoon clouds roll into the Langtang Valley.
There are various websites offering weather reports for the area. Most will be primarily orientated toward climbers and trekkers higher up on the mountain trails but the general trends can be instructive. For example for Lukla a little way up the valley or Kalapathar even further up the Khumbu valley towards Everest basecamp.
Nepal Charity Project
Nepal Charity Project
Moving Mountains has been carrying out sustained development work in the Solukhumbu region of Nepal for more than ten years, working in partnership with village development committees as part of a long-term strategy to improve the quality of life of the local peoples. The development work has centred on the region from Bumburi to Bupsa a day or two's trek down the valley from the main mountain airstrip of Lukla. This area has remained neglected and underdeveloped and has not seen the large financial injection due to tourism as almost all tourist fly into Lukla and walk North towards Everest and Gokyo.
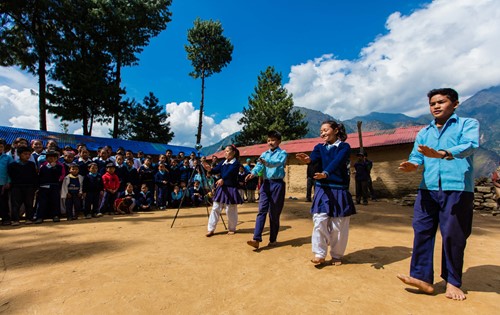
Enjoying a dance performance from one of our local villages.
All of our work is undertaken in partnership with local people fits into a general framework for improving the quality of life and future prospects of the communities. The ultimate aim is to leave flourishing communities that offer a good quality of life for people, preserve and protect local culture and which are self-sustaining and economically and socially viable and vibrant in the long-term. Potential projects are identified and formulated alongside local people. Our work is therefore focussed on providing a kick-start to initiatives for infrastructure, income generation and promoting the education of future generations.
Please find below a brief overview of the projects so far:-
Bumburi
Bumburi – Bumburi is a small village of around seventy households, situated in the beautiful lower Solu-Khumbu region of Nepal. Moving Mountains has been working with Bumburi Village Development Committee since 2004, working alongside local people to identify and implement a range of development projects. In Bumburi you will have the chance to help out on our current project work in the village and to get involved in activities with the children at Bumburi Village School. Projects that we have completed so far include:-
- Construction and commissioning of an 8kW hydro electric and community milling project
- Renovation of the Bumburi Monastery and provision of equipment
- Primary school expansion and renovation
- Provision of primary school computers, stationery and materials
- Funding teachers' salaries
- Clean, piped water supply to 66 houses
- Medical camps offering free medical treatment and medication
- Funding of 'smokeless' eco-friendly cooking stoves
- Assistance for tea cultivation and donation of equipment for eventual processing and sale
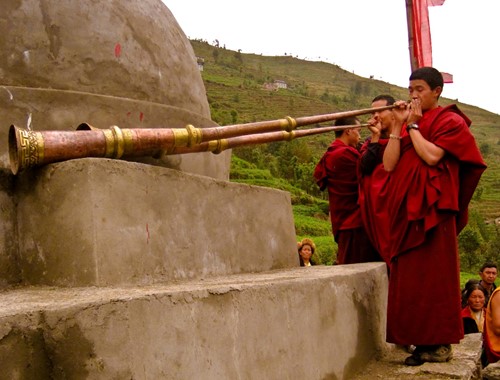
Monks from Bumpuri blow traditional horns.
Bupsa
Bupsa – Bupsa is another of the villages we support in the Solu-Khumbu. We are planning to replicate some of the projects we have successfully carried out in Bumburi such as the eco-friendly cooking stoves and water projects and to continue to expand Bupsa Primary School. You will have the chance to visit all of our projects, including Bupsa's ancient Buddhist Monastery which Moving Mountains has helped the local people to fully renovate and redecorate and where we support a traditional Buddhist education programme for young monks, led by experienced teaching lamas. You'll have the opportunity to visit the monastery and also experience a traditional Buddhist 'puja' ceremony! Projects that we have completed so far include:-
- Primary school expansion and renovation
- Provision of primary school computers, stationery and materials
- Funding teachers' salaries
- Renovation and decoration of the Bupsa Monastery and provision of equipment
- Funding teaching Lama's salary
- Medical camps offering free medical treatment and medication

Volunteers work with local villagers at a medical camp in Bupsa.
All future work will build on these projects and transfer successful projects to other locations where appropriate. Specific future projects may include:-
- Building a proper path to the Bupsa School
- Constructing improved sanitary facilities at Bupsa School
- Building further classrooms at Bupsa School
- Installing a clean water system in Bupsa
- Installing improved cooking stoves in Bupsa
- Building a monk's hostel in Bupsa
- Building further classrooms at Bumburi School
- Building a teachers hostel at Bumburi School
- Building a medical facility in Bumburi
- Building a community hall in Bumburi
- Providing infrastructure in the nearby hamlet of Lildem
Mountaineering Preparation
The Realities of Life on the Mountain
You’re on a mountain for several days, living in a hut with up to 20 other people or sleeping in tents and sharing time and space with a group of like-minded people to summit a high mountain. It’s a fantastic experience in team dynamics and finding out a little about yourself but it can also be frustrating. The smallest things can assume the biggest proportions! Generally, people possess social skills to manage it all very well, but occasionally not. In a very few cases, one person can really dominate a group to its detriment. Diplomacy and tact are necessary tools on a mountain trip!
There are no showers on the mountain sadly, but you can wash in water from a bowl. You will feel rather dirty after just a few days, the dust is everywhere and you may also get a bit sunburned and wind burnt. Make-up is not an option, and nor are hair dryers, and even shaving is rather fraught with difficulty. Thank heavens for the joy of standing on the summit because by the time you come back down there will be only thought on your mind – visiting a shower.
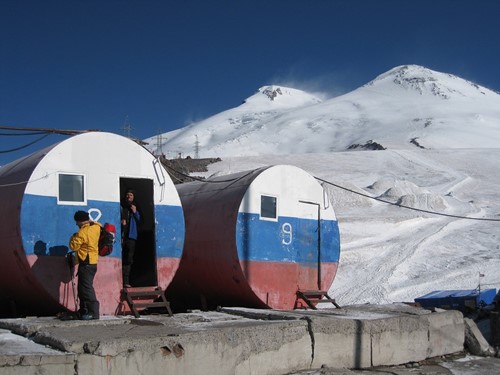
Sometimes close quarters can wear on people who are used to having some privacy. Try to be kind and give people space when they need it, yourself included.
There is no getting away from the fact that the toilets are basic. ‘Long drops’ describe it adequately but does not do justice to the smell and the occasional ‘surprise’ waiting for you, courtesy of the last person who missed. That and having to balance over a small hole in a state of undress, holding a loo roll and keeping a keen ear for a sudden unwanted visitor (did I mention there’s no door?).
Our Staff Have Your Best Interest in Mind
We’re very proud of our staff and you will find them very attentive and courteous, but occasionally they may not understand you or make a mistake. Do be patient with them. English is not their first language and they sometimes find it hard to pick up on our western idiosyncrasies and habits. It is very unlikely that the mistake will have been deliberate.
It goes without saying that for many people climbing a big mountain is the biggest challenge they will have tackled, and thankfully the summit provides ample reward for the effort. But it is hard. Summit day is unrelenting in terms of cold, altitude, mental pressure, emotional stress and physical effort. Some people revel in it, some people have to dig deep. For everyone, it is a bit of an emotional rollercoaster, made all the more poignant because you climb through the night. Dawn will not come too soon, and with it comes a lifting of the spirit. There is no point in saying it’s an easy stroll but when you do get to the top all that hardship seems to dissipate and for the 30 minutes you are on the summit of Europe, the world is right and you could be on top of a hundred Everests.
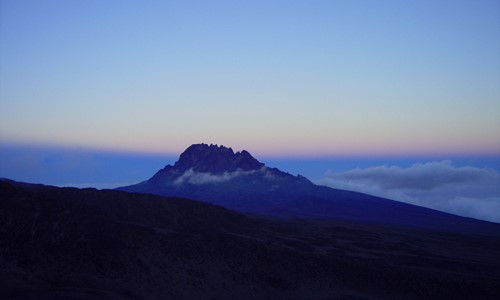
Climbing a trekking peak, like Kilimanjaro, is still a significant effort. Remember to save energy for the descent.
Coming down is as hard as going up. On the one hand, it is easier to descend than to ascend, but the knees are now ready to go home and just rest quietly on a cushion by the fire for about a day, so it seems unfair to remind you that the summit is only halfway! And after the sheer unadulterated atavistic joy at summiting, coming down seems like a chore. Hang in there though; the shower and ceramic toilet is now only 24 hours away.
The Realities of High-Altitude Climbing
On bigger climbs, the steaks seem much higher. More time has been taken to train for the summit. Often times, the higher the peak, the less of a chance of reaching the summit and the more time is spent waiting for a good window. Physiologically this has a huge effect on not only the individual but the group mentality as well. We encourage everyone to keep that in mind and bring up problems in a diplomatic way to be solved as a group. For bigger climbs, it is important to understand group dynamics and be patient. Our staff are well-trained and have your safety and best interest in mind. At times, this may mean there will be no attempt to summit for various reasons.
Existing for many days at high camps, such as this one on Aconcagua, takes its toll both mentally and physically.
We would also like to ask for your feedback after the trip, which is a standard procedure for tour companies, and this will also give you a chance to give us your thoughts about the trip.
Seven Summits
Seven Summits
The 'Seven Summits' is a challenge first proposed and then completed by Richard Bass in 1985. It consists of climbing to the highest point on each of the seven continents:-
- Asia - Mt Everest - 8848m
- South America - Aconcagua - 6962m
- North America - Denali (Mt McKinley) - 6194m
- Africa - Mt Kilimanjaro - 5892m
- Europe - Mt Elbrus - 5642m
- Antarctica - Vinson Massif - 4892m
- Oceania - Carstensz Pyramid - 4884m
Since its original inception, the definition of the Oceana continent altered it slightly to include a peak in Indonesia in lieu of the previous one on mainland Australia. Pat Morrow, closely followed by Reinhold Messner, was the first to complete this second evolution of the challenge. Since then it has been completed in numerous more difficult ways including without supplementary oxygen (Messner) and within seven months (Rob Hall & Gary Ball). It has also been suggested that for an even more difficult mountaineering challenge one could climb the second-highest mountain on each of the continents as this would include more technical ascents such as K2.

The Hilary Step on Mount Everest, the tallest of the Seven Summits.
The Seven Summits remains a significant mountaineering challenge involving expeditions to all corners of the globe and significantly associated logistical and organisational requirements. Adventure Alternative is able to coordinate the logistics and organisation of all seven summits either individually or as part of a fully integrated expedition.
Please contact us for details of the summits not specifically listed elsewhere on the website or for individually tailored itineraries.
Information on the Seven Summits by Gavin Bate
Founder of Adventure Alternative and world-class mountaineer Gavin Bate gives his advice on the Seven Summits.
Mount Kilimanjaro, Tanzania
Mount Kilimanjaro is one of the Seven Summits, the highest peak in Africa, the highest free-standing mountain in the world and one of the most impressive peaks in the world. A volcanic giant alone on the savannah plains, snow-capped and remote, it is as evocative of the continent as the elephant - huge, stately and beautiful. People are irresistibly drawn to see it, while others try to scale its magnificent slopes. For mountain climbers, trekkers and adventurers Kilimanjaro is a perennial favourite, yet in my view, it is often underestimated as a challenge.
I have heard people who return from its high point talk of the "the hardest thing I've ever done". Then there are those who summit virtually on their hands and knees and wear the hardship like a badge of honour, perpetuating the idea that you've only ever climbed Kilimanjaro if you've gone beyond the limits of physical endurance, and perhaps sanity. To any mountaineer or guide, there is only one way to climb a mountain, and that is the safe way and consequently the enjoyable way.
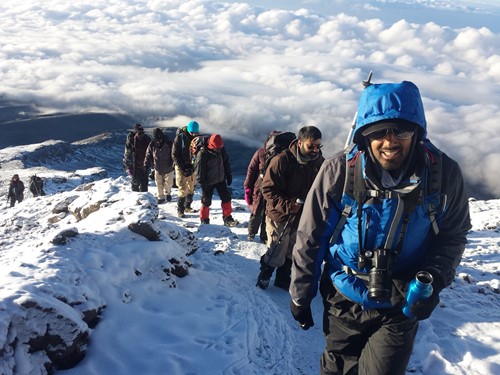
Soaring high above the clouds on Kilimanjaro.
A climb of Kilimanjaro will take you, in a period of around seven days and 30 miles, from equatorial forest to glaciated summit, from one extreme of weather to the other, to the approximate altitude of Camp 1 on Mount Everest. A thousand metres higher than Mont Blanc, Kilimanjaro is not to be sniffed at; and yet people ascend with practically no knowledge of altitude-related illnesses, hardly aware even of the necessity to drink more water. Kilimanjaro is not a technical peak by the ordinary routes, but it does have objective dangers worthy of serious consideration.
I have been fortunate to climb Kilimanjaro many times. In 2005 I ascended the Western Breach for the 35th time and my total tally is currently 52. I find it stimulating and exciting, and never boring. Running my own operation means I employ the same staff, and they are all my friends now so that makes it all the more fun. I love listening to the life stories of clients who come with me, and I think it is vital in my position to also to teach people about mountains and encourage progression onto bigger hills. For lots of people, Kilimanjaro is their Everest, and I respect that ambition. If I ever forgot what it was like to summit Kilimanjaro for the first time then I should give up my job!
Having summited the mountain - safely and enjoyably - people's thoughts turn to the other Seven Summits (the highest peaks on each of the seven continents, an expedition I completed non-stop in the Millennium Year; so I speak from experience in saying that Kilimanjaro is the easiest and certainly the most popular.
For many people, Kilimanjaro is the first rung on a ladder that could feasibly end up on top of Everest itself. Knowledge is important though and like any mountaineering challenge, Kilimanjaro should not be approached with complacency. My' briefing' for my teams never really ends until we are back off the mountain safe and sound. You can never learn too much.
Mount Elbrus, the Tallest Peak in Europe
Elbrus in Russia is probably the obvious follow-on from Kilimanjaro, lower at just over 18,000 feet but significantly colder. It involves a non-technical ascent in crampons and the summit plateau can be a nightmare to navigate in poor visibility. The area is beautiful though, deep in the Caucasus, redolent of the Alps fifty years ago.
A team working its way up the south side of Mount Elbrus.
The Tallest Peak in the Americas, Aconcagua
Aconcagua in South America is not especially technical by the normal route but suffers from the infamous Vente Blanco, the ‘white wind’ which is desperate to get caught in, plus of course, it is 7000 metres high and the effects of altitude are more cumulatively deleterious after about 6500 metres. It is also a very physical expedition with carries to camps to be made and a longer period spent acclimatising. It is important to be very conversant with camping for this trip, there is a far higher level of self-preservation needed.
Denali in Alaska
Denali, the highest in North America is a big, serious expedition in a remote, cold and unforgiving corner of Alaska. A mistake on this mountain may cost dearly. I once was tent bound here for a full seven days in a storm, which is actually quite a common occurrence. But the long-term commitment of being up in the high Alaskan range, hauling 60kg sleds every day and really having to manage yourself properly is very exciting and fulfilling. No space for ego here, it is all about clever judgement and self-preservation. Cold and often very icy, even the normal route is a proper undertaking on the heavily glaciated terrain. Summit day is long, cold and unforgiving with a perfect summit to look forward at the top of the aptly named Pig Hill.
Indonesia's Carstensz Pyramid
The remote Carstenz Pyramid in Indonesia is the only one that requires rock-climbing, 4000 feet of sharp granite rising dramatically out of the impenetrable jungle. Difficult to reach and requiring average rock skills to scale it, most people opt for the much easier Kosciusko in Australia (if you believe that Australia is a continent) which can actually be ascended in a car for the more sedentary adventurer. When you listen to people discuss the Seven Summits, check to see if they have climbed Carstenz, it is much harder to the climb and more difficult to get to.
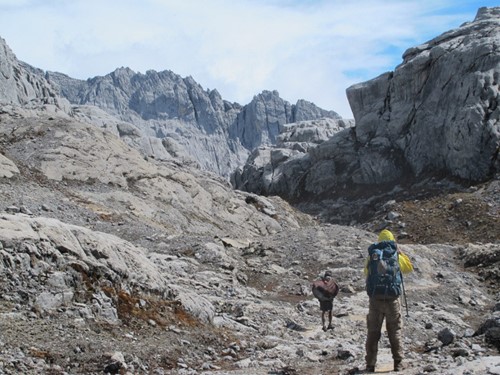
A rocky beast, Carstenz Pyramid looms above the Indonesian jungle.
The Tallest Mountain in the World, Mount Everest
Everest outranks them all simply in terms of altitude and sheer commitment to going above 8000 metres, even though the normal route is not especially technical. Everest also has some serious objective dangers though, like the Icefall, and weather that can certainly add spice to the day. I have been fortunate to do it six times and three times without bottled oxygen or Sherpa support but I faced unforeseen challenges just a few hundred metres from the top five times before finally getting to the top.It's a nine-week trip and there is the choice of south or north side, with our without Sherpa support, and with or without oxygen.
Mt Vinson in Antarctica
That leaves Mt Vinson in Antarctica which is a stunning and utterly memorable expedition for its location if you have about $36,000 to spare. It's not technically too difficult, but woe betides if you leave your gloves behind. The actual climb takes only five days but you can spend days waiting for the weather to fly into Base Camp. However, time in Antarctica is an experience never to be forgotten.
Safari food & lodging
At Adventure Alternative we offer an exciting and adventurous camping experience for families, honeymooners, individuals, small teams, schools and other interest groups. We have the experience and expertise to provide you with the perfect adventure holiday in some of the best safari destinations in East Africa. The basic safari package that we offer can be described as follows:
What is sleeping like on a Safari?
The camping spots that we choose to pitch our tents vary depending on the itinerary and are individually selected based on a number of factors; including tourist attractions nearby, quality of facilities provided, scenic value, closeness to National Parks, security and cleanliness of camp/quality of staff. We have long-term connections with all camps and can guarantee an authentic and comfortable experience in all locations.
You will be sleeping in large walk-in mobile safari tents with mattresses provided and mosquito nets built into the doors and windows, all tents are imported from Nepal and are unmatched in quality, space and comfort levels.
What are Camping Facilities Like on Safari?
At the designated camping grounds, usually lush green lawns, toilets and showers are provided. Most camping spots have flush toilets although in remote locations (Eg, Suswa or Samburu) it is more than likely going to be the long drop variety. The showers are mostly cold, which you’ll find to be quite refreshing after a long safari in under the hot African sun.
Camp lights are provided and your mobile phones, cameras, etc can be charged in the vehicles through the cigarette adaptors, or at charging points within the camps.
What You Eat on Safari and Where
Evening meals and breakfasts tend to be prepared in camp by our qualified cooks and you can choose to eat on the porch of the tent or under the stars. We will provide mobile safari chairs and tables. Lunches are usually on the go and tend to be packed lunches.
All meals are a balanced diet which will be discussed before starting a safari (beef and chicken are favourites although lamb, goat, fish and vegetarian options can also be discussed with the staff during the safari brief) and although rice, potato or spaghetti dishes are the most popular you’ll have the opportunity to try a couple of local delicacies too, no trip to East Africa would be complete without sampling Ugali or Chapati.
There’ll be no shortage of fresh vegetables and fruits that are in season and are served at all meal times. A typical breakfast meal includes bread, sausages, eggs, fruit and juices as well as tea/coffee/hot chocolate. We provide bottled drinking during the entire trip.
We are also able to accommodate special dietary requirements at no extra cost although we would advise that you let us know in advance.
Accommodation Upgrade Options on Safari
Generally, the mid-range accommodation on safari will be in cottages, banda’s or permanent tented camps and meals will be provided by our safari staff. However, there are half-board and full-board options available and you will find that this mid-range accommodation provides a number of basic services as well, including bars and restaurants, better quality toilets and shower facilities, more access to electricity and laundry services.
Top end accommodation provides a high degree of luxury in terms of attention to detail and facilities which can include jacuzzis, spa and massage treatments, swimming pools, excellent bars overlooking watering holes and rivers, elegant themed rooms and lobbies, laundry services, alfresco dining, balloon safaris as well as other intimate unique wildlife encounters. However, you can still make use of these services at the lodges if you are on a camping safari, just be prepared to pay for it!
In Nairobi, we have our own Guest House which you can make use of or we can direct you to one of Nairobi’s many hotels or travellers camps.
Kenya preparation
Kenya preparation
Check out this guide before heading to Kenya. See even more detailed information on our Kenya Country Information Pages.
Flights to and from Kenya
There are three international airports in and out of Kenya: Jomo Kenyatta International Airport in Nairobi, Moi International Airport in Mombasa and Moi International Airport in Eldoret. However, the most convenient point of entry into Kenya is via the Jomo Kenyatta International Airport (JRO) in Nairobi.
Kenya Airways (KQ) and British Airways (BA) offer daily direct flights from London Heathrow to Nairobi. Flight times take approximately 8 hours 30 minutes.
There are also other flights to Kenya but with stop-overs and connections en route which include: Ethiopian Airlines, KLM Air France, Qatar and Emirates. Generally, all flights take at least 9-11 hours.
Kenya offers some of the world's most beautiful scenery and people.
We can give you advice and help reserve the seats for group flight bookings but we cannot sell them to you because we are not a ticketing agency with ATOL (Air Traffic Operators License). If you are traveling as a small group is worth getting together and all booking tickets at the same time to ensure that you are all on the same flight.
If you do want to get someone else to do the legwork of finding the best deal then you may choose to use an agent. An agent that we recommend is dialaflight.com. They handle our own staff flights and they have a proven track record. You can reach them on aa@dialaflight.co.uk or 020-8935-9040 and tell her that you are an Adventure Alternative client.
Kenya Visa
Visas are now purchased through an e-visa portal for UK citizens prior to flying. You are advised to do this some time prior to your flight.
Baggage
Do check the baggage allowance for your particular airline and flight. Also, be sure to mark your bags clearly with your own name and address and the contacts for Adventure Alternative Kenya:
Adventure Alternative Kenya
P.O Box 9388,
Code 00200 Nairobi Kenya,
Telephone Number 020 386 4420 / 0720 859681

Mount Kenya is a spectacular peak surrounded by unique flora and fauna.
Electrical
In most parts of Kenya they use the same 3-pin (type G) plugs as in the UK. The vast majority of UK electrical devices should charge and work fine. However, the electrical supply in Kenya is not as closely controlled or as reliable as the UK. If you have any very expensive equipment then please be aware that an electrical surge or voltage/frequency change could potentially affect it. An expert might be able to advise on surge protectors if you have any concerns.
Vaccinations and Travel Health While in Kenya
You will need to visit your GP prior to your trip to discuss vaccinations and prophylactic medications; we recommend asking about tetanus and hepatitis A & B. You do not need a yellow fever certificate to enter Kenya unless you are entering from another country where yellow fever is prevalent. You are advised to also speak to your healthcare professional about anti-malaria medications.
We have a contract with Interhealth in London which can provide expert travel advice and guidance on travel in any country. Benefits include:
- Free travel consultations and health advice with a medical team to discuss pre-travel requirements such as malaria prevention and vaccination requirements. Tel: 020 7902 9033- 2-3pm Mon-Fri or doctors@interhealth.org.uk
- Access to our own Online Travel Health Advice Centre
- Urgent medical advice – for serious health issues, available 24 hours a day. emergency phone line: 079 7325 0026
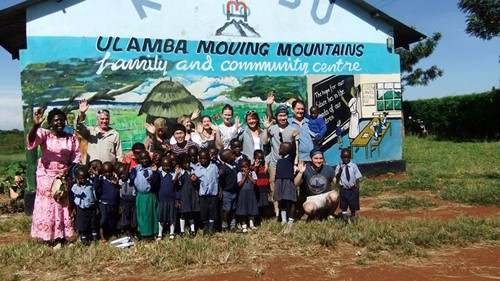
Volunteer and change lives in Kenya
Insurance for Travel to Kenya
You will need a policy that covers the activities and locations on your trip. Remember to notify the insurer of all the areas that you will travel to and that you may need an upgraded policy for volunteering work and trekking to high altitude if you are climbing Mt Kenya for example. There are plenty of companies to choose from, such as DogTag, Campbell Irvine, Snowcard, the British Mountaineering Council or STA Travel.
We encourage people to buy insurance as soon as you have booked your flight and trip, in case there is a need for cancellation. Do also take your papers with you and make sure your teammates and group leader know where it is, in case somebody else needs to make a phone call for you.
Money in Kenya
The local currency in Kenya is the Kenyan Shilling. You can check the current exchange rate at xe.com. You can obtain Shilling in the UK before you travel or at the airport on arrival. There are ATMs in larger towns which take Visa and Mastercard, and there are banks with forex facilities. Be aware that the exchange rate offered at the airport is likely to be unfavourable. Do also remember to have small denomination notes whenever possible because many local places will not be able to offer change for large notes. You can take sterling, euro or dollars, and change it easily. If you are travelling from Northern Ireland or Scotland then remember to bring Bank of England sterling notes, you will probably have trouble changing regional notes.
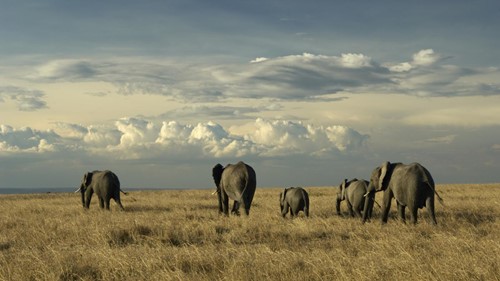
Experience the wonders of the animal kingdom on safari in Kenya.
Research
It can add a lot to your trip if you have done a bit of background research before you travel. This is especially true of the history, cultures, flora and fauna. Knowing a few polite words and phrases in Swahili will help you to show affinity with your hosts. If you come across interesting information that you think other travellers to Kenya would be interested in then please do contact us so that we can share it. Equally, if there are any issues to which you cannot find an answer please do contact us for further advice.
Arrival in Kenya
On arrival at the airport, you will be met by members of Adventure Alternative Kenya staff. They will be holding an Adventure Alternative name board. You will then be taken to your accommodation, where you will have time to freshen up and relax after which you will be introduced to our team and brief you on your staff and trip itinerary. The briefing is very relaxed and will cover everything that you will need to know, there will be time for questions and introductions.
Tanzania National Parks
Below are some of the favourite parks in the northeast region of Tanzania for safaris before or after a climb of Mount Kilimanjaro. We organise 4D/3N packages to Ngorongoro, Tarangire and Manyara, as well as longer tours into the Serengeti.
Serengeti National Park
Location: Northern Tanzania, 208 miles from Arusha, stretching north to Kenya and bordering Lake Victoria to the west.
History: Tanzania's oldest and most popular national park, also a world heritage site and recently proclaimed a 7th worldwide wonder, the Serengeti is famed for its annual migration, when some six million hooves pound the open plains, as more than 200,000 zebras and 300,000 Thomson's gazelle join the wildebeest’s trek for fresh grazing. Yet even when the migration is quiet, the Serengeti offers arguably the most scintillating game-viewing in Africa: great herds of buffalo, smaller groups of elephant and giraffe, and thousands upon thousands of eland, topi, kongoni, impala and Grant’s gazelle.
Size: 14’763 sq km.
Geography / Habitats: The Serengeti is the best known and greatest wildlife sanctuary in the world. The name comes from the Maasai 'siringet' which means 'endless plains', and the Serengeti is just that. The Serengeti's terrain is varied: the vast treeless central Serengeti Plains, savannah dotted with acacia trees, magnificent rock outcrops called kopjes, reverie bush, thick scrub to streams, rivers, small swamps and lakes. These features give the Serengeti Park a fascinating variety of habitats. Survey estimates indicate more than 3000 lions, 1,600,000 wilder beasts and 500,000 zebras. There are more than 400 bird species.
Animals: Wildebeast (circa 1 million), Lions, Elephant, Rhino, Gazelle, Cheetah, Buffalo, Warthog, Flamingo, Waterfowl, Waterbucks, Giraffe, Hippo, Impala, Zebra, Dik-dik, Leopard, Hyena and over 400 bird species have been recorded from Ostrich to the secretary bird. The list goes on and on….
Of interest: Hot air balloon safaris, walking safari, picnics, game drives, bush lunch/dinner can be arranged with hotels/tour operators. Maasai rock paintings and musical rocks.
Accommodation Options: Lodges, fixed tented camp and camping.
Arusha National Park
Location: Northern Tanzania, northeast of Arusha town.
History: Established in 1960 and known as Ngurdoto Crater National Park until 1967. Arusha’s name comes from the local people known as the Waarusha. Managed by the Tanzanian National Parks.
Size: 137 sq km
Geography / Habitats: Arusha National Park is often overlooked by tourists due to the closeness of the Serengeti, Ngorongoro, Lake Manyara and Tarangire however due to this the crowds are low and the park offers a perfect introduction or a chilled last day to a longer safari. The other attraction of the park is being able to stretch your legs as you embark on a walking safari. The Park is very diverse and dominated by Tanzania’s 2nd highest peak Mt Meru. It has a lot of montane forests, the Ngurdoto Crater (a mini Ngorongoro Crater), cliffs, marshland, rolling grassy hills and the seven Momela Lakes.
Animals: Blue Monkeys, Colobus Monkeys, Buffalo, Warthog, Flamingo, Waterfowl, Waterbucks, Giraffe, Zebra, Dik-dik, Elephant (rare), Leopard, Hyena.
Of interest: Walking Safaris, fantastic views of Kilimanjaro and Mt Meru, low crowd levels and beautiful scenery.
Accommodation Options: Lodges, local hotel or Camping.
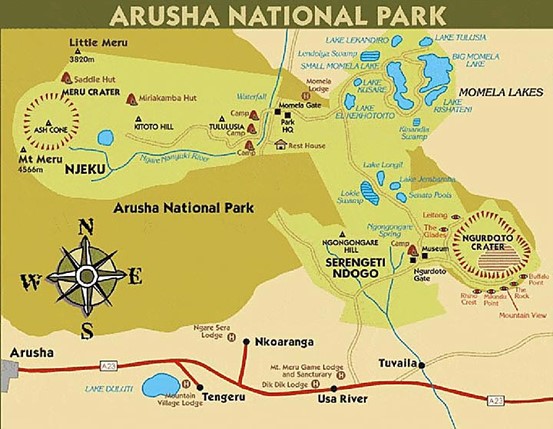
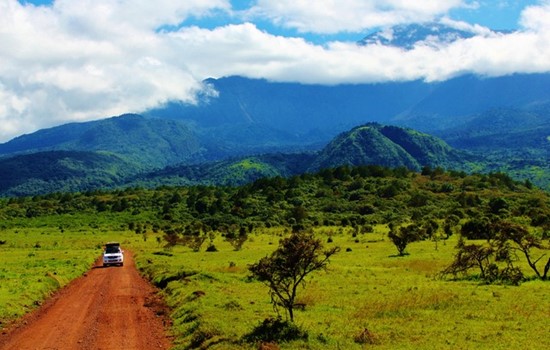
Lake Manyara National Park
Location: Northern Tanzania, 1 ½ hours west of Arusha town.
History: The area around Lake Manyara was once famous has a hunters heaven but thankfully the park is now established, protected and managed by the Tanzanian Park Authorities.
Size: 330 sq km of which 200 sq km is Lake when water levels are high.
Geography / Habitats: Stretching for 50km along the base of the rusty-gold 600-metre high Rift Valley escarpment, Lake Manyara is a scenic gem, with a setting extolled by Ernest Hemingway as “the loveliest I had seen in Africa”. The compact game-viewing circuit through Manyara offers a virtual microcosm of the Tanzanian safari experience. The entrance to the park is a lush forest with many ancient mahogany trees and many monkeys. This then opens up to a large grassy floodplain and the lake itself with a stunning backdrop of jagged blue volcanic peaks that rise from the endless Maasai Steppes. Inland of the floodplain, a narrow belt of acacia woodland is the favoured haunt of Manyara’s legendary tree-climbing lions and impressively tusked elephants.
Animals: Wildebeast, the legendary tree climbing Lions, Elephant, Buffalo, Warthog, Flamingo, Waterfowl, Waterbucks, Giraffe, Hippo, Impala, Zebra, Dik-dik, Leopard, Hyena and over 400 bird species have been recorded.
Of interest: Game drives, night game drives, canoeing when the water levels is sufficiently high. Cultural tours, picnics, bush lunch/dinner, mountain bike tours, abseiling and forest walks on the escarpment outside the park.
Accommodation Options: Lodges, local hotels, fixed tented camp and camping.
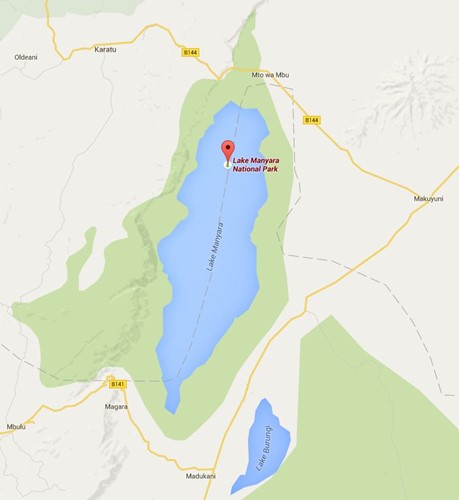
Tarangire National Park
Location: Northern Tanzania, 75 miles from Arusha.
History: The National park takes its name from the Tarangire River, which crosses it lengthwise, giving support to a large wildlife population even during the dry season. During this season, between June and October, thousands of animals including wildebeests, zebras, elands, elephants, buffaloes, hartebeests and more migrate from the dry Maasai steppe to the Tarangire River.
Size: 2850 sq km.
Geography / Habitats: It is the sheer vast number of baobabs that first capture the eye as you enter Tarangire National Park. The gently rolling countryside is dotted with these majestic trees, which seem to dwarf the animals that feed beneath them. Lake Burungi area is in the north-western part of the park and a drive in this area will offer you fascinating opportunities to watch large herds of flamingos and other species of birds feeding on aquatic organisms in Lake Burungi. This area also contains an isolated population of Oryx. The landscape and vegetation are incredibly diverse with a mix that is not found anywhere else in the northern safari circuit.
Animals: Wildebeest, Lions, Elephant, Rhino, Gazelle, Cheetah, Buffalo, Warthog, hartebeest, long-necked gerenuk, Impala, Zebra, Dik-dik, Leopard, Hyena and fringe-eared oryx. The swamps are the focus for 550 bird varieties, the most breeding species in one habitat anywhere in the world. Tarangire's pythons climb trees, as do its lions and leopards, lounging in the branches where the fruit of the sausage tree disguises the twitch of a tail.
Of interest: Guided walking safaris. Day trips to Maasai and Barabaig villages, as well as to the hundreds of ancient rock paintings in the vicinity of Kolo on the Dodoma Road
Accommodation Options: Lodges, fixed tented camp, camping and local options outside of the Park.
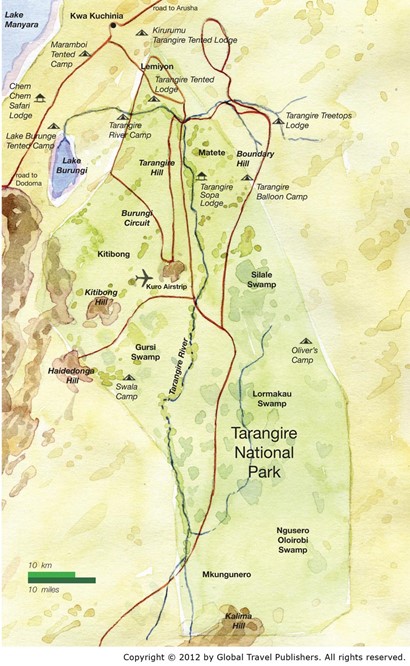
Ngorongoro Crater and Conservation Area
Location: Northern Tanzania, 110 miles west of Arusha.
History: The Ngorongoro Conservation Area is a conservation area and a UNESCO World Heritage Site situated in the Crater Highlands area of Tanzania. The Ngorongoro area originally was part of the Serengeti National Park when it was created by the British in 1951. Maasai continued to live in the newly created park until 1959 when repeated conflicts with park authorities over land use led the British to evict them to the newly declared Ngorongoro Conservation Area. The Ngorongoro Conservation Area Authority is the governing body regulating use and access to the NCA. Based on fossil evidence found at the Olduvai Gorge, it is known that various hominid species have occupied the area for three million years.
Size: 8288 sq km.
Geography / Habitats: Land in the conservation area is multi-use; it is unique in Tanzania as the only conservation area providing protection status for wildlife whilst also allowing human habitation. Land use is controlled to prevent negative effects on the wildlife population. For example, cultivation is prohibited at all but subsistence levels. The Conservation Area is part of the Serengeti ecosystem, and to the northwest, it joins the Serengeti National Park and is contiguous with the southern Serengeti plains. The south and west of the area are volcanic highlands, including the famous Ngorongoro Crater and the lesser known Empakai. The southern and eastern boundaries are approximately defined by the rim of the Great Rift Valley wall, which also prevents animal migration in these directions.
Animals: A population of approximately 25,000 large animals with reputedly the highest density of mammalian predators in Africa lives in the region including the Black Rhinoceros, Hippopotamus, Wildebeest, Zebra, Eland, Grant's and Thompson's Gazelles, Lions, Leopards, Elephants, Wildebeest, Hartebeest, Spotted Hyenas, Jackals, Cheetahs, African Wild Dog and Buffalo. In summer, enormous numbers of Serengeti migrants pass through the plains of the reserve, including 1.7 million Wildebeest, 260,000 Zebra, and 470,000 Gazelles. Waterbuck occurs mainly near Lerai Forest and Servals can be found on the plains to the west.
Of interest: No trip to the Conservation is complete without venturing into the Ngorongoro Crater!
Accommodation Options: Lodges, fixed tented camp, camping and local options outside of the Park.

Travel Insurance
Whatever your trip you will need to take out travel insurance appropriate to the countries you are visiting and what you will be doing when you get there. It is important to take out your policy as soon after booking your trip as possible. If you need to cancel for a legitimate reason then your trip costs and flight costs will be covered.
Travel insurance policies are generally sold for an individual trip or as annual cover. Some companies sell an annual travel insurance policy as part of a package which might include house and car insurance, but in our experience those travel polices may not cover the sorts of activities that we provide like trekking at altitude and mountain climbing, but they will cover holidays like wildlife safaris. Do always check that what you buy covers what you are planning to do. This page offers some advice on what to check for.
Coronavirus update: since the global pandemic and the introduction of travel corridors and advisories against travel by the FCO in the UK and other Governments, insurance companies have adjusted their policies and some are offering cover for travel to countries which are on the FCO list for 'all but essential travel' and there are some offering cover for cancellations due to covid-19.
Staysure for example covers for travel in places that are advised against travel, as does Battleface. But do check the small print for terms; Battlesure for example does not provide covid cover if you are over 59. Global Travel Insurance (GTI) also provides covid cover including cancellation cover but only for people of a certain age. The tricky one is cover for cancellations due to FCO advice but insurance companies are adapting to the new market and there may soon be changes.
Make sure you are covered for emergency rescues for whatever activity you participate in, at any given altitude.
Trip Cancellation Coverage
An important aspect of travel insurance is cancellation coverage. If for whatever reason you are unable to travel then you are able to claim back the costs of your bookings and flights, as long as your reason is listed in the policy. It's best to get cover in place as soon as possible so that you are covered for cancellation immediately.
Regional and Activity Coverage
Check the UK Government FCO pages (or your own country's travel advice website) for latest information on where you are going because some places are listed as 'all but essential travel' which might impact on an insurance policy's validity. Some trips like climbing Mount Elbrus in the Caucasus require specialist insurers like Campbell Irvine.
Insurance companies have different ways of defining trekking and climbing. Some will list conditions based on just the altitude, others will have specific comments on guided or unguided, and some will mention the use of ropes. There is a big variance in what the small print says.
The vast majority of our trips are guided treks and mountain climbs which are non-technical, with altitudes of around 4000 - 6000 metres. For some of them we ask that people carry crampons and an ice axe which is standard for moving on snow but they are not technical climbs, for example Mount Elbrus. Some require a harness with slings and karabiners in order to clip onto a fixed line, which again is not the same as technical climbing at all, for example Island Peak in Nepal. A few require you moving on a man rope with a guide through glaciated terrain, which would be classed as more risky but it depends on many factors such as gradient and exposure. For example Mera Peak in Nepal requires a man rope to walk on, but it's not a heavily crevassed route and although high, it's not a steep gradient. Whereas the Bolivian peaks of Pequeno Alpamayo and Huayna Potosi are much steeper routes and require you to be on a climbing rope and to use crampons and ice axe.
Many non-specialist general adventure insurance companies are not specialists in this type of travel and therefore the parameters of a policy might be very generic. Others are more specialist and are likely to be more specific in how they determine their cover, in fact many now promote a policy for a specific peak. For example True Traveller offers a number of adventure 'packs' which they cover for quite specific trips, for example climbing Kilimanjaro which is nearly 6000m in height but has no technical requirements, or trekking to Everest Base Camp which is a walk to 5500 metres.
If you're on one of our other holidays - safaris, holidays to Borneo - then from an insurance point of view you fall into the more standard 'holiday maker' category. Many people use policies they find online such as ones from the post office or sports cover direct.
For some UK based companies also check out World Nomads, Insure and Go, JS Insurance, Covered2Go and also the British Mountaineering Council or the Austrian Alpine Club.
Medical and repatriation cover
All travel policies provide cover to get you home in the event of an accident, and that should include from the point of incident all the way back to your house. It should cover any medical expenses incurred, air ambulances, and also the costs of a rescue.
For all of our treks, climbs or holidays in wilderness areas you will need to be covered for rescue potentially by helicopter, especially on treks in Nepal and now on Kilimanjaro. The costs of this can be high and it is important you check the maximum value which is covered under this clause. On other trips like treks in Morocco and treks in Kenya there are no helicopter services so any rescue would have to be done by the team of guides and local people available.
In Nepal there is a very good Helicopter Search & Rescue service, but the highest cost (for example from Everest Base Camp) is $10,000 per person. However lots of people use horses to get back down the trails, which cost about $120 per day, if they are feeling sick. For most of the treks it's fairly easy to get to a nearby village and call in a helicopter or use a horse. For mountain climbs in Nepal like Island Peak and Mera Peak, a rescue would involve being assisted off the slopes by the staff down to the nearest village where a helicopter could be called in. For the bigger peaks like Mount Everest, there is a helicopter pad at base camp for going to the higher camps but your policy may not cover this eventuality.
On Kilimanjaro there is a helicopter rescue service which costs around $5000, which will pick up casualties as high as 4600 metres at Barafu Camp elevation and bring them down to a high altitude clinic in Moshi. Otherwise, it's actually very easy for our staff to get people off the mountain and down to lower levels quite rapidly, just by having two people either side of you. There's no cost to that of course, but we also pay a rescue fee to the National Park which allows us to access a jeep which can come as high as about 3200 metres to the Shira Plateau. Some routes like the Rongai route are more remote and don't have any vehicle access like that.
In Borneo a helicopter can be used at a cost of around $2000 per hour, which is useful for trips into remote areas like the Penan villages, but generally any evacuation would be quite easily managed using road and river transport and then a wide network of small aircraft.
But on Aconcagua a helicopter service from base camp to the park gate is included in the cost of the permit. Any rescue high up on the mountain would be self-managed and assisted by the mountain Rangers, depending on weather and accessibility. This is a mountain where the level of self-sufficiency is much higher.
On Elbrus there is no helicopter service on the mountain but there is a very good snow machine and snowcat service which can get people quickly off the mountain on the south side up to 5100 metres. The cost of this is about $600 for the whole snowcat, and it's paid in cash to the driver. The machine will take you straight to the huts or to the chair lift and cable car off the mountain and down to the village. Like many purchases in Russia it's cash only and the driver would not provide a receipt for an insurance claim. We could help by confirming the payment of the money but some insurance companies may not accept that sort of evidence. There's no such facility on the north side though, any rescue would be self-managed and then the casualty taken by 4x4 back to the city of Pyatigorsk.
It is important to check with us the levels of cost that would be incurred and to ensure you are properly covered. In many places - especially high mountains - an evacuation is handled by the staff and the team because there's no access for a helicopter, and that is an acceptance that you must take for these types of trips. Sometimes the weather is too bad, or visibility is low, and it's impossible to bring in a helicopter. An accident would require the team of staff and everyone to work together to bring a casualty down to the nearest safe place. On a trek this is often not a big issue but on a mountain climb
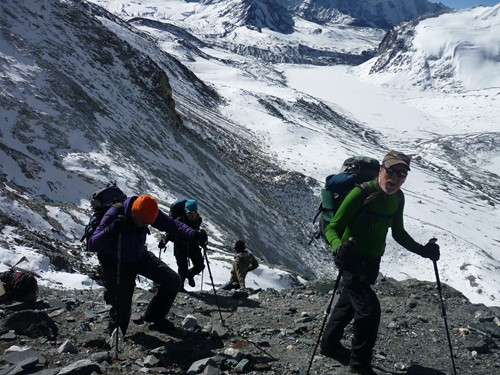
Insurance policies do cover for emergency repatriation and also helicopter rescue but in many places there are no helicopter facilities and any rescue would be managed by the staff and the team, for example the north route on Elbrus. It is also important to say that helicopters won't fly in bad weather or at night.
You need to make sure that you fill out the medical declaration accurately and disclose any conditions or history that may be at all relevant however small. In the unlikely situation where you need to make a claim any undisclosed issues that may have affected your risk may cause your policy to be invalid and can quickly rack up huge medical, rescue and repatriation costs.
Contacting your insurance company
It is more commonly true that you won't be able to contact your insurance company to tell them of an accident or a need to open a clailm file, until you get off the mountain or are back in some sort of civilisation. It's important to do this as soon as possible and give them your information so they open a file and can give you a reference. You will need the policy number plus the date when you bought the insurance and your personal details.
In some places like Nepal you can get a signal and the insurance company will often work directly with the helicopter company to arrange a pick up. In other places or situations this is not always possible and in that case you are required to pay yourself with a credit card and claim later. Whatever the case it will be important to keep any documentation, especially a medical report evidencing your condition or accident and including dates.
If you have any concerns or queries regarding your insurance cover you should raise them specifically, in writing, with the insurance provider.
There are also providers who specialise in cover for people with existing medical conditions. Some general providers may either not provide cover or offer much higher premiums. If you do have specific requirements or conditions it is worth contacting companies such as All Clear Travel.
Many of our clients use: https://www.sportscoverdirect.com/sports-travel-insurance/?promoid=191300

Trekking boot advice
Choosing the best hiking boots
On all treks and on some trekking peaks the most appropriate form of footwear will be sturdy walking boots. Among the advantages of boots over shoes are that they provide support to your ankle on uneven terrain, allow the use of their stiff edges on steep or slippery terrain and also that they resist the ingress of water, dust and stones over their top edge.
The decision on which ones to buy needs to be informed by many factors such as how often you are likely to use them, in what terrain you are likely to use them, the shape of your foot and inevitably the price. However, one factor that should never be compromised on is the comfort and fit of the boot. It will not be long into a trip with ill-fitting boots that you will be aware of their shortcomings.
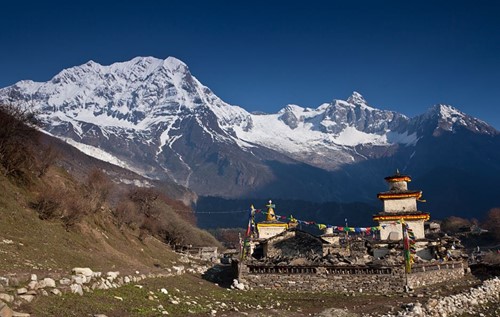
Climb high with the right footwear.
In boot design and construction there are many factors to look at;
- a fully integral 'sewn-in' tongue is essential for waterproofing
- gore-tex or equivalent lining for waterproofing
- a tough 'toe-box' to protect your toes
- protective rubber rands around the toe and sometimes heel will help your boots to last
- cushioning on the sole to help reduce sore feet at the end of the day
- robust lace loops
- stitching lines are natural weak points so not too many of these and not in locations where they will wear
- a stiff sole which has a shank running through it, most boots use Vibram soles for this support
You may also consider changing the footbeds or adding an insole, especially if you have a high arch. You will, of course, need to make this decision at the same time as buying the boots in order to get the fit correct.
To stand the best chance of getting the best hiking boots that fit you well you need to visit a shop with a range of manufacturers and models, certain boot brands commonly produce boots of a certain shape, ie. a narrower or wider fit. If your feet are of a certain shape it is worth identifying the most appropriate manufacturer for you.
In addition, many of the more specialist retailers will have staff who are trained to take a number of measurements of your foot in order to advise the best hiking boots for you. Take your time and try a number of boots and don't feel pressured to buy a boot that doesn't feel right, you will almost certainly regret it.

Robust footwear is the key to a successful trek or summit.
When fitting your boots, remember to wear the socks that you would wear when walking. You need to ensure that when walking you do not experience any 'heel-lift' inside the boot and that there is sufficient space around your toes for you to wiggle them. Any tighter than this and it is likely that they will either rub and give you blisters or be so constricting as to restrict the blood supply and lead to cold toes.
Once you have decided on the best hiking boot for you, you need to wear it in. Most stores will allow you to return or exchange a boot as long as it shows no signs of wear and has not been used outside. Therefore it may be worth plodding around the house and climbing the stairs a few times to make double sure they are right.
Once you are happy you need to wear the boots as much as possible, preferably on longer day trips on similar terrain to the actual trip. This can also help to wear-in your feet as much as the boots! You can then try out some different strategies for avoiding discomfort such as blisters. This may include taping your heels as a preventative measure or using liner socks.
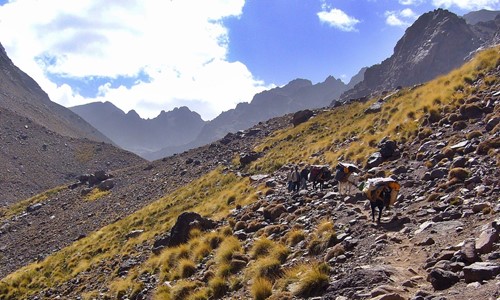
Rocky trails require sturdy footwear.
Below the snowline, it is possible to use B0 graded hiking boots as described above. Make sure you opt for a boot with stiff shank or Vibram sole that provides some good support to the foot but does still allow some bend. Popular trips which we offer where a good quality hiking boot is necessary include Mount Elbrus acclimatisation hikes, Mount Kilimanjaro, Mount Kenya and the treks in Nepal and Morocco, to name a few.
However, on mountaineering expeditions above the snowline, where crampons will be used, it is necessary to have boots that are graded as B1 or higher depending on the altitude and conditions. The higher you go and the steeper and more technical the ground, the more you move into mountain boot territory. Hiking boots are okay to use for short sections of snow patches, and it would be a good idea to take a pair of mini spikes for these sections.
Mountain boots and crampons
Mountain boot and crampon guide
The following information is intended as a general introduction to the types of mountain boots available and their properties. If you are at all unsure which type of boot is appropriate for the trip that you are coming on then please do speak to us before buying or renting any kit.
What are crampons?
Crampons are accessories that attach to your boots and are used for hiking. Most crampons require a special type of boot, or mountaineering boot. They do not make crampons for hiking boots (these are a totally different type of traction device). The reason is because crampons require a stiff-shanked boot in order to stay attached to your boot safely.
Boot grading for crampons
Boots for any climb over snow and ice need to be of a type that will allow fitting of crampons. Boots are graded according to their compatibility with different types of crampon.

Boots graded B0 are not suitable for use with crampons. The sole is not stiff enough to prevent them moving differently to the crampon with the result that the crampons will move around and may come off altogether. They are also not very stiff in their upper section and may not provide enough support to your ankle or enough rigidity to allow 'edging' of the boot in snow when not using crampons.
Boots Graded B1 are suitable for use with strap-on C1 crampons for use on moderate snow and ice conditions. They have fairly stiff soles so that the crampon does not loosen or come off as the boot flexes during walking. They are also fairly stiff on the upper part so that they provide good ankle support and allow edging in the snow when not using crampons. They are however not so stiff that they are too uncomfortable to walk in off the snow.
Boots Graded B2 are suitable for use with C1 or C2 crampons. C2 crampons have a clip lever at the back and therefore require the boot to have a protruding shelf at the heel for the end of the heel lever to engage with. The boots have a stiffer sole than B1 boots and will help to keep the crampon in place on moderate mountaineering climbs. Some B2 boots are still flexible enough to be used on an approach walk although this is very dependent on the materials and construction of the upper.
Boots Graded B3 are suitable for use with technical C3 crampons. The boot is fully rigid and allows the crampon to be used on more technical climbs (where there is likely to be sustained use of the crampon's front points) without the crampon loosening. B3 boots are likely to be very uncomfortable for approach walks and trekking as they are rigid and often heavily insulated.
On all climbs or treks where crampons will be used, your boots will need to be rated at least B1 or B2 for use with crampons.
If you choose to purchase your own crampons prior to the trip please ensure that you take your boots to the shop and ask a suitably experienced person to check the fit of the crampons with the boot. Some combinations of boot and crampon do not provide a good match and can lead to poorly fitting crampons and consequent problems on the mountain. If you are planning on using overboots to upgrade the warmth of a boot you will also have to check carefully if the crampon will be secure. You may need to cut out sections of the overboot to align with heel or toe bails.
Boot grading for warmth
Aside from allowing the fitting of crampons, another very important consideration when choosing your mountain boots is that of warmth. For anything other than technical climbing, this is likely to be the over-riding factor in your choice of boot. Different types of boots are constructed differently, with different materials and built up in layers. Usually, on warmer boots, the layers are able to be separated into an inner and outer boot. This helps as it allows you to warm/dry the inners and also to wear them inside the tent.
It sounds obvious when it is pointed out, but it is not just the ambient air temperature that is an issue. If you are walking on snow, your feet lose heat through the sole of your foot into the cold ground. This is made even worse if the snow is not hard packed, as you may be ankle or even shin-deep in the stuff and your whole foot and lower leg may be conducting heat to the snow. Therefore, it is also the condition of the mountain that affects which boots are needed, aside from just the altitude or location.
Inevitably, the warmer the boot the more volume and bulk it has to it and usually the more expensive it is too. Using a boot that is too warm can be as problematic as having one that is not warm enough. It will lead to excessive sweating which is uncomfortable and can ultimately lead to greater chance of blisters, cold feet or even frostbite- when you stop working hard, the sweat conducts warmth away from your feet, or can even freeze.
Above the snowline there are four main options, in descending order of warmth:
- 'Triple-Boots' for 8000m or very cold peaks (eg Cho Oyu, Everest, Denali) such as Millet Everest, La Sportiva Olympus Mons, Scarpa Phantom 800. These are constructed with inner boot, shell and super-gaiter.
- 'Plastics' like the Scarpa Omega or Vega, preferably with a high altitude rated inner boot for warmth (eg for Elbrus). These are a double-boot with a shell and a liner boot. These can also be upgraded with an overboot (eg 40 Below Purple Haze) if over about 6000m (eg Muztagh Ata), which will usually it up to a limit of about 8000m.
- 'Hybrids' like the La Sportiva Spantik or Scarpa Phantom Guide which are a double or even triple boot but the outer boot is not solid plastic so that it can be more dextrous and comfortable. This may also need to have its warmth upgraded. These are popular on Elbrus and trekking peaks in Nepal like Island Peak, Mera Peak and on our Khumbu Peaks trip, and all the way up to Aconcagua.
- '4-Season' boots like Scarpa Charmoz or Manta; these are what you would commonly use in UK winter conditions. They would be suitable for mountains like Toubkal in winter, Yala Peak, possibly Island Peak and Mera Peak.
Choosing and fitting mountain boots
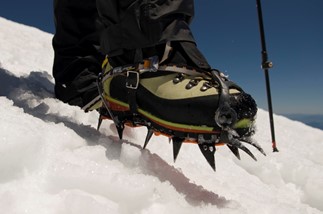
If you are buying expensive boots for an expedition it is strongly recommended that you visit a specialist retailer with trained staff, proper foot-measuring facilities (length & width) and a wide range of brands and models. This will allow you to try out a range of different boots before committing to one.
Another important thing is to take the exact socks that you will wear on the trip with you to the shop. You need to try the boot on with the right sock as this can make a huge difference to the volume and comfort of the fit. Good shops will have also have some simulated terrain so that you can walk up and downhill in the boots. When you get home, wear the boots around the house for a few days, walk up and down the stairs etc. Most shops will allow you to exchange boots within a certain time period as long as they haven't been used outside.
When fitting your boots, you often need to go up a half size or so from what you would buy in a normal shoe. This will allow for thick socks and some extra space as your feet swell at altitude. Generally, on high mountains, you are walking very slowly and deliberately and will not experience the same amount of movement that you would with a hiking boot. However, you do need to ensure that when walking you do not experience any 'heel-lift' inside the boot and that there is sufficient space around your toes for you to wiggle them. Any tighter than this and it is likely that they will either rub and give you blisters or be so constricting as to restrict the blood supply and lead to cold toes.
Note that certain boot brands commonly produce boots of a certain shape, ie. a narrower or wider fit. If your feet are of a certain shape it is worth identifying the most appropriate manufacturer for you. Some manufacturers such as Scarpa have 'thermo-fit' liners for their plastic boots; these are heated in an oven and then put on with special toe-spacers, the liner then moulds to the shape of your foot and when it has cools it stays in that shape. When the toe-spacer is removed it leaves some space for your toes with the rest fitting snugly. You will need to go to a shop with this facility to get this done properly.
Below Snowline and Approach Boots
Below the snowline, it is possible to use B0 graded hiking boots; make sure they are worn in, but not worn out, and have good ankle support. However, a good solution for smaller peaks is to use a B1 or B2 Four-Season boot which can then be used on the peak too. This means that you don't need to bring another set of boots.
To give you a rough idea of which boots you need for some example trips, we strongly recommend that you talk to us and read the trip-specific information before you spend lots of money on new kit.
High altitude climbing
Tips for High Altitude Climbing
Climbing to the world's tallest places present both extreme physical and mental challenges. Here are a few quick tips on what to expect at life above 5500m and how to cope.
The Physiological Problem of High-Altitude Expeditions
The amount of oxygen in air decreases linearly with ascent and very approximately there is about half of sea level oxygen present at 5500m. This falls to roughly one third at the summit of Everest. It is important to appreciate that the partial pressure of oxygen at the summit of Everest is very close to the limits at which human beings can survive at all. Permanent human habitation ceases - due to lack of oxygen, not terrain - above 5400m. Whilst acclimatised man can survive for several weeks or months at 6000m, deterioration is taking place steadily, by the apparent reversal of the very process of acclimatisation that has enabled ascent possible to these altitudes.
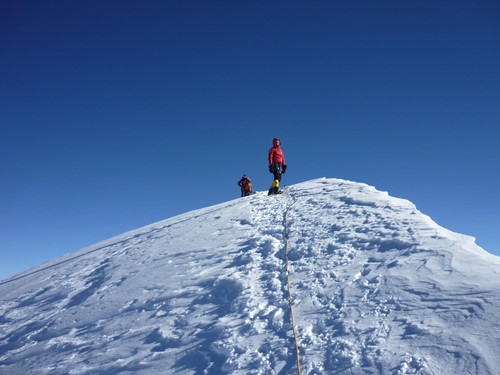
Mera Peak, one of Nepal's Trekking Peaks, allows you to catch a glimpse at life about 6,000m.
Mountain Logistics, Altitude and Acclimatisation
Going above 7000 metres is a unique experience. The success of an expedition is a lot to do with the team adhering to an accepted general philosophy regarding issues of acclimatisation and mountain logistics with respect to health and safety.
In mountaineering, much that happens and many decisions depend on factors such as weather and conditions on the route. The most important individual responsibility on an expedition is balancing personal needs so you maintain your strength and health while still performing in accord with the groups’ desires and objectives. Therefore it is vital to build up a good foundation of experience over the days and weeks at high altitude but not to over-stress the body.
Climb High, Sleep Low
When climbing it is good to adopt the adage of climbing high and sleeping low whenever possible. At lower elevations, our bodies can recuperate from previous days of work with sleep and food. However, there is little advantage in sleeping above 21,000’ to acclimatise, since it is now accepted that above 21,000’ there is no acclimatisation, only debilitation. In a prolonged oxygen-deprived atmosphere, working to capacity, lactic acid and other waste products build up in the muscles, which produce weakness and fatigue.
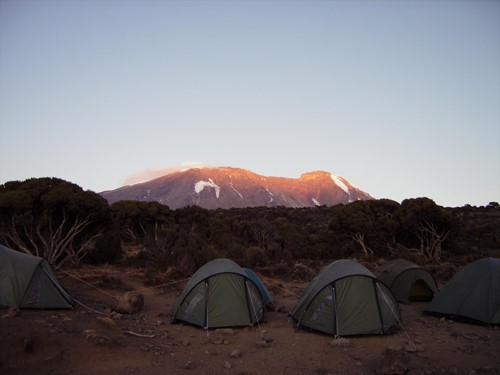
Even on lower-elevation climbs, such as Mount Kilimanjaro, it's a good idea to climb high and sleep low.
Force Yourself to Eat and Sleep
The ability to sleep after hard work is an indication of the body properly adjusting to the altitude. Difficulty falling asleep indicates the need to reduce the stress on the body and slow the rate of ascent. If you can maintain a normal pulse rate and rehabilitate by sleeping well, you should work until you feel a pleasant tiredness, even at altitude.
Sleeping and eating at high altitude, one cannot replenish the body’s energy stores or eliminate waste. Digesting complex foods at high altitude, the body actually spends energy, and many foods cannot be digested in that atmosphere. A fit body is naturally resilient and responds to rest at a lower altitude.
Fighting and Listening to Fatigue
The mountaineer must listen to his or her body, to feel it intuitively. You can overcome fatigue with inner motivation early on, but too much work is unnatural and can affect resilience over a long period. Serious fatigue can go unnoticed by someone who is physically fit, and no dramatic effect from overwork will be noticed until it is too late. Fatigue subtly accumulates in the body, only to manifest itself at the most stressful moments, usually up high, leaving you without strength and the ability to perform.
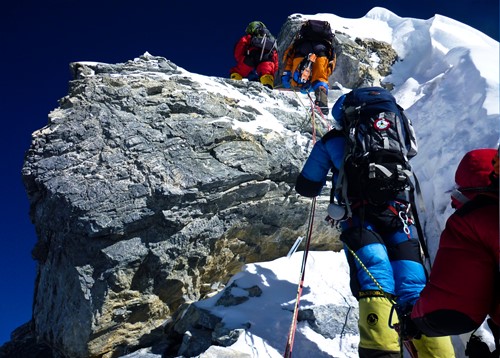
There are many health concerns when climbing big mountains, it's important to listen to your body and understand your limits.
The Battle for High Morale
Another important concern is morale, best kept at a high level with good food, good health, good sleep and good communication with a fairly egalitarian approach to discipline, although it will be important on the climb to adopt rigorous safety procedures. For example, always have someone else check your harness and karabiners. It is important to leave camp on any occasion in nothing other than a confident, relaxed frame of mind. Obviously, people worry about a variety of things, not least climbing an 8000-metre mountain, but if each step is tackled as a step in its own right, then confidence and enjoyment are built, earning a strong feeling of teamwork along the way.
Intake of liquid is important, especially at base camp where everyone can rehydrate at leisure. A minimum of 3 litres per day, up to 6 litres per day, is preferable. At the high camps, it is best to drink hot liquids.
Alternative Remedies
It has been agreed that high altitude sickness can be reduced by tackling free radicals in the bloodstream with strong antioxidants like Glucosamine, green tea, and vitamins C, B and D. An aspirin a day also helps with thinning the blood. If you are suffering from weak knees and are worried about joint degeneration then you might try a product called Intra from a company called Lifestyles (www.1intra.co.uk). A natural vitamin product which is supposed to increase the efficient use of oxygen, whereby the red blood cells bind more of the oxygen than usual is called Geriavit Pharmaton which is available in many shops. Green Defence (www.good4you.co.uk) can help tackle the lack of fresh vegetables at high altitude.
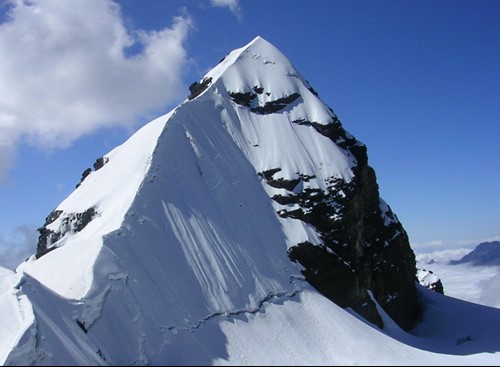
Big mountains, such as those found in the Andes, demand respect and caution.
Physical and Mental Effects on People
Around 6000m acclimatised climbers may expect to feel well, have reasonable appetites, sleep normally and be capable of carrying loads of 20-25 kilos on easy ground. Above 7000m, the situation changes: the feeling of tiredness and lethargy increases, continuous exercise becomes impossible and climbing even easy slopes becomes a painstaking, breathless achievement. Despite this, technical climbing of a high standard has been done and heavy loads have been carried at this height, though well under 20 kilos should be aimed at. Ascent rates will vary enormously depending on terrain and the climbers’ physiology, but 300-400m a day is a very reasonable achievement.
Deterioration of the Body
Deterioration becomes increasingly apparent after several nights at 7000m. The feeling of tiredness increases and more importantly, appetite falls; even foods that were popular at lower altitudes appear tasteless and unpalatable. Weight loss is profound and lethargy also sets in, adding to the difficulties of cooking, which usually takes many hours even in ideal circumstances. Sleep becomes intermittent and due to the lack of oxygen, the cold is felt more even in the warmest of sleeping bags.
The effects of deterioration become increasingly marked after four or five days and unless trapped by weather it is advisable not to stay much above 7000m for longer periods. Recovery from high altitude deterioration is a gradual process that can only take place at altitudes well below 6000m, so base camp should be below or as near 5000m as possible.
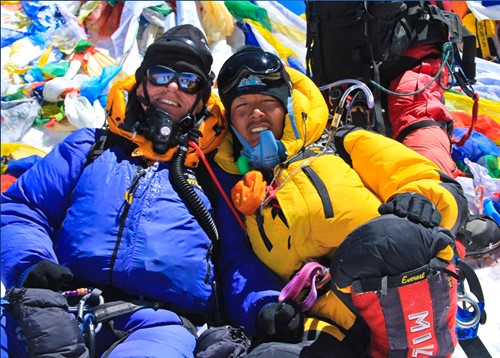
The summit of Mount Everest is hard work and you must fight just as many mental battles as physical ones.
Illnesses at Extreme Altitude
Any illness at extreme altitude tends to be much more serious than at sea level. Sore throats and persistent coughing are common, a product of the dry air and cold, and notoriously difficult to treat - a silk facemask (worn as continuously as possible) helps by warming and moistening the air. Any chest infection is potentially dangerous and needs urgent treatment by descent and antibiotics, as it may be impossible to distinguish between an infection and pulmonary oedema. A number of illnesses occur as a result of prolonged exposure to extreme altitude.
Blood clots, causing pain in the calf (deep vein thrombosis), pain in the chest (pulmonary embolus), and stroke (a weakness of one arm and leg) are a product of dehydration, changes in blood clotting and extended periods lying still in a sleeping bag.
High Altitude Cerebral Oedema and Pulmonary Oedema, though seen typically between 4000-5500m during acclimatisation, do also occur suddenly at extreme altitudes in well-acclimatised climbers. Cerebral oedema and stroke (e.g. weakness of one side of the body) may come on suddenly and be confused with simple exhaustion, dehydration or hypothermia.
Mental changes are frequent - the feeling of apathy is coupled with mood changes, despair or undue elation and sometimes unreasonableness in an argument. Recent memory is impaired above 7000m.
It is most important to recognise these effects and to bear in mind that they may be made worse by many depressant drugs, such as sleeping pills - though these seem quite safe at lower altitudes.

Staying healthy, clean and warm is essential for a successful summit bid.
Cold, Washing, Defecation, Boots, Frostbite & Cooking
The effects of cold are more pronounced at great heights for a variety of reasons. Firstly, it is colder with a summer night temperature of -25°C common at 7000m. High winds with speeds in excess of 160kph (100 mph) are frequent, and lack of oxygen depresses the body's own heat production. Fourthly, apathy and fatigue contribute to carelessness – you must constantly think about how to keep yourself warm!
Facemasks, one-piece down suits, windproof suits, waterproof/breathable coverings for sleeping bags and clothing have revolutionised the high altitude wardrobe. Advice from well-established manufacturers should be sought early in planning, as much of the gear has to be specially made and fitted. Plastic double boots, being extremely light, are the norm at altitude - their one problem is moisture generated by sweating: spare inners and socks, and homemade closed cell foam insoles are worth thinking about. ‘Plastic boot disease’ (white, discoloured, swollen feet) is difficult to deal with - the only solution is to allow the feet to dry out.
Washing is obviously unheard of but boiling all water (though it only boils at 77°C at 7000m) helps to cut down diarrhoea from bowel infections. Pee bottles (with a funnel for women) are vital (a half litre size is usually adequate, but not always). Defecation is difficult, but various suits with appropriate zips are available: thought should be given to the design of underclothes to make sure they can be used with this system.
Frostbite is usually a product of several factors and it is frequently avoidable. Since one's appreciation of the degree of cold is very poor in temperatures below -15°C, it’s worthwhile carrying a miniature plastic encased thermometer (they weigh only a few grams. The occurrence of frostbite almost always means the end of any serious climbing for the victim on the current expedition and much extra work for colleagues. Drugs are of little use.
Cooking is a boring and time-consuming chore: reliable stoves are vital and although Primus, MSR or other liquid fuel stoves work well at extreme altitude they require care in operation and are fiddly to maintain. Butane-propane mix stoves are quick, easy to use and safer, but problems with fuel availability are sometimes encountered.
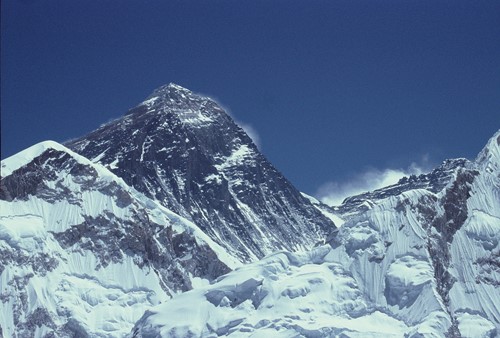
The steep, unforgiving peaks of the Himalaya have wowed and challenged mountaineers for decades.
Unfortunately, no one has yet designed a palatable high altitude diet: dehydrated food is usually rejected after a few days, and despite its weight some people favour the foil packed ready cooked meals which require heating only. Vegetarian foods - porridge, pasta, cooked rice, dahl or beans are popular in contrast to high-calorie fatty meats such as smoked ham, salamis and the tinned meats that are popular at lower altitudes. There is such wide variation between individuals that no firm rules can be made. In any case provide ample quantities of fuel for snow melts and ample sugar: an ideal fluid intake of 3 litres or more per man per day should be aimed at. The only real nutrition issues are fluids and calories.
Tents and Snow Holes
Modern tents have revolutionised high altitude camping. Specially designed box tents have also added to the repertoire of those trying to solve the high altitude accommodation problem, but they are heavy. Snow holes and igloos provide shelter from wind, noise and snow and are often preferable.\
Drugs and "Brain damage"
No drugs have shown to be of use in preventing the deterioration that occurs at extreme altitudes. Diamox (acetazolamide), which is useful in the prevention of AMS at 4000-5500m, has not been shown to alter performance above 7000 metres. Despite some popular opinion, vitamin E, garlic, marijuana or alcohol are not known to help or hinder. Amphetamines and other stimulants are strongly discouraged, as are sleeping pills such as Temazepam.
The possible long-term effects of climbing at extremely high altitude have attracted much publicity. Whilst severe lack of oxygen undoubtedly causes damage to the nerve cells in the brain, there is no clinical evidence of "brain damage" or intellectual impairment in the many climbers who have spent time over 7000 metres. The main danger in climbing the highest peaks in the world lies in death by accident or unrecognised illness – usually a combination of the snow conditions, cold and the effects of lack of oxygen.
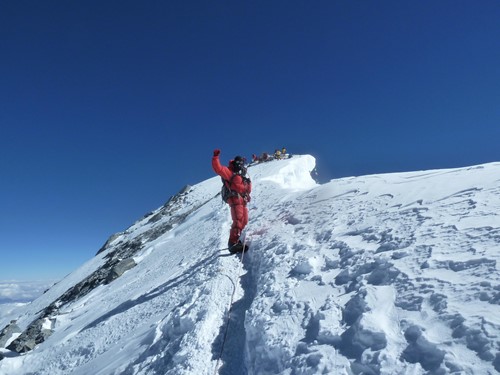
Climbers often require bottled oxygen to reach the top of the world.
Conclusions
There is no way to completely prevent the ill effects of extreme altitudes. The rules are: -
a) To be well acclimatised to around 6500m.
b) To keep well hydrated by drinking over 3 litres per day.
c) To stay above 7000m for as short a time as possible.
d) To think about the effects of wind/cold and make camps and caves as snug as possible.
e) To descend if unwell even with apparently minor illness.
f) To take rest periods as low as possible, certainly below 5500 metres.
Acclimatising safely
Acclimatising safely at altitude and AMS
The physiological factors related to altitude are very complex and still not fully understood. However, in summary, the problem boils down to the fact that your body is placed in an environment where it is initially unable to gain enough oxygen from the air it is breathing.
The good news is that virtually everyone's body will respond and adapt to allow you to acclimatise. This process takes time and can be helped along by adopting certain techniques, these will be explained more fully below but by far the most effective and important ways to manage the effects of altitude are to ascend slowly and to descend if symptoms get out of hand.
As you may expect, when your body is put in this position where it has insufficient oxygen it can make you feel varying levels of physical discomfort which can then progress to dangerous and life-threatening situations if not properly managed.
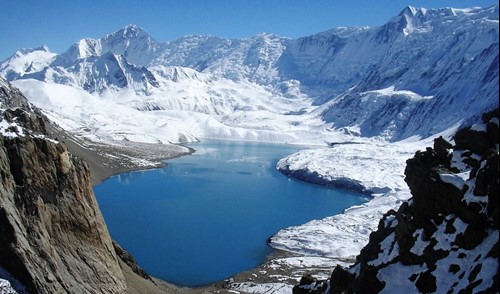
Fantastic views of the Annapurna Circuit.
It is important to note here that your own rate of acclimatisation has nothing to do with fitness and is due to your genetic physiology. Cardiovascular training and being in good physical health will help you to deal with some of the effects of altitude but will not help with your rate of acclimatisation. You may also find that although you have previously acclimatised well you may do less so on a subsequent trip or vice versa.
What to Do
The following measures can be taken to not only promote your health and safety at altitude but also to help you to enjoy yourself rather than enduring a miserable slog. Some of these measures will automatically be built into any Adventure Alternative high altitude itinerary and some will need to be controlled by your own personal management on the trip.
Ascend Gradually
The general guideline that is once above 3000m you should increase your sleeping altitude by no more than 300m each day and to take a rest day every 3 days or so. Due to local geography, this is not always possible so alternative arrangements can work satisfactorily such as progressively higher day hikes from a fixed sleeping altitude before advancing to another.
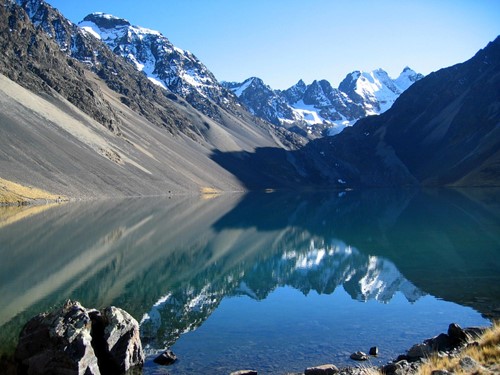
The high peaks of the Andes offer fantastic opportunities for high-altitude trekking and peak bagging.
Climb High, Sleep Low
Each day we try to sleep at a slightly lower altitude to that which we climbed to during the preceding day. That way our bodies are triggered into acclimatising to the peak altitude but we can rest and recuperate better at the slightly lower altitude.
Don't Over Do It
You need to take your time, don't over exert yourself and maintain a sustainable pace. The distances covered each day are rarely large and there is usually plenty of time to complete them. When you get to the next overnight location relax even if you don't feel tired. Try to start every day no more tired than the one before.
Eat Well
The effects of altitude may mean that your appetite decreases. However, it is clearly essential that you are consuming sufficient calories and nutrients to fuel your body. The number of calories you are burning is likely to higher than usual and you should try to eat accordingly. You will almost always feel better after eating even if you did not feel like it beforehand. Some foods are likely to be less appealing than others at altitude. Fatty and dairy products can be less attractive than usual. Take some favourite treats to help you keep fuelled up.
Beautiful ridgelines along the M'Goun Trek.
Drink Well
The dry air, exercise and physiological effects of altitude will mean it is very easy to become dehydrated. This brings its own physical discomforts and potential dangers including a thumping headache. Try to minimise fluid loss in the first place by regulating body temperature and avoiding profuse sweating. Guidance varies but you should aim to be drinking at least 3 litres of fluid a day. This can come in the form of soups and hot drinks as well as water. It can be hard to drink multiple litres of plain cold water every day so flavouring powder can be very useful too. You should also carry some rehydration sachets to use if you do get dehydrated. A good check on your level of hydration is that your urine should be "clear and copious".
Do Not Ascend Further with AMS Symptoms
It is important that you communicate with your trip leader if you have any of the symptoms listed below. Usually, rest at the same altitude will resolve the symptoms and you will be able to ascend. If not we will arrange for you to stay for longer at the same altitude or possibly descend. This does not mean that you will be dumped from the trip and sent home, we will make arrangements so that where-ever possible you can stay with or re-join the group or in any case still get the most possible out of the trip.
Drugs & Pills
There are certain drugs that are promoted as helping with the effects of altitude. The only one that is convincingly shown to aid acclimatisation is Diamox (acetazolamide). It will only really help at altitudes between around 4000 and 5500m and only speeds up the rate of acclimatisation, therefore any worsening effects of AMS must be treated with the same measures as if the patient was not taking it. It will not mask the symptoms of AMS and there is no 'rebound' effect if a course is stopped. We would not recommend the use of Acetazolamide unless there is a specific reason or rationale behind it. This is a prescription medication with a number of physiological effects and you must consult your GP before using it. There are conflicting reports regarding the effectiveness of Aspirin and Ginkgo Biloba as an aid to altitude acclimatisation by their effects on blood composition. The steroid Dexamethasone should only be used at the onset of an altitude related emergency as an aid to the rapid descent. It will only buy a little time for evacuation and should never be used to ascend higher.
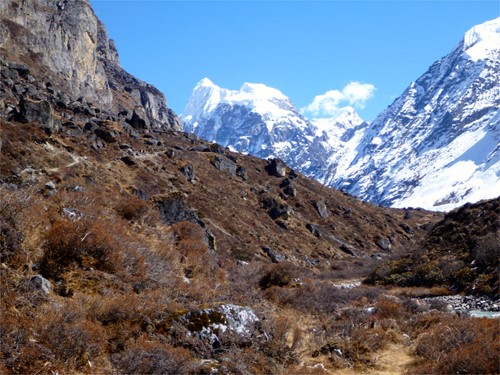
Trekking is a strenuous activity, but you can minimize the risks of altitude by taking care of yourself.
Enjoy Yourself
It should not be underestimated what effect a positive frame of mind can have. You need to be aware of your body's reactions and condition but try not to fall into the trap of "altitude-paranoia". Talk openly with your leaders and teammates about any symptoms, you will find that you are rarely alone.
More Information
As you ascend in altitude the amount, and therefore weight, of earth's atmosphere above your head reduces. This means that the air pressure reduces, the molecules in it are further apart and each lungful of air brings in fewer molecules. As a result, the number of air molecules, and importantly oxygen molecules, arriving to make their way into your blood and fuel your body is reduced. By the time you reach 5500m, there is approximately half as much oxygen available even though the proportion of oxygen is still the same (21%). There are also effects on the efficiency of the functioning of the oxygen transfer from air to blood due to the reduced pressure.
How Your Body Responds
Your body responds to the reduced pressure and availability of oxygen. This process is referred to as acclimatisation. Depending on your personal genetic physiology this will take place at different rates and to different final degrees. In all cases it is a slow process, taking place over a period of days to weeks.
Deeper & Faster Breathing - This is a basic response which simply gets more air to the lungs. It is not possible to maintain full physical function at altitude by this response alone. At rest and during the night this response is less effective, some people may develop periodic breathing where their breathing slows during sleep and they wake with a start as it suddenly re-starts.
Blood Composition - Dramatic changes take place in the body's chemistry and fluid balance during acclimatization. The kidneys excrete more fluid which has the effect of increasing the concentration of oxygen-carrying red blood cells in the blood. You will, therefore, urinate more often and be more susceptible to dehydration.
Mt Elbrus is an amazing climb where you must persevere through acclimatization.
How it Feels
You will not 'feel' the air as lighter or notice the different pressure directly. However, the effects on your body and functioning will be obvious to virtually all individuals. Initially, you will get and stay puffed more easily and your appetite may also reduce or disappear.
A lot of people will also experience mild Acute Mountain Sickness (AMS). AMS is often described as feeling like a hangover. For those lucky enough to be unfamiliar with this feeling it can be characterised by:-
Loss of appetite / nausea / vomiting
Fatigue and lethargy
A headache or light-headedness
Difficulty sleeping
Some people will hide or deny the symptoms as they are worried that they will be prevented from continuing on the trek or climb. This is not the case. It is very important that you tell your leader if you start to feel ill so that they can look after you and monitor the group as a whole. Adventure Alternative itineraries are planned with the flexibility to allow you continue even if we have to take a rest day early or alter a route
How our Staff is Trained to Deal with Altitude
Adventure Alternative local staff have experience in working with western clients at altitude and they have climbed the mountain hundreds of times, and they can certainly deal with getting somebody off the mountain. However, it is fair to say that, despite our best efforts, they don't understand the physiological changes going in the human body during ascent, and there is a cultural 'gap' when it comes to them telling to a client to go down. Therefore we do ask that people find out as much as possible in advance about altitude, listen to their bodies during the climb and to some extent self-diagnose with the use of an AMS card (which we provide prior to departure). Making the decision to descend is mostly a very obvious one to make because the symptoms are quite obvious, but it needs to be a collaborative effort between the team and the staff to keep everyone healthy and happy and to deal with a descent if it is necessary.
Hikers take care on their summit bid of Kilimanjaro.
MORE SERIOUS DEVELOPMENTS
The effects of mild AMS can be controlled by recognising them, acknowledging them and taking fairly simple and straightforward steps. If these are steps are not taken or are ineffective an individual may progress to more serious AMS and further conditions of High Altitude Pulmonary Oedema (HAPE) and High Altitude Cerebral Oedema (HACE). These conditions can be immediately life-threatening.
What is HACE?
High Altitude Cerebral Oedema is effectively a progression of the same physiological effects as mild AMS. It is essentially due to the swelling of the brain within the skull. The resultant pressure progressively reduces the brain's ability to function. The fact that HACE is a later worsening of mild AMS highlights the importance of acknowledging and addressing the symptoms of mild AMS.
The signs to look for are:-
Confusion
Changes in behaviour
Lethargy
Ataxia (loss of coordination)
Treatment for HACE consists of:-
IMMEDIATE DESCENT, facilitated by:-
Oxygen (if available)
Re-compression Gamow Bag (if available)
Possible administration of Dexamethasone
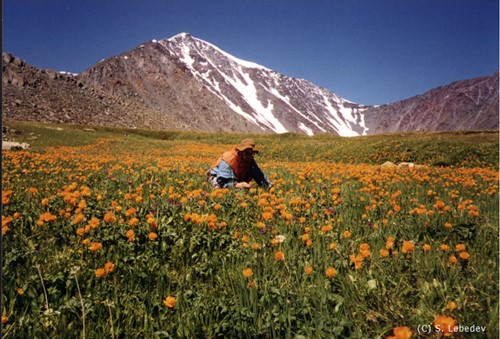
The Altai mountains in Russia offer amazing opportunities for mountain trekking.
What is HAPE?
In simple terms, High Altitude Pulmonary Oedema consists of fluid leaking from blood vessels into the lungs due to constriction and consequent high pressure. The fluid thus builds up and further blocks the passage of oxygen from the lungs into the blood. In this sense, it is similar in effect to drowning.
HAPE in its early stages can be hard to distinguish from other breathing difficulties associated with travel and exertion high altitude.
The specific signs to look for are:-
Decreased exercise performance and rapid breathing
Inability to catch breath even upon rest
Blue lips and nail beds
Crackling sound during breathing
Coughing up pink or red fluid
Treatment for HAPE consists of:-
IMMEDIATE DESCENT, facilitated by:-
Oxygen (if available)
Re-compression Gamow Bag (if available)
Possible administration of Nifedipine
Climbing the ridge towards the top of Yala Peak in the Himalaya.
OTHER EFFECTS
A dry Cough - This is usually due to the dry air or dust - A buff or face mask can help
Heart - Your heart will be working harder due to the reduced oxygen and thickening of the blood - If you have a history of heart problems you should consult your doctor before booking.
Stomach & Bowels - Many people will experience some degree of change to their toiletry habits. This is usually due to the change of diet, poor hygiene or traveller's diarrhoea. If you have any history of stomach or bowel problems you should consult your doctor before booking - Observing good hygiene and keeping well hydrated are essential.
Kidney & Bladder - The physiological effects of altitude include increased urination, the dry air leads to more evaporation and exertion increased sweating. All these mean that you are at increased risk of dehydration - You need to make a concerted effort to stay hydrated by consuming at least 3 litres of fluids a day.
Eyes - There have been reports of problems related to travelling to high altitude soon after undergoing laser eye surgery. If you have any concerns you should consult your optician.
Ears/nose - changes in the inner ear can trigger dizziness and light-headedness common to AMS. A blocked nose is also common and upsets the normal warming process and humidifying process that is essential to keep lungs healthy. This causes a persistent cough. Blow nose regularly, use a wide-brimmed hat, use sunblock and barrier cream.
Sleep - a disturbed sleep pattern is common during the first nights at altitude and is common; lack of sleep over several days indicates poor acclimatisation. ‘Periodic’ breathing during sleep is also common and not dangerous. Snoring may be made worse by dry, dusty air but does not appear to get worse at altitude. Expect to need more sleep, avoid caffeine and alcohol late in the day, and if your sleep does not improve after several days at altitude then consider going down.
More Information About Altitude and Acclimatisation
Travel At High Altitude - Medex - ISBN 0-901100-76-5 [pocket sized leaflet]
(free download http://medex.org.uk/v26%20booklet.pdf)
Altitude Illness - Bezrucha - ISBN 0-89886-685-5 [pocket sized book]
Medicine for Mountaineering - Wilkerson - ISBN 978-1594850769 [large handbook]
UIAA advice sheets - http://www.theuiaa.org/medical_advice.html
Wilderness Medical Society Consensus Guidelines
for the Prevention and Treatment of Acute Altitude Illness
WILDERNESS & ENVIRONMENTAL MEDICINE, 21, 146–155 (2010)
Luks et al
High Altitude Treatment
The following article appeared in the Journal of Travel Medicine under the title;
Do British Commercial Mountaineering Expeditions Carry Drugs to Treat High Altitude Illnesses? (Volume 19, Issue 4, pages 250–252, July 2012)
This appears to be an issue that is clouded by certain companies' fear of legal action in the event of use of the medications. On moral grounds, Adventure Alternative do carry the medications Acetazolamide(Diamox), Nifedipine(Adalat) and Dexamethasone in order to provide the option of them being administered in an extreme emergency situation. In fact, the quote at the top right of page three is from Gavin Bate, MD of Adventure Alternative.
AIDS & Hepatitis policy

This page is intended to help Medical Elective students understand the risks and mitigation associated with being exposed to various diseases while working with patients. We do everything in our power to protect the health and welfare of our students.
HIV/AIDS
AIDS and HIV infection does occur worldwide. HIV is sometimes seen as being disease of the poor. In Africa there is some correlation between extreme poverty and high HIV prevalence, although HIV is prevalent across all sectors of society.
The Risks
Both men and women can become infected and can give the virus to someone else. HIV is passed from one person to another through blood-to-blood and sexual contact with someone who is infected with HIV. Also, an HIV-infected woman can pass the virus to her baby during pregnancy or during birth as well as through breastfeeding.
Rape plays a significant role in the high prevalence of HIV among women. Although HIV prevention campaigns encourage people to use condoms and have fewer sexual partners, women and girls in Africa are often unable to negotiate safer sex.
Factors to consider in assessing risk include the extent of direct contact with blood or other potentially infectious secretions and the extent of sexual contact with potentially infected persons or with persons whose HIV infection status is unknown.
Many persons may be infected and be unaware of their status. Therefore, if you engage in sexual contact, you may be unknowingly at risk from an infected sex partner.
Assess and take ownership of your personal behaviours; do not choose high-risk behaviours.
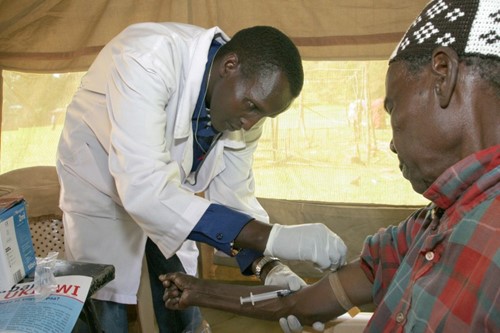
We always practise safe health measures when working with patients.
HIV can NOT be spread in the following ways:
× Shaking hands, hugging, or casual kissing
× Coughs or sneezes, sweat or tears
× Mosquitoes, toilet seats, door knob, drinking fountain
× Eating food prepared or handled by an infected person
× Everyday contact with HIV-infected persons at school, work, home or anywhere else.
Precautions
- Students should avoid use of unscreened blood-clotting factor concentrates or concentrates of uncertain purity. If transfusion is necessary, the blood should be tested, if possible, for HIV antibody by appropriately trained laboratory technicians using a reliable test.
- Students with insulin-dependent diabetes, haemophilia, or other conditions that necessitate routine or frequent injections are advised to carry a supply of syringes, needles, and disinfectant swabs (e.g., alcohol wipes) sufficient to last their entire stay abroad. Before travelling, students must request documentation of the medical necessity for travelling with these items (e.g., a doctor’s letter) in case official inspection personnel at ports of departure/entry question their need.
- Exercise caution at all times to avoid serious accidents or injuries that could require a blood transfusion.
- Abstinence is the only certain choice for preventing infection with HIV
- Exercise appropriate precautions if engaging in activities that expose you to risk of infection.
- All medical students working in high risk areas should wear appropriate equipment at all times, gloves, aprons and take the appropriate universal precautions at all times.
- Should an incident occur in which you suspect you were exposed to HIV, you should immediately seek immediate medical assistance, do not delay as the first 72 hours are critical.
- Consider taking a PEP treatment with you on your visit which can be available through your university.
PARASITIC INFECTION
The Risks
All freshwater in southern and sub-Saharan Africa–including the great lakes and rivers as well as smaller bodies of water–is considered to be at risk for schistosomiasis (a disease caused by parasitic worms’ transmission).
Infection occurs when skin comes in contact with contaminated freshwater in which certain types of snails that carry schistosomes are living.
Schistosoma parasites can penetrate the skin of persons who are wading, swimming, bathing, or washing in contaminated water. Within several weeks, worms grow inside the blood vessels of the body and produce eggs. Some of these eggs travel to the bladder or intestines and are passed into the urine or stool.
Occasionally, eggs may be deposited in the brain or spinal cord, leading to seizures or paralysis. More than 200 million people are infected worldwide.
If skin comes in contact with freshwater from canals, rivers, streams, or lakes, there is a risk of getting schistosomiasis.
No vaccine is available.
No drugs for preventing infection are available.
Untreated piped water coming directly from freshwater sources may contain cercariae larvae.
Precautions
- Do not wade or swim in freshwater in Southern African countries.
- Drink safe water. Because there is no way to make sure that water coming directly from canals, lakes, rivers, streams or springs is safe, you should either boil water for 1 minute or
- filter water before drinking it. Boiling water for at least 1 minute will kill any harmful parasites, bacteria, or viruses present.
- Brush your teeth with clean water.
- If you wear gas-permeable contacts use only clean water to rinse them.
- If you accidentally come into contact with fresh water, vigorous towel drying after a very brief water exposure may help to prevent the Schistosoma parasite from penetrating the skin.
The scope of the guidance below
This information below contains guidance on measures to protect clinical healthcare workers (HCWs) against occupational infection with blood-borne viruses (BBVs). It is based on the recommendations of the Expert Advisory Group on AIDS and the Advisory Group on Hepatitis.
This document covers known BBVs including human immunodeficiency virus (HIV), hepatitis B virus (HBV) and hepatitis C virus (HCV). There are practical advantages in adopting common infection control policies to prevent the transmission of BBVs, and this is reflected in the guidance.
General principles
The BBVs which present most cross-infection hazard to HCWs are those associated with a carrier state with persistent replication of the virus in the human host and persistent viraemia. These include HIV and several hepatitis viruses, considered separately in the following paragraphs. For other rarer potentially blood-borne viruses, specialist virological advice should be sought.
In general, occupational risks of transmission of BBVs to HCWs arise from the possibility of exposure to blood and exceptionally to certain other body fluids or body tissues from an infected patient (see Table 1). Semen and breast milk may pose a risk of BBV infection but exposure of HCWs is considered unlikely in most healthcare settings.
Body fluids etc which should be handled with the same precautions as blood
- Cerebrospinal fluid
- Peritoneal fluid
- Pleural fluid
- Pericardial fluid
- Synovial fluid
- Amniotic fluid
- Semen
- Vaginal Secretions
- Breast milk
- Any other body fluid containing visible blood, including saliva in association with dentistry
- Unfixed tissues and organs
Human Immunodeficiency Virus (HIV)
HIV has been isolated from blood, semen, vaginal secretions, saliva, tears, urine, breast milk, and cerebrospinal, synovial and amniotic fluids. However only blood, blood products, semen, vaginal secretions, donor organs and tissues and breast milk have been implicated in the transmission of infection.
There is good evidence from studies of household contacts of infected people that HIV is not spread by close social contact even when this is prolonged, as in a family setting. A small number of cases of "household" transmission of HIV have occurred, but transmission is most likely to have occurred through exposure to infected blood or blood-contaminated body fluids.
Although HIV transmission may occur in health care settings, most HIV transmission occurs:
- by unprotected penetrative sexual intercourse with an infected person (between men or between man and woman);
- by inoculation of infected blood. At present in the UK this results mainly from drug misusers sharing blood-contaminated injecting equipment;
- from an infected mother to her baby before or during birth or through breastfeeding.
There is at present no vaccine to prevent HIV infection.
Hepatitis B virus (HBV)
Hepatitis B virus surface antigen (HBsAg) may be found in blood and virtually all body fluids of patients with acute hepatitis B and carriers of the virus but blood, semen and vaginal fluids are mainly implicated in the spread of HBV infection.
Transmission usually occurs:
- by unprotected sexual intercourse;
- by injecting drug misusers sharing blood-contaminated injecting equipment;
- perinatally from an infected mother to her baby.
Up to 90% of babies infected perinatally and around 5% to 10% of those infected as adults develop chronic carrier status. The persistence of the `e' antigen correlates with a high level of viral replication and increased infectivity. The most important measure whereby HCWs can be protected against HBV is by immunisation, which provides protection in up to 90% of recipients. Immunisation is not a substitute for good infection control practice since it provides no protection against infection with other BBVs.
Hepatitis C virus (HCV)
HCV is the main cause of what was previously known as non-A non-B hepatitis. HCV is most frequently acquired by direct blood to blood contact and the commonest mode of transmission in the UK is the sharing of blood contaminated injecting equipment by injecting drug misusers. Both sexual and perinatal transmission can occur but in general, these are less efficient modes of transmission. There is at present no vaccine to prevent HCV infection.
Hepatitis D virus (HDV)
HDV causes infection only in those who have active HBV infection. HDV infection can occur either as co-infection with HBV or as a superinfection of an HBV carrier. Since HDV depends on an HBV-infected host for replication, prevention of HBV infection by immunisation will also prevent HDV infection.
GB virus type C (Hepatitis G virus)
Recently a further BBV has been described, provisionally designated either as GBV-C agent or hepatitis G virus. The full clinical significance of infection with this virus, whether it is a true hepatotropic virus, and its natural history are as yet unknown.
RISKS OF TRANSMISSION OF BBVs
The risk of transmission of BBVs is greater from patient to HCW than from HCW to the patient. The risk to the HCW for each virus is proportional to the prevalence of that infection in the population served, the infectious status of the individual source patient, which may or may not be known, and the risk of a significant occupational exposure occurring during the procedures undertaken. In the healthcare setting transmission most commonly occurs after percutaneous exposure to a patient's blood by "sharps" or "needlestick" injury. The risk of transmission to a HCW from an infected patient following such an injury has been shown to be around 1 in 3 when a source patient is infected with HBV and is `e' antigen positive, around 1 in 30 when the patient is infected with HCV and around 1 in 300 when the patient is infected with HIV.
"Sharps" in this context are needles, sharp-edged instruments, broken glassware or any other item which may be contaminated in use by blood or body fluids and which may cause laceration or puncture wounds. Sharp tissues such as spicules of bone or teeth may also pose a risk of injury.
Most cases of occupationally acquired HIV infection have arisen from percutaneous exposure to HIV infected material, and of these, the majority have followed injury from hollow needles in association with procedures where a needle or cannula is placed in a vein or artery eg venepuncture. Others have arisen through exposure of mucous membranes or non-intact skin to blood.
Transmission of BBVs may result from contamination of mucous membranes of the eyes or the mouth, or of broken skin, with infected blood or other infectious material. The transmission risks after a mucocutaneous exposure are lower than those after a percutaneous exposure.

Doctors and students at a medical camp in Kenya.
The risk of acquiring HIV after a single mucocutaneous exposure is less than 1 in 2000. Mucocutaneous exposures occur more frequently than percutaneous exposure; the majority of both types of exposure are preventable.
BBVs are potentially transmissible by a human bite through mucous membrane exposure if the bite breaks the skin of the person bitten. There is no evidence that BBVs can be transmitted by blood contamination of intact skin, by inhalation or by faecal-oral contamination.
Not all patients infected with BBVs have had their infections diagnosed. It is therefore important that all blood and body fluids and tissues (see Table 1, page 9) are regarded as potentially infectious, and HCWs should follow precautions scrupulously in all circumstances to avoid contact with them.
PRECAUTIONS AGAINST EXPOSURE TO BBV INFECTION
Assessment of risk Health care staff carrying out clinical procedures should at all times carry out an assessment of the work to be done and of current procedures in order to be able to prevent or control exposure to substances hazardous to health.
Categorisation of risks and appropriate levels of protection
Each team or group of HCWs working together on a task should discuss the hazards involved in their current methods of working and ways of reducing these hazards. This process should include a consideration of the risks to others involved by such activities as the disposal of sharps, bodies, tissues, body fluids, and contaminated disposable items and the maintenance of equipment.
The team should be encouraged to devise safe and reasonably practicable procedures and routines for performing each task; ensure they are followed after appropriate training and keep them under active review.
The appropriate level of precautions to be taken for any procedure should be determined according to the extent of possible exposure to blood and not because of knowledge or speculation about the infectious status of the patient. All blood, tissues and some body fluids should be regarded as potentially infectious. This approach is sometimes referred to as "Universal Precautions."
General measures to reduce the risk of occupational exposure
- wash hands before and after contact with each patient, and before putting on and after removing gloves; change gloves between patients;
- cover existing wounds, skin lesions and all breaks in exposed skin with waterproof dressings3. Wear gloves if hands are extensively affected;
- wear gloves where contact with blood can be anticipated;
- avoid sharps usage where possible, and where sharps usage is essential, exercise particular care in handling and disposal;
- avoid wearing open footwear in situations where blood may be spilt, or where sharp instruments or needles are handled;
- clear up spillage of blood promptly and disinfect surfaces; wear gloves when cleaning equipment prior to sterilisation or disinfection, when handling chemical disinfectant and when cleaning up spillages;
- follow safe procedures for disposal of contaminated waste
HCWs should be encouraged to follow good practice methods. HCWs and their employers or supervisors should keep themselves informed of safe methods of working.
Safe handling and disposal of sharps Many percutaneous injuries are preventable. Such injuries may occur while hollow bore needles are being prepared for disposal, eg whilst attempting to resheath a needle manually after venepuncture. Implementation of the following procedures for the safe handling and disposal of sharps will reduce the risks:
- place all disposable sharps in sharps containers immediately after use. The containers should be placed safely out of reach of children as near as practicable to sites of use, be puncture resistant, of adequate depth and capacity and be suitable for incineration.
- provide sharps containers in adequate numbers and never overfill. They should be disposed of as clinical waste after closing securely, and replaced promptly;
- avoid resheathing needles manually. Only resheath needles if a device is available to allow this to be done using one hand only. If such a device is not immediately accessible, the single-handed scoop method may be used, i.e. the HCW holds the barrel of the syringe and scoops the needle cap from a hard, flat surface on to the end of the needle. Only when the needle tip is covered should resheathing be completed with the other hand. Resheathing devices should be decontaminated regularly;
- discard disposable syringes and needles wherever possible as a single unit, into sharps containers;
- remove needles from syringes only when essential eg when transferring blood to a container, or when the needle is disposable but the syringe is not, eg local anaesthetic syringes as used in dentistry. Needle forceps or other suitable devices should be readily available;
- remove needles and attach blind hubs to syringes containing arterial blood which are to be sent to the laboratory. Intravascular guidewires and glass slides must be disposed of as sharps.

We always require students to wear gloves and practice standard sanitary best practices.
GLOVES AND VENEPUNCTURE
Gloves cannot prevent percutaneous injury but may reduce the risk of acquiring a BBV infection. Although punctured gloves allow blood to contaminate the hand, the wiping effect can reduce the volume of blood to which the worker's hand is exposed and in turn, the volume inoculated in the event of percutaneous injury. Some HCWs with long experience of performing venepuncture without gloves may prefer not to wear them to avoid a perceived reduction of manual dexterity and possible consequent increased risk of percutaneous injury.
The following is advised:
- gloves are available to all HCWs who wish to wear them for venipuncture;
- inexperienced venepuncturists including medical students should become accustomed to the wearing of gloves from the beginning of their training, and should not take blood from patients known to be infected with BBVs until trained and considered competent;
- all venepuncturists, including those who are experienced, should wear gloves if there are cuts or abrasions on the hands and it is not practical for them to be covered by waterproof dressings alone, or if the patient is so restless that the risk of injury to the HCW is increased.
Reducing the risk of percutaneous exposure: methods, procedures and equipment The following measures may reduce the risk of percutaneous exposure and should be considered where practicable:
- have no more than one person working in an open wound/body cavity at any time (unless essential to the safe and successful outcome of an operation);
- use a "hands-free" technique where the same sharp instrument is not touched by more than one person at the same time, avoid hand to hand passing of sharp instruments during an operation;
- assure safer passage of necessary sharp needles and instruments via a "neutral zone", announce when a sharp instrument or needle is placed there. The "neutral zone" may be a tray, kidney basin or an identified area in the operative field;
- ensure that scalpels and sharp needles are not left exposed in the operative field, but always removed promptly by the scrub nurse having been deposited in the neutral zone by the operator or assistant;
- use instruments rather than fingers for retraction, and for holding tissues while suturing;
- use instruments to handle needles and to remove scalpel blades;
- direct sharp needles and instruments away from own non-dominant, or assistant's hand;
- remove sharp suture needles before tying suture; tie suture with instruments rather than fingers.
Alternative equipment and procedures should be considered where practicable:
- eliminate any unnecessary use of sharp instruments and needles, eg by appropriate substitution of electrocautery, blunt-tipped needles and stapling devices;
- opt for alternative less invasive surgical procedures where practicable and effective;
- avoid scalpel injuries associated with assembly/disassembly, by using scalpels which are either disposable, have retractable blades or which incorporate a blade release device;
- avoid the use of sharp clips for surgical drapes; blunt clips are available as are disposable drapes incorporating self-adhesive operating film;
- consider double gloving with a larger pair of gloves innermost for optimum comfort.
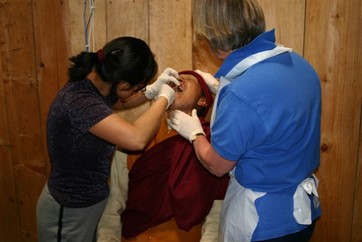
Students participating in a dental clinic in Nepal.
Reducing risk of blood-skin contact The following measures may reduce the risk of blood-skin contact and should be considered:
- if a glove puncture is suspected or recognised, rescrub if possible and reglove as soon as safety permits;
- change gloves regularly if performing, or assisting with a prolonged surgical procedure even if no glove puncture is suspected or recognised;
- the need for protection of body, eyes and face;
- choose waterproof gowns, or wear a surgical gown with waterproof cuffs and sleeves and a plastic apron underneath if blood contact and therefore "strikethrough" is considered a risk - such as procedures anticipated to involve high blood loss;
- if legs or feet may be contaminated (as in obstetric and some other procedures performed in the lithotomy position), ensure that impermeable gown/apron covers legs and wear impermeable footwear. Wellington or calf length overboots are preferable to shoes or clogs. Surgical drapes with "catch-basins" are available to reduce the risk of leg and foot contamination;
- wear protective headwear and surgical mask. Male HCWs should consider wearing hoods rather than caps to protect freshly shaven cheeks and necks; ensure that all blood is cleansed from a patient's skin at the end of an operation before patient leaves theatre;
- remove protective clothing including footwear on leaving the contaminated area. All contaminated reusable protective clothing, including footwear, should be subjected to cleaning and disinfection or sterilisation, with appropriate precautions for those undertaking it. Footwear should be adequately decontaminated after use.
MEASURES TO REDUCE EYE AND OTHER FACIAL EXPOSURE
Protect mucous membrane of eyes with protective eyewear. This should prevent splash injuries (including lateral splashes) without loss of visual acuity and without discomfort. Face shields may be considered appropriate for procedures which involve a risk of the splatter of blood including aerosols or other potentially infectious material. Various forms of combined eye and face protection are available Eyewash should be available in case of accidental exposure. Contact lenses should be removed prior to eye washing.
OTHER MEASURES TO PREVENT BBV TRANSMISSION
Hepatitis B immunisation
All HCWs, including students and trainees, who have direct contact with patient's blood or other potentially infectious body fluids or tissues should be immunised against HBV.
Decontamination and waste disposal
Many occupational exposures to BBVs result from failure to adhere to basic rules concerning decontamination, waste disposal etc. The following general guidelines should be drawn to the attention of all staff who come into contact with blood contaminated material. It is recommended that a member of senior management is designated as clinical waste control officer whose function it will be to oversee the operation of the clinical waste policy. This is particularly important in order to protect third parties, such as ancillary staff, and anyone else present in the healthcare setting, such as patients and their visitors, from preventable exposure.
Equipment and materials
Single-use equipment should be used where appropriate, particularly where decontamination cannot be carried out effectively. Any reusable equipment which is to be reused and which has been employed for a procedure involving potential contact with a patient's blood must be sterilised or disinfected before it is reused. Such equipment includes items which may not necessarily be in direct contact with the patient eg manual self-inflating resuscitation bags and dental handpieces. Reusable equipment must be of a type that is readily decontaminated without distortion or damage to its function. When selecting suction and aspiration equipment, apparatus which will discharge directly into a waste outlet is to be preferred in order to reduce the potential for accidental spillage.
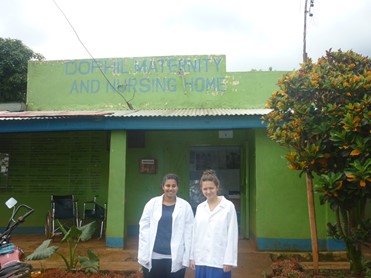
Two student doctors stand outside of their clinic in rural Kenya.
Decontamination of equipment
Thorough physical cleaning of instruments in warm water with detergent to remove blood and debris is essential prior to disinfection or sterilisation, for either procedure to be effective. Neither cold nor hot water should be used for this purpose; the former may harden fats and the latter may cause the proteinaceous material to adhere.
Exposure Prone Procedures
are those where there is a risk that injury to the worker may result in the exposure of the patient's open tissues to the blood of the worker. These include procedures where the worker's gloved hands may be in contact with sharp instruments, needle tips and sharp tissues (spicules or bone or teeth) inside a patient's open body cavity, wound or confined anatomical space where the hands or fingertips may not be completely visible at all times.
Disposal of clinical waste
All waste which is contaminated with blood, tissues and other potentially infectious body fluids should be treated as "clinical waste", and disposed of following local protocols.
Management of blood exposure incidents
General principles
Needlestick and other exposures to blood in the healthcare setting are unnecessarily common at present. Many results from a failure to follow recommended procedures, and from careless disposal of waste. Strict adherence to the guidance earlier in this document should reduce the incidence of these exposures. There will remain occasions where exposure occurs despite careful attention to the correct procedures. All exposure incidents should be reviewed to consider how recurrence might be prevented. All HCWs in hospitals clinics and elsewhere (eg general medical and dental practice) should be informed and educated about the possible risks from occupational exposure and should be aware of the importance of seeking urgent advice following any needlestick injury or other possible exposure. Although the risk of acquiring a BBV through occupational exposure is low, the consequences are serious. Occupational exposure to known or suspected BBV infected material is always stressful, and for some, extremely so. HCWs, or any other person in the healthcare setting, exposed to HBV or HIV infected blood or body fluids should be offered appropriate post-exposure prophylaxis, if available and HCWs, particularly at risk of exposure to HIV, should be encouraged to consider in advance, whether in the event of an occupational exposure to HIV, they would wish to take prophylaxis.
At present, there is no effective post-exposure prophylaxis against HCV infection.
POST-EXPOSURE PROCEDURES
Action after an HCW has been exposed to blood or other potentially infectious body fluids should take account of the interests of both the worker and the source patient. The circumstances which led to the exposure should be identified and all possible steps are taken to prevent recurrence. Immediately following any exposure, the site of exposure ie. wound or non-intact skin should be washed liberally with soap and water but without scrubbing. Exposed mucous membranes including conjunctivae should be irrigated copiously with water, after first removing contact lenses if present. If there has been a puncture wound, free bleeding should be encouraged gently but the wound should not be sucked. HCWs who sustain an occupational exposure should report the exposure promptly and seek urgent advice on further management and treatment, from the senior doctor in their clinical setting.
Testing and counselling
The designated doctor (usually the supervising Doctor) will need, where possible, to obtain information from or about the source patient concerning possible indicators of BBV infection, including risk factors and results of previous tests for HIV and hepatitis, medical history suggestive of such infection; and details of past and current antiviral therapy in patients known to be HIV infected. The source patient should be asked to consent to testing for BBV infections including HIV, HBV and HCV. This will entail pre-test discussion and obtaining fully informed consent. If the source patient is approached in a sensitive manner, it is understood that consent to testing is rarely withheld.

A medical student helps a small family in Kenya get the treatment they need.
Post-exposure prophylaxis
HBV
If the HCW may have been exposed to HBV infected blood post-exposure prophylaxis should be considered, if available.
HCV
At present no post-exposure prophylaxis is available for HCV.
HIV
If the source patient is known to be infected with HIV or is considered to be at risk but has not been tested, health care workers are advised to attend the nearest accident and emergency department for urgent advice and possible post-exposure prophylaxis (PEP) treatment.
A designated doctor will be able to advise the healthcare worker of the risk of acquiring HIV infection after occupational exposure. Although post-exposure prophylaxis (PEP) is highly recommended, the UK recommended Anti Retroviral Medicines are not always readily available in developing countries, depending on your clinical setting and geographical location.
Post-Exposure Prophylactic (PEP) Antiretroviral Medicines will be available to all Adventure Alternative Medical Students whilst they are on a medical placement arranged by Adventure Alternative in Kenya, Tanzania or Nepal. The medicines will be purchased by Adventure Alternative staff locally following the current UK Department of Health recommendations.
Currently, the recommended medicines to be given as prophylaxis following exposure to bodily fluids deemed to be at high risk of HIV are:-
Zidovudine (AZT) 300mg - Twice a day for 7 days
Lamivudine (3TC) 150mg - Twice a day for 7 days
Nelfinavir 1250mg - Twice a day for 7 days
Decisions about prescribing these supplies of PEP will follow a risk assessment of the incident, based on the circumstances of the exposure and the source patient, under the guidance of the local supervising doctor.
The PEP will only be available to students whilst they are on placement. If a student wishes to carry a supply with them whilst on independent travel then they must purchase their own supply. The Adventure Alternative PEP starter pack will be kept in a central location within the Adventure Alternative Accommodation or within the hospital or clinic its f, so that it is readily available to all the students who may be on placement through Adventure Alternative at any one time. Please ensure you find out the location of the PEP from the local Adventure Alternative Representatives on arrival, before your placement commences.
Volunteer fundraising guide
Volunteer fundraising guide
The information on the documents below gives a guide for volunteers who are fundraising for or in relation to Moving Mountains. You can click on the pages to enlarge them. It would be a very good idea to print at least one copy of the first page to have with you when-ever you are doing fundraising activities.
Your fundraising target for Moving Mountains is making a genuine difference to children and communities in Kenya, Nepal and Borneo, and by joining a volunteering or international development trip you are committing to supporting the children and communities that you will be working with.
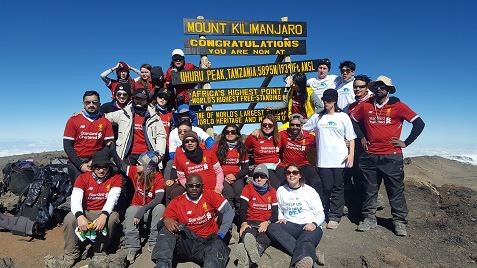
A charity trip on top of Kilimanjaro.
For us the beauty of our volunteering and international development trips is that you have the chance to see exactly how fundraised money is being used on the ground, it is this transparency that has helped to make Moving Mountains the successful charity that it is today.
Fundraising is not always easy but if you approach it in a confident manner and put the effort in then you will find that it is not as difficult as you might have first thought. Setting up an online giving page using BT MyDonate or Justgiving allows people to donate to Moving Mountains directly on your behalf. It also lets you keep track of the amount raised.
The following are a few tips and ideas to get you started but not all of these will suit you personally. Try to think outside the box, try new ideas and involve other people; when people know what the money is going towards you’ll find that most people are really supportive.
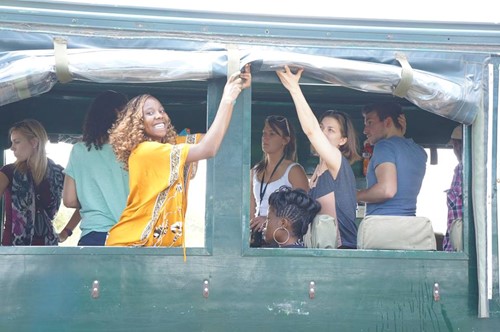
Students on a charity trip to Kenya.
Fundraising Tips
• Make sure your fundraising page is interesting, engaging and explains exactly why you are fundraising for Moving Mountains, people like to know what their donation will help to support.
• Time donation requests, people are more likely to be generous with their sponsorship directly after payday.
• Don’t forget to ask for Gift Aid as it means more money goes to your charity (and your fundraising target!).
• Ask close friends and family to donate first as other people may then match their generosity.
• Add some perspective around a suggested donation, for example, £20 might mean missing a visit to a restaurant.
• Set yourself small weekly fundraising targets rather than thinking about a larger and daunting total target.
• Get friends and family to spread the word about your fundraising too – they’ll be keen to help you get more sponsors.
• Make use of social media, Facebook, Twitter, etc are great tools for promoting fundraising.
• Mention your fundraising events in your answerphone messages, email signatures, notice boards, anywhere you can!
Fundraising Ideas
• Fundraising parties/Social events (coffee mornings, a night at the races, bbq’s, etc)
• Collections (bucket collections, supermarket bag packing, etc)
• Sponsored events (mountain climbs, fun runs & marathons, etc)
• School & University appeals (assemblies, non-uniform days, RAG, etc)
• Church & Community group support
• Local newspapers and media (articles and broadcast advertising your events)
• Sales (setting up tuck shops, selling unwanted items on eBay, etc)
• Local Businesses (letter writing to selected companies for support)
• Support from family and friends
Whatever your Moving Mountains fundraising target is we find that it is better to think of it in smaller sums, for example, a target of £500 could be 50 people each donating you £10... Always keep in your mind what you are fundraising money for, it is not for you to go out on holiday but is an amount which is going directly to the charity to improve the lives of hundreds of children.
Support Moving Mountains online
Fundraising for the Moving Mountains Trust helps us to support and develop long-term sustainable projects in Nepal, Borneo and Kenya and allows us to continue changing lives. To set up a BT MyDonate fundraising page follow these simple steps;
- Go to the following link - http://www.btplc.com/mydonate/
- Click on Start Fundraising
- Click on Create My Challenge (or Join An Organised Event if you are fundraising for a specific project, eg; our Medical Camps in Kenya and Nepal)
- Complete the Personal Registration form to create your account
- Under ‘Search for a Charity’ enter Moving Mountains Trust
- Enter the type of ‘Charity Challenge’ that you intend doing (for people involved in Moving Mountains trips to the countries which we work in click on ‘other’ and enter the name of the trip which you are on, for example; Africamp, Volunteering in Kenya, Himalayacamp, etc)
- If you are doing one specific challenge to raise funds for Moving Mountains (for example; Marathon, Mountain Climb, Coffee Morning, etc) then click Yes under ‘Is your challenge taking place at a specific location?’, click No if you are on a Moving Mountains trip as you are likely to be doing more than one event to raise funds
- Under ‘When is your challenge happening?’ enter the dates of your Moving Mountains trip or your challenge
- Select 12 months for the length of time you can ‘accept donations after your challenge is finished’
- Enter your name when ‘Choosing your web page address’
- Click Yes under ‘Do you want this link to be searchable on MyDonate?’
- Click No under ‘Do you want to link your page to a fundraising team?’
- Click No for both the queries under ‘Gift Aid & Charity Support’
- Be creative under ‘Inspire others with your fundraising story’, remember this is what people will read before they donate, let people know what you are doing and why!
- ‘Photographs & Video’ - Make sure that your main photo is relevant
- ‘Your fundraising targets and total’ - If you are on a Moving Mountains trip then you should already know what your fundraising target is
- ‘Notifications’ - Click Yes to both queries under notifications and enter a personalised message to thank donors (BT MyDonate send this out to the donor automatically) and a link to www.movingmountainstrust.org so people can read more about the work that we are involved with.
- PROMOTE YOUR PAGE! Let everyone know what you are doing, share on Facebook and other social media sites, let friends and family know and get people helping... You’ll be surprised how much support is there when you start asking. Good luck and let us know if you have any queries!
Medical elective ethics
Medical elective ethics
Successful medical electives exist where a long-term developmental perspective is a clearly identified aspect of the experience. This is partly because the ‘gap year’ industry is just that, an industry, and it lacks a pedagogy for global health. It often has a simplistic view of development and an incorrect representation of the ‘developing world’.
Any company offering a medical elective should be aware of the latest thinking on development from leading authorities like the Overseas Development Institute and the United Nations, especially with the current debate on the Millennium Development Goals and what will happen when they expire in 2015 and the next stage of globalization begins.
The qualities of a ‘global’ Doctor as defined by the World Health Organisation are: being community orientated, reconciling individual and community needs and initiating actions on behalf of the community. For this, they need to have an awareness and knowledge of health promotion, illness prevention, population needs, environmental and social factors in disease, and public health medicine.
A well run medical elective with ethics towards funding and equality and health education has the power to be a positive tool for development and can help to create great Doctors. But there should be considerable thought given to the nature of the elective, the relationships it creates with local health providers and the ‘supply chain’ of health in diverse environments, and of course the potential problems it can cause.
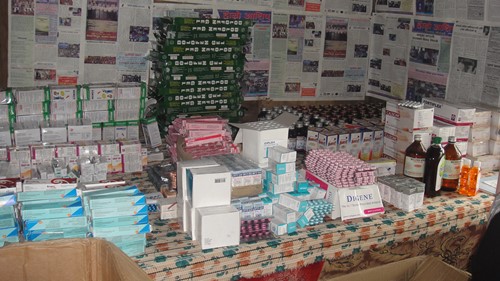
Medical supplies carried by foot to villages in rural Nepal.
Like any ‘responsible’ tourism, it should be underpinned by awareness and knowledge, professional advice and ethical integrity. In other words, it’s not just a holiday.
Unfortunately, there is a historical and cultural imperative which is uncomfortable to consider, because western societies taking advantage of developing nations as a training ground for their own health professionals runs the risk of becoming exploitative.
While it is important for medical students to see diseases and conditions rarely seen nowadays in developed nations, as well as experience different cultural and organizational settings, what happens if those benefits in training are not transferred back to patients in the developing world? The bigger picture of the international elective experience could ultimately be thought of as self-serving and a form of colonialism.
On the ground, practising ethics for medical students on an elective in a developing country can be equally as discomforting. Poor supervision creates an ineffective environment which could impose burdens on local facilities and result in unmet expectations on all sides. The role of the visitor who is expected to intervene and ‘see patients’ has implications on legal grounds and exceeds moral boundaries which students can find distressing. Clearly, patients have the right to know they are being cared for by students, and this begins with the relationship that the elective provider has with the medical institution.
Working with local communities in Kenya to provide medical relief to rural areas.
Some elective providers are NGOs, or they work with such partners in developing countries, and it is important to understand how these organizations are often viewed by Health Ministries which are tasked to provide a national health programme with severe workforce shortages, and often a chronic lack of investment, infrastructure and often even governance. In such an environment, NGOs with foreign funding often present a more attractive option for local health professionals, offering higher salaries and better employment packages.
If the NGO is not working in collaboration with the national and local medical authorities then the danger is that it creates a localized area of ‘health wealth’ with specialized equipment which serves limited populations. The result can be a parallel health system that is inequitable and creates a lot of tension. A medical elective which funds this sort of idealized project might actually be perpetuating resentment.
Done properly, a medical elective should work with an NGO that complies with the Code of Conduct for Health Systems Strengthening.
The Code is “a response to the recent growth in the number of international non-governmental organizations (NGOs) associated with an increase in aid flows to the health sector. It is intended as a tool for service organizations – and eventually, funders and host governments. The code serves as a guide to encourage NGO practices that contribute to building public health systems and discourage those that are harmful. The document was drafted by a coalition of activist or service delivery organizations, including Health Alliance International, Partners In Health, Health GAP, and Action Aid International”.
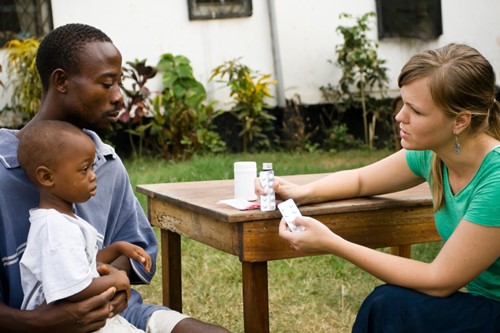
Discussing the benefits of medication and helping families understand their options for treatment.
The main principles of the Code are that NGOs:
- will engage in hiring systems that ensure long-term health system sustainability
- will enact employee compensation practices that strengthen the public sector
- pledge to create and maintain human resources training and support systems that are good for the countries where they work
- will minimise the NGO management burden for ministries
- will support Ministries of Health as they engage with communities
- will advocate for policies that promote and support the public sector
Clearly, the ethics of a medical elective require thought and care before signing up with a provider. It is important to ask questions about the integrity of the funding, and a good start is to look at the criteria in the Fair Trade Volunteering website.
Go into these experiences with open eyes and an informed opinion; discuss with the provider and your supervisor what is expected and how you can be most helpful. Do relevant research and do your part for developing global understanding by using your experience to benefit future students of exchanges or electives.
The following links provide documents to guide you in planning and preparing your elective, and also in looking at the ethics of medical electives
For more information on this subject please visit the following pages:
Electives for Medical Students: Membership guidance note – medical students
Planning your electives
The Electives Network provides information and advice on medical electives throughout the world
An informative article entitled Voluntourism: the downsides of medical missions
An article in the Journal of Global Health Perspectives entitled Does Pre-Medical ‘Voluntourism’ Improve the Health of Communities Abroad?
Medical Elective resources
The IIME (Institute for International Medical Education) produces a database of medical schools around the world. This is useful if you wish to make direct enquiries as to whether they accept students on electives.
Professional insurance
MDDUS is a medical and dental defence organisation offering access to professional indemnity and expert medico-legal and dento-legal advice for doctors, dentists and other healthcare professionals throughout the UK.
MPS is the Medical Protection Society providing legal defense and ethical support for members.
Electives for Medical Students: Membership guidance note – medical students
The foreign office website gives good travel advice by country.
Money4medstudents has a comprehensive list of available grants for electives.
The Royal Society of Medicine awards some bursaries for electives.
Elective link website a website that allows students to rate and review their elective experience for the benefit of undergraduates following in their footsteps for free.
The Electives Network provides information and advice on medical electives throughout the world
Royal College of Physicians medical student elective bursaries
Medsin – http://www.medsin.org
NGO Code of Conduct: http://ngocodeofconduct.org/
British Medical Journal: www.student.bmj.com/international/electivenpack.php
Recommended reading
The Medics Guide to Work and Electives Around the World by Dr Mark Wilson.
Beyond Borders by Hamish Graham.
Medical Tourism: The Ethics, Regulation, and Marketing of Health Mobility by C. Michael Hall.
The Essential Guide to Travel Health: don't let Bugs Bites and Bowels spoil your trip by Jane Wilson-Howarth
Health Professionals Abroad by Tim Ryder
The Virgin Travel Health Handbook: Sound Advice for Anyone Travelling Abroad by Michael Wright
Working in International Health (Success in Medicine) by Maïa Gedde, Susana Edjang, Kate Mandeville
Diagnosing Empire by Narin Hassan
Hitting the Road: A Guide to Travel Nursing by Shalon Kearney
First Aid for the International Medical Graduate (First Aid Series) by Keshav Chander
GO! Work, Travel & People in the Third World by Janice Stevens
Travel Happy, Budget Low by Susanna Zaraysky
Going First Class?: New Approaches to Privileged Travel and Mov (EASA Series) from Berghahn Books
Getting Global Health Teaching in your curriculum by Rough Guide
Health Systems Strengthening – NGO Code of Conduct recommended reading
Some are available via the Web links provided while others can be found in common medical and public health journals.
- Pfeiffer J, Johnson W, Fort M, et al. “Strengthening health systems in poor countries: a Code of Conduct for nongovernmental organizations,” American Journal of Public Health; 2008; Volume 98, Number 12: pgs. 2134-2140.
- World Health Organization Secretariat. The Global Fund’s Strategic Approach to Health System Strengthening: Background Notes 3 and 4 for July 30 – 31 2007 Consultation; 2007.
- Ooms G, Van Damme W, Temmerman M. “Medicines without doctors: why the Global Fund must fund salaries of health workers to expand AIDS treatment,” Public Library of Science Medicine (PLoS Med). April 2007; Volume 4, Number 4: pg. e128.
- McCoy D, Chopra M, Loewenson R, et al. “Expanding access to antiretroviral therapy in sub-Saharan Africa: avoiding the pitfalls and dangers, capitalizing on the opportunities,” American Journal of Public Health. January 2005; Volume 95, Number 1: pgs.18-22.
- Travis P, Bennett S, Haines A, et al. “Overcoming health-systems constraints to achieve the Millennium Development Goals,” The Lancet. September 4-10, 2004; Volume 364, Number 9437: pgs. 900-06.
- Buve A, Kalibala S, McIntyre J. “Stronger health systems for more effective HIV/AIDS prevention and care,” International Journal of Health Planning and Management. October-December 2003; Volume 18, Supplement 1: pgs. S41-51.
- Turshen M. Privatizing Health Services in Africa. New Brunswick: Rutgers University Press; 1999.
Bolivia trek kit list
Bolivia trek kit list
This is s suggested kit list. You may have preferred equipment that you have found works for you in these environments and activities. If so then feel free to adapt the contents below. Please also speak to us if you have any questions before buying any new or expensive gear.
BAGS
Max 90 Litre Duffle bag
35-45 Litre Rucksack
Small stuff sacks, waterproof, various sizes.
CLOTHING
OUTER - SHELL
Waterproof shell jacket breathable
Waterproof shell trousers breathable
Gaiters Goretex or equivalent
OUTER- WARM
Very warm insulated jacket; Down, Primaloft or similar
Warm, insulated mountain trousers softshell, fleece or PrimaLoft (optional)
MID-LAYERS
Thick Fleece / softshell jacket
Wool/microfleece top
Trekking trousers (synthetic)
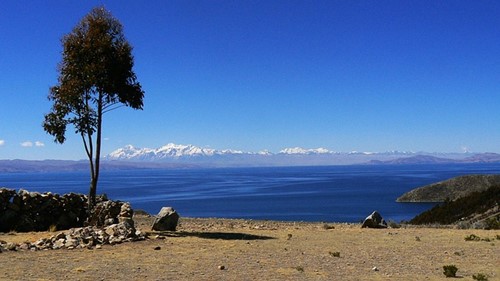
Views along the Cordillera Real.
BASE-LAYERS
Long sleeved base layer top (synthetic)
Light base layer leggings / running tights
Thermal Base Layer Leggings(optional)
Long sleeved thermal top(optional)
Underwear (synthetic dries quicker)
HEAD-WEAR
Warm hat to cover ears
Thin Balaclava to fit under a helmet or main hat
Buff (optional)
Wide-brimmed Sun Hat or cap with neck veil
Glacier glasses cat 3 UV polaroid
Ski Goggles cat 2-3 UV polaroid (optional but very useful in windy conditions)
Nose shade (optional)
HANDS
Thin liner gloves (two pairs are useful)
Mid-weight fleece or Windstopper gloves
Warm insulated Mitts (+lanyards)
Warm spare gloves/mitts to be carried in case of loss of the first pair
Shell mitts (optional but good in wet conditions)+ lanyards
FOOTWEAR
Thin liner socks(optional)
Trekking socks
Thick mountain socks x2
General socks
Trekking boots to provide support to ankles
Very warm plastic mountaineering boots B1 or B2 crampon compatible eg Scarpa Omega (speak to us about other suitable options) You can also borrow these for free from us in Bolivia.
Crocs/sandals/flip flops/down booties (optional for evenings)
Approach shoes / Trainers etc for use prior to the trek
City/travel clothes (can leave at guesthouse)
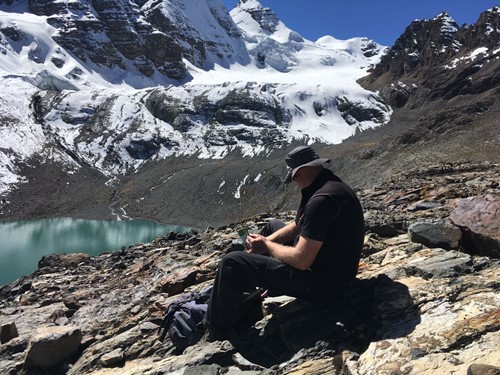
Stopping for a snack break near a pristine high-alpine lake.
SLEEPING
3-4 season sleeping bag (comfort temperature -20C or lower)
Compression sack for sleeping bag
ELECTRICAL
Head torch & spare batteries
Watch with light and alarm
Camera, memory card & batteries (optional but strongly recommended!)
Solar charger (optional)
Altimeter (optional)
MP3 player (optional)
Roaming, Unlocked or In-Country mobile phone (optional)
REPAIR KIT (optional but potentially very useful)
Gaffer Tape
Super Glue
Cable ties
4mm accessory cord ~2m
Needle + extra strong thread
Multitool
EATING/DRINKING
2x 1-litre drinks bottles
Lightweight insulated bottle covers
High energy snacks eg chocolate, energy drink powder, energy gels, jelly cubes etc
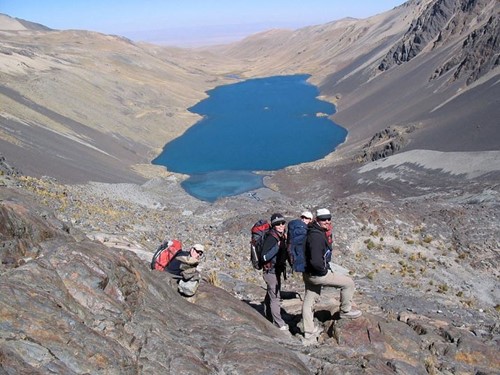
On a trek towards the Condiriri Valley.
OTHER
1-litre bottle to urinate in (optional)
Toilet roll in a plastic bag
Earplugs (optional)
Passport & copies, visa, insurance details, money, credit cards, plane ticket no.s
Waterproof pouch for documents
Books, Cards, Games
Diary & Pencil
MOUNTAIN HARDWARE
Walking Poles (optional) with snow baskets
(you can borrow all the following items from us in Bolivia)
10 or 12 point crampons (make sure these fit your boots well, take your boots to the shop when you buy them)
Walking axe & leash
Mountaineering harness
Screwgate HMS karabiners x2
Mountaineering Helmet (optional)
PERSONAL WASH KIT (optional!)
Antibacterial hand gel
Wet wipes (optional)
Toothbrush with cover
Toothpaste
Roll on deodorant
Shaving gear & small mirror
Shower gel/shampoo (<100ml for before/after climb)
Microfibre trekking towel
PERSONAL MEDICAL KIT
Paracetamol
Ibuprofen
Antiseptic Wipes
Adhesive Plasters
Blister Plasters
Zinc Tape
Insect Repellent
Antihistamine tablets
Sunblock Cream
Water Purification Tablets
Rehydration Sachets
Personal Medication as required:
eg. Anti-Malarials, Asthma Inhalers, Insulin, Epi-Pen etc
Possible Additional Personal First Aid Items
Lip Salve
Throat Lozenges
Latex gloves
Crepe Bandage
Hydrocortisone Cream
Prochlorperazine tablets (for sickness/nausea)
Ciprofloxacin tablets (general antibiotic; prescription required)
Acetazolamide tablets (altitude prophylactic; prescription required)
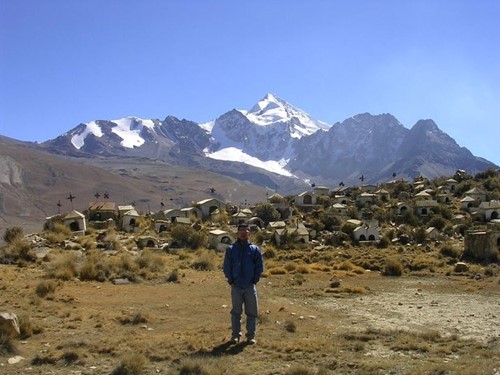
A fantastic view of Hauyana Potsi.
Note: you must check with your GP for your personal suitability to all medicines and their possible side effects and interactions. Please inform us of the details of all regular medication that you intend to use through the course of your trip and any relevant allergies and medical history related to them. You also need to check the requirements and regulations of the airline and all countries visited in relation to medications. For example; laws governing transport of some pain control medication and the need keep insulin at a suitable temperature, ie not in the cargo hold.
Morocco Packing List
Packing list for treks in the Atlas Mountains and Mount Toubkal
If you’re looking for a reliable packing list for your Mount Toubkal climb or trek in Morocco, you’ve landed in the right place. Our comprehensive list will help you be the best type of climber or trekker, prepared with the right balance of essentials while maintaining a manageable bag weight. Here’s the only packing list for treks and climbs in Morocco you’ll need to look at in the run-up to your expedition.
Bags
Organised trips like our Mount Toubkal climbs are fully supported with guides and cooks, and mules (or porters where mules can't cope with the terrain or conditions) to carry your main bag as well as tents (if needed), kitchen equipment and food. While this makes it easier for you to conserve energy and focus on reaching the summit successfully, it does mean that there is a weight limit to stick to. It’s also important to be very aware of the welfare of porters and mules during your climb, so not over-packing is key.
|
Main rucksack or duffle bag with shoulder straps (around 70 litres) |
Porters should not carry more than 20kg in total (if a porter is being used then this allowance needs to include space for their own belongings so make sure your main bag does not exceed the weight of 15kg). During winter climbs on Toubkal it may be that the weather and snow conditions mean that we cannot use mules so if you're main bag is a duffle, rather than a ruck sack, then please ensure it has shoulder carrying straps. We recommend something like the Highlander Lomond Bag or The North Face Base Camp Duffle.
|
|
Day pack (30-40 litres) |
This is the bag you will carry every day on your back, so make sure it has room for essentials such as water bottles, spare layers and waterproofs, camera etc.
|
|
Dry bags / tough poly bags |
Make sure all your contents are wrapped in waterproof bags to keep them dry. Use them also to store used clothes during the trek.
|
|
Waterproof bag covers |
Ruck sacks are rarely fully waterproof due to the amount of stitching on them so advisable to bring a cover for your day pack. |
|
Travel bag |
Bring another bag to leave in the hotel / riad in Imlil with your travel clothes inside. Some people will just use a bin liner or a stuff sack for this, any kit left in Imlil when you are on your climb of Toubkal or trek in Morocco will be very safe. |
Sleeping Equipment
Your choice of sleeping bag and sleep accessories will depend on your personal needs and preferences, mostly you'll be staying in riads and refuges with mattresses but if your itinerary has camping then you'll also need to bring your own sleeping mat or Therm-A-Rest, have a read through our sleeping bag guide for further information.
|
Sleeping bag |
3 Season sleeping bags are sufficient for the colder months but if you get cold easily, and especially during the winter months from November through to March it's better to upgrade to a 4 season sleeping bag or use a 3 season bag with a fleece liner.
|
|
Sleeping bag liner (fleece/silk) |
Liners provide added warmth and a good fleece one will convert a 3 season bag to a 4 season bag. Silk is also warm and less bulky but any liner will help to keep your sleeping bag clean. |
|
Sleeping mats |
These are not required for the majority of our treks and climbs in Morocco (unless the itinerary specifically mentions camping), but are an option for those who desire extra insulation for their sleeping bag. The foam mattresses in a lot of the mountain refuges are well used so an extra layer of insulation with a closed cell foam mat or self-inflating Therm-A-Rest can help keep you warm and comfortable. |
|
Travel pillow |
Pillows are very useful and the soft ones are easily packed small, or else make a pillow out of your clothing. |
|
Sleeping clothes |
You are likely to want to go to the toilet at night s wear something in the sleeping bag, but keep it lightweight and not too tight. Remember sleeping bags are designed to work best without wearing layers or socks, but a T-shirt and leggings or thermals bottoms will be fine. |

Clothing
On the higher peaks of the Atlas mountains you are exposed to the elements at all times and your body will experience quite a big daily temperature range, from over 30 degrees C in the summer and lower slopes to minus 10 degrees C on the summits and high refuges, which can easily be lower with wind. Having the right clothing is essential and the trick is to use a system layers that can be added or removed as conditions change. Every day will require a slight change to your clothing, adding warmer layers, gloves and hats as you go higher.
|
Waterproof / windproof |
Choose a breathable outer 'shell' layer like goretex as this will help to wick out any moisture and keep you dry inside. Make sure it has a hood and that you can fit your other layers of fleece and clothing underneath comfortably. |
|
Down jacket / thick fleece |
A down jacket or a thick fleece is essential for winter and summer summits. If you take a lightweight down jacket then you will probably need a fleece jacket as well in the winter (plus the outer shell over the top). Remember that synthetic insulted jackets remain warm even if they get damp or wet and is probably the better option as it is common to get rain on the likes of Toubkal. |
|
Mid layer fleeces / jumpers |
You will need a midlayer fleece or equivalent jumper for use over T-shirts / base layers and under the jacket. One or two will be enough. |
|
Base layer |
Base layers or thermals are lightweight and add a vital warm layer on cold evenings. Women bring leggings too which are also good for the first few days walking (on a winter climb ensure that you have warm thermal underwear, particularly for the summits) |
|
Trekking trousers / shorts |
Good quality walking trousers, preferably made of a quick dry material. Remember cotton does not dry quickly and jeans are not good for mountain hiking. Many trekking trousers have zips to convert into shorts, or take a separate pair of shorts for the lower level. One or two pairs will be enough. |
|
Trekking tops/ t-shirts |
A couple of trekking shirts or tops for the first few days, avoiding cotton. T-shirts and sports tops also work but will probably need a fleece layer on top for when you stop. Choose short or long sleeved. |
|
Underwear |
It's best to have a clean pair every day. Cotton will get damp and uncomfortable so opt for synthetic or merino wool and remember a dry bag to keep used clothes inside your main pack. Merino is a natural fibre which is naturally odour-resistant, moisture-wicking, insulates when wet, and dries fast. It is soft and comfortable against the skin and not too hot in warm temperatures. Synethic (mix of nyon and spandex) is also soft, comfortable, breathable and fast drying and cheaper than merino. Consider a fitted style like hipster or bikini brief which won't ride up or chafe. For men, the same principle applies and best to avoid loose shorts which can bunch up. |
|
Insulated gloves/ liner gloves and mitts |
Fleece gloves, preferably with a waterproof outer or mitts, and thin inner gloves are advised for winter climbs, best to have a pair of warm gloves on summer treks to keep hands warm at altitude, where it can be cold all year round. |
Footwear
Looking after your feet is important for all treks and mountain climbs. The right care and preparation will save you from pain and blisters, so cut your nails before setting off and keep feet clean and dry. Foot talcum powder is quite good too but remember to wash it off at the end of the day. Take some blister pads just in case and change socks every day.
|
Walking boots |
Leather boots are best, make sure they are well treated or have a waterproof lining to keep you dry. Boots should have proper ankle support and have a stiff midsole so the boot doesn't bend too much. You can read more about boots in our trekking boot guide. Remember also that your feet will swell at altitude and after a days walking so check first that you have some space for movement at home with your summit socks on (crampon compatible boots are required for our Toubkal Winter climb). |
|
Spare laces and footbed |
The terrain is quite unforgiving so do bring spare boot laces. Also if your feet do get damp then one option is to put in a spare dry footbed the next morning. |
|
Trekking socks |
Trekking socks for the early days will be fine - one pair per day - but for the summit days a woollen mix is warmest, but check they fit comfortably in your boot with no tightness. |
|
Camp footwear |
Change out of boots when you get to your riad / refuge or camp and let them air out. Bring a pair of camp shoes such as trainers or lightweight walking shoes or sandals. You will also use these for toilet visits at night. |
Headgear / Eyewear
We lose half of our body heat through our heads, so keeping your head warm while trekking in colder conditions is essential. On the flipside, there’s also risk of sunstroke and sunburn with the intense UV rays at high altitude.
|
Buff® / scarf |
The Buff® is ubiquitous on treks and climbs and is very useful to protect the face from sun and dust and wind. They can be made of stretchy thin material or fleece. You can use a scarf or snood equally well. |
|
Sunglasses |
Eye protection is vital, as the UV rays are particularly strong even in cloud. UV400 sunglasses are a must and try to take a pair that have side protection. Be careful of prescription glasses that change colour, they normally do not provide enough UV protection and the lenses often aren't big enough to prevent the rays getting into the eyes. |
|
Wide brimmed sun hat |
One of the biggest risks of trekking in Morocco is exposure to the sun and possible heat stroke. A sun hat must be worn at all times if it’s sunny and if it has a brim all the better to protect the back of your neck and ears. |
|
Insulated hat |
When the weather turns cold you’ll need to keep the heat in your body with a warm thermal hat. Make sure it covers your ears and isn't too tight. |
|
Ear plugs / phones |
Optional for music fans who like to zone out to their favourite album or doze off to podcasts at night, but also very useful against the noises of other hikers who snore. |
|
Contact lenses |
You can wear contact lenses on Moroccan treks without any problem, the altitude and low pressure on the peaks will not affect the fit of your lenses. The biggest issue is hygiene and handling the lenses, and also dryness of the eye caused by the wind and dry air. Dailies are easier but take saline drops as well as your usual cleaning liquids, and your glasses. |
Personal Hygiene
There are showers and bathing facilities on the treks and climbs, on itineraries with camping we'll provide a bowl of hot water at camps for washing your face and hands. For larger groups, we can provide a shower tent with a bag of water warmed up by the sun. The following is really just suggestions, there is no doubt you have your own personal preferences.
|
Wash kit |
Extras for men: |
Repair Kits
Be prepared for small repairs during your trip, from tears in jackets to jammed zips, the smallest issues can be an annoyance. Repair kits give you peace of mind and can come in handy in many situations.
|
Gaffer tape |
A small roll handy for rips and tears. |
|
Multitool |
The pliers help with stuck or broken zips |
|
Safety pins and cable ties |
Useful to pin a jacket together if the zip is completely broken |
Cameras / Tech
There are charging facilities in the riads on treks in Morocco and in the refuges in the mountains, though best not to rely on having access in a busy refuge so come prepared to be self-sufficient with power when you're at the higher altitudes.
|
Head torch and spare batteries |
This is essential, particularly if camping or for going to the loo at night. There are many types available but something like the Petzl Tikka would be adequate. Have one complete spare set of batteries. |
|
GPS/altimeter |
This is optional but very useful for tracking your progress. Some people use a satellite tracking device called a SPOT so people can follow their route at home. |
|
Camera |
Most people use smartphones nowadays but they are difficult to handle with gloves unless you have a selfie stick. A digital camera will provide better pictures and a lightweight tripod is useful for night shots. Take spare SD cards and a spare battery pack, they do lose power quickly in the cold. |
|
Smartphone and apps |
Smartphones are very useful for apps on the mountain and taking pictures, but there is only limited phone signal and no data signal at the time of writing. A Moroccan SIM card will be cheaper to use. Some interesting websites with apps:
|
| Power pack |
Charging at the higher refuges may be limited, particularly if they are busy so come prepared with a power pack if you plan on using electronic devices |
First Aid
The guides carry an extensive first aid kit, and we also provide advice on the various drugs and high altitude sickness. However you should still carry a personal first aid kit for minor complaints.
|
Personal medication |
A general antibiotic for a bacterial infection, Immodium or Lomotil for diarrhoea, inhalers if you use them, and painkillers for headaches (Tylenol, ibuprofen for example). Also take throat pastilles for the inevitable dry throat. |
|
Altitude drugs |
Diamox (acetazolamide) is the most commonly known and it does help as a preventive treatment for Altitude Mountain Sickness but only if mountaineering principles are followed, namely keep a slow pace. Read our blog on taking Diamox for more information and advice. Dexamethasone is effective for preventing and treating AMS and HACE and prevents HAPE as well. And nifedipine, by reducing pulmonary arterial pressure, is effective in treating HAPE (pulmonary oedema). Please note that in the case of serious altitude sickness the guides will effect immediate descent, night or day, and use all the facilities at their disposal to get a person to safety, including a helicopter service, rescue cars, stretchers and a well established support network. |
|
Oral rehydration sachets / Nuum |
Essential for replacing the salts in your body that are lost whilst hiking and getting dehydrated at high altitude. Nuum are tablets that you mix with water to help with salts and energy. |
|
Plasters, bandages and zinc oxide tape |
Plasters will be very useful for any cracked skin and small cuts, a bandage with tape for something worse. Compeed blister pads for your feet, plus a good quality tape to cover over hot spots if necessary. |
|
Antiseptic cream and wipes |
For small cuts and grazes. Keep small wounds clean and when possible air them out. |
|
Eye drops |
Dry tired eyes is common and eye drops are very useful, or a small eye bath. Dust can get everywhere too, so the drops can help with irritation. |
|
Sun cream |
Sun burn is a serious risk, particularly at altitude, so make sure you bring a strong factor sun block. To avoid having to reapply, choose a long-lasting, waterproof one. P20 is a good choice which doesn't run. |
Miscellaneous
|
Water bottle |
Make sure you have a bottle as you’ll need to stay hydrated. Platypus or camelbacks are fine too, but the tubes may freeze on summit day and must be insulated. Note that disposable plastic bottles are not recommended. |
|
Trekking poles |
These are very useful but especially for the descent, anyone worried about their knees should take a pair, preferably with suspension. |
|
Toilet roll |
Best to bring your own, particularly for the higher refuges where it is not always guaranteed |
|
Book/games |
There will be time to relax in the evenings, so bring a book or kindle, a deck of cards or a small game. |
|
Padlock |
The best padlocks are protected by security code rather than key. |
|
Plug adaptor |
Look for the type C and E plug adaptor to use in Morocco. |
Documents
|
Passport |
Don't forget a photocopied version (and a photo on your phone) in case of loss / theft |
|
Travel Insurance |
Keep a paper copy as well as a digital copy in case you can't access your phone |
|
Money |
Bring cash as well as credit / debit cards. The hotels and riads in the cities will take card payments but there are no ATM's in the mountain villages (including Imlil) so important to have enough cash with you when you head to the mountains for tips, soft drinks, etc. Read our practical information page for more details on money and costs. |
| Flight Details |
Keep a paper copy as airport officials like to see it when you arrive at the airport and are leaving |
Extra kit for winter climbs
|
Mountaineering boots |
Leather doubles, plastics or hybrids, B1 or B2 crampon compatible, read our mountain boot & crampons guide for more information |
|
Crampons |
10 or 12 point walking crampons, read our mountain boot & crampons guide for more information |
|
Walking axe |
Walking axes should have a leash attached, you may find walking poles with snow baskets a good alternative |
|
Harness |
An alpine harness is your best bet, with adjustable leg loops to fit over bulkier clothing |
|
Karabiners |
2 x screw gate HMS karabiners with a long (~120cm) climbing sling |
|
Ski Goggles |
Category 2-3 UV polaroid are preferable |
| Gaiters |
Essential for deep snow |
| Balaclava |
Useful for keeping warm - optional |
| Handwarmers |
Useful for keeping warm - optional |
| Helmet |
There is no danger from rock fall, head injuries are potentially from falls / slipping on the snow - optional |
Buying vs. Renting
For those who regularly climb or trek, buying your own equipment, boots and sleeping bags are a good investment. But renting is an option that can save money and make packing a lot easier. You can rent last minute items in Morocco at Imlil.
If you prefer to buy your gear, get a discount at Cotswold Outdoors (to get the current discount code contact us).
Morocco preparation
Morocco Preparation
The following checklist outlines some of the other things that you will need to make sure you have organised before you leave on the expedition. We have also given suggested sources of further information on each item. As with all aspects of the trip you can contact Adventure Alternative for further advice and support.
Flights
Adventure Alternative is not a flight ticketing agent so we do not sell flights directly. However, the flights to Marrakech are usually fairly straightforward to book. Amongst others, Ryanair, Easyjet and British Airways fly direct from London as well as from other regional airports.
It is worth checking online comparison sites such as Kayak, Ebookers, Sky Scanner etc. If you enter the departure airport as just 'UK' then you will get the options leaving from Manchester, Stansted, Luton, Gatwick etc. You often get the best prices if you either book a long way in advance or at the last minute. Needless to say, if you book at the last minute you are likely to have less choice and also have the possibility of there being either only expensive flights left or even none. It is best to book early.
Marrakech is a colourful city filled with the vibrancy of North African life.
The itinerary for your trip starts on the evening of the day described as "Day 1" on the itinerary. It is best if you can arrange a flight that arrives in Marrakech sometime between lunchtime and late afternoon on this day. That way you will have a bit of time to settle in and take an optional walk out into the city before we all have dinner that evening.
The itinerary ends on the day shown as the final day on the itinerary. We will usually be driving down from the mountains that morning which takes between one and two hours. We should be back in Marrakech by lunchtime so if you can book a flight with departure time from late afternoon onwards that will give us time to get to the airport and for you to check in.
If you are at all unsure about the flight dates or times that you need to book then please do speak to us before making a booking.
Insurance
You will need to take out personal travel insurance for the trip. You need to make sure it covers all the trip locations, altitudes and activities and also cancellation.
You need to buy coverage as soon as you book your place on the trip and buy your flights so that if something happens before the trip that means you can’t travel, you will be able to claim the flights and trip cost back. A few providers that are worth checking are; Campbell Irvine, the BMC, Snowcard, STA Travel, Insure and Go. Note that the BMC include Morocco within their "Europe" coverage so you don't need a worldwide policy.
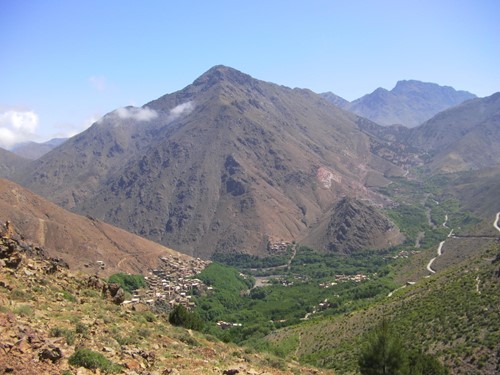
A view of Mount Toubkal in the summer.
Vaccinations & Medications
You will need to check what the requirements are for vaccinations, immunisations and medications on the specific trip you are doing. You will need to make an appointment with your GP or ideally a travel health clinic for at least 6 weeks before travel. When you go to the appointment you need to take along details of the trip including the country you are going to, the areas you will visit and the activities you will be doing. All of these factors, plus your own medical history, will affect what vaccinations you are advised to get or update.
Adventure Alternative operates an account with Interhealth who can give you medical and vaccination advice. You can also get advice from organisations such as the NHS and the FCO. The Fit For Travel and Live Well campaigns also give good advice for staying healthy while you are away.
Visa Requirements
Different countries have completely different visa requirements for people travelling to them. These requirements can also vary depending on your own citizenship, what you will be doing and how long you will be staying. If you are a UK citizen the first place to look is the UK Foreign & Commonwealth Office (FCO). Their website has a page for each country and a section called “Entry Requirements”. If you are not a UK citizen you will need to contact the destination country’s embassy in your home country or the foreign office of your own country.
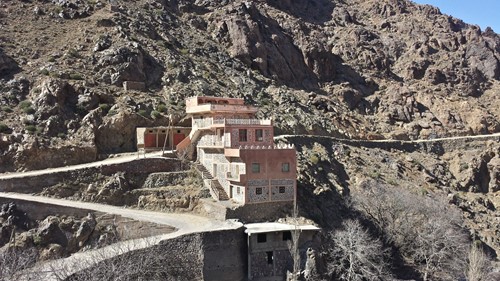
A look at some of the fantastic architecture built right into the hilside in a Berber village.
Money
The currency in Morocco is the Moroccan Dirham, this is normally abbreviated to MAD in currency information. There are usually around about 13 Dirhams to the GB Pound but you can check the current rate here. Do bear in mind that this may not be the actual rate that you get at an exchange bureau though!
The Moroccan Dirham is a 'closed currency' so, strictly speaking, you cannot get dirhams before you enter Morocco. There is an exchange bureau next to the luggage collection belts in Marrakech Menara airport, although the rates may not be very good. We can show you where you can change money at a good rate when we go into Marrakech city. You can also get money out of cash machines in the city, though you will need to check the rates and charges offered by your bank and you may need to put a travel marker on your account before you travel to prevent it being blocked.
In terms of how much money you will need, the following should give a rough idea of costs:-
- Dinner & drinks in Marrakech ~ 100-200 MAD
- Soft drinks / Mineral water / chocolate at refuges (total) ~ 100-200 MAD
- A hot shower at Mouflon Refuge (next to Nelter) ~ 20 MAD/shower
- Firewood supplement at Nelter Refuge (Winter Only) 10 MAD/Night
- Tips for Moroccan Staff (optional- given on last night) ~ 250 MAD
- Some small souvenirs (depends what you buy!) ~ 250-350 MAD
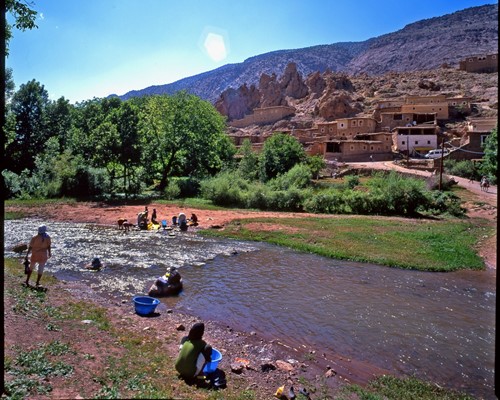
The villages, scenery and experience of being in the Altas Mountains of Morocco are unmatched.
Country Info
In order to get the most out of your trip, it is always good to read a bit about the history, geography, culture, customs and language of the country you are travelling to. There is a lot of information on the Adventure Alternative website and also on the FCO website and part of the FCO Know Before You Go campaign.
Health and Safety in Morocco
The exotic nature of Marrakech may lead to some degree of culture shock and the rugged landscape of the Atlas may be wild by some standards. This should not be seen as a scary or intimidating thing, quite the opposite, it is a big part of the experience of adventure travel. To that end, we do not set out to wrap you up in a bubble of western European culture. However, we recognise that all the uncertainties of travelling to a new and different place can be a bit daunting and can make you a little bit nervous as well as excited. Please be assured that we have our friendly and approachable staff on hand at all times to help you to take in all the new experiences and deal with any unexpected problems.
In order to help you to be as prepared as possible for your trip, we offer the following advice and tips on staying healthy and comfortable.
Before You Depart for Morocco
Before you leave you need to make sure that you that you complete our medical form if there are any pieces of information that you think are relevant but that are not specifically addressed on the form please do let us know. It is always better for us to be informed in advance of anything that we may need to account for.
You need to make sure that you receive all the relevant immunisations. You can get free information on which ones you need from your GP and further information is also available via our account with Interhealth and from the NHS. The process of getting the immunisations will usually need a period of time for booking in the first appointment and then also a couple of visits over a period of a month or more for all the jabs to be actually done. Therefore you need to contact your GP or travel clinic as early as possible to allow time for this process. You will be given a card or booklet that will record what jabs you have had. Take this record to each appointment and keep it safe for future reference. It is also worth noting that some of the jabs can be followed up within a certain period of say 6 months or a year to give more long-lasting protection of up to 10 years.
In Country Health Tips for Morocco
Once in Morocco, there are a whole host of things that you can do to keep yourself healthy and comfortable. Some of these may seem obvious but we include them as they are all things that we have seen in our considerable prior experience:-
Keep Your Hands Clean
This is something that you will, of course, do to some degree at home anyway. However, when you are away there will be bugs to which your body may have no built up immunity to and general cleanliness in some places is not the same as at home. Toilets may have limited facilities for washing your hands. In this cas,e you will need to bring a small bottle of hand sanitiser gel, these products do not need water and will sanitise your hands as the gel evaporates away. At the same time, it is a good idea to keep your fingernails short and clean, a small nail brush can be invaluable in this capacity. If you bite your nails or suck your thumb, this is the time to kick the habit!
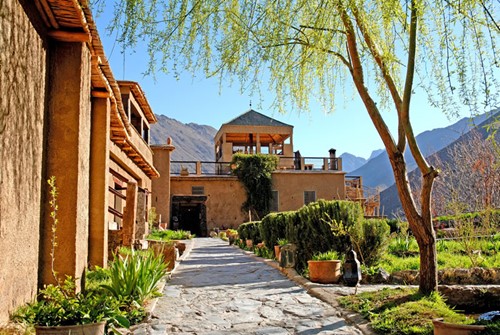
We also offer luxury treks at various Kasbahs in the Berber villages.
Sun Protection
Protect yourself from the sun. We all enjoy the feeling of the warm sun on our face, however, exposing your skin to too much sun can do a huge amount of damage in the long and in the short term. The sunlight up high in the mountains can be much more intense than that which you are used to and you can get burned very quickly. It is important that you have a broad spectrum, high SPF factor sunscreen with you and also that you have options in terms of lightweight long sleeved and legged clothing and a hat that will shade your face, neck and ears.
Note that it is theoretically possible to get sunburned through some clothing materials, some trekking and outdoor clothing now comes certified with a UPF rating giving the proportion of UV radiation that is blocked by the material. It is also worth having a reasonable pair of sunglasses. Also, note that some low-quality sunglasses may shade your eyes without blocking the potentially harmful UV radiation, this has been reported to be more dangerous than no glasses at all as your pupil opens up in the shade and lets even more UV in. Current advice is to look for products with either a CE Mark to British Standard BS EN 1836, a UV 400 label or a statement that the sunglasses offer 100% UV protection.
Aside from the effects of the sun on your skin, there is also the danger of heat exhaustion and its more serious development, heat stroke. These are both caused by the body's internal temperature being raised beyond its functional level and can lead to potentially serious complications. The way to minimise the risk is to stay out of the worst of the sun, particularly in the middle of the day, to keep cool and not to overexert yourself. You will also need to stay hydrated to help your body to cool its self through sweating. A hat can be invaluable for keeping the sun off your head and face.
Watch What You Eat and Drink
All the food prepared by our own staff will be safe and indeed delicious. However, at some points, you may choose to purchase food or drink independently. Most of the time this food will be perfectly safe but of course, we are not able to guarantee this. A few bits or advice can help to avoid nasty stomach bugs.
Try to order dishes that will have been cooked to a high temperature, for example, if a well-cooked piece of meat or potato arrives in front of you, you will be benefitting from the sterilising effect of the cooking temperature. Note that this is not totally fool proof as some bacteria will not be killed by cooking. Avoid cold dishes and ones that might have been cooked in untreated water, such as salads. If you eat fruit, choose ones that have a skin or peel that you will not eat, like bananas. Order bottled or boiled drinks like sodas or tea, always check bottles to see that the caps are still sealed.
Try to get into the habit of taking some "me time" where you wash your hair, have a good wash, sort out your stuff etc. We will provide plenty of opportunities for you to wash your clothes yourself or to pay a small fee for others to do so for you. Having a wash and putting on a full set of clean clothes may not sound like much but can have a very restoring psychological effect. Keep your gear in order, you need to periodically check your stuff and organise it so that you can find it easily and also check if you have lost or broken anything.
If you injure yourself in any way please inform your leaders immediately even if you don't think that there is anything they will be able to do for you. We will offer advice and help to monitor you. If you have a cut or graze for example you will need to keep it clean and change the dressing regularly. Even a simple splinter or thorn can develop into bigger problems if you don't look after it.
You may feel embarrassed to approach us and talk about certain issues such as if you develop diarrhoea or constipation. However, it is very important that you do talk to us. These are things that do occur here and there and you certainly won't be the first or the last to be faced with such problems. We may be able to offer advice ourselves on how to help sort out such problems or we will seek further advice on your behalf where necessary. It is important that we are aware of any problems so that we can monitor them and take required actions as early as possible.
Take Time to Acclimatise to Altitude
As you travel higher in the atmosphere, as you do when ascending the mountains, the air pressure reduces and therefore for every lungful of air you are actually getting fewer molecules. The result is that your system is gaining less oxygen. Clearly having less oxygen will affect you in a number of ways, chief among these is your ability to do physical activity.
Almost everyone will feel more lethargic, have a headache at some point and may feel less inclined to eat. Luckily our bodies do adjust to the altitude, primarily by producing more red blood cells so as to carry more oxygen per litre of blood. However, this adaptation takes some time to take place. The amount of time that it naturally takes any given person to acclimatise and how effectively they do so is mainly a matter of luck. It is controlled principally by genetics and is not affected by fitness.
There are a number of things that we can do to help our bodies to acclimatise and to minimise any negative effects; ascend slowly and in stages, stay hydrated, stay well nourished. There are certain medications that can be used but these are best left as a backup plan. It is important to be honest about how you are feeling, we have plenty of time to get to where we are going and the schedule is made flexible enough to spend additional days at a lower altitude if necessary.
Talk to Us and Your Team-mates
Everyone who travels away from home and loved ones for any period of time may feel some degree of homesickness. This can come in waves and can be made worse if you are tired or not feeling one hundred percent. Often, after the first excitement of meeting new people and seeing new sight,s you may hit a bit of a low in terms of energy and morale. What starts off as just a passing thought can become more of a problem over time. One of the best remedies is simply to talk about it. This may be with your teammates or with one of our staff. The most important thing is to be assured that our staff have dealt with the same concerns in others before you and indeed will have experienced the same thoughts and feelings themselves. We will always talk to you in confidence and will deal with any issues subtly and sensitively.
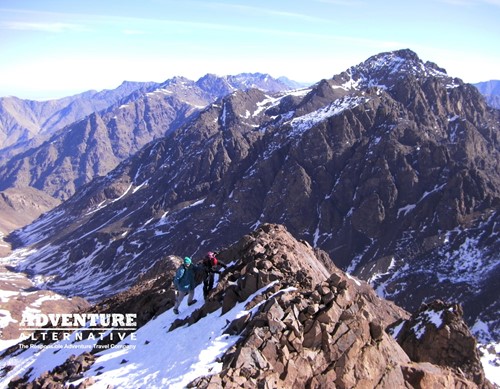
Snow isn't the first thing that comes to mind when you think of Morocco, but in the winter Mount Toubkal gets snow.
Morocco Seasons
From our time in Marrakech to 4000m up in the High Atlas, we will, of course, see a large change in temperature and exposure conditions. On the trek and the mountains, we will need to be prepared for potentially cold conditions with the possibility of precipitation as rain or snow.
The following table gives a general picture of the annual weather variation in the valley close to Imlil where our Toubkal area treks begin. (click on it to enlarge) Obviously, conditions at camps/refuges higher up and on the peaks will be colder and the wind chill will greatly lower the experienced temperatures. To convert the temperatures for higher altitudes you would usually take off another 6-10 degrees C per 1000m of altitude gained.
There are also detailed annual average temperatures charts at a website called Weatherspark and another also with rainfall statistics called World Weather & Climate. You can get good forecasts for the next 6 days at different altitudes on Toubkal at Mountain-Forecast.
As with the weather anywhere, the temperatures on the treks are slightly unpredictable. How hot or cold it actually feels is also affected quite a lot by whether you are in direct wind/shelter or sunlight/shade. However, the following will give you an idea of what to expect and how you should plan your clothing and equipment to suit.
Conditions & Clothing for Summer Trips (May & September)
Expect the daytime temperature in the mountains to be between 10 and 25 degrees C. As previously mentioned, temperatures usually drop by a degree or so per 200m of altitude gained as well, so they will vary according to where we are on the trek. For example, on the top of Mt Toubkal, it could potentially be several degrees below freezing.
Lower down, we will need to be prepared for maximum daytime temperatures of around 30 degrees C or perhaps slightly more, which will feel quite hot if we are out of the breeze and the sun is bright. If it is cloudy and there is some wind then on the higher ground and summits we may also have conditions during the day that could feel more like 0 degrees C or lower.
For some summits, we will also be making an early start. At this time we may spend the first few hours of the trek in the shade of the surrounding mountains before the sun comes up. We will therefore probably start with a light jacket or top on, which we will remove when the sun hits us later on.
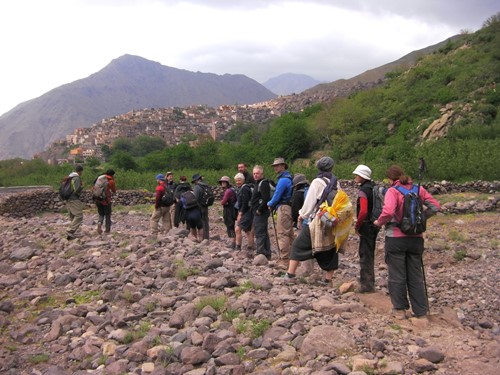
The Atlas mountains can be quite cool compared to the deserts of Morocco.
As an example of clothing to wear;
In the lower valleys, we will probably set off in shorts or light trekking trousers, a lightweight trekking shirt or top and maybe a light micro-fleece or softshell top if the sun is still below the peaks. By mid-day, we will be in single layers of lightweight clothing, sun hat, sunglasses and sunblock on any exposed skin.
On the upper parts of the trek and peaks, we may be leaving quite early in the morning in order to complete the hardest part of the day’s ascent in the cooler conditions. We may leave the camp or refuge in trousers, lightweight top, microfleece or softshell and even perhaps a warm hat. As we begin to climb and the sun comes out we will probably be down to just our lightweight layers and the sunhat and sunglasses will come out. Once we are up on the summit the air will be cooler and, especially if you have been sweating, you will soon need to throw on an extra layer and maybe your hard-shell windproof jacket.
In all situations, you will need to have an extra insulating layer, a waterproof hard-shell jacket and thin hat and gloves in your day-sack in case the weather changes or we are forced to remain stationary for any reason.
At night, temperatures would normally not drop below around 0-5 degrees C at our highest sleeping places such as the Nelter Refuge. But again, there is obviously some variation year to year. It is worth having a good sleeping bag to ensure a good night's sleep. We usually recommend a 3/4 season sleeping bag for our summer treks. If you only have a warmer bag then you can use this and just leave it unzipped if it is hot. When selecting sleeping bags for this trip, look for something with a comfort temperature of around 0 degrees C or lower.
Clothing for Winter Trips
Expect daytime still-air temperatures to be between 5 and 20 degrees C but factor into this that we will see a huge variation in the actual perceived temperatures. If you are high up, in the dark or shade and the wind is blowing across the snow it can easily feel more like -15 deg C and if you are climbing a steep incline in still conditions at mid-day in the full force of the sun it can feel more like 25-30 degrees.
Our clothing needs to be adaptable to the variation in conditions and the best way to achieve this is through a layering system, preferably with zips in the front and even armpits. These zips can be opened and closed as we move to regulate temperature without needing to stop and physically remove garments. Another very useful way to regulate temperature is simply by putting on or taking off a hat and gloves. A couple of pockets in your outer layer can be invaluable for this, or even stuffing them down the front of your top.
The kit list provided can be used as a guide but you may have clothing systems that you have found to best suit your own preferences. The general idea is to be equipped with shell layers for wind and precipitation, insulating layers for temperatures down to perhaps -10 or even -15, base and mid layers for layering flexibility and good quality winter boots with fully compatible crampons.
As mentioned above it could be -5 leaving the refuge in the dark of the early morning, -10 on the summit including wind-chill and +20 or more with strong UV in the valley as we return to the refuge in the afternoon. It is likely therefore that you will leave the refuge in the morning wearing trekking trousers, maybe shell over-trousers, base-layer, warm mid-layer, soft-shell, belay jacket, windproof layer, two hats and thick gloves. By the time you return in the early afternoon, you are likely to be wearing just thin trekking trousers, thin long sleeved base-layer top, sun hat and sunglasses with everything else stuffed into your day-sack.
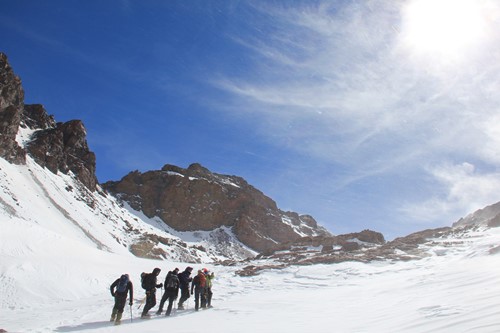
Be prepared for snowy conditions in the winter. We occassionally need to use crampons and ice axes.
Snow Along the Trails
The snowline can vary quite a lot between Imlil and the Refuges. At some times you can walk pretty much all the way to the refuge on the rocky/dusty path. However, you will need to be prepared, in terms of footwear and clothing, for the possibility of there being snow underfoot and potentially cold conditions, well below freezing.
The path to the refuge is not steep so even if there is snow on the ground it is very rare that crampons would be needed to get to the refuge its self. We would usually have our crampons in our mule bag anyway unless our local contacts report difficult conditions. As we get closer to the refuge there may be some ice and old snow on the ground that can be slippery. However, we will move slowly in this case and take whatever steps needed to get through.
The other aspect of walking on snow, aside from grip, is that it makes your feet a lot colder. This is especially true if there is fresh snow in the ground into which you are sinking. Therefore, even if you are going to change to different boots for the peaks, you do need to have good quality, stiff and supportive boots of 3-4 season warmth rating for this lower part. It is a good idea to have some nice warm socks and boots sized to accommodate them inside too. If you would like to send us the make & model of your boots, or a photo, we can let you know if they are likely to be OK. Gaiters are also extremely useful for keeping any snow out of your boots.
In terms of warm clothing, you will definitely appreciate some good warm layers. A good warm down or synthetic jacket is essential, although it does not need to be one of the huge expedition-style ones. This should travel with you in your day pack even when you are walking in the lower valleys. You also need other warm fleece/wool layers for your body, hat, warm gloves and windproof layers. It is more likely to snow than rain, but it is not impossible that we could have rain or sleet lower down in the valleys. I usually layer-up with my upper body and head and wear just normal trekking trousers, though slightly thicker, warmer trousers like softshells may be useful to have as an option.
At the Refuges
For your time in the refuge; the building, in general, is not heated and can be quite cold. As we are in a valley running North-South between steep peaks, this means that the direct sunlight arrives in the valley quite late in the morning and disappears again quite early. I tend to put on warm base-layer leggings and top as soon as we get there, along with other layers on top.
There is a shower/toilet area downstairs that can be rather cold, a common dining area on the ground floor that is moderately cold and a common room on the ground floor that has a log burner in the corner and can be very warm. The sleeping rooms are upstairs on the first floor and can be moderately cold. To get a good night's sleep I would say you will need a sleeping bag that has a comfort rating down to -5degC. Though if you tend to get cold at night then a warmer rating or a silk/fleece liner can be a good idea.
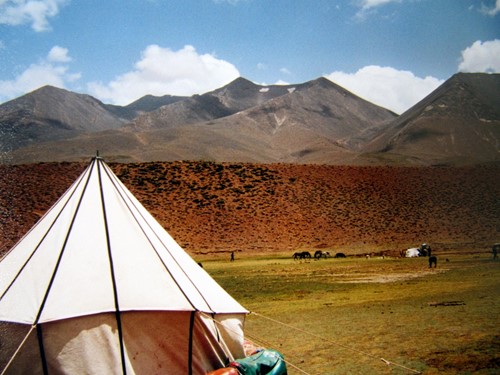
Most of the time we will be staying in buildings, however it's not uncommon to see the tents of the nomadic people who call this area home.
Boots generally stay in the entrance hallway in big racks so it is good to have either some big, thick socks + flipflops/crocs or some down booties to walk around the hut in. Unfortunately, hut slippers are not supplied like they are in the Alps.
With all of this, I would say that it is better to bring too many warm layers than not enough. We will have various briefings and chats in Marrakech and in Imlil so we can always review what you have there and leave any excess kit in Imlil.
We appreciate that it can be hard to visualise what the conditions may be like, and therefore what to bring. Hopefully, the information and examples above will help you to plan. We have a Morocco Kit list for both summer and winter that is worth a look for specific kit items. However, if you have any queries or questions on kit, then please do get in contact with us to discuss it further.
Accommodation in Morocco
During our trips to Morocco, we stay in a range of different locations, which vary to some extent in what facilities they offer. We give the following examples in order to help illustrate what to expect.
Marrakech - City Riad
In Marrakech, we generally stay in one of a few city riads that we use. The exact one may vary depending on the group size and composition. Riads are a traditional style of building in the old part of Marrakech. The rooms are usually arranged around, and open out onto, an open central courtyard and the exterior of the building either directly abuts other buildings or is generally very closed with few windows. There is very often a roof terrace for relaxing on and viewing the famous city roofscape and backdrop of the Atlas Mountains. We will generally stay in twin rooms with sprung or foam mattress beds with all bedding provided. Virtually all the time, rooms will be ensuite with a western-style toilet, bathroom and shower. Breakfast is usually provided at the riad but our evening meals are likely to be taken at a nearby restaurant.
Imlil - Berber Guesthouse
Once in the mountains, our first night is usually spent in a small guesthouse run by a local Berber family, almost everyone who looks after us will be part of the extended family of our host. The guesthouse is fairly basic and slightly eccentric, but clean, very welcoming and an authentic experience of life among a local family. We will stay in a twin or even triple rooms depending on our group size. In some cases, the single beds may be fairly narrow and low to the ground. Bedding is provided in the form of sheets and woollen blankets, but these may not match! All of the rooms are ensuite, with a shower and western-style toilet, although one does not have a sink so you wash your hands under the shower head. Hot water can be limited here, especially if we have a larger group. Therefore it is courteous not to take too long in the shower. It can be cold at night up in Imlil, even in the summer, so you will need to make sure that you have some warm layers to wear in the evenings as there is no central heating here. All our meals in Imlil are freshly prepared by the family at the guesthouse. If the sun is out we will often eat on the roof terrace with great views over the valley and with overhanging cherry trees providing tasty snacks in early summer.
Other Village Guesthouses
Locally owned and run guesthouses in the villages off the main tourist trails will be basic but welcoming and authentic. Most will have showers and western-style toilets but some may be squat-type. Rooms will usually be twin or even triple rooms depending on our group size. In some cases, the single beds may be fairly narrow and low to the ground. Bedding is provided in the form of sheets and woollen blankets. It can be cold at night, even in the summer, so you will need to make sure that you have some warm layers to wear in the evenings as there is no central heating. Food will be prepared by our own expedition cook in the guesthouse kitchen and served in the dining area of the guesthouse.
Kasbah du Toubkal
In Imlil, there is a very impressive and luxurious hotel inside a re-constructed Kasbah (castle) on a promontory above the village. It has been tastefully decorated to give a local feel whilst offering comfort and facilities of around four-star quality. We can arrange upgrades for individuals or groups who would like to stay at the Kasbah, though it does often become fully booked many months in advance so we can't guarantee places. If you would like to discuss this option as part of your itinerary then do get in contact.
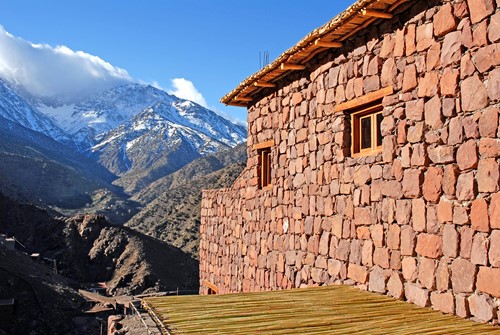
You can opt for a more luxury-based tour option through the Atlas region.
Mountain Refuge - Tamsoult Refuge
One of the refuges we stay at on the summer programme is called Tamsoult. The refuge stands at the lower end of a series of terraced fields which are bright green in summer. It was recently fitted-out so it is in good condition and fairly luxurious for a mountain refuge. It is a large building of three stories at the downhill side. The lower floor houses a communal dining and relaxation area and the kitchen in which our cook will prepare our food. The middle floor, where the front door is, has an area for sitting and relaxing, a few dormitory rooms and the showers and toilets. Upstairs are more rooms, a toilet and a roof terrace. The rooms here are nearly all dormitory-style with large double bunk beds. Therefore you may end up sleeping next to another member of the group in a double bunk, so bring earplugs in case of snorers. This just depends on how full the refuge is and which rooms are available, we are generally able to have separate rooms for male and female members of the group, however, for small teams, we may all be in one room. There is one triple room which we may be able to reserve upon request for a supplement. Food at the refuge is prepared by our own cook in the communal kitchen.
Mountain Refuge - Nelter Refuge
Another mountain hut we use is called the Nelter Refuge. Its location right at the foot of Mt Toubkal means it is popular and sometimes busy. Accommodation at the refuge is basic but functional. The rooms are all dormitory-style with large sleeping platforms extending right across the room on two levels, containing a line of individual foam mattresses. This means that you may be sleeping between two other people, usually from our group but possibly from another if it is busy. Which spaces we have available will depend on how busy the refuge is and how big our group is, but generally, we will occupy a whole level in one room.
In some instances, we will book the annexe building and if we are a bigger group we may be the only one in there. The sleeping arrangements are the same here but the toilets are all squat-type and there is no shower. We can, however, use the facilities in the main Nelter refuge or in the adjacent Mouflon Refuge for a small fee. All our food here is prepared by our own cook and eaten in the communal dining areas.
The Nelter Refuge in Winter
The refuge buildings, in general, are not heated and can be quite cold. As we are in a valley running North-South between steep peaks, this means that the direct sunlight arrives in the valley quite late in the morning and disappears again quite early. It is a good idea to put on warm base-layer leggings and top as soon as we get there, while you are still warm from the trek, along with other layers on top. There is a shower/toilet area downstairs that can be rather cold, a common dining area on the ground floor that is moderately cold and a common room on the ground floor that has a log burner in the corner and can be very warm. The sleeping rooms are upstairs on the first floor and can be moderately cold. To get a good night's sleep most people will need a sleeping bag that has a comfort rating down to say -5degC. Though if you tend to get cold at night then a warmer rating or a silk/fleece liner can be a good idea. Your big boots will stay at the entrance hallway in big racks so it is good to have either, some trainers or some big, thick socks + flipflops/crocs or some down booties to walk around the hut in. Unfortunately, hut slippers are not supplied like they are in the Alps.
Mountain Refuge - Camping
In the summer we usually camp at the refuges. We will generally be in 2-3-man dome tents arranged on flat platforms at or near the refuges. Sleeping in the tents can be a great experience and in some ways more relaxing than in the refuges if they are busy. It can get a little cold in the tents, even in summer, so it is worth having a good sleeping bag and bed-roll/carrymat. We will use the toilets and cooking/eating facilities at the refuge and our own cook will prepare our meals.
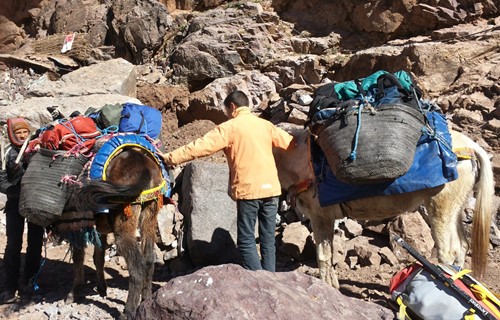
Supplies is often carried by donkey in this part of the world.
Food in Morocco
As a general rule, the food we eat in Morocco will be dominated by fresh salads, vegetables and either couscous or pasta, followed by fresh seasonal fruits and accompanied by small semi-flat breads, hot, sweet tea made using fresh mint leaves. The food is all freshly prepared and is very healthy and nutritious.
It is often worth bringing a small supply of your own favourite high-energy snacks to eat during the trek if you find your energy levels dipping. Things such as jelly babies and energy bars/gels can be a useful backup in this case. As can dried fruits and nuts.
Breakfast
Breakfast is usually Moroccan in style with semi-flat bread, jams, honey and butter washed down with sweet, black mint tea and/or coffee. We will also sometimes have fried or boiled eggs.
Lunch
Most days on the trek we will stop for around 30-40 minutes and have a good lunch. Our cook and muleteers will go on ahead of us and set up 'camp' to make our lunch. This may be at a local house of guesthouse or even just in a suitably attractive spot on the trail. The exact time of the meal depends on our speed covering the ground to the position previously agreed with our cook and muleteers. Therefore, if we are a slower group it may be 2 pm before we stop. Lunch is usually sweet mint-tea with bread and a huge platter of finely chopped salad such as tomato, pepper and onion along with sweetcorn, olives, sardines, beans and preserved meats. We will often have delicious local oranges as well.
Some days on the trek may involve taking lunch at locations to which the mules cannot reach. On these days we will carry a simple packed lunch. This usually consists of bread, sardines, cheese and fruit.
Dinner
Dinner does vary but a typical meal would be soup and bread followed by a chicken or vegetable tagine and couscous, rice or pasta. We often also have seasonal fruit for deserts such as oranges, watermelon or cantaloupe.
If you have any medical or religious dietary requirements then please do make sure that you give us details on your application and booking.
Volunteer guidelines
Volunteer guidelines
In order to gain the most from taking part in overseas volunteering and in turn to leave a positive mark on the destination country, we ask that participants agree to certain aspects of preparation and conduct.
1. Inform themselves about all relevant issues relating to their venture.
By informing themselves fully volunteers will ensure that they are well prepared for their trip. It is recommended that volunteers familiarise themselves with their host country, its peoples and cultures, as much as possible before they go. Suggestions are to find books and other resources on it, monitor the news on that country, and meet people who have lived there or come from there if possible. Sending organisations should facilitate this process by providing volunteers with possible sources for their research, some basic facts and putting them in contact with exvolunteers who have been there or, better still, have worked on that placement.
2. Familiarise themselves thoroughly with their role description before departure.
Written role descriptions go some way to dispel uncertainties volunteers have about what they will be expected to do on their placement. By familiarising themselves with their role description this can prompt them to ask further questions about it and about the reasons why such a job is necessary. Once again, contact with ex-volunteers who have worked on that placement will help volunteers prepare so that they can utilise their time overseas well.
3. Respect local customs and adopt the role of learners and guests.
A major motivation for volunteering, expressed by volunteers, is to ‘give something back’, to ‘help out’ people less fortunate than themselves. This motivation, however, can sometimes lead to volunteers being overzealous as they work to maximise their impact. Often they can come with a sense that they know best, showing little respect for local customs and knowledge. However, it is often the volunteer who learns more from the hosts, than the hosts from them. The principle in the charter aims to encourage the volunteer to be aware of their role as learner rather than just ‘giver’.
4. Act always in a professional manner and be flexible and adaptable while in their placement.
In cases volunteers may be tempted to get in too much of a 'holiday' frame of mind and take a less than professional attitude to their placement. They may turn up late, leave early, or behave in a manner innappropriate to providing a service to the local community. Furthermore, while volunteers may receive role descriptions, as often as not volunteers are expected to be flexible and adaptable in what they do while on placement, and in their attitudes to the local community and their colleagues. This principle aims to underline these points to volunteers.
5. Take due care with their personal safety and physical and mental health.
Health and safety issues are vital for volunteers. While the sending organisation can provide
volunteers with guidance, it is the responsibility of the volunteer to abide by that advice and to use their common sense. Volunteers should find out about the local health and security situation as part of their general research on their host country. Some sending organisations may provide health insurance for volunteers but most will not. It is the responsibility of volunteers to check this out and take appropriate steps.
6. Channel the experiences and knowledge gained while overseas into their home community.
As pointed out in principle 3 above, volunteers on overseas placements are in the privileged
position of being able to learn about their host country and the experience of working in a developing country. This principle aims to encourage volunteers, on their return, to use the knowledge they gain to raise awareness at home on issues affecting the developing world. Mostimmediately, this can include being available for other volunteers. It can also include giving talks in their local areas, becoming part of support and/or campaign networks, and/or receiving training and participating in development education. Engagement with local media through writing articles or giving interviews is a further option.
7. Accept and sign a Code of Conduct embodying these principles.
Many sending organisations give volunteers a Code of Conduct to sign before going on their placement in an attempt to ensure that they are aware of what the organisation expects of them in terms of appropriate behaviour. This principle aims to encourage sending organisations to include the principles of the Charter within their Codes of Conduct and so encourage volunteers to follow them.
Volunteer guidelines - responsibilities and legalities
The following information is to clearly describe the responsibilities that we have to you from both the company and the charity, and where the legal liability for your trip lies. This is for people carrying out work for Moving Mountains in a voluntary capacity, such as building a school.
Who you are booking with
By offering to assist on a Moving Mountains project or volunteering programme you accept that the logistics of your trip will be managed by Adventure Alternative (both in the UK and in Kenya or Nepal). Any payment you make for trip logistics (transport, accommodation or activities) goes to Adventure Alternative and your contract is with Adventure Alternative, not Moving Mountains; this means you come under the terms and conditions laid down by the company, and not the charity.
Adventure Alternative is based in the UK as a tour operator, but we also have our local providers in Nepal and Kenya which are locally registered tour companies that receive investment and training from the UK head office. Therefore you will receive an invoice from the UK Company for the agreed logistics, but it will be local company that physically manages your trip.
Donations to the charity
Any donation for the charity must be made to Moving Mountains, which exists both as a registered charity in the UK and as registered NGOs in both Nepal and Kenya. We do not allow people to fundraise for the charity and use those funds for their trip costs.
All charitable projects or programmes are agreed jointly by the Trustees of both the UK and the in-country organisations. Sometimes the projects will be driven by specific fundraising events, and sometimes they will be part of a long-term ongoing commitment to an area. While we are happy to include the donor in this process, we must make it clear that it is the job of the charity and not the donor to decide the nature of the project.
It is the responsibility of the Trustees to ensure the proper and relevant expenditure of donated funds, and any collaboration we have with donors does not mean joint responsibility for project implementation or programme completion.
Who is responsible for you? Who has liability for you?
Even though you are volunteering for Moving Mountains, your trip logistics are covered by Adventure Alternative and therefore it is the company that has responsibility for you. It has a tour operator insurance policy to cover its activities.
Moving Mountains has a public liability insurance policy but it does not cover the work of volunteers in a foreign country engaged in building projects or the like, where health and safety regulations are lower than in the West. The charity is covered for 'green light' activities which include what we offer in the programme but we cannot allow activities which are dangerous such as going on scaffolding.
Please note that liability insurance is completely different from the usual travel insurance you will need for medical expenses and repatriation incurred during a trip abroad.
Commonsense advice
Your trip will often be in basic surroundings, possibly doing building or renovation projects which are inherently more dangerous than their equivalent in the West. Building standards are lower, techniques often are different and basic, and regulations are simply not there. We ask that you consider carefully your role in all of this. It will require three commitments, one on our part and two on yours.
Our commitment to you:
- We will endeavour to give you as much information as possible so you are not ignorant of standards and facilities and likely issues that may develop.
- We will provide good, experienced staff to advise you accordingly of the best way to handle situations and projects.
- We will use all our resources and experience and staff to protect your welfare and safety, on the understanding that accidents sometimes do happen, and situations are dealt with very differently and it is very difficult to offer 'western' responses.
- We will inform you of our risk assessment and contingency plans in case of accidents or issues, plus details of our network of staff, both Kenyan and western.
Your commitment to us:
- You should take the advice of our staff, and not engage in potentially dangerous activities which could be injurious to your health or welfare. This will require an increased level of common sense, self-preservation and integrity. We do not, for example, recommend climbing on scaffolding, but laying bricks and putting in floors would probably be fine. We are not demanding anything from you that may be dangerous and we ask that if you ever feel unsure then please just walk away.
- You must have your own comprehensive personal holiday insurance to cover you for all the usual medical, repatriation, loss of baggage and cancellation issues. Do talk with us if you want to make sure that your policy covers you for the various activities you will be doing. There is nothing you will be doing that would be regarded as a hazardous activity in legal terms.
We do not want your trip to become an issue of insurance but unfortunately we live in a world of litigation and arguments over liabilities. We are open in saying that doing voluntary work in a remote place carries with it a degree of uncertainty and possible accidents, which can of course happen any time in any place. We do ask that you consider the whole environment in which you will be living and working. This is not a disclaimer for our duty of care to you, simply an appeal for moderation and reasonable attitudes on all sides. Communication is key to this so please do contact us at any time to ask questions.
Kit List for Kilimanjaro
Kilimanjaro and Mt Meru all require similar kit for non technical climbs (treks), which covers the vast majority of our adventures. If you are undertaking a technical ascent of Mt Kenya's Batian peak or Kilimanjaro's Western Breach then please contact us for additional kit requirements.
The kit list does change a bit depending on whether you are going in the wet or dry season, but do always consider that the nights and especially summit night is very cold and requires a good thermal layer, fleece layers and a down type jacket. You will also need a good quality rainproof jacket and trousers in case it rains, plus we recommend gaiters to protect the tops of your boots.
In the rainy season around April and October, it is very likely there will be strong rain showers for a few hours in the day. It's advisable to bring two pairs of boots, one leather waterproofed pair for the rain and mud, and another pair for when it's dry.
Don't forget to keep your extremities warm and also protected from the sun, so warm hats and gloves plus a sunhat and god quality sunglasses. Take one set of thermals for when you need them and possibly also to wear in bed, and don't forget several pairs of socks and underwear. You can take T-shirts for wearing round the camp and on the trek, but cotton does not dry quickly so we recommend the quick-drying synthetic tops.
Boots really need to have ankle support and a good sole for grip and preventing you twisting a leg. The mountain has a lot of different terrain to cover and it will be important to support your feet well and also keep them warm. Lightweight trekking boots or shoes are lighter of course but they are not as warm and not as sturdy.
Sleeping bag needs to be rated to minus 10 and you may want to bring a liner too for extra warmth and just to keep the bag clean. Always go for a bag with a proper 'mummy' style hood which keeps your head warm at night.
In terms of equipment don't forget a headtorch, trekking poles (especially for the descent and if you feel uneasy going down or you have susceptible knees), battery power packs for phones and electronic items, a first aid kit with the basics including ibruprofen for altitude headaches, and some basic toiletries.
Kit Overview for Kilimanjaro, Mt Kenya and Mt Meru
- Duffle bag or rucksack for your main gear with lock (to be carried by porter). Maximum 15kgs.
- Daysack of about 30 -40 litres for carrying your daily needs, with waterproof cover.
- Bag to leave in the hotel with travel clothes (suitcase is fine)
- Sleeping bag rated down to -10° Celsius or more if you get cold easily (available for hire)
- Sturdy hiking boots with ankle support, and a sole that does not bend too easily. Gore-Tex lined fabric boots are not quite as warm as leather and are not fully waterproof in very heavy rain.
- Shoes or sandals for wearing around camp
- Gaiters
- Waterproof windbreaker and trousers, preferably breathable, with a hood and big enough to accommodate several layers beneath
- Fleece tops or jumpers, or lightweight down tops
- Down or synthetic jacket or a heavy duty fleece
- Base layer, long sleeved top and long johns
- Balaclava or buff
- Warm hat and sun hat
- Warm gloves or mittens and thin liner gloves. Make sure gloves are windproof or waterproof.
- Sun hat, high SPF sun lotion, high SPF lip screen and good quality sunglasses
- Trekking clothes - trousers and shorts, shirts and T-shirts, jumper or mid-layer fleece, underwear and several pairs of hiking socks
- Water bottles and/or camelback (take a protective cover for the mouthpiece) and water purification tablets (optional, iodine-based is fine). The Park only allows hard Nalgene water bottles, no disposable ones.
- Head torch with spare batteries
- Trekking poles (available for hire)
- Personal wash kit including a nail brush, moisturising cream, after sun, a small towel, tweezers, nail clippers, wet wipes (Femfresh for women), soap and a small shampoo.
- Variety of waterproof bags - for dirty clothes, sleeping bag and keeping clothes dry
- Personal first aid and hygiene to include ibuprofen to help with altitude, paracetamol for high temperatures, plasters, antiseptic cream, Immodium, strepsils, some toilet roll and prescription medicines. Also, ear plugs are useful.
- Passport, insurance papers, spending money, air tickets, spare batteries for digital cameras, reading books and maps, diary, pen
- Power pack for phones, and any electrical items.
In-depth Kit and check list for Kilimanjaro, Mt Kenya and Mt Meru
Rental Items
You can rent sleeping bags, duffle bags, trekking poles and waterproof trousers/jackets from us.
If you are buying gear in the UK/Ireland then Cotswold Outdoors gives our clients a discount - contact us for details.
A look around camp at first light.
Personal Hygiene on Kilimanjaro
The campsite will have hot water near the mess tent where you can fill a bowl in order to have a wash of your face and hands, and clean your teeth. Take a nail brush and even a flannel so you can properly clean the dirt and dust away. We provide soap too but you can bring your own. It's a good idea to bring a small towel which dries quickly.
You can also ask for a bowl of hot water at camp to take into your tent in order to have a private body wash, plus we do also have a shower tent with a shower bag for larger groups or groups who wish to chip in together for a porter to carry it. The shower bag lasts about 5 minutes and is best used on a hot day when the heat in the shower tent can be nice and warm.
It's difficult to wash your hair on a Kilimanjaro trek, easier for people with short hair obviously. Some people bring no rinse shampoo shower caps.
Most people bring a packet of wet wipes to keep clean and women tend to bring Femfresh as well. Do also bring some moisturising cream and deodorant.
For people wearing contact lenses, it can be tricky to keep hands perfectly clean and it's certainly best to put in lenses inside the tent and out of the wind. There is no issue with using lenses at altitude, although in the high thin air it's common to have dry eyes.
Further help
Trekking Boot Guide | Sleeping Bag Guide | What to Wear on Kilimanjaro |Toilets on Kilimanjaro | Top 5 routes on Mt Kenya.
Training for Kilimanjaro
Training for Kilimanjaro and Mount Meru
This is a trek to climb Kilimanjaro with no technical requirements, but it does offer a mountain experience which includes camping and being outdoors all the time. You will need to be able to walk five to six hours a day for a week straight. Any regular hill walker will find climbing Kilimanjaro within his or her capabilities, but also remember that you will be sleeping and eating on the mountain too. The cumulative effect will be tiring and you should mentally prepare for a week of sleeping in a tent and living outdoors. Trip preparation will be important, so best not to leave things until the last minute, we recommend a few months of moderate training prior to departure. Hill walk as much as possible with a pack of about seven kilos.
Beautiful sunrise over Mount Kilimanjaro.
A training programme should include regular hill walking with a small pack of around 10 kgs, or regular visits to the gym for the final two months before departure. Work on strengthening calf and thigh muscles and exercise your cardio-vascular stamina on a step machine or cross trainer, but remember this is a holiday and not a forced march! Don't approach it as if you are training for a marathon, and remember it can be dangerous to over train.
Whether you climb via the Kilimanjaro Machame route, the Mount Kilimanjaro Lemosho route, Mount Kilimanjaro Rongai route or the Mount Kilimanjaro Northern Circuit route - all have similar fitness requirements.
The secret of climbing Mt Kilimanjaro is to go slowly and enjoy the scenery, drink well, eat well and sleep well. A regular, consistent and slow pace will ensure the proper acclimatisation. Statistically, the biggest proportion of failure occurs with young, fit males who go too fast and ignore the simple rules. It’s not a race or a competition!
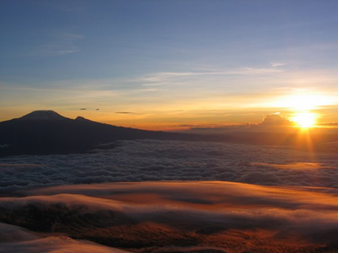
The sun rising above the clouds on Mount Meru.
Operate on the principle that if you look after yourself well during the first five days, then the sixth 'summit day’ will be a big challenge but not dangerous. We cannot condone the people who push themselves beyond the bounds of safety and wear the badge of hardship as a medal of honour. We want people to be clear-headed on the summit, with the strength to come all the way back down again! Drink lots of liquid, eat every meal and go slowly all the way – this is the mantra that my staff will say to you over and over again.
When people climb Kilimanjaro many worries are borne of ignorance, but with knowledge comes calm, and with that calm comes the ability to prepare mentally and to prevent unnecessary stress. Therefore the more you read about the mountain, about altitude sickness and about self-preservation on expeditions, the better prepared you will be. We have booklets on high altitude trekking which we can send to you.
Safety on Kilimanjaro
Safety on Kilimanjaro
We take your security very seriously at Adventure Alternative, Below is the emergency procedure on Mount Kilimanjaro in the event of an accident or the need for a descent.
Emergency procedure on Kilimanjaro
There is now a helicopter search and rescue service on Kilimanjaro operating out of Moshi, it is run by Kilimanjaro SAR. A helicopter is called by our guides who have completed a special training course to learn how to assess patients and call in an evacuation. The heli will only fly to around the height of the last camp Barafu, 4600 metres. It cannot land on the summit, so an injured person would still need to be carried down to the lower level before being taken off. Also the helicopter will only fly if the correct weather conditions allow it, and it will not fly at night.
You will need to provide Castro with your insurance details on arrival so that he can provide a manifest for the helicopter company. Once an evacuation is made then Kilimanjaro SAR will contact your insurance company to make payment. Make sure that your policy covers you up to 6000m for a helicopter evacuation. Kilimanjaro SAR also has a medical clinic where people can be taken for assessment and treatment, so your insurance policy should also cover for medical treatment after the evacuation.
The helicopter company also operates a flight for people who are not sick but who wish to descend the mountain early, this is called a leisure flight and it costs around USD$2500.00. You can arrange this in advance directly with the company and make your payment with them,
In the event of a rescue or an emergency which does not need a helicopter, the guides will contact local manager Castro Capelo in Moshi by mobile phone and also the nearest Ranger station. All three parties will then co-ordinate a rescue involving an assisted descent down the nearest path with porters, or a vehicle brought up to the Shira plateau. On Kilimanjaro, there is also a specially designed stretcher which has a bicycle wheel attached to the bottom to assist with a steady and quick descent.
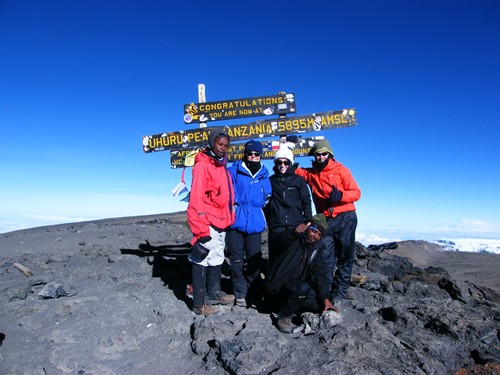
The summit of Kilimanjaro is a rewarding experience, however take note that the journey is hard and you should listen to your body.
Castro will then meet the injured party at the park gate and arrange immediate transport depending on the person's injury/condition to either the hotel or the hospital. Castro will also call the UK office and together we will ensure that the next of kin is notified and ensure that the insurance company is contacted as soon as possible so that a case number can be applied and the situation monitored by the Emergency Assistance Team.
Rescue vehicles and Ranger assistance on Mount Kilimanjaro are covered in the park rescue fee which we pay on your behalf. Our vehicles are on hand for any assistance, and hospital bills can be paid in cash or with a credit card.
We carry a fully stocked mountain first aid kit on every trip up the mountain, plus a small oxygen bottle with regulator and mask, though it is useful if you bring your own selection of commonly used items like headache tablets. Inside the first aid kit is a comprehensive booklet on how to deal with most situations.
Our mountain staff have all completed internationally recognised first aid certification courses and have also undergone additional training specifically in high altitude medicine from a UK based medical trainer.
Knowing when to go down and relying on the guides
Some people may not acclimatise well to altitude and it is simply not worth continuing if it is likely to be injurious to your health. “The mountain is always there” may be a cliché, but it is true. The guides will assist you all the time and will ask if you wish to carry on. If you are clearly sick and unable to make your own judgement then they will take you down and you will be in good hands.
If you are not sure if you can continue because you are not feeling great, then please note that the Tanzanian guides find it difficult to ‘tell’ you to go down, unless the situation becomes very apparent. It goes against their culture to give a direct imperative to others (especially Westerners) and this may appear to be a lack of leadership because guides are employed to ‘make the call’ when necessary.
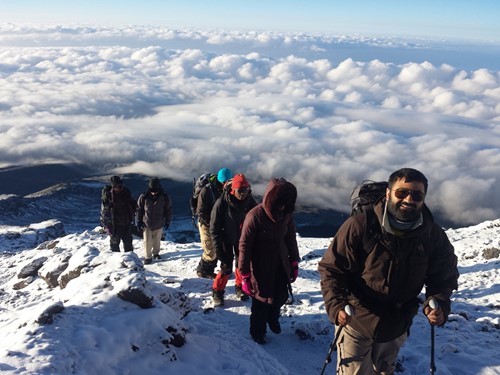
Our staff is well-trained to handle emergencies and you are in good hands during your trek up Mount Kilimanjaro.
The guides themselves have climbed the mountain so many times that they are adept at recognising the point at which somebody is clearly not going to summit. But they find it hard to answer the direct question “Do you think I can get to the top?”. Politeness dictates that they must answer “yes” so try to couch your question in a less confrontational (yes or no) format. It seems strange to us but East Africans rarely speak to each other in this way and they find our Western directness a little alarming.
Over the years, however, we have trained our top guides to be less afraid of telling people if the summit is clearly beyond someone's ability. Kamanda and Lipman, in particular, are company representatives who speak good English.
Our personal advice is to listen to your body. If it gets too hard and you are obviously very slow and finding it hard going, and perhaps getting frightened, then don’t risk your health and turn the trip into an awful memory. Better to go down and accept it gracefully. Some very obvious symptoms like laboured continual breathing even after resting, complete loss of appetite or headaches, continual loss of sleep, feeling faint or drunk, or just feeling very ill are all clear signs that you are not acclimatising well. Unless proved otherwise, you should always assume that the hypoxia caused by less oxygen at altitude is having an impact on your body and is therefore a cause of your symptoms.
Conversely, do not be tempted to go faster than is planned for you, just because you are feeling fine. The guides have been advised not to accede to any request to reduce the number of days of the trip, so please do not try to persuade them to do this. Additionally, do not ask them to go all the way down to the gate from the summit in one day, this is highly unfair on the porters and it would affect the staff logistics. The number of days on the Machame route for Kilimanjaro does for allow for ample acclimatisation, and we would advise that you take it slowly and give yourself the best chance of adapting to the new environment.
We have plenty of information discussing health at altitude, and acclimatising safely, which we hope will help take away the worry and mystery of altitude sickness and give you some confidence in managing your body safely on this expedition.
Kilimanjaro trip preparation
Kilimanjaro Trip Preparation
Be in the know before you go on your trip to Kilmanjaro. Below are some helpful tips to prepare for your trek up Mount Kilimanjaro.
Is Kilimanjaro right for me?
Climbing Kilimanjaro is an incredible experience. However, like with any challenge, there will be some bumps along the way. One thing to remember is that things in Africa happen at a different pace. You may feel like things are a bit chaotic, but it is the normal way of life here. Things do not always work and conditions might not be what you would expect at home. However, the people are very friendly and keen to help.
It is not surprising to see people begging. Please do not give in and perpetuate this damaging practice. Tips are customary but should be given to Castro at the gate on the last day for distribution. This is much better than giving individuals money privately or secretly, which some people do because they think they're doing it 'right', but this is never the case and it always causes problems long after you have left. We have a system in the company which the staff understand and recognise and like, and Castro is a good and honest boss who will not exploit the staff.
If you would like to learn more about some of the difficulties of spending many days in a mountain camp, see our Mountain Realities page.
Flights to Kilimanjaro
Kilimanjaro International airport (JRO) is the most convenient point of entry to Tanzania, as it is only 48 kms from Moshi Town. A flight to JRO from the UK takes about 9 hours and there is a daily flight with KLM via Amsterdam or you can fly via Nairobi with British Airways or Kenya Airways. There are other routes via the Middle East and also via Ethiopia and Istanbul.
If you are flying on the day flight with BA leaving at around 10 am to Nairobi and changing onto the Precision Airways flight to Kilimanjaro in the evening then do note that the time between the flights is very short and luggage very often does not make it.
Another option is to fly to Nairobi and take a coach to Moshi. The coach costs $80 return and takes about 7 hours. Note that you will need to get two visas if you choose this option – one for Kenya and one for Tanzania, plus if you are in Kenya for longer then 12 hours then you will also need a yellow fever vaccination for entry to Tanzania.
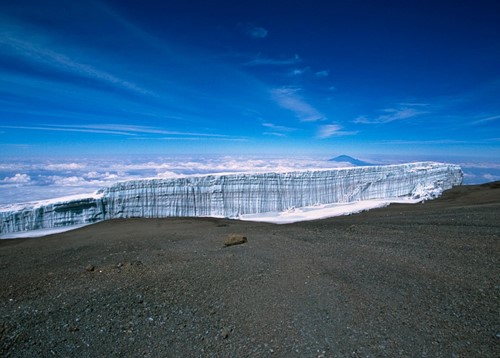
Receding glacier line of the permanent ice sheet on Mount Kilimanjaro.
Baggage
We have our own registered company, Adventure Alternative Tanzania and a guesthouse in Tanzania. The MD is Castro who has been with us for many years. You can mark your baggage with the following details
Company correspondence address: Adventure Alternative Tanzania, PO Box 1383, Moshi, Tanzania
Physical address: Hotel Keys Lodge, Mbokomu Road Road, Moshi. +255 27 275 2250
Visa for Tanzania
You can buy your visa on arrival in Tanzania very easily. For most nationalities, it's US$50, though there is a higher charge for the US and some other nations at $100, payable in US dollars. You do not need a passport photograph. You need a yellow fever certificate only if you are coming from a country with endemic yellow fever.
Trekking in the snow, high above the clouds on Kilimanjaro. Excited for summit day!
If you are flying into Nairobi and then travelling overland to Tanzania you will also need to purchase a Kenyan visa, which is done online and in advance through an e-visa system. Please check the Kenyan High Commission website before travelling to check the latest prices for visas. If you are transiting through Kenya, in that you are arriving into Nairobi by air and catching an onward flight to Tanzania then you do not need a Kenyan visa, unless you plan to leave the airport. One way coach transfer from Nairobi to Arusha is approximately $60 each way.
Vaccinations and Travel Health
You will need to visit your GP prior to your trip to discuss vaccinations. You do not need a yellow fever certificate to enter Tanzania unless you are entering from another country where yellow fever is prevalent. This does include Kenya, so if you are coming in overland from Nairobi, having spent more than 12 hours there, then you should have one.
Trip Insurance for Kilimanjaro
For treks and climbs going to altitude or remote regions, you will need to check carefully that you get the right kind of insurance coverage. It is also important to make sure that you have cancellation cover.
We encourage people to buy insurance as soon as you have booked your flight and trip, in case there is a need for cancellation. Do also take your papers with you and make sure your tent mate knows where it is, in case somebody else needs to make a phone call for you. Make sure that your give your insurance information to Castro when you're in Moshi so he can pass it to the Helicopter search and rescue company if an evacuation is necessary.
For people in the UK looking to buy a travel policy covering Kilimanjaro then try True Traveller, or Sportscover Direct, World Nomads, Insure and Go, JS Insurance, Covered2Go or the Post Office. If you are climbing regularly and looking for an annual cover then the British Mountaineering Council or the Austrian Alpine Club offer very good policies.
Money
The local currency in Tanzania is the Tanzanian shilling. Though be careful not to mix up Kenyan and Tanzanian Shillings as there is a 20 times difference in value! You can check the current exchange rate on xe.com. You can buy Tanzanian shillings from some outlets in the UK but otherwise change your money on arrival.
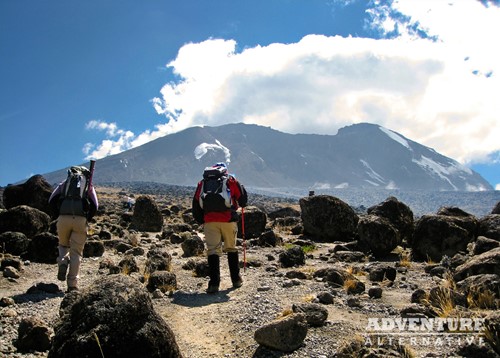
Two trekkers make their way towards Mount Kilimanjaro along the Machame Route.
There is an ATM in town which takes Visa and Mastercard and there is a bank with forex facilities. Do also remember to have small denomination notes because many local places will not be able to offer change for large notes. You can take sterling, euro or dollars, and change it easily, including small amounts at the hotel desk. If you are travelling from Northern Ireland or Scotland then remember to bring Bank of England sterling notes, not the Northern Irish / Scottish sterling notes which are not recognised.
Arrival
Whether you arrive at Kilimanjaro airport or the Coach Station (after an overland connection from Nairobi), you will be met on arrival by Castro - director of Adventure Alternative Tanzania or one of our other guides. They will be holding an Adventure Alternative name board or possibly one with your name on it. Do have a good look around if there are a number of other company reps there, and note that our staff are not allowed into the baggage hall so you will need to come right out into the arrival area.
The charge for an airport transfer is up to £40 / $50 per vehicle (3 / 4 people) per transfer, which is payable to Castro in any currency. We don't include this as standard in our trip fee as some people arrive by air, others by road so it's not applicable to everyone on a trip. A standard airport taxi fare is about USD$80.00.
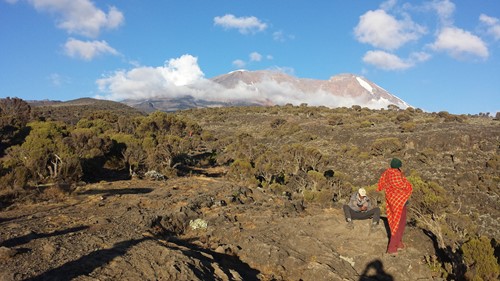
The Roof of Africa dominates the skyline.
On arrival at your hotel, Castro will introduce you to our team and brief you on your safari or climb. The briefing is very relaxed and will cover everything that you will need to know about your trip.
Please note; sometimes arrival day can be a bit busy for Castro if a large number of people are arriving at different times. He or other staff may be back and forth to the airport all day and may spend a lot of time just waiting at the arrivals hall. In this situation, you may be left to relax at the hotel for some time before the group is all together. It is obviously much easier to brief everyone all together so it is likely that we may wait until later on for a full mountain briefing. In the meantime, if you have any questions or are unsure about anything then do call Castro or ask the hotel staff to do so. He is usually only a short drive away if he is not at the hotel.
Electrical
In most parts of Tanzania, they use the same 3-pin (type G) plugs as in the UK. The vast majority of UK electrical devices should charge and work fine. However, the electrical supply in Tanzania is not as closely controlled or as reliable as the UK. If you have any very expensive equipment then please be aware that an electrical surge or voltage/frequency change could potentially affect it. An expert might be able to advise on surge protectors.
Kilimanjaro Daily Routine
How much will you carry?
We use porters to carry the bags and the gear and the food, so you can concentrate on your climb of Kilimanjaro but you will be expected to carry a day sack with some of your own personal equipment which you need for the day such as water, spare clothes, camera and waterproofs. This is normally about 5 or 6 kilograms. Every person will have their own porter carrying their bag so nothing ever gets lost.
The porters are not allowed to carry more than 20kgs in total (including their own clothing so please do not overfill your bags. The maximum per bag is 15kgs. They also carry bags on their heads, even rucksacks, so it is probably more convenient to bring a duffle bag for your gear. We will also put your bags into waterproof sacks in case of rain.
Keeping in touch with home
Your mobile phone should work all the way up the mountain (slightly dependant on which network you are using) as long as you have roaming access. Please bring your own power packs. You may need to walk a little distance to find a spot with a signal. Also, do not expect to get 3G connection, mostly you will find it is voice only.
Keeping dry and warm
There is little doubt that you will have some rain, and it is likely to be in the lower regions around the montane or forest level. Waterproofs are necessary; remember that on the equator the rainy season is traditionally April/May and October/November.

A look at a typical camp set up along the trek to the top of Kilimanjaro.
Expect short-term extreme conditions, i.e. sharp showers of rain, hot sun, gusts of wind, snow and low night temperatures. Clear nights will be colder but more beautiful, and generally, the cloud builds up mid-morning, only to dissipate again with the setting sun.
Above Shira Camp (day 2) you may get snow, sleet and even hail. The ground is more open and exposed so it will be important to have some dry bags for your daysack (or a cover) and all the appropriate clothing for protection against the elements. Up higher at Barafu Camp, it will be colder and windier so the shell jacket is really vital; temperatures can drop dramatically, and there may be snow. Summit morning can be icy underfoot, and very cold (minus 10°C) so good boots with hats and gloves are important.
Work on a ‘wet and dry’ system so that if your T-shirt gets wet during the day, you always have a dry T-shirt and warm top to change into the moment you get to camp. On the lower slopes in the forest you can use a poncho or an umbrella to keep dry, but higher up where it's more windy and cold you will need your waterproof shell. In the evenings you will want a lightweight down jacket or fleece jacket.
On summit night you will want to take all your warm clothes and protective shell, it can be very windy and cold as you go up and especially at Stella Point. Take gloves and mitts if you have them, a warm hat and an extra layer just in case. Don't forget to take your sunglasses and suncream with you for when the sun comes up, and don't forget to put the cream on since the glare off the snow and from the sun itself is very powerful.
At night use your sleeping bag with as few layers on as possible, but keep the top of the bag zipped up to prevent heat loss. If you want to add warmth to the bag then put clothes underneath for extra insulation and put a jacket over the foot end of the bag. Also stack your daypack upright against the end of the sleeping bag to stop your feet pressing against the tent wall.
Sometimes it is the heat and sun that is the problem; always use good quality sunscreen and moisturise well in the evenings. Take a good sunhat and even use an umbrella against the strong direct sunlight.
Daily routine on Mount Kilimanjaro
During your climb of Kilimanjaro generally, 'bed tea' is at about 6.30 - 7.00am, breakfast is between 7.30am and 8.00am, and departure from camp is at 8.30am latest. There is a snack lunch at midday, tea and biscuits around 4 pm and dinner at 7 pm. Summit morning is different; tea and biscuits at 11.30pm and start hiking at midnight or sometimes 1 am.
Most daily hikes take from 4 – 7 hours. The pace is slow and not forced at all. There is a rest at least once every hour and plenty of time to take photos, enjoy the view and chat. When you arrive at the campsite you will find the tents erected and your bags ready to collect. In the morning please have your bags packed before breakfast.
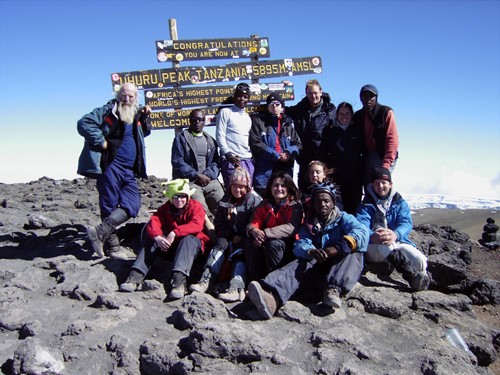
Enjoying a summit celebration on a fantastic sunny day.
Summit day
Expect a long day starting at midnight and getting all the way back down to High Camp by about 4 pm in the afternoon. The route up will be in the darkness and it will be cold and often windy. Do prepare with good warm clothing and protect your extremities and face. From Barafu Camp to the crater rim will take about 6 to 8 hours, and you will arrive with the dawn which is very special. From the rim (Stella Point) it is a further hour to the top, so expect summit time to be between 7 am and 9 am. With an hour on top for photos and enjoying the exceptional view, and feeling absolutely elated, the route down is dusty, loose and quite a strain on the knees. Take it easy and stay with one of the guides; they will split up to cover all the mini groups that naturally form for the descent.
When you get back to Barafu pack your bags for the porters to take down (you should prepare this the night before), take a rest and lunch and then drop down to High Camp which is a further two hours to the edge of the forest. Some people question this, but it is necessary to get lower because Barafu is still at 4600 metres and your body will thank you for losing altitude. It may be the last thing you want to do after having summited Kilimanjaro, but it is necessary!
Tips for Your Guides on Mount Kilimanjaro
Adventure Alternative is proud to pay excellent salaries, but tips are still very much part of the culture and on average you should anticipate $150 - $200 (depending on the number of days) in local currency to give to Castro at the end of the trip.
* Please prepare your tips before going on the mountain by changing any money into local currency and into small denominational notes like 5000 or 10,000 Tanzanian shillings.
* Please give your tips as a group to Castro at the gate. Do not give the tip to the guides or the porters directly.
* Please do not give an individual tip to a specific porter or guide during the climb of Kilimanjaro. This breeds suspicion and encourages them to pester tourists for more money. We try to maintain consistency and fairness at all times. If there is someone who the group feels deserves special mention then tell Castro and by all means add a small amount extra, but make sure that it is given in front of everybody and recognised as a reward for service beyond the usual call of duty. Please also remember that money is not the only way of showing your gratitude, a genuine thank you in front of all the other staff goes a long way to making someone happy. Also have a look at our Tips for Kilimanjaro section here.
Food and accommodation on Kilimanjaro and Mount Meru
Climbing Kilimanjaro involves camping and eating outdoors, and it's a great experience of getting back to nature.
Camping
We camp in tents on the Machame, Lemosho and Rongai Routes. Camping is liberating and really makes you feel as if you are on an expedition! Nothing to worry about, it is enjoyable and hygienic and there is enough privacy and comfort. If you haven’t camped since being in the Scouts or Guides the word should not be associated with hardship or discomfort. Most worries are dispelled on the first day. The tents are two-person North Face mountain tents and we provide comfortable foam mattresses with waterproof covers.
Huts
The huts on Mt Kilimanjaro are wooden buildings with bunks and mattresses and only available on the Marangu Route. Similar huts are also used on Mt Meru. They are dry and warm and can sometimes be crowded. Ten to fifteen people can be accommodated in each dorm and there is no pre-allocation of beds, it is first-come-first-served, so expect to be sharing your hut with strangers.
Toilets
Nearly all the campsites now have newly constructed toilets with long drop facilities. It is important to take a torch with you at night and take a responsibility to keep the huts clean. Going to the toilet behind a bush is strictly forbidden, but we do also bring up our own toilet tent with chemical toilets. If you get caught out on the path then you are allowed to pee behind rocks or bushes, but if you need to go for a poo then the rule is to pack out your own toilet paper in a plastic bag and put it in the rubbish when you come to camp.
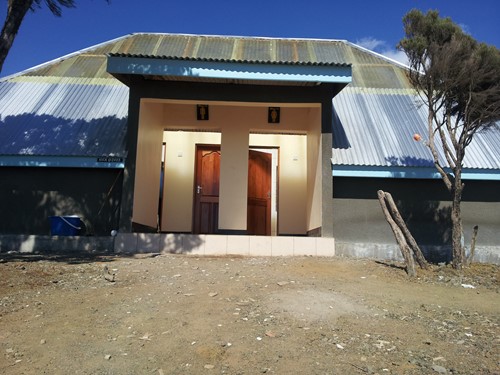
Rubbish
All rubbish is collected by the staff and carried down the mountain. Do not throw rubbish down the long drop (toilet paper is fine) and make a habit of picking up litter that you see on the trail. The responsibility for keeping Kilimanjaro clean is on the shoulders of every visitor. The mess tent will have a rubbish bag hanging by the door so please do use it. In the toilet tents, please put toilet paper in the plastic bag hanging on the hook.
Hotel
The accommodation in Moshi is at the Keys Lodge on Mbokomu Road Road and it is about ten minutes drive from the centre of Moshi and is safe, with a high wall, but that should not stop you from taking all usual security measures with your belongings. The staff are friendly and speak English. There is a bar, a swimming pool, a laundry service, a restaurant, internet, left luggage, TV’s in most rooms, fans in every room and hot water.
Food
All our food is fresh and the meals are tasty and well prepared and served in comfortable mess tents with tables and chairs. Three-course meals with vegetables, fruit, salads, desserts, soups, popcorn, biscuits and a complete range of beverages including herbal teas. We want you to enjoy your holiday on Kilimanjaro and that means good food! Our cooks are all well experienced in Western tastes so expect as an example a soup starter with bread, tomato and avocado side salad followed by chicken casserole with boiled potatoes and julienne carrots with a fresh fruit medley to finish with, and coffee and chocolate for supper. We also provide lots of pasta with vegetables, beef stew, fried fish with potatoes, and fried chicken.
If you have dietary preferences then do let us know and also inform Castro after your briefing in Moshi. The cooks can easily cater for most preferences, although celiac's should bring their own snack supplies from home as gluten-free snacks can be hard to source in Tanzania. Sweets and chocolate are all available in the shops in Moshi, as are things like batteries, but you may want to bring your own supply from home.
Water
We do not bring bottled water on the mountain; we boil all water which comes from the rivers and glacial streams plus it is also treated. The staff will fill your water bottles every evening.
Kilimanjaro weather and seasons
When to Climb Mount Kilimanjaro
Peak seasons are traditionally January to March and June to October, and these are popular times to climb with temperatures in Moshi averaging 22 degrees C and summit temperatures around - 7 degrees C. The rains are in April, May and October and November but nowadays climate change has changed this pattern greatly. December is getting warmer again with clear skies.
The weather on Mount Kilimanjaro can vary dramatically within the same day, from hot to cold, sunny and clear to rainy with clouds. It is hard to predict the weather on any particular day, so be prepared for good and bad weather on any one day. This is an equatorial mountain so don't think in terms of seasons. The annual temperature range is not great, but there will be a great change due to altitude and the time of day.The lower regions can be hot and humid, with temperatures between 20 and 27 degrees Celsius, while summit temperatures can range from 0 to -20 degrees.
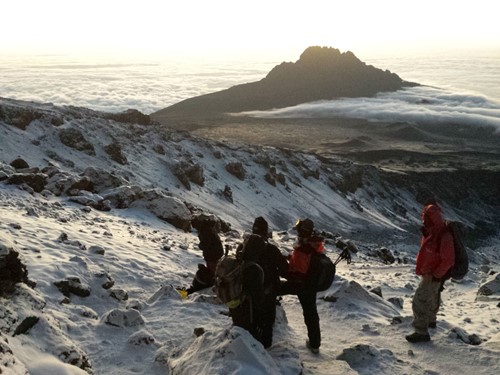
Like all mountains, expect the unexpected. Snow can fall at high altitudes, and summit day can be a full winter experience.
Kilimanjaro offers the remarkable experience of five very different habitats during your ascent. You are passing through cultivated farmland into the equatorial rainforest and then alpine heath, high alpine desert and eventually an icy glaciated environment at high altitude. The summit of Kilimanjaro - Uhuru Point - is about the same altitude as Camp One on Mount Everest.
For the first few days, it is possible to get heavy rain, but this becomes snow and hail as you move higher. Expect a daily routine of clear cold mornings and a build-up of cloud and potential rain towards early afternoon which dissipates again in the evening.
Full Moons on Kilimanjaro
Since the summit climb involves a night ascent, check whether you will have a full moon or not. Some people prefer to summit during a full moon (being the dates below and a day either side of them). We do have a couple of climbs which summit around the full moon however we do tend to try and avoid them as they are very busy times on the mountain. Without doubt summit day is slightly easier if well lit by a full moon (it can still be cloudy during these moons) however for us a head torch is still ample if dark and the real buzz of the experience is when the sun creeps up out of the dark night and hits you like opening a furnace door! So do not assume that a full moon summit is the best time to climb. The night sky on Kilimanjaro at any time in clear conditions is simply fantastic, you can see north and south constellations all at once.
Freezing level on Kilimanjaro is normally at about 4600 metres.
Tanzania expedition kit list
Tanzania Expedition Kit List
The following are some suggested items to bring along with you on your Tanzania expedition.
BAGS
80-100 Litre Duffle Bag
~45 Litre Day Sack
Waterproof Rucksack Cover
Small Waterproof Stuff Sacks
OUTER - SHELL
Waterproof shell jacket
Waterproof shell trousers
Waterproof Gaiters
OUTER- WARM
Warm Insulated Jacket (fleece/insulated)
MID-LAYERS
Microfleece/woollen top(s)
Softshell Jacket (optional but useful)
Insulated Gillet (optional but useful)
Trekking Trousers (synthetic) zip-off ones are good x2-3
Shorts (to cover thighs)
BASE-LAYERS
Long sleeve Base Layer top(s) (synthetic)
Leggings/Running Tights (optional)
Underwear (synthetic dries quicker!)
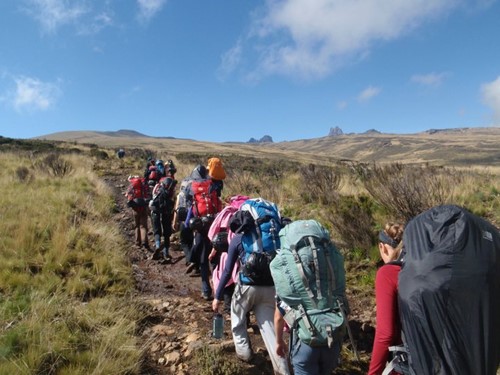
Trekking in East Africa along the savannah.
HEAD-WEAR
Warm Hat
Buff
Wide-brim Sun Hat or Cap with neck veil
Sun Glasses
HANDS
Thick Insulated Gloves or Mitts
Thin liner Gloves
FOOTWEAR
Liner Socks (optional)
Good Trekking Socks
Waterproof Trekking Boots (not trekking shoes)
Trainers/ general shoes
GENERAL CLOTHING
General Sweatshirt (Logo-ed?)
General T-Shirts x2-3
General Socks x4-5
Underwear x4-5
SLEEPING
4 Season Sleeping Bag (comfort -10 or lower)
Sleeping bag liner cotton/silk (optional but helps to keep cleaner)
Waterproof stuff sack for Sleeping Bag
Thick Foam Mat or Self-Inflating Mat
Repair Kit for self-inflating mat
ELECTRICAL
LED Headtorch & spare batteries
Watch with light and alarm
Camera, memory card & batteries
Solar charger (optional)
Old unlocked phone (optional)

The verdant landscape of the Ngorongoro Crater.
PAPERWORK ETC
Passport
Photocopy of passport
Flight details
Student card
Insurance policy details
Yellow Fever cert. (if relevant)
Waterproof bag for papers
Cash/bank cards
Notebook/Diary Pencil + Biro
Photos of home, family etc
Books & Information
Cards / Games
REPAIR KIT (optional but useful)
Gaffer/Duck Tape
Super Glue
Cable ties
Needle + extra strong thread
Multitool/penknife
EATING/DRINKING
2x 1-litre drinks bottles
Favourite high energy snacks
Watch the sunrise with the Zebras while on safari.
OTHER
Toilet roll in plastic bag + spare ziplock bag
Earplugs (optional but recommended!)
Guidebook (optional)
MOUNTAIN HARDWARE
Walking Poles (optional)
PERSONAL WASH KIT
Antibacterial hand gel
Wet wipes (optional)
Toothbrush with cover
Toothpaste
Shampoo and or Shower gel
Deodorant
Shave Kit + Mirror (optional)
Clothes wash liquid (optional)
PERSONAL MEDICAL KIT
Paracetamol tablets
Ibuprofen (tablets/gel)
Antiseptic Wipes
Latex Gloves
Adhesive Plasters
Blister Plasters
Zinc Tape
Crepe Bandage
Sterile Dressing
Antihistamines (optional)
Rehydration Sachets
Antiseptic Cream
Sunblock Cream
Lip Salve (with SPF)
Knee/Ankle Support
Personal Medications eg Anti-Malaria Tablets, Inhalers, Epipen etc
Kilimanjaro safety
Kilimanjaro safety
We take your safety on Kilimanjaro seriously at Adventure Alternative, below is the emergency procedure in the event of an accident or the need for a descent.
Emergency Procedure
In the event of a rescue or an emergency, the guides will contact Castro Capelo in Moshi by mobile telephone and also the nearest Ranger station. All three parties will then co-ordinate a rescue involving an assisted descent down the nearest path with porters, or a vehicle brought up to the Shira plateau. Serious accidents may involve the use of a stretcher.
Castro will then meet the injured party at the Park gate and arrange immediate transport to either the hotel or the hospital. We use the best hospital in town (KCMC - Kilimanjaro Catholic Medical Centre). Castro will also call the UK office and together we will ensure that the next of kin is notified and ensure that the insurance company is contacted as soon as possible so that a case number can be applied and the situation monitored by the Emergency Assistance Team.
Rescue vehicles and Ranger assistance on Mount Kilimanjaro are covered in the Park rescue fee which we pay on your behalf. Our vehicles are on hand for any assistance, and hospital bills can be paid in cash or with a credit card.
We carry a fully stocked mountain first aid on every trip up the mountain, although it is useful if you bring your own selection of commonly used items like headache tablets. Inside the first aid kit is a comprehensive booklet on how to deal with most situations.
Knowing when to go down and relying on the guides
Some people may not acclimatise well to altitude and for them, it is simply not worth continuing if it is likely to be injurious to your health. “The mountain is always there” may be a cliché, but it is true. The Guides will assist you all the time and will ask if you wish to carry on. If you are clearly sick and unable to make your own judgement then they will take you down and you will be in good hands.

Climbing mountains is tough work, but we are here to take care of your safety.
If you are not sure if you can continue because you are not feeling great, then please note that the Tanzanian guides find it difficult to ‘tell’ you to go down, unless the situation becomes very apparent, which is the most common situation. It goes against their culture to give a direct imperative to others (especially Westerners) and this may appear to be a lack of leadership because guides are employed to ‘make the call’ when necessary.
The Guides themselves have climbed the mountain so many times that they are adept at recognising the point at which somebody is clearly not going to summit. But they find it hard to answer the direct question “Do you think I can get to the top?”. Politeness dictates that they must answer “yes” so try to couch your question in a less confrontational (yes or no) format. It seems strange to us but East Africans rarely speak to each other in this way and they find our Western directness a little alarming.
Over the years, however, we have trained our top guides to be less afraid of telling people if the summit is clearly beyond someone's ability. Kamanda and Lipman, in particular, are company representatives and speak good English.
Our personal advice is to listen to your body. If it gets too hard and you are obviously very slow and finding it hard going, and perhaps getting frightened, then don’t risk your health and turn the trip into an awful memory. Better to go down and accept it gracefully.
Conversely, do not be tempted to go faster than is planned for you, just because you are feeling fine. The Guides have been advised not to accede to any request to reduce the number of days of the trip, so please do not try to persuade them to do this. Additionally, do not ask them to go all the way down to the gate from the summit in one day, this is highly unfair on the porters and it would affect the staff logistics.
Tanzania school trip prep
Tanzania School trip Preparation
This page gives you a first introduction to all the things that you will need to do in the lead up to your AfriCamp. The information here is fairly brief, but there are links to other pages that provide more detailed information about certain subjects. With all of these subjects, do speak to us if you have any queries. We give rough amounts of time before the trip that you need to be thinking about each item. However, with all of these, it is a case of the earlier the better.
Flights (8-10 months before leaving)
It is a good idea to begin researching flights early as the prices can fluctuate. There is no issue with looking at flights even 8-10 months before departure.
The most convenient places to fly to in order to access northern Tanzania is Kilimanjaro International (IATA Code JRO) which is between the towns of Arusha and Moshi. However, it is sometimes cheaper to fly to Nairobi Jomo Kenyatta (IATA Code NBO) in Kenya and travel overland south to Tanzania. You will need to discuss your arrival point with us at an early stage when planning the trip. It is often possible for us to meet the group in Nairobi if required and include transport to Tanzania within the itinerary.
For independent bookings, it is worth trying flight comparison sites such as ebookers, Sky-Scanner and Kayak. Though do check terms and conditions if you fly with combinations of airlines.
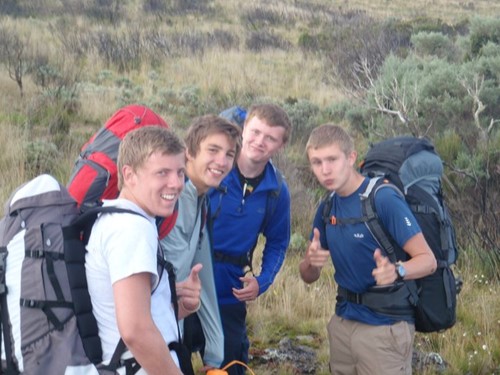
Students excited to be out and about in the Tanzanian bush.
Insurance (8-10 months before leaving)
It is essential that you have personal travel insurance to cover all the locations and activities on the trip. When getting quotes, you need to check the wording of the policy carefully and it is worth sending the company a copy of your itinerary and getting them to confirm in writing that a particular policy will cover it all.
You need to take out the insurance policy as soon as you have made any bookings with us or have bought any flights. Then the money you have spent is covered. If you had to pull out of the trip before you have insurance then anything you had spent on flights would be lost.
Vaccinations & Medications (min 8 weeks before leaving)
You need to make an appointment to speak with your family doctor and/or a travel health centre at least 8 weeks prior to leaving. You can then ask them to advise you on what vaccinations you will need. You will also need to speak to them about the type of antimalarials that are most suitable for you personally. The NHS publish guidance on their Fit For Travel website.
Passport & Visas (min 3 months before leaving)
You need to make sure that your passport will not run out sooner than six months after your trip date, Do check this early as it can take a long time to process a new one.
You also need a Yellow Fever vaccination certificate if you are arriving from certain countries, including Kenya. If you are not flying straight from the UK/Europe then do check requirements.
UK passport holders can buy their visa before they travel but most people get it on arrival in Tanzania. All you will need to do is show your passport, fill out a form and pay the fee. The fee was $50 at the time of writing, bring good condition GBP, Euro or USD notes to change.
If you are not a UK passport holder then you need to check the specific requirements for your nationality. This is best done via your own embassy or the Tanzanian Ministry of Home Affairs.
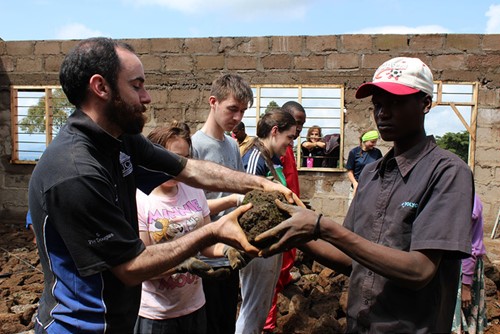
Building the Ng'aroni school in Tanzania.
Money (1 month before leaving)
The Tanzanian currency is the Tanzanian Shilling (TZS). At the time of writing, there were 2,625 TZS to the GBP. You also have to be careful not to mix up Kenyan Shillings (KES) with Tanzanian Shillings - 1 KES = 18.5 TZS.
Officially it is a closed currency so you cannot get it before you travel to Tanzania. You can change money in-country and most bank cards will allow you to withdraw money from ATMs. Our staff will assist you in getting or changing money after you arrive. But make sure you have some cash on you during the flight to pay for your visa with on arrival.
Research (3-10 months before leaving)
It is important that you are informed about the country and culture of Tanzania before you travel there. A good starting place is the UK Foreign & Commonwealth Office 'Know Before Yoy Go' campaign. You can also find pages on our website giving information about the country, culture and language. Books like the Lonely Planet and Rough Guide are also good for a broad introduction. You will also be better prepared if you read up on subjects related to your activities, such as Safari Animals and going to high altitude.
Fundraising (start 10 months before leaving)
Fundraising for the Moving Mountains Trust will form an important part of your preparation for the trip. Before you start, you first need to make sure that you know enough about Moving Mountains to be able to explain what you are doing to potential donors. If you have any questions about this then do contact us or Moving Mountains directly for information. You also need to be clear about exactly where the donor's money is going.
You need to be organised and start early with your fundraising. It is much easier to do it over a longer period and in small amounts than to try and do it all in a rush at the last minute.
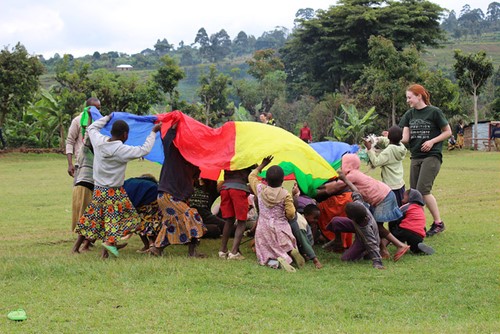
It's playtime at a local school in Rural Tanzania. Join in the fun!
Training (start at least 6 months before leaving)
There are many different challenges on your AfriCamp and for some of them, some prior training will stand you in good stead. We can help to organise training days on things like International Development Work, Health, Food Hygiene, First Aid, Equipment, Mountain Walking, Camping and many other things. Please do speak to us about your requirements.
You also need to arrive on the trip with good fitness and health. This will be particularly important on the climb of Mt Meru, but will be relevant to staying healthy and comfortable throughout the trip.
Kit & Clothing (6-10 months before leaving)
Have a look at the trip page and detailed kit lists nice and early. Some of the kit you will probably already have, some you may be able to borrow and some you may need to buy. But before you spend lots of money on any new kit, do read our guidance information on things like Boots, Sleeping Bags etc. Do also speak to us about what level of performance the kit needs to be. For this trip alone, you do not need expensive, top of the range gear. However, if you are likely to use it again and again over coming years then it might be worth the investment on some items. You need to make sure that you have tried and tested all the kit well before you leave to make sure it is right for you.
Electrical
In most parts of Tanzania, they use the same 3-pin (type G) plugs as in the UK. The vast majority of UK electrical devices should charge and work fine. However, the electrical supply in Tanzania is not as closely controlled or as reliable as the UK. If you have any very expensive equipment then please be aware that an electrical surge or voltage/frequency change could potentially affect it. An expert might be able to advise on surge protectors.
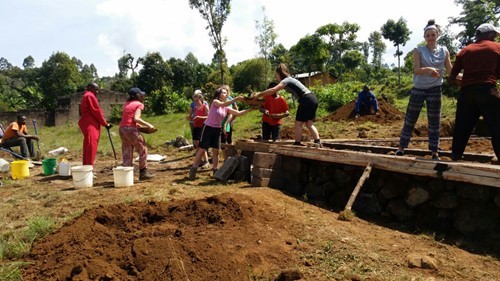
Students, volunteers and locals alike work together to get the job done.
Tanzania School trip food and accommodation
Through the course of your trip, you will experience a range of different types of accommodation and will have the opportunity to eat and even learn to prepare traditional East African food. In this way, we aim to give you a full and rich cultural experience and allow you to see what life in rural Africa is like for rural East-Africans rather than for tourists passing through. The accommodation will primarily be camping but also with the possibility of homestays with local families in their own houses.
Camping
On the project phase of the trip, we will camp in a large group with all the staff, the Africampers and also the local kids from the local community. We will sleep mainly in large safari tents. These sleep four people, are large enough to stand up in and have a covered porch area at the front. For our communal cooking area, we may have a large mess/kitchen tent or perhaps a small local building. The tents are large enough to live in comfortably as long as you are fairly organised with your belongings and work as a team with your tent-mates. The toilets will be shared facilities which will almost certainly be squat-type toilets. We will bring shower tents in which you can wash with hot water.
Mountain Huts
On the expedition phase on Mount Meru, we will usually use the mountain huts. These are basic and unheated but a welcome refuge in a hostile environment. Usually, our meals will be cooked as a group by our mountain staff.
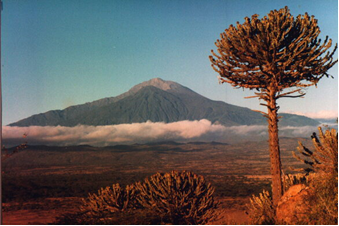
A look at the striking profile of Mount Meru.
Homestays
As part of the programme, you may be offered the opportunity to stay with a local host family in their own home. It is likely that the home will be that of one of your local peers with whom you will be travelling. We will provide an appropriate amount of money and/or supplies to the family so that they are not left wanting because of it. Obviously, the style, size and facilities at the home will vary according to specific circumstances. However, we will ensure that the facilities available to you are sufficient for your needs. This part of your stay puts you in a very privileged position to experience real East African life and the essence of local culture, it is one that will stay with you long into your future.
Food
During your stay in Tanzania, the vast majority of the food that you eat will be prepared by ourselves in our accommodation or camp. Our staff are masters at cooking large volumes of tasty food in even the most basic of environments. However, we will require you to help with the processes of preparing and clearing up the meals. Again this can be a fantastic opportunity to gain first-hand experience of another essential part of any culture. You will also learn skills and principles that are transferable to cooking any food anywhere anytime.
Traditional Tanzanian food is healthy, tasty and often very filling. Staple foods in East Africa include ugali, rice, chapatis, beans, potatoes, vegetables, meat and chicken. The predominant local foods also vary slightly by area and according to what the main crops are local. For example, some regions have vast fields of pineapples, some have bananas, maize, sugar cane, tea, coffee or rice paddies. We will, of course, cater for any medical food requirements and to some extent for group consensus on taste. However, do not expect to be eating all traditional European foods or having endless varieties of ingredients.
Bumburi Community Clinic
About the Bumburi Medical Clinic in Nepal
The Bumburi Medical clinic is in the village of Bumburi which can be reached either by heading south for two days from Lukla or trekking two days from Paphlu airport. Since the road from Paphlu to Lukla is being built it will soon be possible to drive almost all the way there.
Funding and Activities
The clinic has been funded by Moving Mountains Trust and in particular, the donors have been medical students who have taken part in our medical camps over the past seven years, which are run in the same area. The clinic is part of the long-term commitment to the regeneration of the whole region, which has included hydro-electric power, new schools, businesses and refurbished monasteries. Since the charity began in 1991, the demographics of the villages has completely reversed, and now people are moving back with their families because they recognise that the quality of life is better. Education is of a high quality and the introduction of electricity and machinery has meant the village co-operative is now selling corn and oil to the markets as far away as Namche Bazaar.
Providing good quality healthcare is obviously an intrinsic part of the development of any community, and Moving Mountains embarked on a number of projects some years ago to help tackle some of the primary health care problems facing the villagers. In particular respiratory problems caused by smoke from open fires inside the houses was helped by installing closed stoves that use a third of the wood and have a chimney. We also installed water into almost all the houses and in some cases back boilers so that people had hot water for the first time.
History
The community then took applications for two villagers to attend nursing college for three years, during which we built the clinic itself on land donated by Moving Mountains Nepal Chairman Ang Chhongba Sherpa. The study course was also funded by medical students running the medical camps, and on April 13th, 2016 (Nepali New Years Day) the Ang Kami Memorial Clinic was officially opened. Ang Kami was the father of Ang Chhongba.
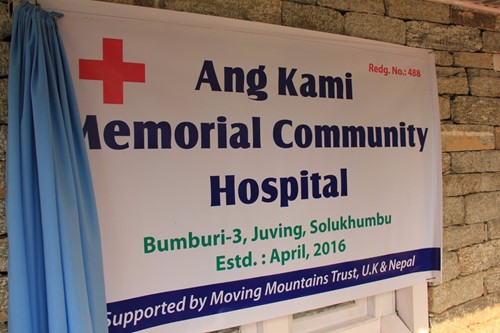
The clinic has a pharmacy, several treatment rooms and it's own toilets and shower facilities. It is in a beautiful location overlooking the Solu Khumbu, built from local stone and slate. The village of Bumburi comprises 129 houses but the through traffic will ensure there is a steady flow of patients.
Who Can Volunteer?
We would encourage medical students to add on a week or so in this medical clinic in the Himalayas after their elective and donate some time to helping the nurses and assist with the programme of community health events. There are various free clinics such as ante-natal and baby, plus home visits and health education talks in the school. Complicated cases are referred to a number of hub hospitals in Lukla or Saleri. The two nurses, Mingma and Ang Dawa, will greatly appreciate your presence and help.
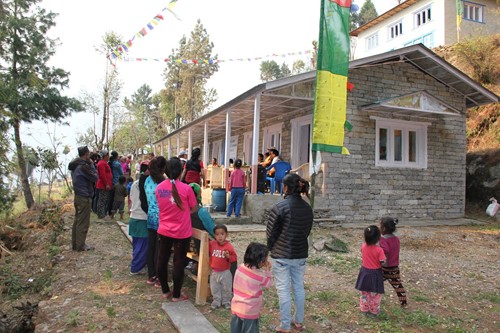
Medical elective students coming to Nepal to complete their medical elective have a great opportunity here to fundraise for the clinic and give something back, and also to spend some time in the community to get some additional experience.
The visit to the community medical clinic can easily be linked to an adventure trek after the elective. This village is on the Everest Base Camp trail so it would be easy to drive to Saleri or Jiri or Paphlu and walk from there all the way to Everest in about two weeks, with a stop in the clinic en route.
Kathmandu Accommodation
Accommodation Choices in Kathmandu
The Adventure Alternative Guest House (photo below and also the image above is taken from the roof garden): This is our own guest house which offers a home from home experience and is the base for many of our visiting trekkers, climbers and volunteers (who come out with our charity, Moving Mountains). For more details click here. The cost is £23pp per night for bed and breakfast.

The Manang Hotel
This hotel is a popular and long-established mid-range, 3-star hotel in the centre of Kathmandu’s tourist hub of Thamel. The rooms are clean and spacious and the hotel has a good restaurant. Otherwise, on its doorstep, you’ll find all of Kathmandu’s famous shops and restaurants. Rooms are around £65.00 per night for a twin or £60 per night for a single depending on dollar rates. Further details can be viewed by clicking here:
Yak and Yeti Hotel
If you would like some luxury before or after your trek then the Yak and Yeti is one of Kathmandu’s most famous hotels. The hotel is a blend of modern day sophistication and cultural heritage with its 100-year-old palace and the newly designed structure of the hotel. You can wander amongst the large grounds past antique fountains, gilded temples and emerald gardens and still be just moments away from the shops and adventure of the city. Rooms start from £155 per night for a twin B&B. Further details including room types and costs can be found by clicking here.
Nepal trek kit list
Kit list for trekking in Nepal
This list covers the needs of a trekking holiday in Nepal with additional comments for those people tackling a trekking peak. Most equipment and expensive outdoor clothing and sleeping bags can be hired in Kathmandu very easily.
For most treks the majority of accommodation will be in lodges or teahouses which have simple bedrooms and two single beds with mattresses. Lodges all have blankets to borrow so normally a good quality three season will be enough. For trekking peaks there is normally a base camp with tents, and you will want a warmer sleeping bag or a liner to increase the warmth of your bag, plus a sleeping mattress.
- BAGS - Rucksack or duffle bag for a porter to carry plus a day pack to be carried by you. Your day pack should be comfortable and capable of carrying everything you need for the day, around 40 litres is normally big enough. If you are doing a trekking peak and taking bulky items like down jackets then 50 litres will be better.
- SHELL - Top and bottom waterproof outer layer. Aim for good quality with a goretex lining.
- DOWN – A puffy jacket, filled with either down or synthetic, is essential for keeping warm at high altitude and especially on the trekking peaks. For trekking you can use a lightweight down but for the climbing trips it is bets to have an expedition style jacket which is long enough to cover the backside. Down bottoms are largely unnecessary until you are climbing the higher 8000m peaks.
- FLEECE - bring a good quality fleece jacket for general use and on the trekking peaks. Sometimes this is all you will need if the weather is good but in bad weather you are likely to wear this top and the shell on top. There are many different fleeces on the market, some very technical, but as long as it keeps the wind and cold out, it will be adequate for a trekking holiday.
LAYERS - Bring a selections of shirts, trousers, shorts, T-shirts, fleece tops, hats and gloves. Remember that cotton takes longer to dry so many people opt for the synthetic trekking clothing that dries faster and is still warm. For a two week trip two or maybe three layers will be enough.- BASE LAYER - This is a warm layer of top and bottom that is close to the skin and is only really needed for the very cold mornings, especially for those people doing a trekking peak or getting up very early to see a sunrise, for example from Kala Patthar. Base layers can be made of merino wool or synthetic material and it is likely you will only need one set.
- UNDERWEAR – You will want to change underwear the most often, so bring enough and also bring a separate bag for used underwear and socks since there will be no opportunity to wash these items. Cotton does not dry easily so we would recommend different materials.
- SOCKS - you will want to change your socks every few days and for a trek you will be fine with quite lightweight hiking socks since it gets very hot. The early days of a trek can easily be done in lightweight socks, only changing to woollen socks at higher altitude. For trekking peaks and any climbs involving climbing boots (plastic or hybrid) you will want well cushioned woollen (or equivalent) socks, but probably only one or two pairs for those few days.
- BOOTS - Comfortable boots with a good sole and ankle support are obviously important for a trek in the mountains, but the early days can often be very hot so you might want to bring a lightweight pair or walking shoes or boots for most of the trek, changing into warmer boots at higher altitude and especially on the more broken ground (for example glacial moraine), and many of these boots take crampons for using on trekking peaks. It's also a good idea to bring lodge shoes or sandals for use indoors.
Do also bring gaiters to protect your boots and add warmth, and these are especially useful on trekking peaks where there is soft snow and to avoid the snow getting into your boots. - SLEEPING BAGS - Bring a 3 or 4 season bag for most treks and if necessary a liner (silk or fleece) for when it gets colder. Sometimes it can be too warm for a sleeping bag so a fleece liner with a blanket from the lodge will be enough. Synthetic or down bags will both be fine for trekking and climbing trips, but it's definitely better to bring proper bags with a hood.
- WATER BOTTLES - These should be hard plastic re-usable, not throwaway bottles.For a trek and trekking peak trip you will want to have two litres to hand most days. Bladders are fine but if you are planning cold early starts then bring some insulation for the tube. If you want to disinfect the water then you could bring a UV filter (Steripen) but most people ask the lodge owner to boil some water the night before. The staff will boil water at camps if you are climbing, but do also remember to bring a flask for hot drinks if you plan to climb.
- HYGIENE - bring a wash kit since most lodges have hot showers now and there will always be opportunities to wash your body and hair. You will also want a travel towel, hand sanitiser and moisturising cream for the dry air on your skin. Lodges will have toilet paper but most people like to bring their own supply just in case. For trekking peaks the staff will make a hole for use as a toilet and you will need toilet paper. Sanitary items are available but the range available is small so we would recommend you bring your own supplies from home. Bring nail clippers, nail brush and if you wear contact lenses then you will want eye drops to combat the dry and often dusty air. Lip balm is also essential, as is sun cream with a high spf factor. It's also a good idea to bring ear plugs as the lodges can often be quite noisy.
- MEDICAL - take a medical kit to deal with small cuts and scrapes and some antiseptic wipes and cream and zinc tape; you will also want headache tablets like ibuprofen (which also helps with altitude mountain sickness) and paracetamol or equivalent for a high temperature; medicine for travellers diarrhoea and simple gastro-intestinal issues; calamime lotion for sunburn and cream for dry skin; blister pads and tape for chafing and blisters; throat lozenges; insect repellant and anti-histamine cream and anti-malarials (especially if visiting the jungles of Nepal); rehydration sachets and/or mineral supplements;
Prescription drugs - personal medications, acetazolamide (Diamox), dexamethasone, antibiotic course, asthma inhalers.
Many people will want to take Diamox to assist in avoiding high altitude illness, but these are prescriptive and should only be taken in an informed way. There is plenty of literature about altitude illness drugs and we have written a number of pieces on keeping healthy at altitude, acclimatising safely and climbing at altitude.
Note: you must check with your GP for your personal suitability to all medicines and their possible side effects and interactions. Please inform us of the details of all regular medication that you intend to use through the course of your trip and any relevant allergies and medical history related to them. You also need to check the requirements and regulations of the airline and all countries visited in relation to medications. For example; laws governing transport of some pain control medication and the need keep insulin at a suitable temperature, ie not in the cargo hold.
- TREKKING KIT - trekking poles, umbrella, dry bags and a waterproof cover for your rucksack. For repairs on the go do bring some a multi-tool, gaffer tape, cable ties, spare laces and light cord.
- ELECTRONICS - you will be able to charge items in the lodges for a fee so it's better to bring your own power pack with usb cables to charge smartphones, ipods and so on. Headlamps are necessary and many are now rechargeable, otherwise batteries are available in most village shops. If you do bring a tablet then a padded sleeve is very useful for it. There are mobile phone towers in the Khumbu region now but it's better if you pick up a local sim card. Most villages have a place where you can go online and use a computer, and some of the bigger lodges will have a wifi system which will be slow if lots of people are using it.
- OPTIONAL ITEMS – Buff or neck gaiter, trekking crampons (like Kathoola Microspikes) for crossing a snowy or icy patch of ground, insulated bottle cover
- SNACKS - lodges and shops in the villages will sell a wide range of snacks and chocolate, trail bars and mixes, energy gels and drinks, soft drinks, beer and many different brands of foods for eating on the trail. You may want to bring some of your own favourites from home though. Vegan snacks and sweets are much less common, as are gluten free products and gelatin free sweets, so do bring these kinds of items with you.
- OTHER - passport & copies, visa, insurance policy, money, credit cards, plane ticket, books, cards, games
Typical trekking set up with leather boots, trousers and fleece tops, hat, sunglasses and gloves, trekking poles with a day pack.
Trekking Peak Equipment
All of the equipment can be rented very easily in Kathmandu or in the high villages near to the popular trekking peaks. For example in Khare for Mera Peak or Chukkung for Island Peak. This will save money on the daily charge and also the extra weight for a porter to carry. However you cannot guarantee the sizes of certain items, especially boots, nor the quality. Check every item first, especially the sharpness of the points on the crampons and whether the slings are worn out.
-
Crampons - 10 or 12 point crampons (for snow climbing) are perfectly suitable for trekking peaks. The 12 point version have two spikes that point forward which are useful for steep gradients like the headwall on Island Peak, but for most of the peaks which are walking on glaciers a 10 point set will be fine. You can choose strap-on crampons or clip-ons, but make sure that whatever you bring fits your boot.
-
Ice axe - for most of the trekking peaks a straight walking axe is enough for dealing with a slip and for steadying on steep ground. Take a leash as well because it is easy to drop an axe especially when tired, but make sure you are familiar with its use.
- Harness - for trekking peaks in Nepal it's a good idea to bring an alpine harness with a wide fleece belt and leg loops that can be clipped and unclipped. This is particularly useful for putting on and removing the harness without having to pull the loops over your boots which have crampons attached.
- Helmet - a standard climbing helmet is necessary, not only to protect you from something falling from above but also to protect your head in case of a fall. Make sure the helmet is big enough to allow a hat or beanie underneath.
- Jumar and leash - this is only needed for peaks where there is a fixed line to assist your ascent, for example on the headwall of Island Peak. The leash can be a piece of 6mm cord or a sling which connects the jumar to your harness. Your guide will help adjust this to your size. In cold temperature it is better to use the big jumar with a handle which can be manipulated with a glove and make sure you choose the correct left or right handed jumar. On a fixed line you are likely to have the jumar in one hand and the axe in the other.
- Karabiners - bring two or three screwgate 'krabs' which come in a multitude of different shapes and sizes, and they will be used to clip onto a line when moving on snow as a team and for attaching a safety line to a fixed line (alongside the jumar line) and for attaching a sling to your harness.
- Slings - bring some short and medium slings for using when you are clipping into a rope and for safety on a fixed line. On a climb carry a medium sling over your body for emergency use.
- Abseiling device - this can be a figure of eight which is perhaps easiest to use in the cold, or a grigri or a stich plate. There are many types but it's important to be familiar with its use and consider the ease of using it in the cold with gloves on.
-
Walking poles with snow baskets - the poles are useful on any trek, especially on the descent of a steep rocky path, but on a trekking peak they are also invaluable for balance when moving on snowy and glaciated ground. It's important to use a snow basket if the snow is soft.
-
Prussic loop - this is a loop of 6mm rope which is wrapped around the climbing rope using a prussic knot in the event of an emergency. It is attached to your harness with a sling and a karabiner; the prussic can slide up and down the rope but the prussic will lock onto the climbing rope when weight is applied.
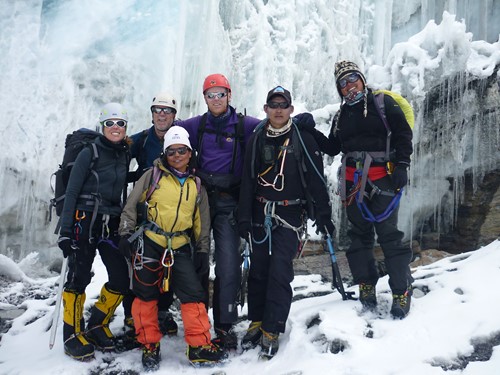
Typical set up for a trekking peak summit day with climbing boots, gaiters, crampons, harness with krabs and slings and jumar and ab device, helmet, fleece layers with shell jackets and bottoms, day pack, sunglasses, ice axe and hats.
Luggage Allowance on Internal Flight to Lukla
Please note that standard luggage limits on internal flights are 15kg in total which covers your porters bag (12.5kg) which will go in the hold plus your hand luggage (trek day bag). You can of course wear your trekking boots and jacket to help cut down on the weight of your bag. You will also have left any city clothes or extra travel kit in Kathmandu. If your combined weight is over 15kg you will need to pay an excess baggage charge on the flight however it's ony $1/kg. If you have a particularly heavy porters bag that means we'll require additional porters then you will need to cover this fee. Most people have no issues with a 12.5kg porter bag plus their own day bag.
Nepal: Local price guide
Nepal, a local price guide.
Depending on your particular trek, expedition, elective or time volunteering with us in Nepal your trip will have differing inclusions and exclusions included in the trip fee. Following are some items and their costs that are generally not included in trip fees, which you can use as a guide to how much spending money you may need to bring with you to Nepal.
In Kathmandu –
Breakfast/lunch/dinner at the Adventure Alternative Guesthouse 450/650/700Rs
Breakfast at the hotel in Thamel ~ 550 Rs
Lunch in town ~ 750 Rs
Dinner in town ~ 800 Rs
Internet in hotel 250 Rs/hour (generally free in town)
1-litre mineral water in hotel 150 Rs in street Rs, 25
Beer/soft drinks 250 Rs (more in the hotels 500 Rs)
Whilst trekking in the mountains – Costs depend on location / height
1-litre mineral water 250 Rs to 450 Rs
Extra boiled water in the lodge (1 litre) 200 - 300Rs
Coke/Fanta/beer 250 Rs – 450 Rs
Hot shower 250 Rs – 450 Rs
Charging 200 Rs/hour sometimes more for a power bank
WiFi ranges from 250 depending on amount of data. Some lodges have a shared network - ensure all background Aps are turned off.
Internet in Namche Bazaar 350 Rs/ an hour (dial-up)
Int phone call in Namche 220 Rs/ minute
Satellite call above Namche ~ 250 Rs/ minute (mobile covers the Solo Khumbu with a local sim card)
Upgrade to a shared room with bathroom 800 Rs
Upgrade to a single room with bathroom 1400 Rs
Upgrade to single normal room 200 Rs
Laundry ~ 40 – 100 Rs per item
Tea, coffee, hot lemon etc 60 – 150 Rs per cup
Hot drinks by flask – 1200 Rs
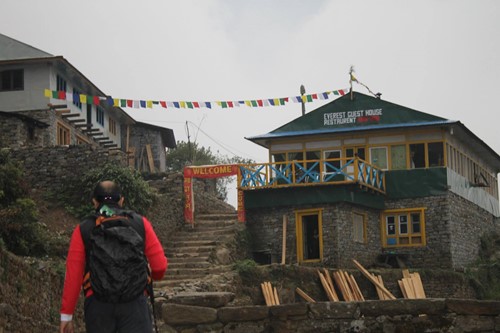
Typical Himalayan Lodges - hospitable, friendly and comfortable
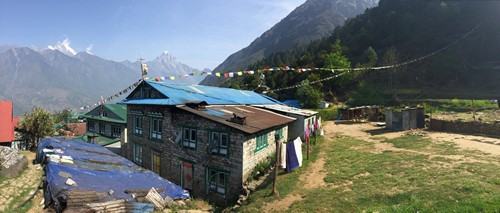
Mount Kenya routes
The following descriptions are a brief introduction to the main routes to climb Mount Kenya.
Mount Kenya has three main peaks, the two highest are highly technical (Batian and Nelion) and are rarely climbed in comparison to the third peak called Point Lenana which is a trekking peak. Other peaks on the massif also present interesting rock climbs.
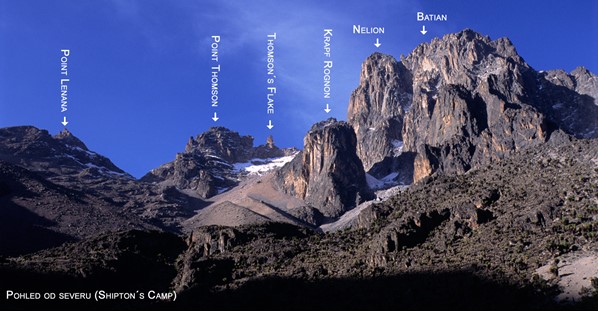
Point Lenana on the left is 4895m high, and Batian is 5199m which is the highest point of the mountain.
There are three main routes on the mountain that cater for 90% of all trekkers visiting the mountain- Naro Moru to the West, Sirimon on the North West and Chogoria on the South East. Most people go up and down a combination of these three. You can camp or use huts on all three and the trek is normally 5 days to go up to Point Lenana and back down again.
There are a further five routes which are much less climbed - Burguret on West, Timau on the North, Meru on the North East, Ithanguni on the East, and Kamweti to the South. These are all wild camping and the National Park often requires Rangers to attend a group because of wild animals. These routes don't have official park gates, and route finding is much harder.
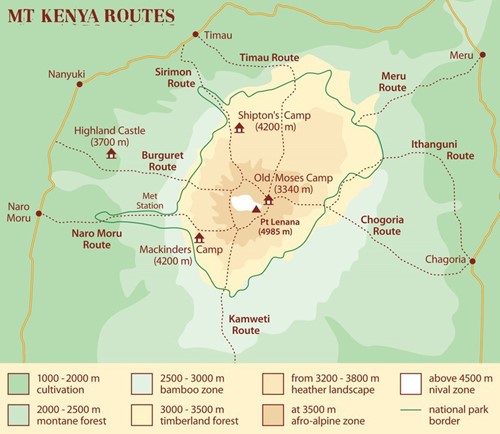
Access is good to the mountain, there is a good road from Nairobi and the journey is about four hours. Most people use Naro Moru as their base on the west side, and Chogoria town or Embu as their base on the east side.
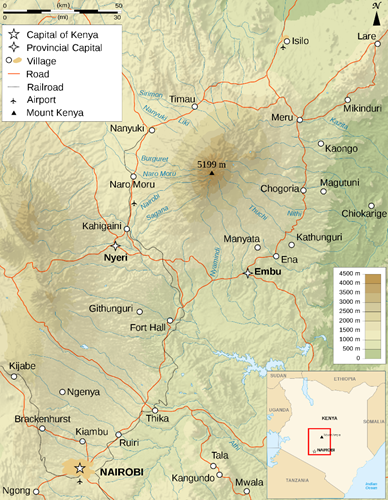
Mount Kenya is an extinct volcano with just one central vent. The main peaks are pretty much in the middle with ridges and valleys that radiate out from the summits like the spokes of a wheel. The routes follow the valleys up to the massif and the trekker then ascends scree and rock to the glaciated summit of Lenana, seen below on the right hand side.
The two main peaks are the remains of the volcanic magma that solidified in the main vent and there is a roughly circular path that goes round them which is the Summit Circuit route. Point Lenana is a smaller sub peak to one side of the main peaks.
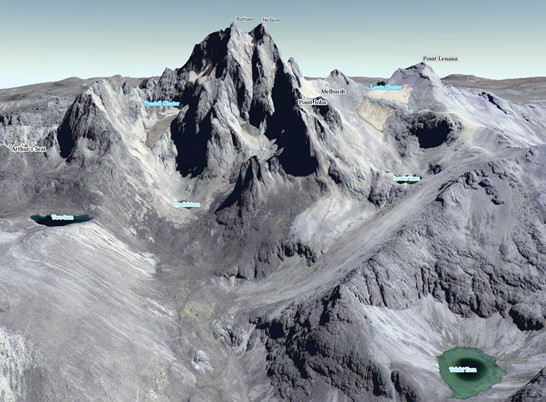
A number of huts are found on all the main routes. The mains camps on the western ascent routes are:
Sirimon - Old Moses Camp, Liki North Camp, Shiptons Camp
Naro Moru - Met Station, Mackinders Camp and Austrian Hut just below Pt Lenana
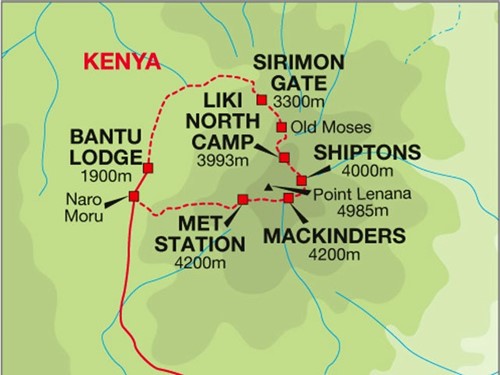
Route distances
| Name | Starting From | Distance | Start Altitude |
| Sirimon | North-North-West | ~25km | 2650m |
| Naro Moru | West | ~20km | 2400m |
| Chogoria | East | ~20+10km | 2850m/1700m |
| Burguret* | West-North-West | ~25km | 1500m |
| Timau** | North | ~35km | ~3300m |
| Kamweti** | South | ~25km | ~3000m |
Statistically about 15,000 people climb the mountain every year and the vast majority go to Pt Lenana at 4985 metres, the third peak on the mountain which is moderately easy to reach. The technical peaks of Nelion and Batian attract just a few hundred each year.
Of the walkers, about 90% climb via the Naro Moru, Sirimon and Chogoria routes. They therefore have staffed park gates and facilities at the camps including huts and Rangers. The other routes - Burguret, Kamweti and Timau - attract about 5% of the total number and are much more wild with basic facilities and camping only.
Sirimon Route
The Sirimon Route is accessed via the North West corner of the mountain and the Kenya Wildlife Service have the Sirimon National Park Gate at the road head where you can pay your fees, there is also accommodation available here. The route is usually considered one of the easier routes as it climbs relatively gradually with only a couple of steeper sections to reach the top camp. It is also currently the most popular route, though it is by no means busy. There are two Huts with dormitory rooms as well as toilets and camping sites; Old Moses (3400m) and Shiptons (4200m). The route follows a vehicle track for the first day, open moorland and the MacKinder Valley for the second day and then the North approach to Point Lenana on summit day.
The forest is relatively sparse on this route and the bamboo zone is not really evident. Most of the second day is spent in the alpine heath and moorland. Crossing the ridge into the MacKinder Valley is a good viewpoint if it is clear and the approach to the peaks along the classic U-shaped MacKinder Valley can be spectacular in clear conditions. The MacKinder Valley shows quite a lot of the giant Lobelia and Groundsel which are the classic Mt Kenya Flora. You are also quite likely to see Rock Hyrax at Shipton's cave or hut.
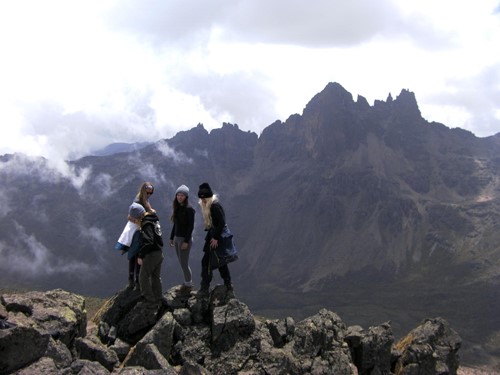
Enjoying the striking features along the Sirimon Route.
Naro Moru Route
The Naro Moru Route approaches from the West and KWS have a National Park Gate there and also their main headquarters for the mountain. There is accommodation available here also. This route used to be by far the most popular route as it is relatively short and has huts at Met Station (3050m) and MacKinders (4200m). However, it has been overtaken by the Sirimon route as the most popular. The huts are good at both locations and they also have camping space. The first day up to Met Station is on a vehicle track through the forest and bamboo. The second day goes through more bamboo and forest before emerging onto the alpine heath and following the Teleki Valley to MacKinders. You would usually then use the South approach to Point Lenana, passing another hut (Austrian Hut) at 4790m.
The forest is still dense on this route, as is the bamboo zone. You are quite likely to see bushbuck, Colobus monkey and Sykes Monkey and also evidence of Buffalo and Elephant. The hygenia forest is also in good condition with a lot of flowers and other plants. The giant heathers above the forest were heavily damaged by a fire in 2013 but the alpine moorland has a lot of Giant Lobelia as well as MacKinders Gladiolus higher up. The Teleki Valley has a lot of the classic Tree and Cabbage Groundsels as well as Lobelia Telekii and Deckenii. Some of the cabbage groundsels in particular absolutely massive. On the approach to or at MacKinders you are almost guaranteed to see Rock Hyrax.
MacKinders camp along the Naro Moru Route of Mount Kenya
Chogoria Route
The Chogoria route approaches from the East and there is a National Forest Reserve gate near the village of Chogoria and a National Park gate further up. The route is often described as the most attractive route on Mount Kenya. However, there is no hut for its high camp and it is quite a bit longer unless you use 4x4's to cut out the lower part. It is normal to drive 4x4's through the forest until close to or as far as the Meru Bandas (3000m). The next stage is following a 4x4 track a bit further up to the "Roadhead" where you can either branch left for a more direct route, or right to pass Mugi Hill and Lake Ellis. Both tracks re-converge near the head of a spectacular amphitheatre of cliffs know as The Temple, in the bottom of which is Lake Michaelson and at the West end, a large notch where the Nithi River enters. Just above the junction (4300m), is an old rickety hut that porters often sleep in, but clients have to camp. From here the path continues to rise, up to Simba Tarn, here it splits to head either North or South for Shipton's or Austrian huts respectively.
The physical landscape on this route is its biggest attraction. Whereas the other routes above generally follow a U-Shaped glacial valley for much of the way, the Chogoria traverses around the head of the spectacular 'Temple' with the Hall Tarns perched on the rock ledge above it and Lake Michaelson in the base of the amphitheatre. The additional features of Lake Ellis, the Giant's Billiard Table and the Nithi Falls further add to its interest. The Chogoria is very often used as a descent route after ascending one of the other routes.
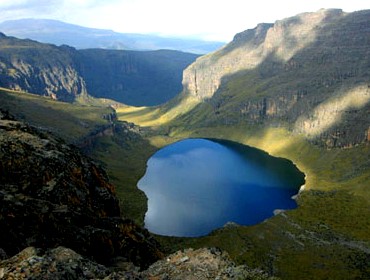
Stunning alpine lake along the Chogoria route.
Burguret Route
The Burguret route approaches from the West, not far from the Naro Moru route. It is not well used and does not have a distinct path which can be followed in the way that the others above can, neither does it have any huts or facilities. There is also no KWS Park Gate so prior arrangement has to be made with the rangers and payments made and receipts collected at another gate beforehand. The lower section through the bamboo forest is likely to need 'route-finding' by the guides unless another group happens to have been through recently. This means that the actual precise route taken will vary from time to time until out into the moorlands and the first normal camping place at Kampi Ya Machengeni (3000m). The next stage is easier in terms of route finding as the ground is more open, however, it is again a matter of making a route rather than following one up to the next usual camp at the rocky outcrops of Highland Castle, 3700m. From here the route continues up thinning flora along the ridge to Hut Tarn where it meets the summit circuit. From here ascent to Point Lenana can be made via either the North or South, though MacKinders Hut or Austrian Hut are the closest.
The Burguret route is not well used due to its added difficulties of route finding and lack of facilities. However, this lack of development and the chances that you will be the only party on the route add to the attraction for some people. In addition, it is along a route very similar to this that Felice Benuzzi, Giovanni Balletto and Vincenzo Barsotti made their remarkable climb of the mountain when they escaped from the British PoW Camp in Nanyuki in 1943. The story is recorded in Benuzzi's fantastic account- 'No Picnic on Mount Kenya'.
Trekking along the lesser-established routes of Mount Kenya evokes feelings of isolation and untouched wilderness.
Timau Route
The Timau Route approaches from the North from near the village of Timau. It used to be a popular route for ascending in a 4x4 as it follows a meandering route through the gentler northern slopes until they steepen at around 4200m. From here it drops abruptly into and across the Hinde Valley and the Nithi North river before climbing up to meet the Chogoria Route at Hall Tarns. Conditions vary on the route but vehicles generally do not ascend above about 3400m. It is still theoretically possible to climb via this route, though specific advice would need to be sought from the KWS Rangers regarding current conditions.
Kamweti Route
The Kamweti Route approaches from the south by first driving up from the village of Kutus to the Forest Castle Lodge in the forest zone. You can begin the trek at the lodge or drive a further 6km up to the Kamweti Forest Station at around 2600m. From here it is as much a case of making a track as following one for around 6km through the bamboo and giant heather before emerging out onto a ridge and along to the head of the Kiringa river where it flows out of a large bowl in the mountainside. The next 10km or so sees the heath thin out as the trail reaches a feature known as The Scoop, at the end of a long ridge leading to the peaks. From here the route options are to follow the ridge along to Austrian Hut via Tilman Peak or to traverse West round to MacKinders Hut via lake Hohnel.
Technical Summits - Batian & Nelion
Point Lenana is the third highest point on Mt Kenya after the technical peaks of Nelion and Batian. These peaks are part of the same large body of rock and are separated by a large notch called the gate of the Mists. There are two main 'standard' routes to the technical summits. As the peak is essentially on the equator, the sun is on the North faces during UK summer and South faces during the UK winter, though note that on the equator there isn't really a summer and winter, only really dry and wet seasons. You, therefore, climb the routes that are in the sun so that they are more free from ice and your hands and feet don't go numb from being in the shade hanging off ice cold rock! Therefore broadly speaking, you would go via the North face to Batian in the UK summer and via the south side during UK winter. The standard south route is the South East face of Nelion, this requires crossing Nelion (and the gate of the mists) to get to Batian.
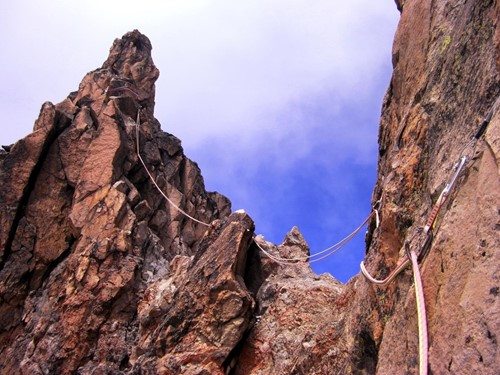
A look at a trad pitch along Mount Kenya's Batian Route.
Other Peaks
Some of the lower grade climbs are as follows (grades are given indicatively only)
- Midget Peak SW Gulley; UIAA III+
- Point John SE Gulley; UIAA III
- Point Peter NE Gulley/Ridge; UIAA III
- Point Dutton NW Face; UIAA II
- Delamere Peak N Face; UIAA II
- Point Pigott NW Face; UIAA III
- Sendeyo S Face; UIAA III
- Tereri NW Ridge; UIAA II
- Krapf Rognon SE; Grade 3 Scramble
- Point Melhuish; ~Grade 3 Scramble
- Shipton's Peak; ~Grade 2/3 Scramble
- Tilman Peak; ~Grade 2/3 Scramble
- Grigg Peak; ~Grade 2/3 Scramble
- Sommerfelt Peak; ~Grade 2/3 Scramble
- Castle Hill; ~Grade 2/3 Scramble
Climb Mount Kenya with Adventure Alternative for a professional personal service and a great team of guides and staff.
Mount Kenya trek kit list
![]()
To successfully climb Mount Kenya you'll need kit which keeps you warm, dry, protected from the sun/rain and comfortable in the various environments that you'll find yourself in, below is a general summary of what you should be thinking about;
- Bags - a medium-large rucksack for a porter to carry your kit on the mountain and a smaller pack for you to carry essential items during the trek. You can leave suitcases or other bags with travel clothes at the base of the mountain safely.
- Shell - Waterproof layer to keep off wind/rain. An umbrella can be very useful and gaiters over the boots
- Warmth - Layers of clothing including base layer/Tshirt, fleece/shirt, warm jacket/top
- Feet - Good quality trekking boots, sandals, trekking socks
- Sleeping - Warm sleeping bag which is 3 or 4 season, plus a sleeping mat
- Extremities - gloves, warm hat and sunhat
- Miscellaneous - Trekking poles, water bottles, flask, favourite high-energy snacks, head torch, power pack, book etc
- Personal care - Suncream, anti-malarials, small 1st aid kit, wash kit
This list below is much more detailed and includes optional items and personal medical kit ideas, remember that synthetic clothing will dry much quicker than cotton.
BAGS
65-75 litre rucksack (for a porter to carry your main gear) with cover
35-45 litre day sack (for you to carry each day)
Dry bags of different sizes for clothes and sleeping bag
SHELL
Waterproof jacket and trousers
Waterproof gaiters
Umbrella (optional)
WARMTH
Warm jacket - could be fleece or down jacket. Make sure you can put the waterproof jacket over the top.
1 or 2 Fleece tops or hiking shirts/sweatshirts
1 or 2 base layers or T-shirts
Pair of trekking trousers and shorts
Leggings or thermal bottoms or running tights
Several sets of underwear - cotton best avoided. Sports bras and cycling shorts are good.
EXTREMITIES
Warm hat and a buff or scarf
Sun hat
Warm gloves or mitts, and thin liner gloves are also useful
FEET
Several pairs of good quality trekking socks
Waterproof trekking boots with a sturdy sole
Trainers or flip flops/sandals for campsites
SLEEPING
3-4 season sleeping bag (comfort -5degC or lower)
Sleeping bag liner cotton/fleece/silk (optional)
Stuff sack for sleeping bag
Thick foam mat or self-inflating mat (like a Therm-A-Rest)
PERSONAL
Sunglasses
Walking Poles
Some favourite snack bars
Head torch with spare batteries
Power pack for charging phones etc
Wash kit
Papers - passport, money, insurance
2 water bottles - (hard plastic, not disposable bottles)
Flask for hot drinks - useful on summit night (pptional)
Earplugs
Wet wipes, tissues
Anti-bacterial hand gel
FIRST AID suggestions
Paracetamol - temperature, colds
Diamox for altitude prevention
Antibiotic for gastro-intestinal problems, for example ciprofloxacin
Ibuprofen - headaches, also good for altitude related symptoms
Antiseptic wipes and a few plasters and tape, antiseptic cream
Blister Plasters
Oral rehydration Sachets
Sunblock and lipsalve
Knee/Ankle Support
Personal Medications eg anti-malaria tablets, inhalers, anti-histamine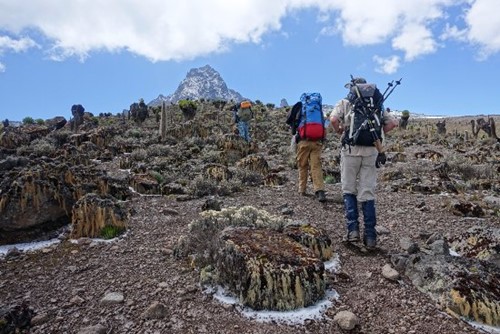
Trekking on Mount Kenya
Naro Moru and Sirimon trek - both on the west side of the mountain, normally five days and either camping or a combination of camping and huts.
Mount Kenya Traverse - up the Naro Moru or Sirimon route and down the Chogoria on the east side, five days camping or combination with huts.
Summit Circuit - up the Naro Moru route, round the climbing peaks of Batian and Nelion and down the Chogoria route, six days camping with option to use huts.
Burguret Route - up the little used Burguret route on the west side and down the Chogoria route. Five days wild camping.
Batian Peak - a highly technical rock climb to the top of the highest peak on the mountain
Nelion Peak - a technical route to the second highest peak on the mountain.
Climbing Nelion and Batian peaks - equipment and clothing
On summit day take a climbing pack of around 30 litres which is slimline and won't get in the way of your harness. Wear base and fleece layers, climbing trousers with some stretch and a hard finish to them, a down belay jacket with a hood, outer shell jacket and trousers, a warm hat under your helmet, wool socks and good quality tactile gloves which are warm yet provide enough feel on the rock. Gloves are not normally worn rock climbing but on this route it can get very cold. so a good glove would be one with a leather palm for grip.
Take spare windstopper gloves, socks and hat in your pack with a flask of hot drink, snacks (and spare food in case of a slow descent), water bottles, suncream and lip salve, spare batteries for the head torch, and a small first aid kit (headache tablets, plasters, stretchy tape for sprains, dressing for wounds). In case of getting benighted on the route it's a good idea to also take a good quality emergency space blanket and a sit pad for some insulation.
Climb in good quality sticky approach shoes or take a combination of rock shoes and the hiking shoes. It will be possible to change footwear above the Amphitheatre, but much will depend on the weather and cold. Mountaineering boots are too stiff and difficult to feel the rock,but some lightweight low profile mountaineering boots could be used, as long as you can climb 5.8 comfortably in them. The approach shoes and/or lightweight mountaineering boots both work well on the mixed conditions of the route.
For the face route on Batian you will need to think of warmth on the feet, and rock shoes are possible but obviously not great in the cold or on slippery icy rock. However on Nelion rock shoes are a much more feasible option, but you need stiff soled mountain boots with crampons to cross the glacier to the base of the route. Again, weather will determine any final decision, so an idea on Nelion would be to bring all three - mountain boots, approach 'hybrid' shoes and rock shoes.
There is no need for crampons on the routes, unless you plan to to cross the Gate of Mists in which case B1 boots, crampons and an ice axe will be necessary. Mini spikes can be useful however on the walk-in and on the scree if there is ice and snow.
The guide will lead the route and put in the protection and carry a rack, but if you do want to lead any sections then contact us for information on what rack to bring. There are some pitons on both Nelion and Batian but mostly protection is manually placed, and the guides mostly prefer cams.
Personal climbing equipment to bring includes a helmet, climbing harness with a belay loop, several locking karabiners, several short and medium slings, prussik loops, an abseiling/rappelling device, belay plate and some quickdraws.
Adventure Alternative will supply the group climbing equipment - kernmantel dynamic ropes, cams, nuts and wires for protection on the route.
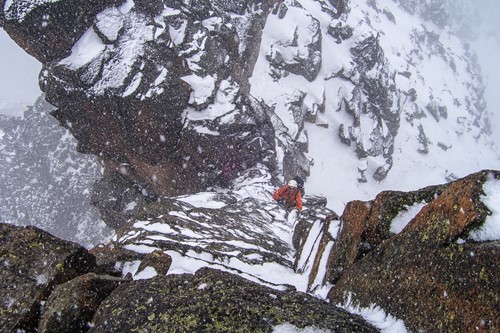
Snowy conditions on Batian
Kenya school trip kit list
Kenya School Trip Kit List
The following is a guide for school expeditions to Kenya, to help keep your personal kit costs to a minimum it is worth borrowing from friends or family, particularly with the larger more expensive items like ruck-sacks, waterproof jackets, etc
BAGS
65-75 Litre Rucksack (needed if you are trekking on Mt Kenya, Mt Meru, etc)
80-100 Litre Duffle Bag (some airlines may give you 2 x large bags for luggage allowance, one for personal kit and one for donations for the kids)
Waterproof Rucksack Cover (optional)
15-35 Litre Day Sack (can be used as hand luggage on the flight)
Small Waterproof Stuff Sacks (or a selection of standard plastic bags to ensure kit stays dry on the mountain - plastic bags have been outlawed in Kenya so better to pack these)
OUTER
Waterproof jacket
Waterproof trousers
Waterproof gaiters (optional)
Warm Insulated Jacket (fleece/insulated)
MID-LAYERS
Microfleece/woollen top(s)
Trekking Trousers (synthetic) zip-off ones are good
Shorts
Happy workers making earth move on one of our projects.
BASE-LAYERS
Long sleeve Base Layer top(s)
Underwear
HEAD-WEAR
Warm Hat
Wide-brim Sun Hat or Cap
Sun Glasses
HANDS
Thick Gloves or Mitts
Thin liner Gloves
FOOTWEAR
Good Trekking Socks
Waterproof Trekking Boots (not trekking shoes)
Trainers/ general shoes
Sandals or flip flops
GENERAL CLOTHING
General Sweatshirt and shirts/tops
General T-Shirts
General Socks
SLEEPING
3-4 Season Sleeping Bag (comfort -5)
Sleeping bag liner cotton/silk (optional - helps keep bags clean and you can sleep in just the liner in warmer parts of country)
Stuff sack for Sleeping Bag
Thick Foam Mat or Self-Inflating Mat
ELECTRICAL
Head torch & spare batteries
Camera, memory card & batteries (a lot of people are using their phones these days)
Solar charger (optional)
Old unlocked phone (optional)
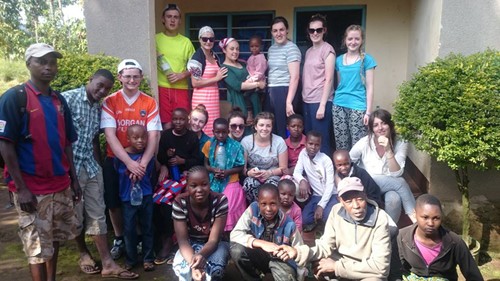
Volunteers together with locals enjoying some bonding and cultural exchange.
PAPERWORK
Passport
Photocopy of passport
Flight details
Student card
Insurance policy details
Cash / bank cards
Notebook/Diary Pencil + Biro
Books / Cards / Games
EATING/DRINKING
2x 1 litre drinks bottles
Favourite high energy snacks
Plastic Mug, Plastic Bowl, Plastic Plate, knife fork and spoon
MOUNTAIN EXTRAS
Walking Poles (optional)
PERSONAL WASH KIT
Antibacterial hand gel
Wet wipes (optional)
Toothbrush with cover
Toothpaste
Shampoo and or Shower gel
Deodorant
Shave Kit + Mirror (optional)
Clothes wash liquid (optional)
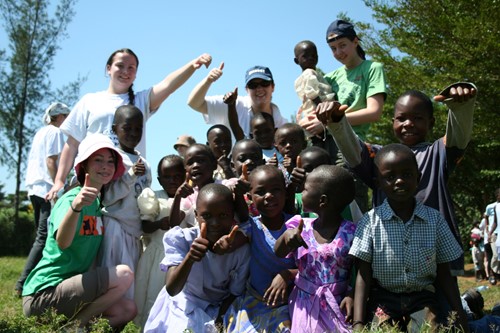
Student trips rock! Enjoying some fun in the sun.
PERSONAL MEDICAL KIT
Paracetamol tablets
Ibuprofen (tablets/gel)
Antiseptic Wipes
Small selection of plasters
Blister plasters (Compeed, etc)
Antihistamines (optional)
Rehydration Sachets
Antiseptic Cream
Sunblock Cream
Lip Salve (with SPF)
Personal Medications eg Anti-Malaria Tablets, Inhalers, Epipen, etc
We will have a large group first aid kit with everything needed for an expedition like this, including all of the above, we've just listed a few essentials under 'Personal Medical Kit' of items that tend to get used regularly.
Mount Kenya trek options
Extra Options for Mount Kenya Ad-Ons
The advertised price for all our options on Mount Kenya does not include transport to the mountain or accommodation before or after. The information below details various options and we can assist with booking the following:
- Airport transfers
- Accommodation in Nairobi
- Transfers to and from Embu or Naro Moru - depending on your route
- Accommodation in both locations too - hotels or lodges
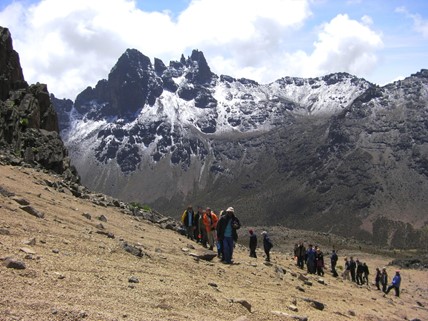
The beautiful Mount Kenya dusted in snow.
Costs of accommodation and transfers
- Airport transfer in Nairobi - £25.00 one way (one car takes up to 4 pax)
- Private transfer between Nairobi / airport and Embu - £100 one way
- Private transfer between Nairobi / airport and Naro Moru - £120 one way
- Accommodation in Nairobi at Wildebeest Eco-Camp - £65 per person / night (dormitory beds with cooked breakfast, upgrades to private garden tents available)
- Accommodation in Embu at our Guest House - £25 per person/night (twin rooms, full board)
- Accommodation in Naro Moru at the Blueline Hotel - £30 per person/night (twin rooms, full board)
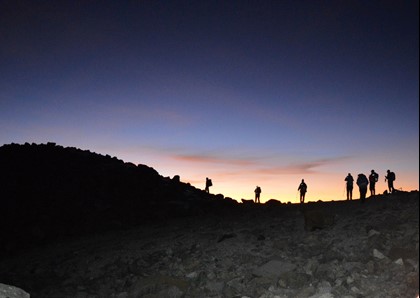
A beautiful sunrise along the Chogoria Route.
The advertised prices on our site are based on camping throughout (mountain tents are provided), optional upgrades at the mountain huts are available, particularly if you are using the Sirimon or Naro Moru routes (most other routes on Mount Kenya will involve wild camping) and the current costs for these upgrades are listed below.
Mount Kenya accommodation upgrades
- Mountain Hut accommodation - £20 per person / night at Met Station or Mackinders Camp on the Naro Moru route, Old Moses or Shiptons on the Sirimon route or Meru Banda's on the Chogoria route.
Safari and Moving Mountains Options
- Sponsor a Moving Mountains beneficiary or former street child to join you for the climb - £150.00. Share your experience with someone who has been supported by our charity, Moving Mountains and give them the chance to develop personally by joining you to summit the highest trekking peak in their country.
- Visits to our Moving Mountains development projects on the lower slopes of Mount Kenya, these include the Solio development for internally displaced people and Tigithi Primary and Kiamathaga Secondary Schools on the western side of Mount Kenya, near Naro Moru town and the Rescue Centre for Street Children, our Black Cats sports programme and a number of school development projects on the eastern side of Mount Kenya in Embu (Urban Primary, County Primary and Gatwe Primary Schools - there is no charge for visiting any of these projects, however we would ask that you cover local staffs transport (if required)
- Tailor-made safari adventures - prices will vary depending on the numbers in the team, length of the itinerary and National Parks and Game Reserves/Conservation Areas visited but we are more than happy to discuss options with you and help build an itinerary to suit your time and budget. From Mount Kenya, you have great access to Ol Pejeta Conservancy for day trips and overnights or the longer but popular option of a 4 or 5-day safari to Lake Naivasha, Hells Gate and the Masai Mara.
Safari clothing
Safari Clothing & Equipment - Personal Kit
We recommend keeping clothing light and long-sleeved during the day (colours are traditionally khaki or green, bright colours could spook some wildlife) with a fleece or jumper for the evening and a lightweight raincoat, particularly if you are travelling during wet seasons.
Safari Packing Essentials
The following should give you an idea of the essentials;
- Short & Long Sleeve Shirts - Long sleeved is for protection from the sun and insects in the evenings.
- Shorts & Trousers - again, long trousers can protect from the sun & insects.
- Safari Hat - wide-brimmed works best, but a cap is a good alternative!
- Jacket/Fleece - it can get colder in the evenings and on early morning game drives.
- Shoes - Comfortable trainers/shoes and a pair of sandals. You will need some type of hiking or safari boot if you plan on any walking safaris.
- Swimwear
- Binoculars Camera
- Personal first-aid kit and wash kit
- A packet of wet wipes is very useful to clean up after driving along a dusty road!
- A small day pack
- Sunglasses and sunscreen (including SPF lip salve)
- Guidebooks, maps, etc
- Money belt
- Torch (can be useful on a luxury safari but very important on camping/budget safari)
- Water bottle
- Insect Repellent
Spotting hippos in a pool in Kenya.
If you're on a camping safari then you need to add the following extra's;
- Sleeping bag
- Sleeping bag liner (helps to keep your main bag clean and can be used on its own in very warm weather)
- Camping mat or Therm-a-rest
Visiting Our Projects
If you're planning on visiting some of our Moving Mountains projects during your safari then it's a good idea to pack some photos of your family and pictures from your home. Most children are fascinated by the outside world and will really appreciate you taking the time to show where you come from.
Contact us if you are considering bring gifts, etc. We have put a lot of effort in over the years to ensure that our beneficiaries feel part of a family rather than a charity case and although we welcome your efforts in bringing gifts for the kids we prefer to stay away from the old hand-out mentality, in favour of a much more progressive developmental aid, a hand-up rather than a hand-out. As such, any gift should be distributed by our staff on the ground to ensure that no favouritism is shown to specific kids. Our staff will ensure that the right children are receiving it and this also helps children get away from any sort of begging mentality, if aid is delivered to local children by our local staff then it avoids any sort of old colonial attitude towards aid.
There are however some things that are needed, particularly in schools, our children's home, rescue centre and on our sports and music programmes, if you have access to any of the following then our staff will be very grateful and will ensure that they reach the communities, schools or children who benefit most;
Spotting wildlife on the savannah means protecting yourself from the sun and wind.
- Football kits (full kits for our Black Cats teams) and football team jerseys... All children love football, particularly the big teams; Man Utd, Arsenal, Barcelona, Real Madrid, Sunderland (!?!), etc
- Football boots (the red dirt pitches are very sore on boots and they are expensive to buy locally, even 2nd hand)
- Footballs and sports equipment, not just for the Black Cats but for the schools that we work with (includes sports medical kits and pumps for balls)
- Musical equipment
- Pencils for school children (pens are not used in Primary level education, pencils are much more useful)
- Games and group activity equipment, colouring and reading books
- Black school shoes (like boots these are reasonably expensive to buy in Kenya, even 2nd hand)
- Good quality clothing (all sizes, not just to distribute at our children's home or rescue centre but to boost stock in local social enterprises)
- Local produce (helps the local economies and if visiting family homes then a bag of sugar, maize, rice and tea, etc will be much more useful to any family)
Avoiding malaria
Avoiding malaria
Malaria is spread primarily by bites from Anopheles mosquitoes and is characterized by fever and influenza-like symptoms, including chills, headache, muscle pain, and malaise; these symptoms can occur at intervals. Further serious medical complications are a possibility. Therefore if you have these symptoms while travelling in a malaria zone or within 4 weeks of leaving the malaria zone you must speak to your trip leader or a doctor about it.
As the disease is spread by mosquitoes, the primary action is to minimise the risk of being bitten in the first place. Bites are most often sustained between dusk and dawn and in areas with low wind speeds and the presence of water.

Proper netting helps you to stay protected from mosquitos at night.
Specific measures that you can take to reduce the risks of being bitten include:-
- Between dusk & Dawn remain in well-screened areas
- Using mosquito bed nets treated with insecticide such as Permethrin
- Wearing clothes that cover most of the body
- Use repellent on exposed skin such as 50% DEET
No vaccine is currently available and no method can protect completely against the risk for contracting malaria. There are a number of anti-malarial medications that can be used, advice on which medication is most suitable for you must be sought from a medical practitioner with access to your own medical history. Many factors can affect which medicine is most appropriate to you personally including:-
- where you are going
- medical history, including any drug allergies
- relevant family medical history
- current medicines
- any problems with antimalarial medicines in the past
- your age
- whether you are pregnant
Antimalarials only reduce your risk of infection by about 90%, so taking steps to avoid bites is also important. It is vital that you take the anti-malarial tablets all the time and the correct dosage.
You can initially check the Malaria risk of your destination using the NHS Fit For Travel website and going to the pages for the country. There will be guidance and a Malaria Map showing where in the country is considered a risk, for example this is the one for Nepal Malaria Map.

Possible medications to consider include:-
Malarone (Atovaquone plus proguanil) the adult dose is one adult-strength tablet a day. It should be started just one or two days before your trip, taken all the time that you are in a risk area and for seven days after you get back. It is more expensive than other antimalarials so may be more suitable for use on short trips.
Avloclor (Chloroquinine) the adult dosage is two tablets taken once a week. It must be started one week before you travel, taken all the time you are in a risk area and for four weeks after you return. Chloroquine is one of the oldest antimalarial medicines and many strains of malaria are now resistant to it.
Vibramycin-D (Doxycycline) the dose is 100mg daily as a tablet or capsule. You should start the tablets two days before you travel, and take them all the time you are in a risk region and for four weeks after you return. Possible side effects include sunburn due to light sensitivity. Doxycycline is relatively cheap.
Trekking through lowland jungle increases your risk of getting bitten by an infected mosquito.
Lariam (Mefloquine) the adult dose is one tablet weekly. It should be started three weeks before you go and taken all the time you are in the risk region and for four weeks after you get back. It is not recommended if you have epilepsy, seizures, depression or psychiatric problems, or if a close relative has any of these conditions. It is not usually recommended for people with severe heart or liver problems.
Paludrine (Proguanil) the adult dosage is two proguanil tablets each day (usually taken with two tablets of chloroquine once a week, on the same day each week) You should start taking it one week before travel and continue all the time you are in a risk area and for four weeks after you return. The major disadvantage of taking proguanil and chloroquine is that resistance has developed in many areas, so the drugs are no longer effective.
Please also refer to the following advice from the UK National Health Service:-
http://www.nhs.uk/Conditions/Malaria/Pages/Prevention.aspx
http://www.fitfortravel.nhs.uk/advice/malaria.aspx
http://www.hpa.org.uk/Topics/InfectiousDiseases/InfectionsAZ/Malaria/
Malaria Symptoms
Symptoms of malaria can develop as quickly as seven days after you are bitten by an infected mosquito.
The initial symptoms of malaria are flu-like and include a high temperature (fever), headache, sweats, chills and vomiting. These symptoms are often mild and can sometimes be difficult to identify as malaria.
With some types of malaria, the fever occurs in four to eight-hour cycles. During these cycles, you feel cold at first with shivering that lasts for up to an hour. You then develop a fever that lasts for two to six hours, accompanied by severe sweating.
Other symptoms of malaria can include muscle pains, diarrhoea, generally feeling unwell.
If you develop any symptoms that match those above you must speak to your trip leader immediately so that they can take further action.
Hygiene on trek
Hygiene Tips for Trekking in the Mountains
Here is an easy way to reduce the environmental impact of your trek in the mountains... Don't ask for a hot shower every day in the lodge.
This is because they often heat the water with wood rather than using kerosene. Instead, enjoy the restorative benefits of a cold bucket wash and build up your anticipation for a hot wash every few days. This will add to the challenge of your trek, and add to the enjoyment in retrospect. It will also help the environment up there in the mountains, and hope, truly make your holiday greener. If every trekker going to say, Nepal, every year (currently over 100,000 people) followed this routine then the difference would be huge. So help us make a difference one less shower at a time!
Our trek leader will be leading by example by not showering every day, not bringing soap, taking extra undies instead of washing clothes, and still smelling sweet on the trail. So don't feel you need to do clothes washing on your trek, just take some extra underwear and put the dirty stuff in a bag to take home
When you do wash use a biodegradable soap, but remember that biodegradable doesn't always mean environmentally friendly! Here are the soapy facts:
- Biodegradable soap is NOT biodegradable when it ends up in a river or lake because it requires soil for it to break down properly.
- Biodegradable soap is NOT NATURAL....it is a chemical.
- If you wouldn't want to drink it then keep it out of water sources.
You don't need to use soap! You can leave that bar at home, and consider these alternatives:
- Use a washcloth, scrubber etc.
- A little scrubbing can clean mostly anything.
- Use alcohol-based waterless hand sanitizers to kill germs.
- Soap is not 100% necessary for good personal hygiene
And if you really, really need to use soap then make sure that any brands of biodegradable soap you use are actually biodegradable and phosphate-free.
Thank you for your help!
Travel vaccinations
VACCINATIONS AND PROPHYLACTIC MEDICATION
The following information should be considered a general guide to help you to be aware of the possible diseases associated with travel abroad. However, it must not be used as a substitute for consultation with your GP or a specialist travel clinic. Further information can be obtained through the following resources:-
- Foreign and Commonwealth Office "Know Before You Go" scheme
- National Health Service "Fit For Travel" scheme
- MASTA Travel Vaccine Checker
- Public health England's, National Travel Health Network and Centre
TIMING
Some vaccinations require a course of multiple injections over a certain time period to be effective. You therefore ideally need to make contact with your GP or Travel Clinic at least 8 weeks prior to your departure date.
If you realise that you are later than 8 weeks before departure it is still important to make contact, make sure that you tell them when you are due to travel when you are enquiring about appointments.
Common Travel Vaccinations
- Cholera vaccination – cholera is a disease that causes diarrhoea and vomiting and is usually caught through infected water.
- Diphtheria vaccination – diphtheria is a bacterial infection that mainly affects the nose and throat.
- Hepatitis A vaccination – hepatitis A is an infection that causes inflammation of the liver.
- Hepatitis B vaccination – hepatitis B is similar to hepatitis A but it is caused by a different virus.
- Japanese encephalitis vaccination –Japanese encephalitis is a disease that is spread by mosquitoes. It is usually mild but can develop into encephalitis (inflammation of the brain).
- Meningococcal meningitis vaccination – meningococcal meningitis is an infection of the meninges (the protective membranes that surround the brain and spinal cord).
- Poliomyelitis (polio) vaccination – polio is a highly infectious virus that can cause flu-like symptoms and is potentially fatal.
- Rabies vaccination – rabies is an infection of the central nervous system that is passed to humans through the bite of an infected animal.
- Tetanus vaccination – tetanus is a severe but short-lived infection that is caused by bacteria.
- Tick-borne encephalitis vaccination – tick-borne encephalitis is similar to Japanese encephalitis but it is caught through the bite of an infected tick.
- Tuberculosis vaccination – tuberculosis is a bacterial infection that affects the lungs.
- Typhoid fever vaccination – typhoid fever is a potentially fatal bacterial infection that is caught through contaminated food or water.
- Yellow fever vaccination – yellow fever is a serious viral disease that is spread by mosquitoes. (you may need to show a certificate of vaccination for entry into some countries) You can check which countries the World Health Organization list as having Yellow Fever transmission risk, and those that require a certificate.
- Malaria - there is no vaccination against Malaria and we strongly recommend taking anti-malarial tablets in a country where malaria is prevalent.
Remote locations often times don't have adequate health services. Make sure you do all you can to protect yourself prior to leaving your home country.
CONSIDERATIONS
Exactly which vaccinations you need will depend on a number of factors. Certain activities may place you at higher risk of getting some diseases. In particular, consider the following:
- The country, or countries, you are visiting and the specific region of a country you are visiting will also be important.
- When you are travelling. Some diseases are more common at certain times of the year, for example during the rainy season.
- Where you are staying. In general, you will be more at risk in rural areas than in urban areas.
- If you are backpacking and staying in hostels, or camping, you may be more at risk than those who are staying in a hotel.
- How long you will be staying. The longer your stay, the greater your risk of being exposed to diseases.
- Your age and health. Some people may be more vulnerable to infection than others, while some vaccinations cannot be given to those with a particular medical condition.
- What you will be doing during your stay. For example, whether you will be spending a lot of time outdoors, such as trekking or working in rural areas.
- If you are working in a medical setting. For example, a doctor or nurse may require additional vaccinations.
- If you are in contact with animals, you may be more at risk of getting diseases that are spread by animals, such as rabies.
- How far you will be from medical help. For example how quickly you can get to a medical facility carrying the rabies treatment medications.
Sources of further information include:-
- The UK Foreign & Commonwealth Office - https://www.gov.uk/foreign-travel-advice
- UK NHS Fit For Travel - http://www.fitfortravel.scot.nhs.uk/home.aspx
- UK NHS Choices - http://www.nhs.uk/conditions/Travel-immunisation/Pages/Introduction.aspx
- The National Travel Health Network and Centre, NaTHNaC - http://www.nathnac.org/travel/index.htm
- The UK Health Protection Agency - http://www.hpa.org.uk/HPAwebHome/
- The World Heath Organization Travel Health Advice - http://www.who.int/ith/en/
Sleeping bag advice
Most of our trips, treks and expeditions will require you to have a sleeping bag. Choosing the right sleeping bag can be a bit daunting when faced with the huge array on sale, but the main focus for your decision will be on the filling and then the amount of fill depending on the lowest temperature you are likely to experience.
Sleeping bags keep you warm by trapping the warm air around you; your body creates heat and the warm air is trapped in the filling the same as a duvet on your bed. Air is a poor heat conductor but a great insulator.
Mountain sleeping bags are mummy-shaped, mostly with a zip and drawstring that keeps the top tight around you.
The sleeping bag can't insulate you from below because your weight is compressing the material, so on cold terrain the bag is really only as good as the insulation provided from your mat.
There are two main types of insulation that the sleeping bag may use - synthetic and down.
Down insulation (the small down feathers from ducks and geese) is lightweight, durable and packs down well, but it's more expensive. Wet down will not maintain warmth though, plus it's difficult to dry once wet. Dry down is a recent innovation that coats the filaments of the feathers in a hydrophobic coating and helps keep the bag from getting damp.
Also there's an ethical consideration since down is an animal by-product and there is plenty of evidence of inhumane treatment of the animals (ducks and geese). The ethical down standard is well worth reading when you are choosing a bag that uses ethical down.
Synthetic insulation is usually a bit heavier and bulkier, but will dry out better than down and do maintain some warmth even when damp. Recent innovations are more lightweight though and products like Primaloft, Thermolite, Climashield and Quallofil are examples of high-end synthetic insulation.
Synthetic fill comes in two types, short fibres and long filaments. Short fibres mimic the structure of a down feather but they break down quite quickly with use so don't last long. Continual filaments are durable and provide good insulation but they don't compress well.
The decision on which filling is right for you will, therefore, be decided by things like:-
- Weight and bulk on long trips Down is lighter and compresses well.
- Damp - might it get wet with no chance of drying? A synthetic bag drys better and keeps it's warmth when damp.
- Cold - in very cold temperatures, a down bag has the best weight to warmth ratio
- Cost - down is more expensive but probably the better investment long term because it's a durable bag. Synthetic bags are cheaper generally.
More on Down Insulation
Down insulation is available in different qualities, this depends on which bird it came from and what proportion of it is down vs feathers. Eider duck down is usually the best, goose down the next best and duck down slightly less so.
The proportion of down to feather may be specified as a percentage. For example, 90/10 would be 90% down, 10% feather; the higher the first number the better.
The down is also often given a 'Fill Power' rating. This is a measure of how much the down puffs up and traps the air that will insulate you. If it puffs up more, you need less of it to do the same job. Again, the higher the number the better, numbers of 750 or higher are good. Just to confuse things, tests results to the US system will come out higher than the European system. See this video of a US fill power test.
You should also check whether the down is responsibly sourced. Down clearly comes from birds and therefore the way in which the birds are reared and how the down is collected is of relevance. At one extreme, geese may have the down feathers plucked from their breast region whilst they are still alive. Some down is sourced from birds slaughtered for their meat and is gathered from the dead bird during processing.
Some manufacturers such as Tundra claim to only use down that has already been naturally moulted by geese that are reared for breeding purposes. The European Down and Feather Association have a code of practice, and Patagonia have also now produced a standard that they have committed to follow on the ethical sourcing of down for their clothing. We all have a duty to question manufacturers so that they are put under pressure to ensure that down is responsibly sourced.
Sleeping bag temperature ratings
Different people will feel warmer or colder in exactly the same sleeping bag in exactly the same conditions. However, there is a measurement system that you can use to help guide you. Not all manufacturers will use this system but if the sleeping bag has EN13537 written on it next to the rating, then they are. See this Explanatory video on youtube.
The rating system does not give one number for the bag, it gives a range. These are summarised as follows:-
Upper Limit - the highest temperature at which somebody would be able to sleep in the bag with the zip open and their arms and head out. Hotter than this and they will be sweating and unable to sleep.
Comfort Temperature - the temperature at which somebody would sleep comfortably.
Lower Limit - the temperature at which somebody would still be able to sleep for 8 hrs without waking up due to the cold.
Extreme - the minimum temperature at which somebody would survive for 6 hrs without hypothermia.
The most useful temperature rating to use would probably be the Comfort rating. If you read what the sleeping bag is rated as and then make a decision based on your how much you feel the cold.
Example of a sleeping bag rating tag
Note that it is the "Comfort" temperature that is most useful, in this particular case it is +8 deg C. A lot of people would be uncomfortable sleeping at +3 deg C in this, bag and some would be on the verge of hypothermia at -11 deg C.
Season ratings for sleeping bags
Sleeping bags are rated by seasons to provide a generic comparison when buying. It's a simple guide though, sleeping bags are an investment for the future and care should be taken to look at all the factors like type of fill, temperature rating, type of use and ethical considerations.
1 season - summer camping
2 season - UK late spring and early autumn,
3 season - autumn, early winter with no frost, mid-cold nights
4 season - cold winter nights with frost, high altitude
5 season - extremely cold, polar conditions and high altitude
Sleeping Mats
As mentioned above, a sleeping bag only really insulates you from the air around you, not from the ground beneath you. This effect can be enormous and even the best sleeping bag is likely to be useless without an appropriate mat, especially if you are camping on rock, snow or ice. You must have an appropriate mat in conjunction with your sleeping bag.
There are two main types of sleeping mat; Closed Cell Foam and Inflated/Self-Inflating.
Closed-Cell Foam Mats are the traditional old-school camping mats. These are very light but quite bulky and limited in their insulating properties. Their huge advantage is that they are robust and will still work if they are punctured by a knife, thorn, crampon etc. they can also be used immediately with no need to inflate them.
Inflated Mats will generally pack much smaller but may be slightly heavier. They can, however, be made much thicker and can, therefore, be much more comfortable and much more insulating, especially if they contain down insulation as well as air. The big potential disadvantage with these mats is that they are useless if they are punctured. It is therefore essential that you carry a repair kit for them. Also, bear in mind that blowing them up with your mouth will put some moisture inside them. This is not generally a problem, but if you are in a cold location this may turn to ice and build up inside. It will also start to affect the performance of any down filler inside.
On high altitude mountain climbs, we will normally carry both a closed-cell mat and an inflating mat.
Sleeping bag liners
These are usually made of silk or synthetics (like microfiber or polyester), cotton or fleece. Fleece and silk are insulating and add a few degrees to the warmth of a bag, while the cotton ones or synthetic ones are useful for keeping your sleeping bag clean inside.
The fleece ones are quite bulky but very useful where you might be sleeping in a variety of temperatures. For example on a big mountain you might have a four season bag for the high cold camps, but at base camp it is much warmer. In which case sleep in the fleece liner and use the sleeping bag as a duvet.
Silk liners are obviously lighter and pack down smaller, and they are also warm but not as warm as a fleece liner.
Cotton liners are great for jungle trips where it is hot and humid and you don't even need a sleeping bag. They're much easier to launder than a whole sleeping bag if you want them as a liner, and they're great for hostels and indoor use.
Some synethic liners are quite advanced, they use a hollow-core Thermolite fibre and a three-dimensional knitted structure which traps air nicely and they can be used as a standalone sleeping bag.
Sleeping bag shape and size
Not all sleeping bags are the same length and width. If you are tall, wide, have an aversion to tightness or have a particular way of sleeping, you may want to check the dimensions of the sleeping bag and maybe even ask to open one out in the shop.
There are a few different shapes of sleeping bag available. The simple rectangular ones are cheap for a reason! They are not really useful for mountain conditions.
A 'mummy' shaped bag is the norm as it works more efficiently in that it traps air for insulation purposes within the wall of the bag but does not have excessive pockets of air between you and the inner wall of the bag. These pockets of air can make it take longer to get warm and cool down more easily.
Mummy shaped bags also make more efficient use of material and are therefore lighter and less bulky for the same overall size. Some people find the narrower or more shaped fit a bit constrictive, particularly if you happen to have wide shoulders or a particular body shape.
There are also some new 'pod' shaped sleeping bags that are much wider and allow you to curl up inside them and sleep in a variety of shapes. This may work well for general comfort but does make for a much bulkier bag and so is not likely to be particularly well suited to travel where weight and bulk of the packed bag is a factor.
Some models will have certain features to try and improve performance. These might include the shape, size and layout of the pockets in which the insulation is distributed, particularly with regard to avoiding cold spots where insulation may not be well distributed. A well-shaped hood that can close down around your face and keep you comfy is very important in cold conditions. Another feature that can be very useful is a baffle that can be independently closed up around your neck to fit the bag to your body shape and avoid any draughts.
As with a lot of cheaper clothing, cheaper sleeping bags may have lower quality zips and zip detailing. The last thing you want is not to be able to close your bag if the zip is broken or swallows up a wad of fabric and jams. Good bags will also have a baffle on the inside of the zip so that you don't get a strip of cold along with it.
You can use silk, cotton or fleece sleeping bag liners to help keep the bag clean and also get a few degrees more of warmth.
Looking After Your Sleeping Bag
As with all kit, it will continue to perform well for longer if you look after it. When not in use it is best stored laid out flat in a dry place. It should not be left in its stuff sack and ideally not hung up. Some sleeping bags come with a small stuff sack for using on a trip and also a much larger cotton bag for storage at home.
Washing your sleeping bag is possible, see video from Trail Magazine, but will inevitably reduce its performance of done too often. If you use a liner then this can help reduce the need for washing. If you do need to wash it then you need to do it carefully by hand using special washing liquid that won't leave a residue. You can then tumble dry it on a low heat setting, although your machine is unlikely to be big enough for a 4 or 5 season bag. Adding a tennis ball to the drier can help to break up and 'clumps' and help to re-loft down.
When carrying/using your sleeping bag you should try to keep it dry at all costs. Carry it in a waterproof stuff sack. In addition to rain, snow and rivers, the bag can get damp from steam from a stove or drips/ice crystals falling off the inside of a tent. If it gets damp then air it at the first opportunity. Using a gore-tex outer bag can be useful in certain environments and some bags come with a water-resistant outer shell material. Beware though, some of these outer shells can also be quite air-tight. Therefore if the bag is fully puffed-up and you jump on it you can damage the stitching or even pop it like a balloon!
When you get your sleeping bag out of its stuff sack it will need some time to 'loft' or 'puff-up' before it is at its best. Therefore it is wise to lay out your sleeping bag at least an hour or so before you get into it.
Suggested Sleeping Bags for some of our trips
Please note that this is just a rough guide, as mentioned above, warmth can be very subjective. If you feel the cold then do go for a bag that is warmer (rated to a lower comfort temperature) or take some thermals or a silk/fleece/cotton liner as well. Do speak to us if you have any doubts or questions before spending your hard-earned cash on a new sleeping bag.
| Trip | Accommodation | Insulation Type* | Comfort Temperature** |
| Borneo treks | Lodges, homestays | Cotton liner (self made) | 10 deg C |
| Mount Kenya | Huts and tents | Synthetic | -5 to -10 deg C |
| Nepal treks | Lodges | Synthetic | -5 deg C |
| Mount Toubkal | Mountain refuge, tents | Synthetic or Down | -5 deg C (winter) , 0 deg C (summer) |
| Mount Kilimanjaro | Tents | Synthetic or Down | -10 deg C |
| Ojos del Salado | Tents and hut | Down | -15 deg C |
| Elbrus South Route | Mountain hut | Synthetic or Down | -5 deg C |
| Elbrus North Route | Tents and hut | Down | -20 deg C |
| Island Peak | Lodges and tents | Down | -15 deg C |
| Mera Peak | Lodges and tents | Down | -15 deg C |
| Mount Aconcagua | Tents | Down | -20 deg C |
| Mount Everest | Tents | Down | -40 deg C or lower |
* This assumes general material specifications. High-grade synthetics can out-perform low grade down and may be more appropriate in case of extreme allergies or locations where there may be significant moisture or potential condensation and ice buildup.
** This is only a guide and assumes that the sleeping bag has been graded according to EN13537. Also, ensure that you read the right part of the sleeping bag rating tag or description, some marketing literature can be misleading and quote the Lower Comfort Limit, what is given here is the Comfort Temperature, see section above on ratings for an explanation.
Sleeping bag rentals
All the sleeping bags that we rent for Mount Kilimanjaro and Mount Elbrus are Highlander Serenity 350 or 450 synthetic bags which are 4 season and weigh 2kgs and have a spiral hollofil synthetic fill and a comfort rating down to -4 deg C.
Sleeping in Borneo
Our trips to Borneo generally involve sleeping in riverside lodges, chalets or homestays when you are not in a hotel. In all these places there will be a mattress on the floor with a mosquito net provided. It is hot and humid so you will not want a heavy sleeping bag; instead we use a cotton sleeping liner, basically a cotton bed sheet made into a sleeping bag shape.
Porters rights
Porters Rights
Adventure Alternative has long been campaigning for more responsible policies towards employment of local people, including porters, and sharing the benefits of tourism more fairly with local communities. We have also been leading by example through our business practice and our development work in association with Moving Mountains.
There are still some popular misconceptions about the employment of porters and local staff. One of which is that you are travelling more responsibly by not using porters. This ignores the fact that responsible employment of porters is a good way to share the economic benefits of your trip directly with the people whose homeland you are travelling through. This, of course, hinges on the need to agree on fair payment and terms of employment. Paying too much for goods and services can be as destructive to the local economy as paying too little in that it can lead to inflated prices that the rest of the local community cannot subsequently afford to pay. It is in matters such as choosing the right wages where it is vital to building up a long-term, two-way and trusting relationship with local staff. This is something that Adventure Alternative has long championed by setting up local companies, staffed by local people.
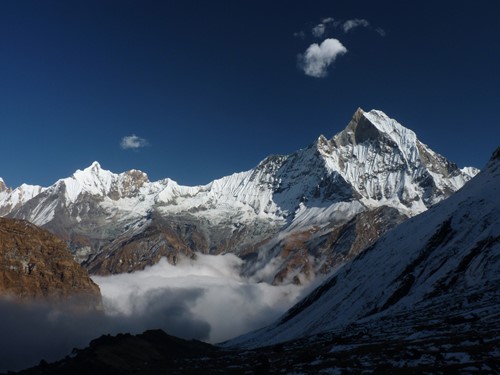
The porters of Nepal and other areas we operate in are treated with respect and have proper training.
The following gives the general Adventure Alternative policy on the terms of employment on which porters are employed by us. It also acts as a memorandum of agreement between the UK office and our in-country offices or in-country providers.
1. The relationship between UK tour operator and destination country ground agent
On the vast majority of Adventure Alternative treks, climbs and expeditions the staff will be employed directly by our own in-country company. This ensures that we have direct and unambiguous responsibility for the working conditions of all staff associated with the trip.
In the cases where a third party ground-handler is used for all or part of the trip, a working partnership will have been established through which the third party is given clear and unambiguous guidance as to the working conditions that must be established for all staff, including porters. This guidance is delivered in person and also via this document, which is considered a memorandum of understanding.
2. Relationship with head porters / sirdars / guides
In almost all situations, a full-time representative of our in-country or UK office will be present on the trip and will hence act to coordinate and monitor the management of staff and porters on the trip. All in-country staff who are placed in a position of responsibility for other staff members have established a good working relationship with staff and have a proven track record or fair and responsible leadership.
In-country representatives/head porters/sirdars/guides are authorized to use specific funds to pay for porters to be evacuated and treated in case of sickness or accident without their own remuneration being affected. Insurance policies for the coverage of staff and porters are in place where appropriate and practicable.
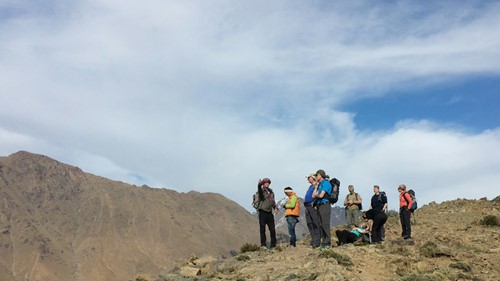
Our porters and guides are paid fair wages and have weight limits for what we allow them to carry.
3. Communication with porters’ groups
Direct channels of communication are established with porters, porters’ organisations and the communities from which the porters come. This is often via our in-country offices and directors or, on occasion via our in-country contacts. Porters or their representatives are involved in decision-making processes where relevant.
4. Terms of employment and special provisions
Porters are hired through formal verbal or written contracts, setting out the terms of employment as well as the rights and responsibilities of porters on a short-term (trek-by-trek/seasonal) or longer-term basis. Porters or their resident community collectively witness and approve the content of their contract.
The minimum age for porters shall be 16 years of age unless specific mitigating circumstances are identified and approved by the UK office.
Where in-country provision makes it feasible, Adventure Alternative has insurance policies in place that cover all staff, guides and porters. In locations where this is not practicable the trip leader has at their disposal sufficient funds and authority to be able to fund any necessary evacuation and healthcare provision for staff, guides and porters.
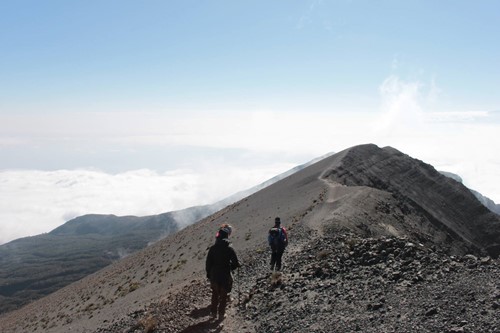
Porter's Rights are important to the well-being of those employed with Adventure Alternative.
5. Wages
Porters shall be paid a stable and fair basic wage that does not rely on tips to make it economically viable. This figure is based on research into the local economic situation and average wages in the country, as well as consultation with porters groups and local NGOs, This also takes into account the particular aspects of each trek. This may include season, experience needed, distance from porters’ homes etc.
Provision shall be made for porters’ food and accommodation so that they do not have to provide for this out of their wages.
Tips shall be considered an optional contribution by clients and must not be relied upon to make employment for the porters economically viable. This must be explained to both porters and clients. All tips given shall be collected into a general ‘pot’ and then distributed openly and fairly by the head porter/sirdar/guide according to local customs. The giving of personal tips must not be adopted as it can create unfair payments and resentment through the porter team and can sometimes encourage cynical false-friendliness by porters keen to encourage larger personal tips. Guidance on tipping amounts can be found on our website or from the head porter/sirdar/guide.
6. Training
Where relevant, porters’ training covers basic safety issues, in order to safeguard both porters’ own health and that of other staff and clients. For example, this will include symptoms of altitude sickness, dehydration etc. Opportunities for training are provided to those porters who wish to further their education, career and personal development.
7. Equipment
Equipment appropriate to each stage of each particular trek shall be provided to porters, including; sleeping tents, protective clothing, carrying equipment and kerosene for their own use.
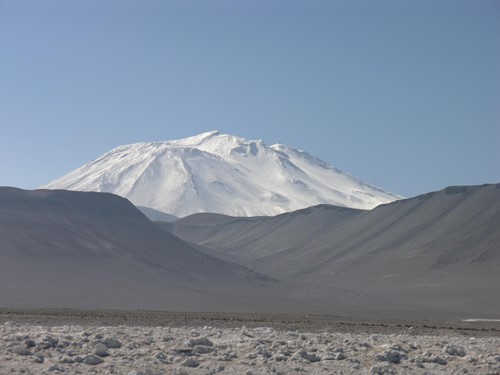
Porters are expected to be respectful at all times, just as clients are expected to respect porters.
8. Loads
A maximum load is set and porters shall not be asked to carry more than this under normal circumstances:-
Mt Kilimanjaro/Meru = 20kg, Mount Kenya = 20kg, Nepal (Trekking) = 30kg, Nepal (Climbing) = 20kg, Morocco (Trekking) = 25kg, Peru = 25kg, Pakistan = 25kg, In all other cases = 30kg.
The amount of trekkers’ luggage and equipment that porters are expected to carry shall take the weight of porters’ own personal loads into account.
Where younger workers are employed as porters, the maximum weight of their loads shall be adjusted accordingly.
9. Client awareness and behaviour
Clients are provided with detailed pre-trek information on porters via our website and in-country representatives upon arrival. This will enable them to understand the issues confronting porters, be aware of the conditions that porters should be working under and to adopt responsible behaviour in their own practice.
Porters and clients are introduced by name at the start of a trek. Where appropriate, each porter is personally assigned to specific client(s) on a trek. However, personal tipping is not to be made as this can create difficult and unfair net gross wages for individual porters. (see section 5)
10. Monitoring
Representatives from the UK or in-country offices make regular unannounced visits to the ground agent to ensure that all contractual agreements are being met. They also regularly take part on treks to monitor policies on porters on the ground. Porters’ representatives are consulted during post-trek debriefing sessions and through subsequent correspondence.
If you have any further queries regarding our policies on employment of porters and local staff, that have not been addressed in the above, then please do feel free to contact us by email or telephone to discuss it further.
Papuan singing dog
Papuan Singing dog
In Augst 2012 we received word of a potential sighting (and photo capture) of one of the rarest (if not the rarest) breeds of dog in the world – the New Guinea Singing Dog (NGSD).
The sighting was made by Adventure Alternative Borneo director Tom Hewitt whilst on a trek in the remote Star Mountains of Western New Guinea Island. Every year or so, Tom leads expeditions to New Guinea, an island shared between independent Papua New Guinea and Indonesian administered West Papua.
History of the New Guinea Singing Dog
The intense topography of Papua as a whole coupled with low-scale political troubles in the Western side of Papua has meant that little research has been done into the existence of NGSD in the area. The dogs themselves are believed a close relative of ancient dogs that were domesticated from Asian Wolves between 10-15,000 years ago and are related to the dingo of Australia.
The first live ‘Singers’ were caught in the Eastern province of the island in the 1950s and taken to Australia – nearly all of the Singers outside Papua are now descended from these four dogs. More recent expeditions have failed to locate any singers, including a month-long expedition to the Eastern province highlands in the mid-90s. In this case, the Singers were heard but never seen. The NGSD is considered an evolutionarily significant unit. New Guinea Singing Dogs are named for their distinctive and melodious howl, which is characterized by a sharp increase in pitch at the start and very high frequencies at the end.
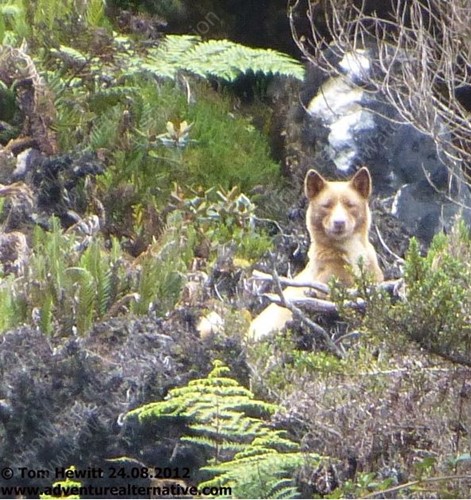
The details of the Sighting
We invited Tom to offer his own account of the trip and the sighting…
A client approached me at the end of 2011 requesting a bespoke trip that was ‘beyond any usual tourist or trek route, ideally mountainous and not hot and humid’. For a long time, I had been looking at Mandala Mountain on the West Papua map. It is the 2nd highest free-standing peak in Oceania with very little information available about it. It seemed to fit the requirements.
At an unconfirmed 4,760 m (no one is really sure) Mandala Mountain is the highest peak in the Star Mountain range – one of the most remote and unexplored areas of the world and until 40 years ago Mandala mountain even had its own permanent glacier. Here the native flora and fauna species, including the secretive singing dogs have remained in virtual isolation and undisturbed for thousands of years.
The twelve-day tour included myself and the client, plus a trusted cook and guide that I had used before and seven local porters and guides from the starting village, itself an expensive one hour chartered plane ride from the capital of West Papua, Jayapura.
At the time of the sighting, we were in a dramatic, wide valley with 4,000m peaks and limestone walls with waterfalls on either side. We spent a total of four days camping in this valley and there was regular contact with a number of exciting animals: couscous, possums and even tree kangaroos were seen most days, as well as many unidentified ground-nesting birds living in the swamp grass. One species of bird of paradise was heard in the lower forest, but not seen. There were a few highland flowers and grasses and occasional groves of an ancient cycad species – primordial in every respect.
The guide and cook were 10 minutes ahead of us on day one of the return the trek, they had stopped I presumed, for us to catch up. When we reached them the guide proclaimed ‘dog’. This took me quite by surprise and it took three explanations by him for me to understand. But sure enough above us on the rocky outcrop in the bush, there was a dog – the guide seemed as bemused by it being there as we were. After initially being quite close to the guide, by the time we arrived, it had taken a position on the hillside above us; this is the position found in the photos. We watched it for around 15 minutes as it continued to watch us. It seemed as curious as we were but not particularly scared or nervous. What stood out was how healthy it looked upon closer examination with binoculars.
I had no in-depth knowledge of NGSD’s at the time of the expedition and the photos in question were merely one of a huge number taken. To my utmost regret I did not make any video footage, nor did I try to get any closer. But in the context of any trip to Papua at the time, this was no stranger than other events that happen daily – such as waking up one morning to see one of the porters using a tree kangaroo as a neck scarf to keep him warm.
There have been no previous confirmed reports of Singers in that general area. This can be easily explained by the fact that it is not an area the locals would ever go to, or at least not very often. There is much better hunting in the lower forests and hills. It is also very rarely visited by any other visitors.
When we returned from the trek, I searched for more information on the Singing Dogs of Papua and realized that I had possibly the only ever photo of one in the wild. The photos have since been disseminated amongst various experts including the American-based New Guinea Dog Conservation Society.
More recently, our native Papuan guide again reported seeing a wild dog. This time in the Mount Trikora area of West Papua. The photo that Tom took has been cropped to show the dog specifically and can be seen below.
Himalayan Flight Delays
Many of our treks require the use of an internal flight from Kathmandu into and out of the Himalayas. These flights fly early each morning and they ‘fly by sight’ which means that if there is cloud cover, or bad weather in Kathmandu, or at the destination, then there can be delays. Since they normally fly in the mornings (when the weather is clearest) the delays are not a few hours, but can be one or two days.
If necessary we can be flexible and adapt the itinerary to catch up on, or absorb lost days, but if the planes can’t fly, then there is little that we can do except wait. This doesn’t happen very often, but it does happen and some years are better / worse than others. You should be particularly aware of this if your trek is very early, very late, or outside of the main seasons. You should consider possible impacts on international flights.
Occasionally the planes can’t fly but helicopters can; if the trek team as a whole prefers this option we can certainly organise it, but there would be a supplemental charge and exact costs can't be guaranteed until the time as prices are based on demand / supply. As an estimate you can expect to pay between $300 - $500pp for a chopper to / from Lukla. This cost must be paid for by the clients in full at the time and any receipts for this will be given directly to you should you wish to make a claim on your insurance. Any reimbursement from the originally booked aeroplane flight will be refunded to you.
If your flight is delayed flying out of Kathmandu into the mountains and if that means you'll have to reduce the number of days on your trek or trip, then we can offer people full board accommodation in our own guest house, if availability exists, in lieu of those lost trek days. If there is no availability in our guest house, or if you prefer to stay in Thamel, then we will instead reimburse you $35pp/d for the days that you're in Kathmandu and again in lieu of accommodation / meals that you have lost had you been on the trek.
If the trek team as a whole has the ability to extend their trek dates and use the same number of days on the trek as originally planned, then no additional payments / accommodation would be made for delayed days in Kathmandu. The same applies to the return flight from the mountains back to Kathmandu in that, if people stay on for extra days outside of their original itinerary, then costs for additional accommodation or meals in Lukla (or elsewhere) would need to be paid for by the individual.
A flight delay can be a frustrating experience, especially when you have to go to the airport each morning in the hope of clear weather, to potentially be turned away again come lunch time, but it is very much part of the realities and experience of air travel in the Himalayas. If you are delayed in the city then there is lot's to see and do in Kathmandu. Most treks have a day or two of bad weather days factored into the itinerary or days that we can double up on when descending from altitude, but the best advice is to give yourself an extra day to cover you in Kathmandu and in most cases it's simply an extra day that allows you to enjoy the vibrancy of the city.
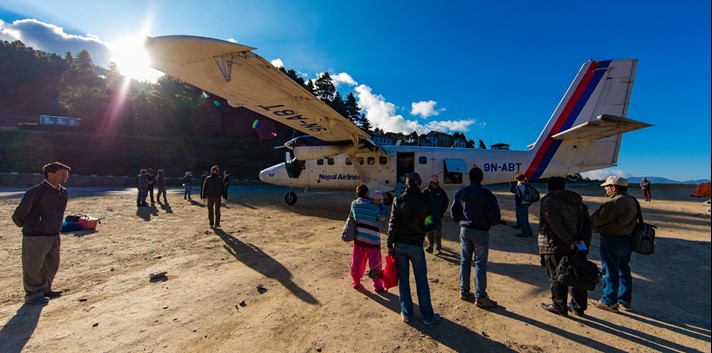
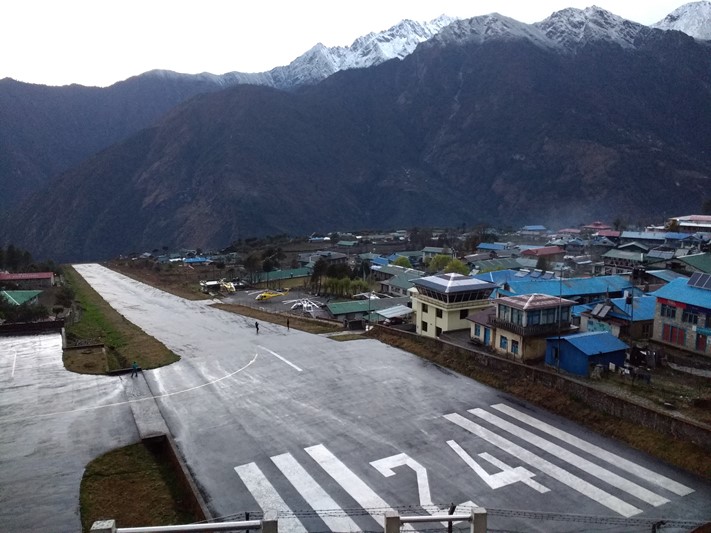
Guest House in Kathmandu
Accommodation in our Kathmandu Guest House
We have a guesthouse in Kapan which is above the smog of the city and about 25 minutes by cab to the centre (£5-6.00). There are several floors with double, triple and single rooms, a big living room area, kitchen, several terraces with views over the city, and a garden. There is also a puja room on the top floor which can be used as a dormitory. Most rooms are ensuite and have flush toilets. The house very secure and our office is on the grounds. There is wifi and we provide someone to provide a breakfast and also a cleaner. There is plenty of space for storage of luggage. Click here to view the guest house on google maps and click here for full details on the guest house on Adventure Alternative Nepal's website.
The price is £23.00 per person per night bed and breakfast.
The guesthouse is large with a secure compound.
The guesthouse is NE of the city centre about 25 minutes by taxi and above the smog. It is in a place called Kapan.
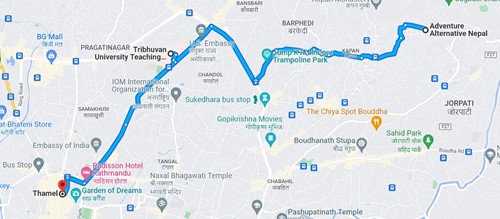
This is the drive from the guesthouse to the Thamel district which is the popular place for trekkers.
Picture Gallery of the house

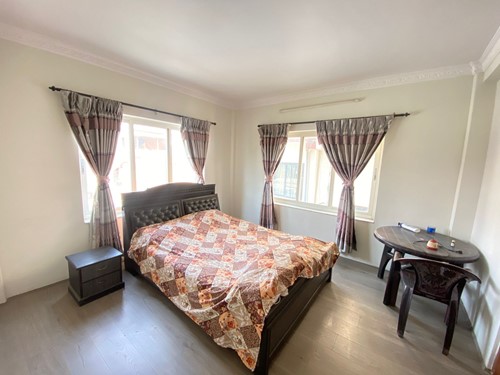
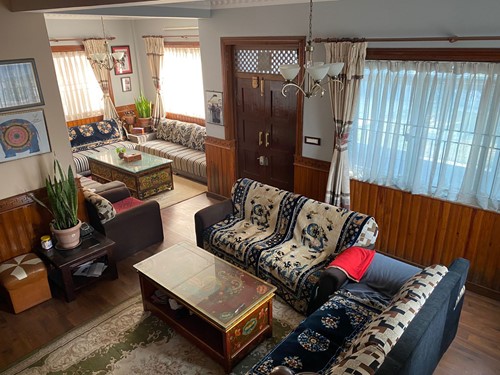
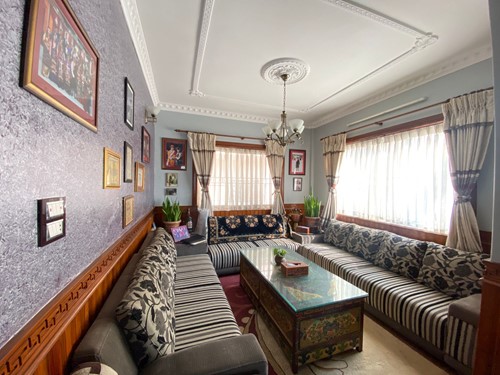

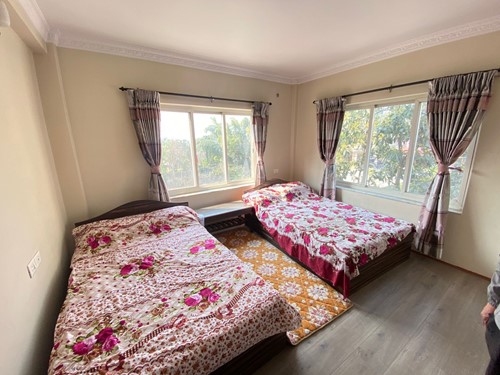
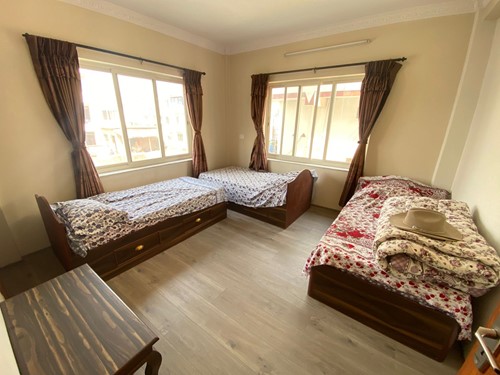

Kilimanjaro Routes
Some 30,000 people climb Kilimanjaro every year, making it one of Africa’s most popular attractions. And as Africa’s highest peak and one of the fabled Seven Summits, the summit is also one of the most challenging attractions to reach! Tanzania’s iconic mountain stands at 5895 metres but despite its intimidating size, conquering it is entirely feasible if you’ve got a good level of fitness and a decent amount of determination. To climb up Kilimanjaro, you’ll need both physical and mental strength, but that rewarding feeling and sense of achievement at the top will be completely worth it.

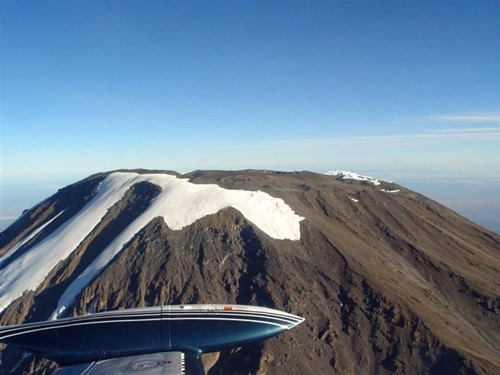
There are nine different routes on the mountain of which seven are ascent routes and two are used for descent. Not all are recommended, one is now shut and quite a few merge with each other, but they do have their own particular pros and cons . Here is a breakdown of each of the routes for climbing Kilimanjaro:
- Machame Route (“Whiskey” Route)
- Lemosho Route
- Shira Route
- Rongai Route
- Northern Circuit Route
- Marangu Route
- Western Breach/Arrow Glacier Route
And there are two routes used for descent. They are:
- Mweka Route
- Umbwe Route
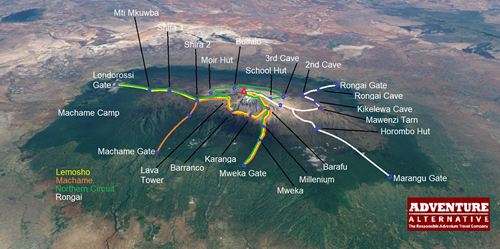
Machame Route – Highly Recommended!
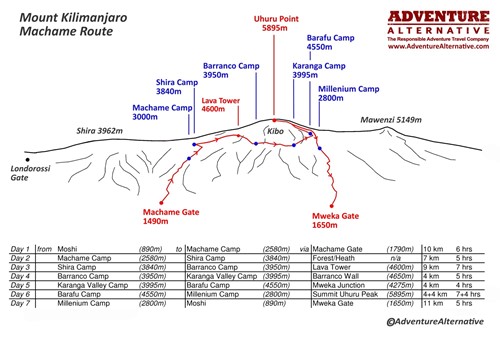
Also known as the Whisky Route, the Machame Route offers excellent acclimatisation because three of the campsites are at the same altitude which is a big benefit to the body as you ‘climb high, sleep low’ which is good mountaineering practise. The route is approximately 62 km/ 37 miles from gate to gate, and the starting altitude at Machame Gate is 1640 metres.
Machame is also the route that provides the most distinctive view of the five ecosystems on the mountain - cultivated farmland, cloudforest (montane), alpine heath, high desert and the glaciated summit. This is a big reason for the popularity of the route. Each campsite is really quite different from the other, and each day is like entering a different world, from the lush jungle to dense forest, then low brush on the vast lava plateau to the surreal world of huge volcanic boulders, followed by the rock and scree on the massif and finally the glaciers on the crater itself.
Machame gives climbers the thrill of a mountain challenge and currently accounts for about 50% of all visitors. It is a camping route and suited to people with plenty of hiking and camping experience, The seven day version is what we recommend and has a very high success rate of about 85%; the most common reasons for descending are tiredness, stomach upset from local food bought in Moshi, and altitude sickness.
This route is physically tough, requiring good fitness and determination especially on the summit night which begins at midnight with a summit at about 8am. It’s entirely possible for beginners to complete the challenge with fitness training and the help of qualified guides.
Days:
The recommended time is seven days, with five of those days ascending from the Machame Gate on the southwest side of the mountain. The number of days directly relates to altitude acclimatisation, so we would not consider less than seven days which is the minimum number recommended by the International Climbing and Mountaineering Federation (UIAA).
Difficulty:
This route is mostly strenuous, initially with ups and downs and navigating a succession of valleys and ridges and plateaux and then the unrelenting scree slopes up the central massif to the crater which is quite steep and challenging. However there is nothing technical in the challenge and you are not required to use ropes. Summit morning in the dark can be very cold, icy and windy as it follows a number of zigzags up the rocky slope which is often covered in snow and ice. At the altitude of nearly 6000 metres it will require mental power and good physical health and fitness.
Scenery:
The Machame Route is a favourite mainly because of the variety of habitats you pass through and the attraction of the flora and fauna, much of which is endemic to the mountain.
What other mountain in the world starts with farms of giant banana trees and coffee plantations into steaming jungle and then cloud forest, and then out of the forest into alpine heath and moorland to the strange volcanic rubble on a bleak plateau, arid alpine desert and finally a glaciated summit which is actually an arctic region at just under 6000 metres right on the equator?
There’s so much variety in the terrain and landscape, with the vastness of the Shira Plateau, the imposing Lava Tower, and the sheer cliffs of the Barranco Wall. Giant groundsel and lobelia loom out of the mist, waterfalls and streams have carved the mountainside into deep ravines and narrow ridges that radiate from the central massif like spokes on a giant wheel. The glaciers glint in the distance, evidence that only 20 years ago the whole massif was snow covered.
Pros and Cons:
Breathtaking scenery and steady acclimatisation with three nights sleeping at the same altitude are the main benefits of choosing the Machame Route. The paths are well maintained, the campsites have good toilet facilities and the success rate is high.
However with 50% of climbers on this route it is probably the busiest nowadays, depending slightly on time of year. Summit morning can be very busy, especially on a full moon night, and the campsites can be extremely busy with several hundred people spread out.
The distance from Moshi to Machame park gate is about one and a half hours so not too far, and descending the Mweka route means a quick 30 minute journey back into town at the end.
Best Guided Treks:
Book a 7 day camping trip on the Machame Route with us for £1,895pp. The price includes qualified local guides with UK first aid qualifications and specialised training in high altitude medicine, all accommodation in the hotel and 2 person tents with mattresses, all camping equipment and private toilets plus three meals per day on the mountain.
Lemosho Route – Highly Recommended!
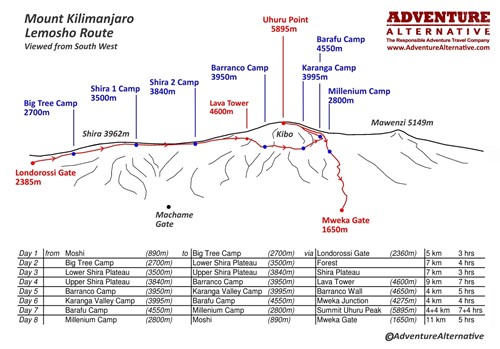
The Lemosho Route begins on the west side of the mountain and is normally an eight day trip but can also be seven days. It merges with the Machame Route on the Shira Plateau which is the second camp, and is popular because the initial ascent through the forest is easier and it adds an extra vital day of acclimatisation if you choose the 8 day option.
Lemosho is a relatively new route and it was designed to absorb some of the busier paths on the other two main routes of Machame and Marangu. The extra day and the slightly easier gradient through the forest makes it a slightly better option for acclimatisation.
The first two days journeys through the Lemosho Glades, which is the rainforest that encircles the mountain at this altitude between 2400 and 3500 metres where you might see Colobus monkey, and plenty of birds on the giant camphorwood trees. The forest thins out and the path climbs onto the vast Shira Plateau which was created during the last eruption an estimated 50,000 years ago. The route then skirts the southern flanks of the mountain, with campsites at Barranco and Karanga Valley both at the same altitude which assist with acclimatisation. Then the path moves up to the final camp at Barafu (“ice” in Swahili) at 4600 metres which is the springboard for the big eight hour push up to the summit through the night.
Days:
Allow eight days for the Lemosho Route for the best experience but don’t spend any less than 7 days/6 nights on the mountain so you can acclimatise safely. This is an appropriate time regarded by all guide associations as safe for a mountain of this size.
Difficulty:
The difficulty level is very similar to the Machame Route, with a variety of ups and downs and crossings over valleys and ridges, the dry air of the high plateaux and the unrelenting scree slopes to the crater rim. Camping at altitude is tiring and every day the less oxygen in the air will certainly be evident in your panting and tired muscles.
The first two days of the Lemosho route are easier as the route has less of a gradient through the forest, but it is also longer. Overall this is a benefit, however it is as well to point out that the time to the start gate at Londorossi and doing the park formalities is longer.
Scenery:
Lemosho is almost the same as Machame route in terms of the scenery with equally as distinctive ‘layers’ of habitat and ecosystems to journey through. The longer trail through the low level forest is particularly attractive and you are more likely to see some wildlife here than on the busier Machame side. The first camps at Mti Kubwa (Big Tree), Shira 1 and Moir Hut are quieter too, so there is a greater impression of remoteness and solitude.
Pros and Cons:
The additional day on the mountain makes the trip more expensive, but the eight day programme is better for acclimatisation and allows a 90% summit success rate.
The distance to the Londorossi park gate from Moshi or Arusha is longer and you are required to complete the park formalities before then driving further up the trail to the actual hiking starting point. This can mean not starting to walk until the afternoon.
The initial route through the forest is longer and easier, and you are more likely to see some wildlife. After day 3 the route merges with the Machame route which means you will come across the busier campsites at Barranco and Karanga and then Barafu.
Best Guided Treks:
Book an8 day camping trip on the Lemosho Route with us for £2,245pp. The price includes our qualified local guides, hotel accommodation, 2 person tents and camping equipment, all meals on the mountain and park permits.
Shira Route - high starting point, less recommended
Approaching Kilimanjaro from the west, the Shira Route shares a lot of similarities with Lemosho. In fact, Shira was the original route and Lemosho was later established as a better and alternative.
But unlike Lemosho which starts at the Londorossi Gate and walks through the beautiful rainforest, Shira Gate at 3600 metres is accessed from a higher point by car, putting your starting point at the Shira Ridge. This means that the trekking journey for most people coming straight off the plane is too much, so it is not really a recommended route except for those who might be previously acclimatised (for example on Mount Meru).
Days:
Seven days is recommended for the best acclimatisation and on this route it would be a good idea to spend two nights at the first camp (Simba) to help with that process, or else it’s more likely you will suffer from altitude sickness. Better still would be an eight day option with two nights at the first camp and a further two nights at the next camp on the Shira Plateau followed by the next two camps at Barranco and Karanga being more or less the same altitude. Done this way, Shira route would work well.
Scenery:
Similar to Lemosho at the start with extensive rainforest, the route eventually joins up with the Machame route with the camps around the base of the summit massif and then the final push on scree and rock to the crater.
Pros and Cons:
Although you’ll enjoy panoramic vistas with far fewer lesser crowds than Machame or Marangu, the high starting altitude of the gate means that climbers are much more likely to experience altitude-related symptoms on day one. These include headaches and dizziness, nausea and vomiting, fatigue, shortness of breath, or even loss of appetite. If you can overcome this initial jump in altitude and manage additional days to acclimatise then it’s certainly possible to do this route. Also the cost of extra transport getting to the gate means this route is more expensive.
Rongai Route – Best for Rainy Season and quieter trip
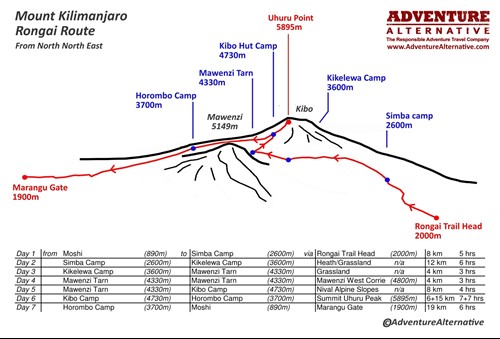
As the only route that approaches the mountain from the north, the Rongai Route is quite different from the others. You will begin your trip from close to the Kenyan border, and journey through areas of wilderness before joining the Marangu Route at Kibo Camp which is at the base of the summit massif. The descent is then on the Marangu Route so this is almost a complete north-south traverse of Kilimanjaro.
The north side experiences lower precipitation, being in the rain shadow, so this trail is ideal for the rainy season as it is more sheltered. It is a much quieter route than the others, mainly because the extra time it takes to reach the gate at the start, so for many people this is their preferred route.
Days:
The recommended time is seven days as the optimum time for a good summit success rate, however as ever eight days adds the extra acclimatisation and will increase both the summit rate and the enjoyment of summit day. Therefore for enjoyment and summit success we would definitely recommend eight days.
Difficulty:
This route is considered to be one of the easier routes up Kilimanjaro with a more gradual ascent up to the summit massif. For those with less backpacking and hiking experience, this may be preferred. On summit day itself the route reaches the summit crater at Gilman’s Point further away from the actual summit than the other routes, so psychologically this does make a difference. Having slogged through the night to reach the crater, it is that bit further than people on the Machame/Lemosho route to reach the escarpment to the summit proper.
Scenery:
While the scenery doesn’t offer as much diversity or share the same wow factor as Machame or Lemosho, it does promise remoteness with some areas of untouched natural beauty. There are more days in the forest and heath, with less distinctive difference between the habitats. You are less likely to experience the eerie lunar-like formations of the high alpine desert but on the plus side it is less likely to be wet.
Pros and Cons:
Rongai offers a less challenging way up with an easier acclimatisation profile and lower traffic. It’s also the best trail if you’re hiking outside of dry season. The downside is that the views aren’t quite as captivating as the Machame or Lemosho routes, and the extra psychological push needed to get from the crater rim at Gilman’s Point up to the summit.
Best Guided Treks:
Book a 7 day camping trip on the Rongai Route from £1,955pp. The price includes qualified local guides, accommodation, 2 person tents and camping equipment, plus 3 meals per day on the mountain.
Northern Circuit Route – Good if You Have More Time
One of the newest routes on Kilimanjaro, the Northern Circuit is also the longest and in many ways the most spectacular because you see so much of what the mountain offers. Due to the additional length of time for acclimatisation, success rates for the summit are higher.
It has the same starting point as the Lemosho Route but deviates north before the Lava Tower, circumnavigating round the north section of the mountain and summitting Uhuru Peak via Gilman’s Point (Marangu and Rongai routes also summit via this point). On this trail you will get an opportunity to journey through the quiet and rarely visited northern slopes, which really give a heightened sense of adventure and remoteness on this mountain which attracts so many hikers every year.
Days:
This is a trail that requires nine days as a minimum but can be completed in ten or eleven days if you want more time to enjoy the views.
Difficulty:
In terms of difficulty, the Northern Circuit is similar to the Machame or Lemosho routes. Physical and mental stamina are important as it is a longer trip, but acclimatisation will be better as you have longer to adapt to the less oxygen in the air. It’s a camping route with staff providing the campsite set-up, and on a trip like this you really do get embedded in the outdoor routine. The days vary in length but as usual it’s the long summit day that is the hardest, although on this route it won’t seem nearly as hard on the lungs.
Scenery:
With fantastic panoramic views and diversity with the different habitats, you will experience everything that is special about Kilimanjaro with the added bonus of having the mountain to yourself most of the time.
Pros and Cons:
This is considered one of the safer trails in terms of acclimatising as there will be plenty of time to get your body used to the altitudes. You will also get to enjoy 360-degree views with fewer crowds around. Obviously being a longer trip it is more expensive but ultimately, considering this is such an iconic peak which has become one of the great ‘bucket list’ aims in life, the money is definitely worth it.
Best Guided Treks:
Book a 12 day adventure on the Northern Circuit from £2,445pp. The price includes qualified local guides, accommodation, 2 person tents and camping equipment, plus 3 meals per day on the mountain.
Marangu Route – Recommended if you want to sleep in huts
The Marangu Route (also known as the ‘Coca Cola Route’) is the oldest and most established route on Kilimanjaro and used to be the most popular. It’s considered to be the easiest way up in terms of gradient and terrain. It is also the only route on the mountain that has huts to sleep in.
However the ascent and descent are done on the same pathway which can mean the route gets busy and the huts can get quite full. However it’s a very useful trail for families and groups looking for the comfort and convenience of a hut, and avoiding having to use the mountain tents. It’s a useful route to do in the rainy season if only to avoid having wet clothes inside a tent.
It’s an easier route with no real difficulties on the path but it doesn’t share the distinctive difference in scenery that you see on the other tracks, The early days on the huge plateau covers open ground and scrub all the way until the final hut below the summit massif. The summit day itself is just the same level of difficulty though, with the same amount of elevation to cover to reach the crater rim at Gilman’s Point and then Uhuru Peak.
Days:
Our minimum number of days on Kilimanjaro is always seven days, irrespective of the route, in order to maintain safety parameters and allow for acclimatisation on a mountain that is nearly 6000 metres high. Many people try to climb the Marangu route in less than seven days but this is not to be recommended.
Difficulty:
With a gradual slope, this path is considered to be one of the easier routes on Kilimanjaro.
Scenery:
The initial days ascend through the steamy forest and band of montane which encircles the whole mountain, and on this route you then spend several days crossing a large plateau and approaching the summit massif directly (as opposed to going round the massif as with Machame and Lemosho). There aren’t the same distinctive variations in habitats, but the views of the summit massif ahead are still beautiful.
Pros and Cons:
As one of the easier trails this could be suited to climbers with less experience. It’s also the only route with sleeping huts and dormitory-style accommodation, so good for families or groups wanting to avoid the camping experience. The distance from the gate to Moshi is the shortest too, so an easy beginning and end to and from the hotel.
Western Breach - Most Dangerous Route
This route is now closed by the National Park because the melting of the ice on Kilimanjaro has meant there is now a danger of falling rocks which led to the death of three American climbers In January 2006. Another incident in 2015 led to a near fatality, and since then very few people have climbed this route. The Park will only allow experienced alpinists on this route if they sign a disclaimer and for obvious reasons, local guides are not keen on ascending it.
The breach is a notch in the crater rim and the route is by far the most difficult on the mountain. The approach follows the Machame route and diverts at the Lava Tower to ascend higher to the Arrow Glacier, which has since retreated to a fraction of what it used to be. This change is what now makes the route so dangerous because the gully which used to be tight with ice is now effectively a giant bowling alley with rocks spinning down from a great height and completely invisible at night.
The route reaches an angle of 45 degrees and there are numerous rock steps to negotiate, in fact there is no single route or path to follow, it depends on the conditions on the day you ascend. Nowadays the main aim would be to avoid being exposed to falling rock of course, something which cannot be completely guaranteed unfortunately because back in the day this was the most exciting and dramatic route on the mountain.
Umbwe Route – Used for Descent
The Umbwe route is the most direct route on the mountain, it ascends steeply through forest up to Barranco Camp on the south side. This means that in terms of acclimatisation it would be the hardest to adapt to.
The Kilimanjaro National Park designated this route to be a descent route some years ago so therefore it’s not possible to ascend the Umbwe route anymore. It’s commonly used by porters to deliver food supplies up to Barranco Camp, and it’s also used a quite retreat for people who are sick at either Barranco or Karanga Camp.
The route is mostly forested, a steep trail that ascends directly up a narrow valley from the roadhead to the Barranco Camp.
Mweka Route – Used for Descent
Similar to Umbwe, Mweka Route is only used for descent nowadays and also is on the south side of the mountain. It is the most direct route for people coming off the summit on the Lemosho or Machame routes which use Barafu Camp as their final staging point for the summit.
Coming off the summit, people come back to Barafu for a lunch and then descend directly down the Mweka route to Millennium Camp at the forest line for one more night under canvas. The next morning the Mweka route continues through forest and eventually onto a road to reach Mweka Gate which is where you can get sign out of the park and receive your summit certificate.
Because the roadhead ascends quite a way up through the forest, this route is popular for emergencies on the basis that a jeep or ambulance can make it quite high to pick up an invalid.
Want to find out more about guided tours up Kilimanjaro? Take a look at ourpreferred routes and book your trip of a lifetime from £1895.00 – including accommodation and food, all camping equipment, transport, and all park and campsite fees.
Mount Kilimanjaro Map
Mount Kilimanjaro is Africa’s tallest peak, and is the highest freestanding mountain in the world. For serious adventurers, Kilimanjaro is often at the top of their bucket list. Completing the trek to reach the top at 5,895 metres is one of the biggest physical achievements you can make as a hiker or climber. But it’s not just your physical strength that you’ll put to the test when attempting Kilimanjaro. You’ll also need to have strong mental muscle and endurance.
As you can see from this map, there are four main routes that we can take you on. These routes have been selected for their incredible vistas, terrain, feasibility and safety. Each route offers something different in terms of camps, difficulty and length of time required to complete.
Overview of Trips with Adventure Alternative
We organise a number of trips for people who want to climb Kilimanjaro. Despite its huge size, it’s a feasible challenge that many people can do successfully with some basic training and lots of determination. Kilimanjaro is the highest walkable mountain in the world!
Here are the guided trips that we organise at Adventure Alternative:
- Machame Route – 10 day trip – £1,895pp
This is a seven day camping trek, with five days ascending. The trip will take 10 days in total including your arrival in Moshi Town, a second day for briefing and sorting equipment, and a final night in the hotel to recover after you return from the mountain. You can depart on day 10, or you can extend your trip with a four day/three night safari.
- Lemosho Route – 11 day trip - £2,245pp
This is an eight day climb, giving you more time to acclimatise. The trip is 11 days in total including arrival in Tanzania on the first day, a briefing day, and an overnight stay in the hotel after you’ve descended. You can depart on day 11, or you can continue with us for a four day/three night safari.
- Rongai Route – 10 day trip - £1955pp
This is a seven day camping only trek to the summit, with five days ascending through the forest. In total the trip will take 10 days, giving you the first day for arrival and settling in Moshi Town, the second day for briefing and getting a good night’s rest, as well as a final overnight stay in the hotel on return. One day 10, you can either arrange travel back home or join us for a four day/three night safari adventure.
- Northern Circuit Route – 12 day trip - £2445pp
This is a nine day full mountain circumnavigation trip. It’s the longest route, allowing you to explore the mountain in detail. The trip will take 12 days in total, including an arrival day, a briefing and relaxation day, and an overnight stay in your hotel once you return from Kilimanjaro. Continuing with us for a four day/three night safari after your climb is also an option.
The Importance of Using Maps
Studying maps of Kilimanjaro is essential when planning your trip. There are seven routes in total and choosing the right way to go up will affect your success rate and also your overall experience of the climb. A very common mistake is assuming that paying money for a professional guide means a guarantee for reaching the summit. However, all routes have their own success rate and some are trickier than others. You also need to be fully prepared for every stage of the climb and the acclimatisation involved. This is why it’s important to study a map, plan your journey carefully, and navigate seamlessly once you’re out there.
Each route has its pros and cons, and will take a different approach stopping at different camps. Other things to bear in mind include the amount of time you have in Tanzania, your climbing experience and your experience with high altitudes, the time of year and weather conditions, as well as your own level of fitness. If you’re unsure about which route is right for you, get in touch with our team. We can help you choose the best trip and give you advice.
As well as studying a Kilimanjaro map before setting off, it’s also important to use a more detailed map to navigate with. Some excellent maps can be purchased at the Kilimanjaro National Park Gate. If you book your trip with us, we will give you a full briefing the day before and help you sort out all maps and equipment.
Our experienced mountain guides are also there to support you and make sure everyone stays on track. This means that you won’t have to worry about navigating on your own. Over the years, we have guided many groups from around the world, including walking clubs, schools, university clubs, and even record breakers. Our safe acclimatisation programme is what we pride ourselves on, and it has given us an average 95% success rate.
Physical Maps
It is not possible to climb Kilimanjaro without a guide because the National Park does not allow it. A guide is essential in ensuring the health and safety of the group and keeping everyone to a suitable schedule for acclimatisation. Even though someone will help you navigate, bringing your own map is still an essential tool for any mountain climb.
Here are some of the maps you can buy to help you on your trek:
- Kilimanjaro, 1:62,500, ITMB Publishing, ISBN-10: 1553415507, ISBN-13: 978-1553415503
- Kilimanjaro: Map and Guide, 1:75,000/1:30,000 West Col Productions, ISBN: 0906227666
- Kilimanjaro, 1:80,000, Climbing Map, ISBN 13: 9783952329412
- Kilimanjaro National Park, 1:125,000, Maco Editions
- Arusha National Park, 1:44,000/1:20,000, Veronica Roodt Publications
- Arusha & Mt.Meru National Park Tanzania, Harms Verlag, ISBN 13: 9783927468276
Using the Map to Choose the Right Route
While there are seven routes to choose from, we focus on four routes as some of the others are unsuitable or simply aren’t as beautiful when it comes to the views. All of our routes are selected for reasons such as the terrain, the amount of time allowed for acclimatisation, the scenery on the way up, and the ease and success rate of the climb. We take into account all of these factors to create trips that are unforgettable and targeted at success.
All of our routes are camping only. Hut accommodation is only available on the Marangu Route. However, we avoid this route as it’s the oldest and most well-known path that attracts bigger crowds in peak season. With the same pathway for ascent and descent, there can be a lot of problems with traffic.
Other routes we avoid are the Shira Route due to its higher starting point and issues with altitude sickness, and the Mweka and Umbwe routes as these are designated 'down' routes by the Park. They would be too difficult to ascend because of the steep altitude profile.
The routes we recommend are Machame, Lemosho, Rongai and the Northern Circuit.
Machame Route
Machame Route Map:
The Machame Route, also known as the “Whisky Route” is our recommended route to the top. It has a very high success rate and our guided trekking program offers excellent acclimatisation. Not only is Machame a great choice for those looking to succeed with their climb, but it also boasts some of the most amazing views on the mountain. There’s plenty of variety in the terrain and landscape, with sights that take in the Shira Plateau, the Lava Tower and the Barranco Wall.
Despite this route being physically demanding, it’s entirely possible for beginners to complete with the right training, prep and guidance. This makes Machame one of the most popular ways to the summit, and we recommend it for climbers at every level and ability. While its popularity means that there are sometimes crowds, the breath-taking panoramic views more than make up for that.
Camps:
Machame Camp
Shira Camp
Barranco Camp
Karanga Camp
Barafu Camp
Millennium Camp
Lemosho Route
Lemosho Route Map:
The Lemosho Route is another one that we recommend, and it gives trekkers an extra day on the mountain to acclimatise better. Lemosho takes you on one of the Kilimanjaro’s newer paths, approaching the mountain from the west before merging with the Machame Route after the second camp.
One of the best elements of this track is the remote rainforest at the start, before joining the Shira Plateau and then onto the Lava Tower. In terms of difficulty, it’s very similar to Machame, with steep climbs to take into account but entirely feasible even for new climbers.
Camps:
Big Tree Camp
Shira 1 Camp
Shira 2 Camp
Barranco Camp
Karanga Camp
Barafu Camp
Millennium Camp
Rongai Route
Rongai Route Map:
This is the only route that starts from the north, giving you a completely different view. Not only that, but approaching from the north side also gives you a little more shelter than the other routes and there’s less precipitation this way. This makes Rongai the best option for rainy season. There are two rainy seasons to bear in mind; the first begins in mid-March and lasts through early June, while the second is from November to early December.
The Rongai Route starts from close to the Kenyan border and travels through areas of untouched wilderness before later joining the Marangu Route at Kibo Camp. After reaching the top, you will descend using the Marangu Route.
Rongai is also one of the easiest routes up to Kilimanjaro as it has a nice, gradual ascent. The scenery isn’t as beautiful or diverse as Machame and Lemosho, but Rongai certainly wins when it comes to remoteness.
Camps:
Mawenzi Tarn
Kibo Hut Camp
Kikelewa Camp
Simba Camp
Northern Circuit Route
Northern Circuit Route Map:
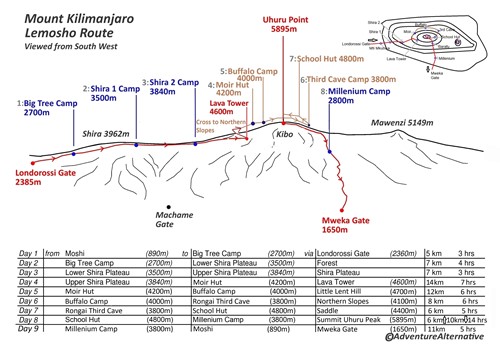
The Northern Circuit is ideal for climbers who have more time, or those without high altitude climbing experience and require more time for acclimatisation. As well as being one of the longest routes on Kilimanjaro, it’s also one of the newest. Success rates tend to be high due to climbers rarely ever experiencing altitude sickness.
This route has the same starting point as Lemosho but goes north instead before reaching Lava Tower, taking you across some of the less-travelled pathways in the northern section of the mountain. It will then take you via Gilman’s Point to get to Uhuru Peak.
In terms of difficulty, the Northern Circuit is similar to the Machame or Lemosho routes.
Kilimanjaro Location and Facts
Mount Kilimanjaro is located 205 miles from the equator, in the country of Tanzania. It is a dormant volcano with three volcanic cones as its peaks; Kibo, Mawenzi, and Shira. Kibo is the tallest of the cones, and this is where the summit lies. While Mawenzi and Shira are extinct, Kibo is dormant. This means that the Kibo cone can erupt again. However, the last eruption was 360,000 years ago and the most recent activity was 200,000 years ago.
The National Park itself is close to the Kenya border, making travel convenient from Nairobi or Mombasa. Kilimanjaro International Airport is less than two hours from Short flights are also possible from Kampala in Uganda and Kigali in Rwanda.
While climbing Kilimanjaro, trekkers will experience five ecological zones as they ascend. The zones get colder and drier as elevation increases, and this means that wildlife will disappear as you near the top. Once you’re close to the summit, you will enter into the arctic zone where there will be mostly ice and rock. At this extreme altitude, your body will be in a state of deterioration. Short exposure to this altitude is fine for the human body, but long stays are not possible.
Although getting to the summit is very feasible and over 30,000 people attempt to climb Kilimanjaro each year, about 50% will fail. The failure is almost always down to problems with altitude sickness. This is why we put so much emphasis on acclimatisation. Our programs allow climbers enough time to adjust, and that’s why we have such an impressive average success rate of 95%.
Find out more about climbing Kilimanjaro with the experienced guides at Adventure Alternative and get in touch with our team today. Call 028 7083 1258 or use our online contact form and someone will get back to you as soon as possible.
Kilimanjaro Packing List
The Only Kilimanjaro Packing List You Need
If you’re looking for a reliable packing list for your climb up Mount Kilimanjaro, you’ve landed in the right place. Our comprehensive list will help you be the best type of climber, prepared with the right balance of essentials while maintaining a manageable bag weight. Here’s the only Kilimanjaro packing list you’ll need to look at in the run-up to your expedition.
| Bags | Sleeping Equipment | Clothing | Footwear | Headgear / Eyewear | Personal Hygiene |
| Repair Kits | Cameras / Tech | First Aid | Miscellaneous | Documents | Buying vs. Renting |
Bags
Organised trips like our supported Kilimanjaro climbs come with a large team of people including guides and cooks, and porters to carry your main bag as well as tents, kitchen equipment, food, fuel, tables and chairs. While this makes it easier for you to conserve energy and focus on reaching the summit successfully, it does mean that there is a weight limit to stick to. It’s also important to be very aware of the welfare of porters during your climb, so not over-packing is key.
|
Main rucksack or duffle bag (70 litres) |
Porters are not allowed to carry more than 20kg in total and this allowance needs to include space for their own belongings. So make sure your bag does not exceed the weight of 15kg. The Chagga porters carry bags on their heads, so no hard cases please. We rent out the Highlander Lomond Bag which you can pick up in Moshi when you arrive. Note that these bags will go into another large sack which the porters carry, in order to protect your bag further from the elements
|
|
Day pack (30-40 litres) |
This is the bag you will carry every day on your back, so make sure it has room for essentials such as water bottles, spare layers and waterproofs, camera etc. We rent out the Vorlich 40L day pack which has its own rain cover and is perfect for a trip like this.
|
|
Dry bags / tough poly bags |
Make sure all your contents are wrapped in waterproof bags to keep them dry. Use them also to store used clothes during the trek. We have various sizes for rent.
|
|
Waterproof bag covers |
We will put your main bag into additional waterproof sacks in case of rain but make sure you bring a cover for your day pack which we also rent out. |
|
Travel bag |
Bring one other bag or case to leave in the hotel with your travel clothes inside. Some people use this as their hold bag and then transfer the Kilimanjaro clothes and kit to a rented duffle when they arrive. |
Sleeping Equipment
Your choice of sleeping bag and sleep accessories will depend on your personal needs and preferences. We will provide 2 inch foam covered mattresses to sleep on.
|
Sleeping bag |
3 Season sleeping bags are sufficient for the warmer months but if you get cold easily, and especially during the colder months around October through the new year it's better to upgrade to a 4 season sleeping bag or use a 3 season bag with a fleece liner. We rent out sleeping bags which are 4 season bags rated to minus 5C, which come with cotton liners to keep the bag clean.
|
|
Sleeping bag liner (fleece/silk) |
Liners provide added warmth and a good fleece one will convert a 3 season bag to a 4 season bag. Silk is also warm and less bulky. We also recommend a cotton liner to keep your sleeping bag clean. |
|
Sleeping pads/mats |
These are not required for Kilimanjaro, but are an option for those who desire extra insulation for their sleeping bag. The foam mattresses we provide do work, but obviously an extra layer of insulation is that much warmer and more comfortable. Inflatable Thermarests or lightweight Exped mats are fine but they tend to slide over the mattress, so a closed cell camping mat is actually the best. |
|
Travel pillow |
Pillows are very useful and the soft ones are easily packed small, or else make a pillow out of your clothing. |
|
Sleeping clothes |
You are likely to want to go to the toilet at night and wear something in the sleeping bag, but keep it lightweight and not too tight. Remember sleeping bags are designed to work best without wearing layers or socks, but a T-shirt and leggings or thermals bottoms will be fine. If you do get cold then put your day sack between the end of the sleeping bag and the tent wall, and wear a hat. |
At Adventure Alternative, we rent out a large selection of equipment which are provided on arrival at the hotel. This includes sleeping bags with cotton liners, two sizes of duffle bags, 40L day packs, assorted sizes of dry bags, rucksack covers, trekking poles, waterproof tops and bottoms, gaiters, gloves and mitts, ponchos and umbrellas.
Clothing
Due to Kilimanjaro’s altitude, the mountain creates its own micro-climate above the cloud level which is cold and very changeable. You are exposed to the elements at all times and your body will experience quite a big daily temperature range, from 18 degrees C in the rainforest to minus 5 degrees C on the summit, which can easily be lower with wind. Having the right clothing is essential and the trick is to use a system layers that can be added or removed as conditions change. Every day will require a slight change to your clothing, adding warmer layers, gloves and hats as you go higher.
Find out more about Kilimajaro’s weather and the best time to go there on our blog, and read about what to wear on each day and tips on how to adapt to the conditions.
|
Waterproof/ windproof |
Choose a breathable outer 'shell' layer like goretex as this will help to wick out any moisture and keep you dry inside. Make sure it has a hood and that you can fit your other layers of fleece and lightweight down underneath comfortably. |
|
Down jacket / thick fleece |
A down jacket or a thick fleece is essential for summit night and for the evenings. If you take a lightweight down jacket then you will probably need a fleece jacket as well (plus the outer shell over the top). Remember that synthetic down remains warm if it's damp or wet and is probably the better option. |
|
Mid layer fleeces / jumpers |
You will need a midlayer fleece or equivalent jumper for use over T-shirts and under the jacket. One or two will be enough. |
|
Base layer |
Base layers or thermals are lightweight and add a vital warm layer on cold evenings and summit night. Women bring leggings too which are also good for the first few days walking. |
|
Trekking trousers/shorts |
Good quality walking trousers, preferably made of a quick dry material. Remember cotton does not dry quickly and jeans are not good for mountain hiking. Many trekking trousers have zips to convert into shorts, or take a separate pair of shorts for the forest stage. One or two pairs will be enough. |
|
Trekking tops/ t-shirts |
Two or three trekking shirts or tops for the first few days, avoiding cotton. T-shirts and sports tops also work but will probably need a fleece layer on top for when you stop. Choose short or long sleeved. |
|
Underwear |
It's best to have a clean pair every day. Cotton will get damp and uncomfortable so opt for synthetic or merino wool and remember a dry bag to keep used clothes inside your duffle. Merino is a natural fibre which is naturally odour-resistant, moisture-wicking, insulates when wet, and dries fast. It is soft and comfortable against the skin and not too hot in warm temperatures. Synethic (mix of nyon and spandex) is also soft, comfortable, breathable and fast drying and cheaper than merino. Consider a fitted style like hipster or bikini brief which won't ride up or chafe. For men, the same principle applies and best to avoid loose shorts which can bunch up. |
|
Insulated gloves/ liner gloves and mitts |
Fleece gloves, preferably with a waterproof outer, and thin inner gloves are both essential for climbing Kilimanjaro, but on summit night a pair of mitts are best for keeping hands warm. We rent out waterproof gloves and fleece gloves.
|

Need help with getting your wardrobe prepared? Read our detailed blog post on what to wear for Kilimanjaro and some links to good brands and ideas for what best to buy.
Footwear
Looking after your feet is important for mountain climbs. The right care and preparation will save you from pain and blisters, so cut your nails before setting off and keep feet clean and dry. Foot talcum powder is quite good too but remember to wash it off at the end of the day. Take some blister pads just in case and change socks every day.
|
Walking boots |
Leather boots are best, make sure they are well covered in dubbin to keep the water out. Fabric boots will get wet if it rains heavily but the goretex lined ones will stay dry in a shower. Boots should have proper ankle support and have a stiff midsole so the boot doesn't bend too much. You can read more about boots in our trekking boot guide. Remember also that your feet will swell at altitude and after a days walking so check first that you have some space for movement at home with your summit socks on. |
|
Spare laces and footbed |
The terrain is quite unforgiving on Kilimanjaro so do bring spare boot laces. Also if your feet do get damp then one option is to put in a spare dry footbed the next morning. |
|
Trekking socks |
Trekking socks for the early days will be fine - one pair per day for the first 5 days- but for the summit night a woollen mix is warmest, but check they fit comfortably in your boot with no tightness. Socks can be long or short. |
|
Camp footwear |
Change out of boots when you get to camp and let them air out. Bring a pair of camp shoes such as trainers or lightweight walking shoes or sandals. You will also use these for toilet visits at night. |
Headgear / Eyewear
We lose half of our body heat through our heads, so keeping your head warm while trekking Kilimanjaro is essential. On the flipside, there’s also risk of sunstroke and sunburn with the intense UV rays at high altitude.
|
Buff® / scarf |
The Buff® is ubiquitous on treks and climbs and is very useful to protect the face from sun and dust and wind. They can be made of stretchy thin material or fleece. You can use a scarf or snood equally well. |
|
Sunglasses |
Eye protection is vital, as the UV rays are particularly strong even in cloud. UV400 sunglasses are a must and try to take a pair that have side protection. Be careful of prescription glasses that change colour, they normally do not provide enough UV protection and the lenses often aren't big enough to prevent the rays getting into the eyes. |
|
Wide brimmed sun hat |
One of the biggest risks of climbing Kilimanjaro is exposure to the sun and possible heat stroke through the top of the head. A sun hat must be worn at all times if it’s sunny and if it has a brim all the better to protect the back of your neck. |
|
Insulated hat |
When the weather turns cold you’ll need to keep the heat in your body with a warm thermal hat. Make sure it covers your ears and isn't too tight. |
|
Ear plugs |
Optional for music fans who like to zone out to their favourite album or doze off to podcasts at night, but also very useful against the noises of other hikers who snore. |
|
Contact lenses |
You can wear contact lenses on Kilimanjaro without any problem, the altitude and low pressure will not affect the fit of your lenses. The biggest issue is hygiene and handling the lenses in a tent, and also dryness of the eye caused by the wind and dry air. Dailies are easier but take saline drops as well as your usual cleaning liquids, and your glasses. |
Personal Hygiene
There are no permanent showers or bathing facilities on Mount Kili, but a bowl of hot water is available at camps for washing your face and hands. For larger groups, we can provide a shower tent with a bag of water warmed up by the sun. You can also ask the guides to provide a bowl of hot water for a wash in your tent.
|
Wash kit |
Extras for men: |
Repair Kits
Be prepared for small repairs during your trip, from tears in jackets to jammed zips, the smallest issues can be an annoyance. Repair kits give you peace of mind and can come in handy in many situations.
|
Gaffer tape |
A small roll handy for rips and tears. |
|
Multitool |
The pliers help with stuck or broken zips |
|
Safety pins and cable ties |
Useful to pin a jacket together if the zip is completely broken |
Cameras / Tech
There are no charging facilities on the mountain so come prepared to be self-sufficient with power.
|
Head torch and spare batteries |
This is essential for the summit night when you need your hands free for scrambling or using poles and also for going to the loo at night. There are many types available but something like the Tikka A would be adequate. Have one complete spare set of batteries for summit night. |
|
GPS/altimeter |
This is optional but very useful for tracking your progress. Some people use a satellite tracking device called a SPOT so people can follow their route at home. |
|
Camera |
Most people use smartphones nowadays but they are difficult to handle with gloves unless you have a selfie stick. A digital camera will provide better pictures and a lightweight tripod is useful for night shots. Take spare SD cards and a spare battery pack, they do lose power quickly in the cold. |
|
Smartphone and apps |
Smartphones are very useful for apps on the mountain and taking pictures, but there is only limited phone signal and no data signal at the time of writing. A Tanzanian SIM card will be cheaper to use. Some interesting websites with apps:
|
| Power pack |
There are no charging stations on Kilimanjaro so bringing a small power pack with USB cables is the smart thing to do, especially since phone and camera batteries tend to die quite quickly in the cold. |
First Aid
The guides carry an extensive first aid kit, a mountain shelter, oxygen bottles and a mask and a stretcher on every climb. We also have literature on the various drugs and also high altitude sickness for you to read. However you should still carry a personal first aid kit for minor complaints. Also, visit Mountain First Aid Kits for further advice.
|
Personal medication |
Anti-malarial tablets (you don't need to take these on the mountain as there are no mosquitoes up high), a general antibiotic for a bacterial infection, Immodium or Lomotil for diarrhoea,inhalers if you use them, and painkillers for headaches (Tylenol, ibuprofen for example). Also take throat pastilles for the inevitable dry throat. |
|
Altitude drugs |
We have these in our medical kits and our guides know how to diagnose and administer them, but you may want to bring your own. These are prescription drugs and they do have side effects. There are three drugs that are used for high altitude sickness and it is vital you read the information we provide about each of them. Diamox (acetazolamide) is the most commonly known and it does help as a preventive treatment for Altitude Mountain Sickness but only if mountaineering principles are followed, namely keep a slow pace. Read our blog on taking Diamox for more information and advice. Dexamethasone is effective for preventing and treating AMS and HACE and prevents HAPE as well. And nifedipine, by reducing pulmonary arterial pressure, is effective in treating HAPE (pulmonary oedema). Please note that in the case of serious altitude sickness the guides will effect immediate descent, night or day, and use all the facilities at their disposal to get a person to safety, including a helicopter service, rescue cars, stretchers and a well established Ranger network. |
|
Oral rehydration sachets / Nuum |
Essential for replacing the salts in your body that are lost whilst hiking and getting dehydrated at high altitude. Nuum are tablets that you mix with water to help with salts and energy. |
|
Plasters, bandages and zinc oxide tape |
Plasters will be very useful for any cracked skin and small cuts, a bandage with tape for something worse. Compeed blister pads for your feet, plus a good quality tape to cover over hot spots if necessary. |
|
Antiseptic cream and wipes |
For small cuts and grazes. Keep small wounds clean and when possible air them out. |
|
Eye drops |
Dry tired eyes is common and eye drops are very useful, or a small eye bath. Dust can get everywhere too, so the drops can help with irritation. |
|
Sun cream |
Sun burn is a serious risk at high altitude, so make sure you bring a strong factor sun block. To avoid having to reapply, choose a long-lasting, waterproof one. P20 is a good choice which doesn't run. |
Miscellaneous
|
Water bottle |
Make sure you have a bottle as you’ll need to stay hydrated. Platypus or camelbacks are fine too, but the tubes may freeze on summit day and must be insulated. Note that disposable plastic bottles are now illegal on Kilimanjaro and will attract a fine from the Rangers. |
|
Flask |
Om summit night you will want a hot drink to keep warm and hydrated. The guides carry large thermos flasks but you may want to bring a half litre or one litre flask of your own. We rent these out. |
|
Umbrella |
These are very useful on the first day in the forest if it is raining hard and too hot to wear waterproofs, and on the second day if there is no wind. Higher up on windless sunny days they are again useful. We rent out large good quality umbrellas. |
|
Trekking poles |
These are very useful but especially for the descent which is on loose scree. Anyone worried about their knees should take a pair, preferably with suspension. We rent out poles from Moshi. |
|
Hand warmers |
Ideal for those who have poor circulation or get cold easily. The charcoal ones that react with oxygen don't work as well because of the high altitude and lack of oxygen in the air, but they are certainly useful for your hands inside your mitts on summit night. |
|
Microfiber travel towel |
Lightweight and dries quickly. Optional. |
|
Toilet roll |
We do provide toilet rolls but you may wish to bring your own. If you do then please bring recycled toilet paper and keep it in a plastic bag. |
|
Mosquito repellent |
There are almost no mosquitos on Kilimanjaro due to the height above sea level. However, there are mosquitos in Tanzania so repellent sprays are recommended for when you first arrive and finishing descending. |
|
Book/games |
There will be time to relax in the evenings, so bring a book or kindle, a deck of cards or a small game. |
|
Padlock |
The best padlocks are protected by security code rather than key. |
|
Plug adaptor (2 pin round) |
Look for the type G plug adaptor to use in the hotel in Tanzania. |
Documents
|
Passport |
Don’t forget a photocopied version (and also a photo on your phone) in case of loss/theft. |
|
Yellow fever certificate |
This is only needed for entering Tanzania if you are coming from or via a country where there is yellow fever, for example if you visited Kenya beforehand. |
|
Travel insurance details and policy certificate |
Keep a paper copy as well as a digital copy in case you can’t access your phone. |
|
Money |
Bring cash as well as credit cards. The hotel takes cards for paying your bar bills, and in the town you will spend mostly Tanzanian shillings. You can change sterling or euros but US dollars are most common. |
|
Flight details |
Keep a paper copy because the airport security like to see it when you enter the airport on the way home. |
Buying vs. Renting
For those who regularly climb or trek, buying your own equipment, boots and sleeping bags are a good investment. But renting is an option that can save money and make packing a lot easier. You can also rent last minute items in Tanzania from us.
At Adventure Alternative, we offer sleeping bag hire (inclusive of laundry costs) and we also have plenty of gear available for rent in our office in Moshi.
If you prefer to buy your gear, get a discount at Cotswold Outdoors in the UK/Ireland using the code AF-AALT-C8.
Ready to start packing for your climb up the world’s highest free-standing mountain? See our easy-to-use, printable Kilimanjaro kit list.
Kawag Forest Reserve
Kawag Forest Reserve adjacent to the Danum Valley Conservancy in Sabah offers a mixture of pristine primary and secondary rainforest. Like many places in Borneo the area was once poached but the forest has regenerated well and is characterised by younger trees and denser undergrowth; it houses a rich variety of flora and fauna and in particular for birdwatchers. Mammals can be found, including pygmy elephant, gibbon, slow loris and western tarsier, mouse deer, long tailed macaque and banteng, and occasionally you might see orangutan and leopard cat.
It's location near the Danum Valley makes Lahad Datu the obvious place for starting and ending a visit there and we offer a 3D2N stay after trips such as the Borneo Wildlife Tour. We also feature this excursion on our Borneo Bespoke page as many of our clients prefer to build their own holiday to Borneo with a variety of elements, for example wildlife viewing, island visit and maybe trekking or culture.
Kawag Forest Reserve is officially the Ulu Segama-Malua Forest Reserve near the boundary of Danum Valley Conservation Area, and it sits on a crystalline base which is 200 million years old. The lush rainforest and network of crystal clear streams and waterfalls with plenty of easy walking trails make it a perfect place for birdwatchers.
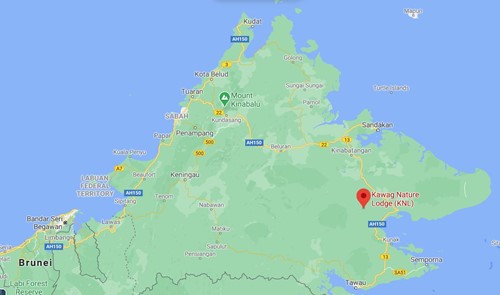
The Kawag Nature Lodge is one and a half hours from Lahad Datu and has twenty rooms and a dining hall, an observation tower an a platform overlooking the Kawag river. With 24 hour electricity supply, ten of the rooms have air conditioning and there are hot and cold showers. The lodge is rated 4.5 on tripadvisor and ranks well for good food and wildlife guides. New management in 2020 have rectified some of the issues around room decor. The location on google maps shows how it sits almost halfway towards Danum Valley from Lahad Datu, which has an airport that is easily reached from KK or Sandakan with MASWings.
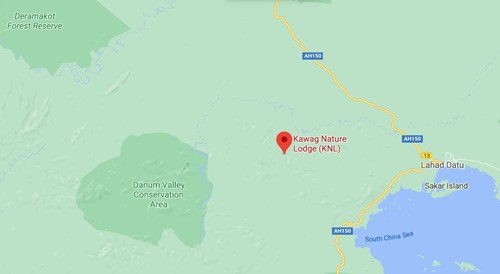
The lodge is an alternative to the Borneo Rainforest Lodge or the Danum Valley Conservation Field Centre and would be the most economical of the three, but this area is very popular for wildlife enthusiasts so it has needed a new option for accommodation for some time. It is not trying to compete for the luxury of the BRL or the location and facilities of the Field Centre, but it does fill a gap for providing an excellent location to view particularly birdlife in a pristine part of rainforest.
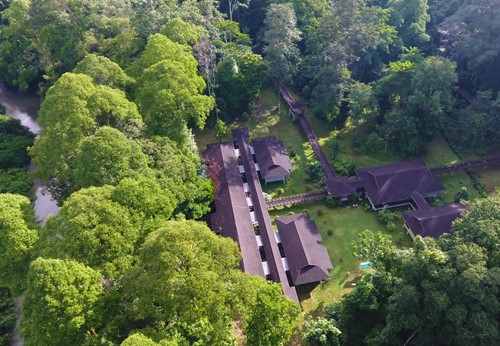
Things to bring:
Lightweight trekking clothes which dry quickly and a raincoat with a trekking pack and some waterproof bags for electrical and camera items. You will also want binoculars and lenses (400mm a good idea), a water bottle and hat plus insect repellant and sunscreen for the pack. Wear comfortable walking shoes and light socks, plus leech socks which can be knee length football socks for when you go on jungle walks. Sandals, swimwear and a quick dry towel for swimming in the waterfalls and rivers, toiletries and a basic first aid kit including rehydration salts, headache tablets, plasters and some first aid cream. For evenings take a torchlight or headlight. There are no ATMs so only cash is used. Also take your own power bank and electronics in waterproof bags.
Animal and bird sightings
Birds: Malaysian honeyguide, Paradise flycatcher (male & female), Bornean crested jay, Bornean magpie, Rufous woodpecker,Blue eared kingfisher, Scarlet minivet, Orange backed woodpecker, Rufous piculet, Blue head pitta (male), Black naped monarch, Rhinoceros hornbill, Bushy crested hornbill, Red bearded bee eater, Rufous collared kingfisher, Red & black broadbill, Pied hornbill, White crowned shama.
Mammals: Striped palm civet, Malayan porcupine, Bornean gibbon. Malay Civet and Bearded pigs habituated around the restaurant area.
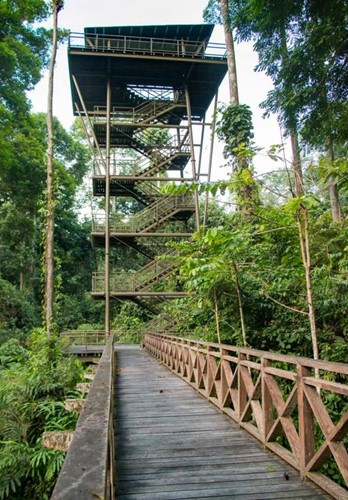
Bird sightings from the observation tower or during walks
When is the best time to visit Borneo?
When is the best time to visit Borneo?
In general the best time is between March and October when Borneo is having it's 'dry' season and the rivers are low. There will be plenty of sunshine and although there will still be rain, it's the best time to be wildlife spotting as the animals have to come further out of the forest to find water. This would be the most popular time for trips like our Borneo Wildlife Tour with the most likely sighting of wild orangutans.
From November through to February Borneo experiences its 'wet' season or monsoon. It is hot and humid but a lot quieter with fewer tourists.
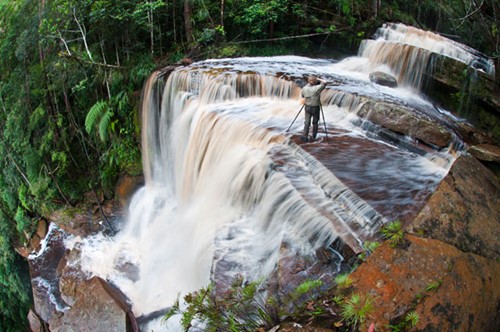
WHICH IS THE BEST MONTH TO GO TO BORNEO?
On a month-by-month basis you will find different changes in Borneo. If you're there during January and February you should expect daily afternoon monsoon downpours. Things then dry up over April, May and June with the awakening of flowers and jungle foliage, which adds a lush and colourful background to any trip or adventure. July is Borneo's high season, as it’s the traditional holiday and festival month. August and September are still relatively dry, but of course you always have to be prepared for the odd shower! October and November is deemed low season as the rains become more frequent, but don't let that put you off as the odd shower means less people and a more intimate experience! December brings us full circle and back into the 3 month monsoon season.
Since our trips are varied from climbing Mt Kinabalu to Biking and Hiking to enjoying the Mammals, Caves and Rivers, there are on occasion other weather issues to consider but in general it’s best to stick to the advice above and avoid the monsoon season as the trails can be muddy, and as much as we like to get out of the rain, so does the Borneo wildlife, making spotting it difficult!
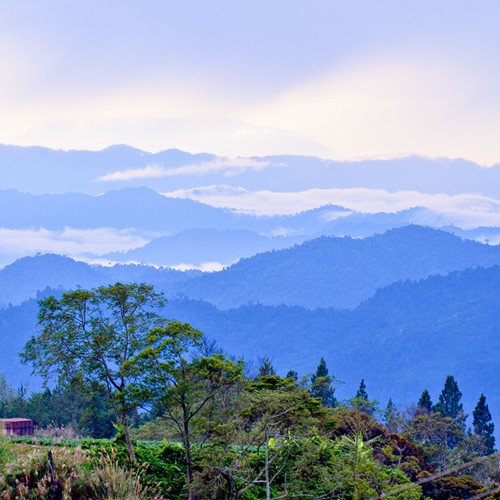
Training Program for Kilimanjaro
HOW FIT DO I HAVE TO BE FOR KILIMANJARO?
Essentially Kilimanjaro is a walk. It is not a forced march and because you are going to altitude, it is at a slow pace - in fact seasoned hill walkers can at times find the slow pace a bit of a struggle as their natural pace may be quicker. However, it is a walk to nearly 6km above sea level and you will walk for around 6 to 8 hours each day, depending on which route you choose on Kilimanjaro. Our team of guides will set a pace that is appropriate so that it fits well with the abilities of the group, the terrain and altitude on a particular day, and of course one that will assist with your acclimatisation. Although it’s very hard to train for high altitude (low oxygen levels) without going to somewhere like the Altitude Centre, you should embark on some training prior to your climb to ensure you’re fit enough to cope well with the challenge ahead. Any training prior to the climb, to improve your general fitness, will mean less pressure and quicker recovery come your actual climb. But what would we recommend?
HOW DO I TRAIN FOR KILIMANJARO?
All of us are at different levels of fitness and the term ‘fitness’ is subjective, it means different things to different people. We’ll make the assumption that, since you’re interested in climbing Kilimanjaro, that you are fit / well enough to do so and in turn fit enough to train for the challenge. If you have any doubts, injuries or queries do check with a medical professional.
To train for a climb you are best to consider what opportunities exist where you live / work. Is there a beach, a park, a forest, a hill? Is there a gym, a pool? Are there fitness classes or clubs? Also, and most importantly, what interests you? Some people love to run, others hate it! Some love to cycle, others swim. Choose exercise and activities that you enjoy - don’t make it a chore! Join a class, rope in a mate, join a club – there’s lots of options and if you do it with someone, then you’ll help motivate each other. The hardest part of training is starting it as soon as you start to notice the benefits it gets easier and easier.
Finally, consider what you need to exercise! There is no point having huge, oxygen grabbing, fantastic looking biceps if your legs can’t walk for eight hours up and down a hill! Training for Kilimanjaro should include the following:
- Cardio exercise
- Flexibility
- Strength & Conditioning especially legs and core
- Stamina & general fitness
CARDIOVASCULAR TRAINING FOR KILIMANJARO
Cardio exercise stimulates the cardiovascular system by keeping the heart pumping at an accelerated pace for an extended period of time. A good and balanced diet is also an important part of cardiovascular health, especially with the amount of hidden fats, sugar and salt in todays processed foods. Good cardio exercise can include running, jogging or treadmill, cycling or turbo trainer, or swimming.
FLEXIBILITY TRAINING FOR KILIMANJARO
Stretching is often overlooked however it plays a vital role in keeping muscles and joints strong and less susceptible to injury. You should spend a few moments each day doing some stretches, even as you relax and watch TV, or listen to some music. It is also a great way to reduce stress as you focus, physically and mentally, on your stretches. When you do stretch do it gently, take your time and just to the point of resistance. Sustain the stretch for 20 seconds and never bounce.
STRENGTH AND CONDITIONING LEGS AND CORE FOR KILIMANJARO
Most people think that a good core means a washboard six-pack, but in reality, it’s a collective effort of a combination of muscles around the front and back of the body that stabilises and protects the spine and pelvis. These muscles also help control movements, balance and transfer energy and shifts in body weight. A strong core will assist with your climb and allow you to move effectively and securely. To strengthen your core you should do crunches, sit-ups, planks, push-ups, squats, and lunges. Or if you would prefer to join a class, then Pilates is excellent for your core.
As for your lower body and legs then it’s essential that you do regular lower-body exercise pre trip and not just because you’ll be using your legs to trek every day, but it also improves your balance and stamina for walking whilst supporting and reducing the chances of injuries to your knees and hips. One of the best methods of training is to go walking in the outdoors with a little but of weight in your pack, but if you don’t have hills or challenging walks near you then consider working on squats, step machines, leg presses, calf raises, leg extensions, and hamstring curls.
STAMINA AND GENERAL FITNESS FOR KILIMANJARO
General fitness and stamina training alongside a good diet, plenty of hydration (see altitude training) in the build up to your climb will all add up and lead to a more enjoyable and successful climb of Kilimanjaro.
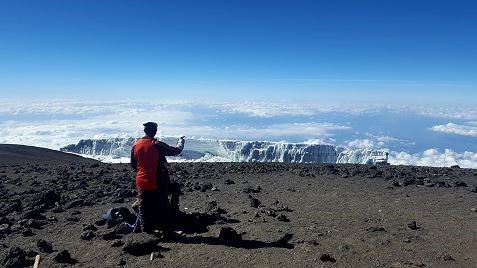
IS THERE A TRAINING GUIDE FOR KILIMANJARO?
When considering a pre-climb fitness or training program for Kilimanjaro do remember to balance training days with days off! Mix it all up and most importantly make sure it’s fun!
We recommend that you have 3 days with some activity, then a day off, then repeat. With being in work / university / child commitments etc. it’s often hard to squeeze everything in and don’t beat yourself up if you can’t – just do what you can!
‘Ideally’ a training guide for Kilimanjaro should include one of the following activities on a daily basis Mon – Fri (remember to rest every 3rd day): a run, a swim, a cycle / turbo session, time in the gym, or an exercise / Pilates / circuit class; then at the weekends, when you have more time, you can aim for a longer walk. Start slow! Then build in effort / duration / distance.
If you have any concerns, would like ideas, or fancy a chat about your fitness or training, please do call or email us! You don’t need to be super fit for Kilimanjaro and the different routes on Kilimanjaro do vary, but the fitter you are, the easier it will be.
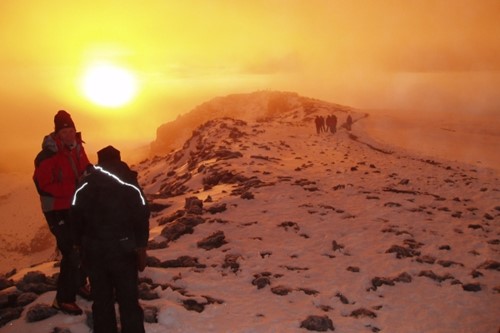
Danum Valley - Trip Add-on
This is a 3D2N add-on trip to the Danum Valley Conservation Area, staying at the Danum Valley Field Centre, trekking through primary rainforest with a private nature guide whilst searching for some of Borneo's elusive wildlife.
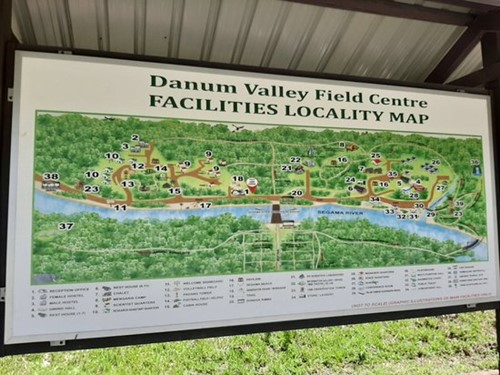
After a short two-hour car journey from the nearest town of Lahad Datu, we reach the Danum Valley Conservation Area which covers an area of 438km sq. It was set up to protect the region and its wildlife against logging and the rainforest here has an isolated and pristine feel to it. There are a number of viewpoints along the treetop canopy of the dense jungle foliage and dramatic mountains that stretch for miles on every side; it really is a nature lover’s paradise.
The area is known for its huge variety of birds and other wildlife. It’s possible to spot wild cats, orangutans, macaques, gibbons, red leaf monkeys, pygmy elephants and — if you are very lucky — the rare clouded leopard. The canopy walkway is a great way to experience life in the treetops where much of the wildlife is to be found.
A number of jungle trails are available, including the trek to the viewpoint which passes Coffin Cliff, an ancient Kadazan Dusun burial site.
The guide price of £775 is based on 2 people sharing a standard room with fan, all meals, wildlife guide, one safari night drive, transfers to and from Lahad Datu, conservation and camera fees.
This excludes tourism tax, private guide / extended safari upgrades or personal expenses.
This trip can be added onto the beginning or end of any of our Borneo trips:
Mulu Caves and Bako Park - Sarawak
Borneo Bike and Hike Challenge
Penan Tribe Trek - Trip Add-on
This is a four day, 3 night trek into the interior of Sarawak to live with the last nomadic tribe in Borneo, the Penan Tribe. We trek deep into the Ulu Baram region to remote villages and hidden waterfalls. We stay with the community and immerse ourselves in this fascinating culture to see how they live and enjoy being guests in their village. The villagers will take you on 'expeditions' into the forest where they go hunting and foraging, they will show you the land and the waterfalls and how the logging has affected their livelihoods.
In the village you can stay in one of the traditional homes, but you can also experience life in a hammock by making your own 'roof' from giant leaves. The Penan don't need much in the way of belongings and this trip is an experience in slow living and using resources carefully and subsistently. You will be guided by one of the Penan who speaks English and will introduce you to everyone from the blow pipe maker to the chief.
The importance of preserving and learning from the indigenous people across the globe has never been stronger. The Penan people of the Sarawak region of Borneo face a continued struggle against deforestation and the loss of their native culture. In this trip we are hosted by the Penan people on their own terms in a partnership designed to support their communities through sustainable tourism and education in the issues that jeopardize their survival.
The trip will allow you to see how the local people run a seed collecting and tree planting programme and, depending on the time of year, you can see the people collecting seeds, planting saplings and working at the nurseries, while staying in the Penan villages and seeing how this amazing tribe lives.
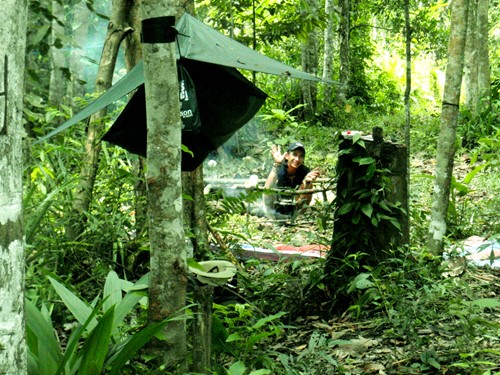
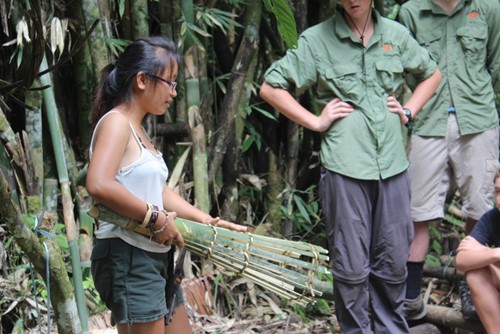
At the same time you experience a real adventure just getting there! We use a combination of air, boat and 4x4 jeeps to arrive near the Penan settlements, after which you are guided on foot by the local people and hosted in their homes. This is very much off the tourist trail, but the financial benefits of this holiday are already enabling the villagers to send their children to school and provide primary healthcare.
£695.00 per person
This trip can be added onto the beginning or end of any of our Borneo trips:
Mulu Caves and Bako Park - Sarawak
Mount Mulu - Trip Add-on
This is a four day three night add-on trek and climb of Mount Mulu. At 2376m, this climb is especially memorable for the virgin rainforest views, prolific orchid and pitcher plant diversity, interesting fauna, and spectacular views along the trail and from the summit. This is a near 50 km round trip and one of Borneo’s toughest treks, harder than Kinabalu and more adventurous.
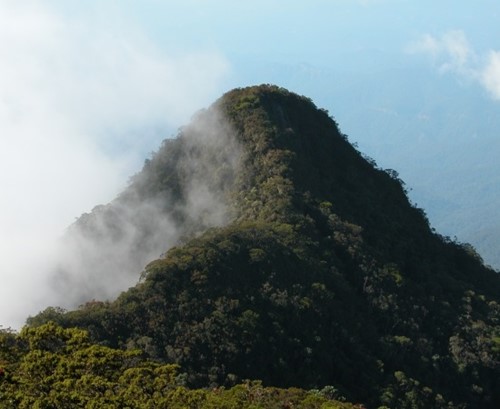
Mount Mulu, or Gunung Mulu is the highest peak in the Mulu National Park which was declared a Unesco World Heritage site in 2005. Several attempts were made to reach the summit in the 19th century, but the first person to reach the summit was a rhino hunter called Tama Nilong who ‘discovered’ the south-west ridge in the 1920s. In 1932 Tama Nilong led Lord Shackleton and an Oxford University Expedition to the summit and the very same route is still used today.
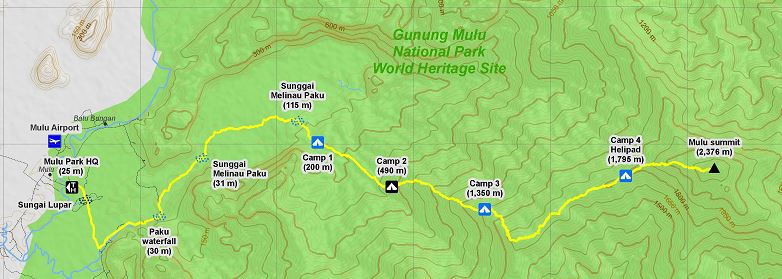
Click the map for a larger version
Mulu Park is perhaps the number one tourist attraction in the entire province of Sarawak, however the summit is rarely reached and usually only by seasoned hikers or scientific researchers. The trail is challenging due to the heat and terrain however the toughest day is generally regarded to be the first and the trek is 26km each way. We start close to sea level (25m), and there are lengthy sections of trail on Day 2, during which (annoyingly) you lose elevation that you’d previously gained. For those that are up for the challenge, the reward is well worth the effort with outstanding views and a truly fascinating experience in an environment that few visit.
£495.00per person
This trip can be added onto the beginning or end of any of our Borneo trips:
Mulu Caves and Bako Park - Sarawak
Mount Kinabalu - Trip Add-on
This 3D2N climb of Mount Kinabalu can be added on to other safaris you're doing with us in Borneo. This trip includes overnighting in the Laban Rata hut on the mountain, start and end at Kinabalu park gate with a room at a local lodge on the first night at the base.
Day 1 - Transfer from KK and arrive Kinabalu park, twin/double private room in Sutera lodge. Dinner and evening walk to see fireflies and pitcher plants.
Day 2 - Check into Park early after breakfast, meet the Sabah Park guide and start the ascent. Overnight in Laban Rata hut with buffet meal, packed lunch and all bedding provided.
Day 3 - Summit Mt Kinabalu and descend back to park gate, arriving afternoon.
The cost is £345.00 per person which includes accommodation and meals at the Sutera lodge and Laban Rata, transfers to and from KK. Single person supplement is £125.00.
Not included are the direct payments made to Sabah Park by each climber for the permit, the Sabah park guide, insurance and an internal transfer from the gate to the start of the climb which is currently £120.00 for two people. The park guide is a set figure for a group of up to five, so the more people the less this figure will be.
A porter is an additional £30.00 for the ascent and descent, and a colour certificate at the end is £2.50.
This trip can be added onto the beginning or end of any of our popular Borneo trips or as a component in a bespoke package:
Borneo Wildlife Tour - Sabah
Wild Borneo - Sarawak
Mulu Caves and Bako Park - Sarawak
Sabah's Lost World
Borneo Nocturnal Mammal Tour
Mount Kinabalu is the youngest mountain in the world and it rises out of the planets oldest rainforest! At 4,095 metres (13,435 ft) Mount Kinabalu is the highest peak in Borneo, and the highest point between the Himalayas and the snow-capped mountains of New Guinea. Lacking foothills, it appears to shoot straight up into the sky, its jagged granite peaks floating above the clouds. The mountain is "u" shaped, with bare rock plateaux at about 3,900 metres like two arms with the infamous Low’s Gully between which is over one kilometre deep in places. Few mountains can beat Mount Kinabalu for stark simplicity. It is set near the equator, rising straight out of the tropical rain forest, a continuous, clean, black, bare rock mass, to the summit. Because of its breath-taking isolation Kinabalu has its own climate, a constant flux of cloud and wind, rain and cold, and the warmth from the forests below.

Kawag Nature Lodge - Trip Add-on
This can be added on to any holiday in Borneo and is a 3 day / 2 night stay in this beautiful lodge in Danum Valley with guided wildlife walks and visits to see waterfalls and caves. Rooms are of a high standard and food is excellent, with personal attention to service and experienced guides. Perfect for couples or families.
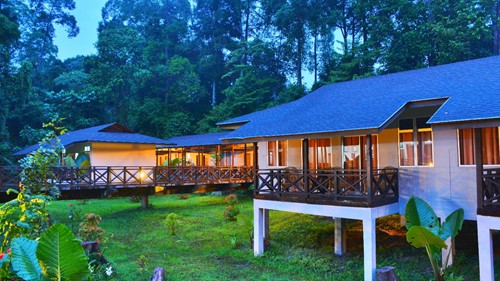
There is plenty of time to relax and unwind plus experience the amazing wildlife and rainforests of the Ulu Segama-Malua Forest Reserve while staying at the Kawag Nature Lodge, built atop 200 million years of crystalline basement near the boundary of the Danum Valley Conservation Area (DVCA). Immerse yourself in the jungle as we explore the trails and waterfalls, which are surrounded by crystal clear streams – perfect for a swim! Plus of course the chance to see some exotic wildlife!
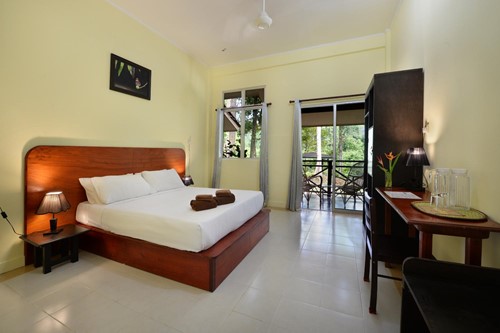
The price is based on an air-conditioned twin or double room, in-house guide, all meals, one night drive, and transfers to and from Lahad Datu (52km away / 1.5hr). Not included: tourism tax, private one to one specialist guides or extended night drives.
£795.00
This trip can be added onto the beginning or end of any of our Borneo trips:
Mulu Caves and Bako Park - Sarawak
Borneo Rainforest Lodge - Trip Add-on
This is a real treat at the end of your time in Borneo for a 3 day / 2 night stay at the prestigious and award-winning Borneo Rainforest Lodge in Danum Valley Reserve.
The Borneo Rainforest Lodge is nestled within 43,800 hectares of protected virgin rainforest with an immense biodiversity of 200 species of plants per hectare. This 130-million-year-old rainforest is home to more than 320 species of birds and 124 species of mammals. It is also listed as an Important Birding Area (IBA MY24) as a site for international importance for conservation of birds.
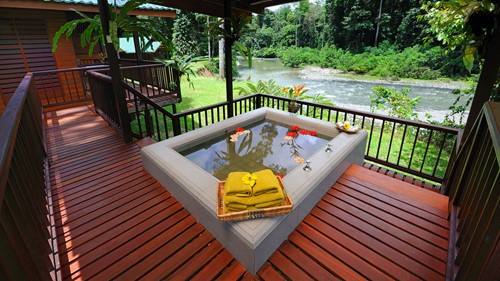
BRL has 30 chalets and a spa which adopts eco sensitivity, sustainability and minimum impact as the core principles of designs and operations.
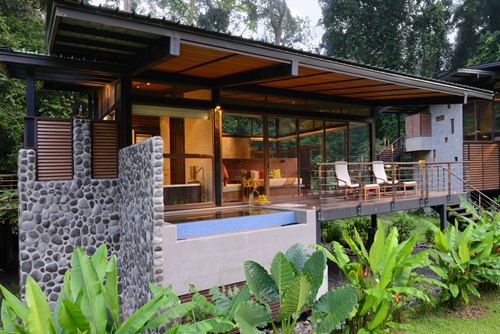
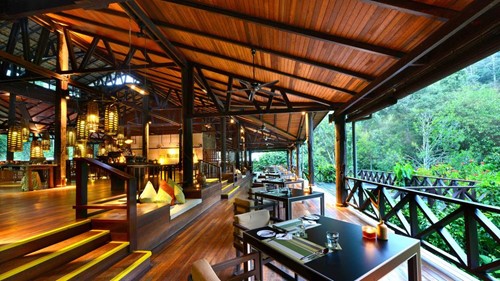
Our package includes guided safari walks and nature treks, with opportunity to view plenty of wildlife and to relax in comfort surrounded by the pristine jungle environment, you can also pamper yourself with a traditional massage at the in-house Spa.
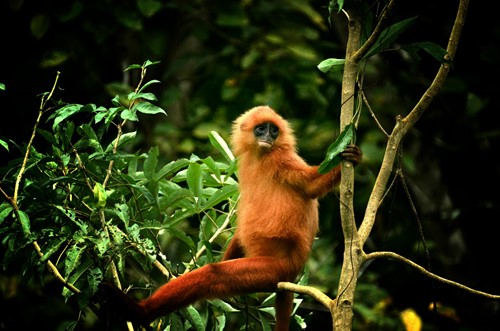
The price is for a standard twin/double room with fan, in-house guide, one night drive, return transfers to and from Lahad Datu (2.5hrs) and permits.
Not included: tourism tax, private specialist guides, extended night drives.
£975.00
This trip can be added onto the beginning or end of any of our Borneo trips:
Mulu Caves and Bako Park - Sarawak
Hibiscus Beach Retreat - Trip Add-on
This is a 2 Day/ 2 night add on trip in a stunning and idyllic boutique beach chalet, which is set in a secluded cove on the Kudat peninsula on the northern tip of Borneo.
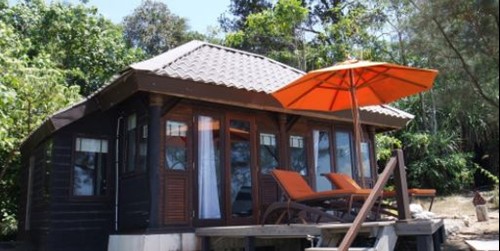
Cliff Top Chalet
A stay at the Hibiscus Beach Retreat is the kind of tropical fantasy that everyone dreams about! This experience is a world away from the hustle and bustle of everyday life, the two unique chalets offer barefoot luxury, privacy and exclusivity at its best!
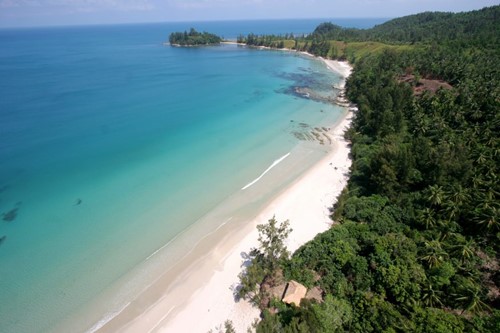
Choose from either of the one-bedroom self-contained chalets, which are suitable for couples and small families. For those who love to wake up to the sight of the sea, ‘Clifftop’ offers amazing beach views from the bright and airy chalet. Nestled atop a cliff, in among the jungle, guests can lounge on the decking and take in the splendour of this seafront setting.
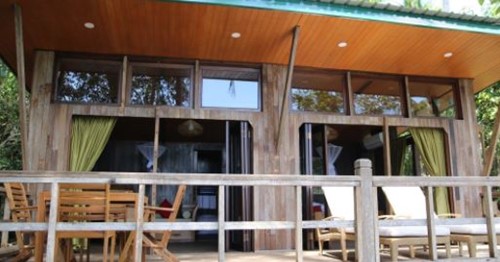
Or Treetops (above) is a traditional wooden chalet, built on stilts 3m above ground. Out of every window and from the decking you are met with the sights and sounds of the jungle, as well as a wonderful sea view. The soft white sand of our near deserted beach is just a 50m walk through the jungle.
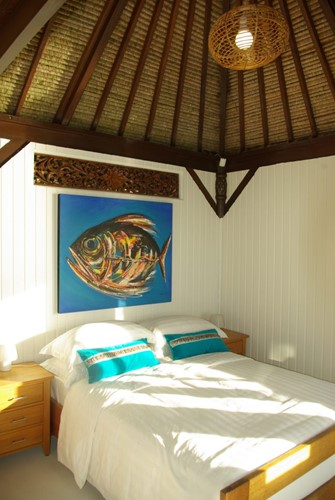
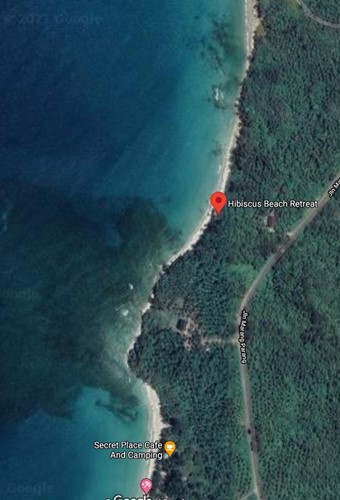
Flights to Kudat from KK or Sandakan, or car transfer from KK available. Price is for bed and breakfast and local activities can be arranged on location.
Average price is £230.00 (seasonal variations do occur - please contact us for the latest prices).
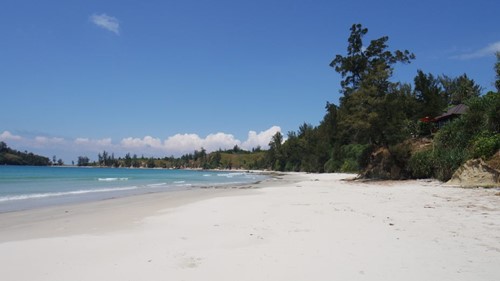
This trip can be added onto the beginning or end of any of our Borneo trips:
Mulu Caves and Bako Park - Sarawak
KK's Hotel Sixty-3 Add-on
If you are staying a night in Kota Kinabalu then you'll find Hotel Sixty 3 a good quality, well rated and centrally located hotel in the heart of the city.
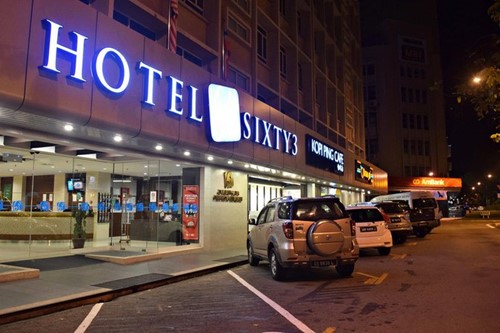
It sits on the quaint, at times bustling, yet also charming street of Jalan Gaya (formerly known as Bond Street), with the State’s tourist information office right opposite the hotel. The area is flourishing with a myriad of restaurants, bistros, cafes and local street side shops.
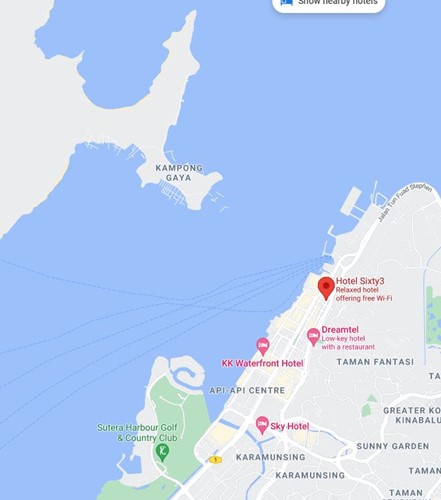
It’s also famous for its colourful and vibrant Sunday market and is easy walking to the riverfront, and boats for day trips to the islands.
Price is for a standard double or twin room. £140.00
This trip can be added onto the beginning or end of any of our Borneo trips:
Mulu Caves and Bako Park - Sarawak
Big Fin Beach Resort - Trip Add-on
This is a 3 day / 2 night stay at this private and secluded beach resort, which is just off the coast of Kota Belud, near Kota Kinabalu (40km). Private ensuite double / twin rooms are available and all have balconies with sea and mountain views. All rooms have a wall fan, hammocks, double beds with bedding, towels and mosquito net, western toilet and cold water shower.
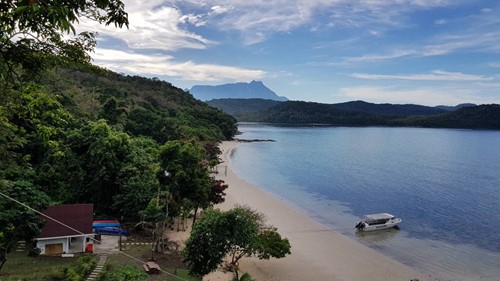
Guests at Bigfin beach resort can enjoy scuba diving (including PADI courses), kayaking, paddle boarding, snorkelling, jungle treks or simply lounging by the beach.

Price includes room, breakfast, lunch and dinner, drinking water and hot drinks, return boat transfer from Mengkabar village, mask and snorkel rental.
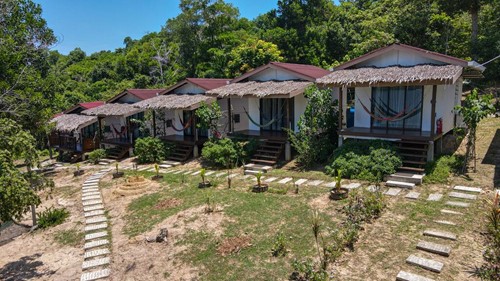
£110.00 (£20 surcharge for peak season April/July/August)
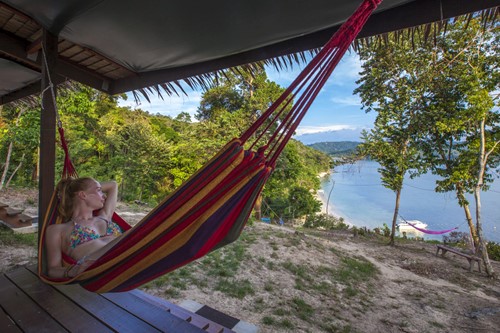
This trip can be added onto the beginning or end of any of our Borneo trips:
Mulu Caves and Bako Park - Sarawak
Sepilok / Kinabatangan River - Trip Add
This is a perfect add on trip of 4 days and 3 nights with visits to the Sepilok Orangutan Centre and the Kinabatangan River for stunning wildlife safaris. Enjoy fantastic accommodation and relax in this most fascination of environments. The trip start / ends at Sandakan.
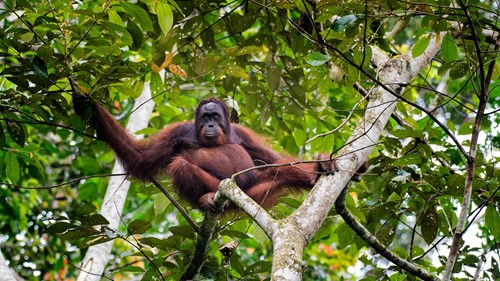
Visit the world famous Sepilok wildlife centres where rehabilitated orangutans can be seen in their natural environment, rescued sun bears being readied for release back into the wild and giant flying squirrels among others endemic species.
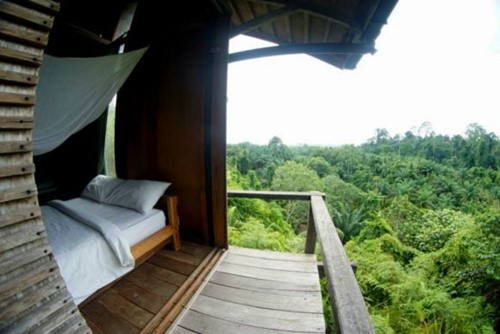
Accommodation will be at Paganakan Dii (above) which is the perfect retreat to experience nature in its most serene and natural state. Built on elevated site above the surrounding foliage, the combination of cool longhouses and cosy duplex chalets makes for an unforgettable experience.
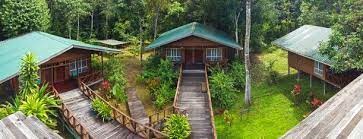
On the Kinabatangan river we stay at the Borneo Nature Lodge (above image) which is nestled along the riverbank of the longest and biggest river in Sabah. The Lower Kinabatangan is one of Sabah's most splendid natural treasures and the richest concentration of wildlife in South East Asia. We awake to the calls of birds, insects and animals as the pre-dawn chorus begins, then after a good breakfast enjoy a jungle walk along the ridge with stunning views over the Kinabatangan River. There are also boat safaris to see wild orangutan, pygmy elephant, crocodiles, proboscis monkey, clouded leopard and many other animals and birds including the hornbill.
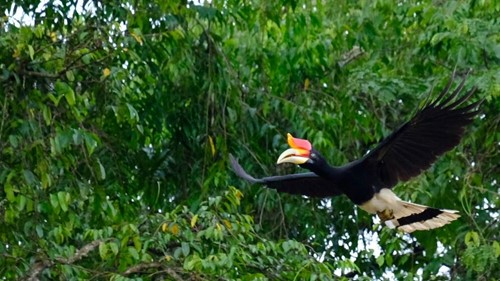
Price is per person based on shared wildlife guide and safaris, twin/double rooms, and all meals and transfers.
£440pp

This trip can be added onto the beginning or end of any of our Borneo trips:
Mulu Caves and Bako Park - Sarawak